Turorial
6

click on french flag to find the original tutorial


Conditions of use of the material provided
It is forbidden to modify, change the name, take off watermarks
or alter tubes provided
It is forbidden to share them in groups or offer them on
your site, blog or forum
If you want to use them to create a tutorial, you must ask
the permission of the authors

Odette has the permission of the creators to use their tubes,
masks and decorations
Thank you to all of them.
Without their beautiful creations, no tutorials could be
written.

Odette used PSPX5 and I used PSPX9 to create our tags
but you can follow this tutorials with any other version
of PSP

Matérial
tubes and misted image by Lisa T - mask

open all tubes
window/duplicate. Close the originals and work with the copies
to preserve the originals
don’t forget to erase tuber’s watermark before
using images
open the mask and minimize it to tray

Plugins
Graphic Plus / Quick Tile II
Mura’s Meister / Perspective Tiling

Colors palette
foreground color -> color 1 -> #e0b98d
background color -> color 2 -> #d08f4b


use the pencil to follow the steps
hold down Left click to grab it and move it


Realization
1
open a new raster layer 900 * 600 pixels
prepare both colors in materials palette
prepare a linear gradient in FG box -> 45 / 3 / uncheck « invert »
flood fill layer with gradient
effects -> image effects -> seamless Tiling / default
settings
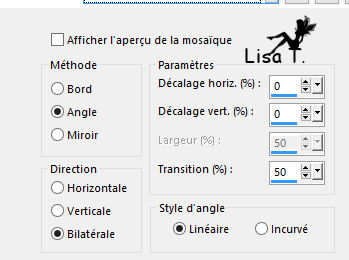
adjust -> blur -> gaussian blur / 40
2
layers -> new mask layer -> from image
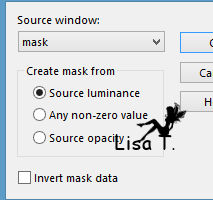
layers -> merge -> merge group
adjust -> sharpness -> sharpen
3
in materials palette, set White as FG color
layers -> new raster layer
selections -> select all
flood fill selection white
selections -> select none
layesr -> new mask layer -> from image -> Check « invert
mask data »
layers -> merge -> merge group
adjust -> sharpness -> sharpen
5
using selection tool / rectangle -> select around white
frame
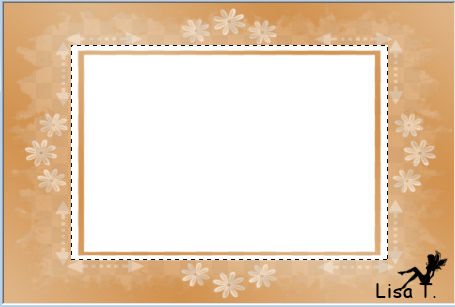
selections -> promote selection to layer
copy / paste landscape into selection
selections -> select none
highlight bottom layer
layers -> merge -> merge all (flatten)
adjust -> sharpness -> sharpen
6
image -> add borders -> 2 pixels color 2
image -> add borders -> 25 pixels white
select large border with magic wand tool
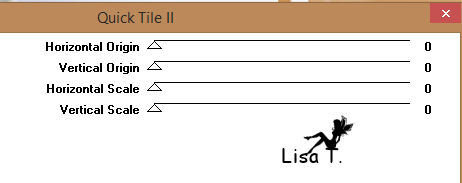
effects -> plugins -> Graphic Plus / Quick Tile
II
selections -> invert
effects -> 3D effects -> cutout -> 0 / 0 / 75
/ 10 / black
selections -> select none
image -> add borders -> 2 pixels color 2
image -> add borders -> 25 pixels white
effects -> plugins -> Graphic Plus / Quick Tile
II (don’t change settings)
adjust - blur -> gaussian blur / 40
selections -> select none
7
layers -> duplicate
effects -> reflection effects -> kaleidoscope
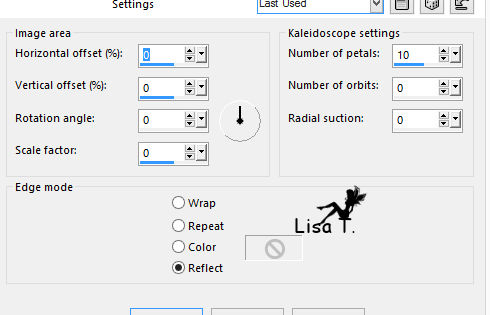
rename layer « background » - layers
-> promote background layer
layers -> arrange -> sent to bottom
8
highlight top layer
image -> resize -> 85 % (uncheck « resize
all layers »)
selection tool -> rectangle -> select a rectangle
under white frame as shown below
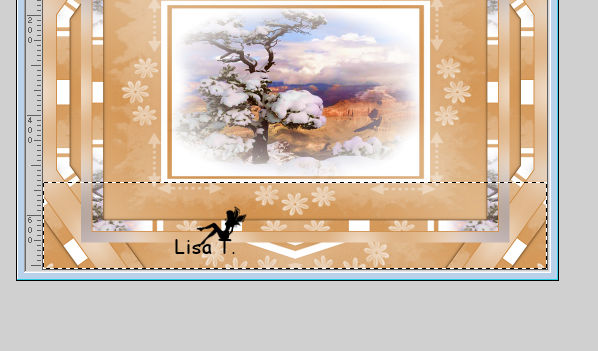
selections -> promote selection to layer
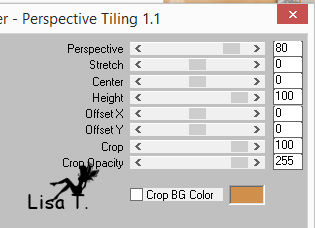
effects -> plugins -> Mura’s Meister / Perspective
Tiling
selections -> select none
layers -> merge -> merge all (flatten)
iamge -> add borders -> 2 pixels color 2
image -> add borders -> 25 pixels color 1
copy / paste character tube as new layer and move it to
the right
resize if necessary (if you use the tube provided -> 85%)
drop a shadow of your choice
copy / paste tube « bulbs » as new
layer and move it top left (see final result)
layers -> merge -> merge all (flatten)
image -> resize -> check « resize all
layers » -> 1000 pixels (width)
adjust -> sharpness -> unsharp mask

apply your watermark
save as... type .jpeg
don’t forget to sign your work

OPTIONAL - Animation
if you want to add an animation
here are the explanations (with Ulead Gif Animator)

layers -> duplicate TWICE -> you now have 3 identical
layers
close the eyes of copies, highlight bottom layer
effects -> Alien Skin Eye Candy Xenofex 2 -> Constellation
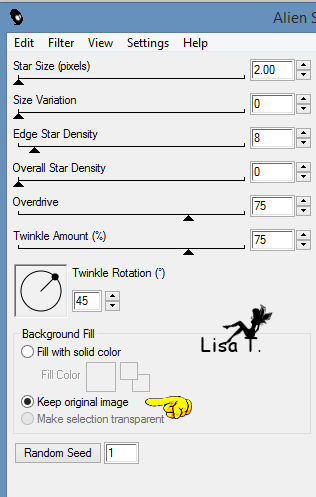
close the eye of bottom layer
open the eye of middle layer and highlight it
redo effect Constellation, don’t change settings,
but Click on « random seed »
close the eye of middle layer, open the eye of top layer
and highlight it
redo effect Constellation, don’t change settings,
but Click on « random seed »
close the eyes of middle and top layer
open the eye of bottom layer and highlight it
file -> save as... type .PSD

OPEN UGA
file -> open
and choose the work saved type .PSD
bottom left : you see 1 image - top
right you see the 3 layers worked with PSP

bottom left, click on « duplicate »
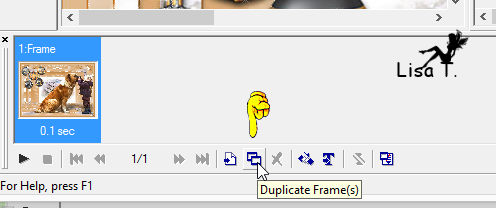
top
right : close the eye of bottom layer
open the eye of middle layer

bottom left, click on « duplicate » - top
right : close the eye of middle layer
open the eye of top layer

click on « optimize »
file -> save as... type .gif

Animated tag


if you have any problem,
or to show us your creations,
Don’t hesitate to write to Odette
 to
Odette to
Odette
or to me
 to
Lisa T to
Lisa T
It will be a real pleasure for us to present them at the
end of this tutorial

Your Creations
coming  soon soon

Back
to the board of Odette’s tutorials
board 1 

|