Star

You will find the original tutorial Here

This translation is my property,
Thank you Nara for your kind permission
it is strictly forbidden to copy or distribute it on the
Net
Thanks to Nara for her kind permission
I work with PSP19, but it is possible to use another version.
The tubes provided are for personal use
you are not allowed to share them, or present them
in another site
without the authors’ permission

Material
1 preset (double click on it to install it) - tubes - Nara’s
watermark
Open the tubes, duplicate them and work with the copies

Filters
AP Lines
Alien Skin Eye Candy 5 - Impact
Toadies
Nick Software
Flaming Pear

Use this paint brush to follow the steps
Left click to grab them

Colors
color 1 -> foreground color -> FG -> #dfd0cb
color 2 -> background color -> BG -> #df2a4a
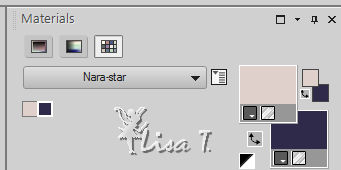
prepare a linear gradient in the FG box
Realization
1
open alpha layer (selections)
window -> duplicate
minimize original layer to tray, work with the copy
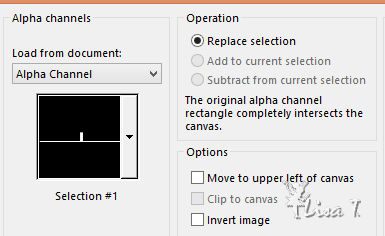
2
selections -> load-save selection -> from alpha channel
-> selection 1
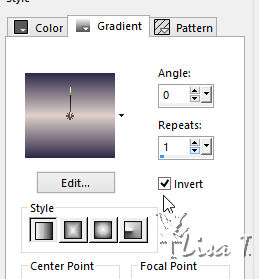
3
flood fill selection with the gradient
selections -> select none
4
effects -> reflection effects -> kaleidoscope
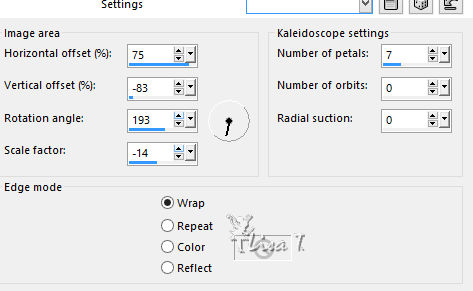
5
effects -> image effects -> seamless tiling -> default
settings
6
effects -> plugins -> Flaming Pear -> Flexify
2
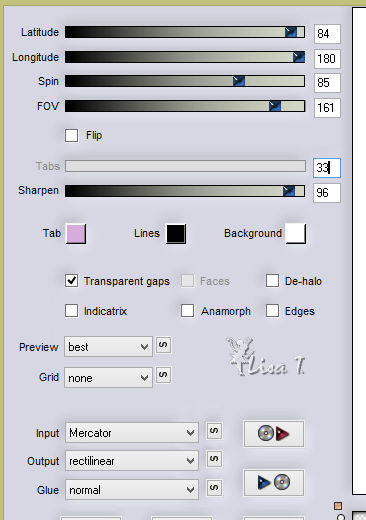
7
effects -> plugins -> AP Lines / Silverlining / Horizontal
settings
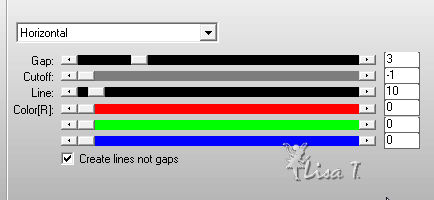
8
effects -> reflection effects -> rotating mirror

9
effects -> image effects -> offset
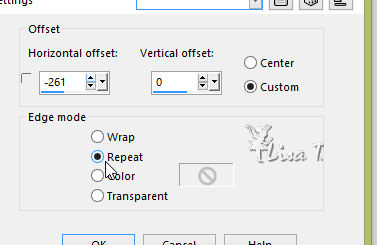
10
layers -> duplicate
effects -> image efects -> offset

11
layers -> new raster layer
selections -> load-save selection -> from alpha channel
-> selection 2
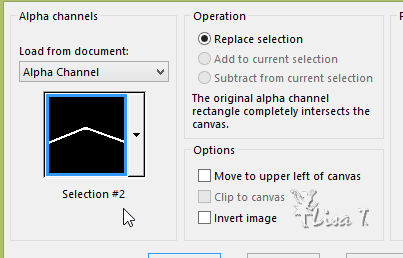
12
flood fill selection with the gradient
selections -> select none
effects -> plugins -> AP Lines / Silverlining / Horizontal
settings as in step 7
13
effects -> plugins -> Simple -> Top Left Mirror
activate Pick Tool
move layer as shown - press M key to deselect
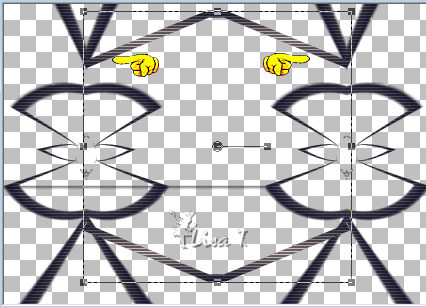
layers -> arrange -> move down
layers -> merge -> merge visible
14
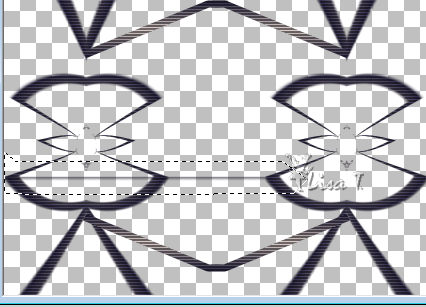
highlight midlle layer
erase the grey line with Eraser tool
layers -> new raster layer
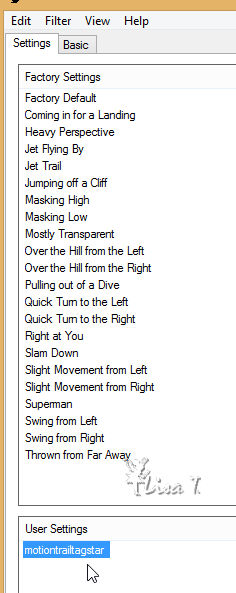
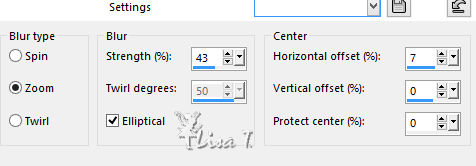
effects -> Alien Skin Eye Candty 5 - Impact / Motion
Trail
apply the preset provided
15
layers -> new raster layer
layers -> arrange -> send to bottom
selections -> select all
copy / paste into selection « TubeNaraPamplona
1453 »
selections -> select none
16
adjust -> blur -> radial blur
17
effects -> plugins -> Toadies > Weaver
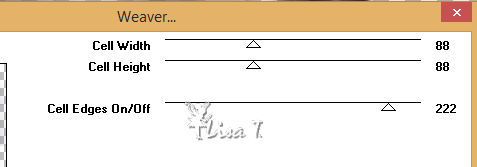
effects -> edge effects -> enhance more
18
copy / paste as new layer « TubeNaraPamplona 1453 »
19
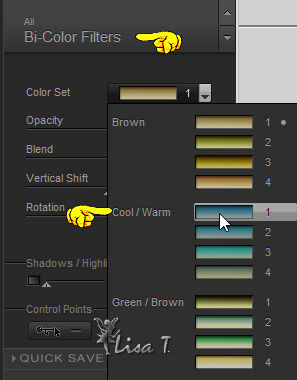
highlight top layer
effects -> plugins -> Nik Software -> Color effex
Pro 3.0 Complete / Color set -> cool Warm 1
20
copy / paste as new layer « TubeNaraPamplona 1523 »
image -> resize -> uncheck « resize all
layers » -> 75%
move it as shown on final result
effects -> 3D effects -> drop shadow -> 6 / 6
/ 50 / 15 / black
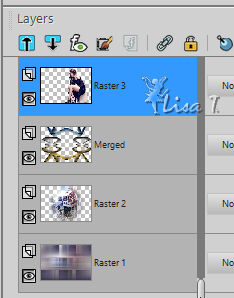
your layers palette looks like this
21
image -> add borders -> symmetric -> ...
3 pixels color 2
3 pixels color 1
3 pixels color 2
22
copy / paste as new layer Nara’s watermark
apply your watermark
layers -> mereg -> merge all (flatten)
file -> save as... type .jpeg
Apply your watermark
save as… type jpeg
your tag is finished
Thank you for having followed it
My version with my tubes

to write to Nara

back to the boards of Nara’s Tutorials
board 1  board
2 board
2

|