Narah

You will find the original tutorial Here

http://www.recantodamagia.com/tags/tags3/tag.narah/tag.narah.htm
I am member of TWInc
this translation is protected


This translation is my property,
it is strictly forbidden to copy or distribute it on the Net
Thanks to Nara for her kind permission
I work with PSP12, but it is possible to use another version.

The tubes provided are for personal use
you are not allowed to share them, or present them in another site
without the permission of the authors

Material
Tubes by Nara Pamplona
plugins preset Alien Skin Eye Candy 5 Impact/Extrude
user defined filter/emboss 6
double click on the presets, and they will be installed automatically
you can also import them
1 watermak “Nara Pamplona”
1 mask by Denise Worisch
Open the tubes, duplicate them and work with the originals

Plugins
Alien Skin Eye Candy 5 Impact

Mura’s meister Copies

Flaming Pear Flexify 2

&BKG Designers SF10 IV

Graphic Plus

AAA Frames


Use the paint brush to follow the steps
left click to grab it
 |

Colors
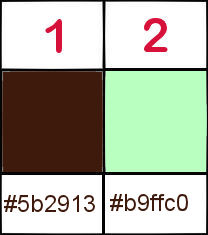
foreground color -> color 1 -> #5b2913
background color -> color 2 -> #b9ffc0
install these colors in the materials palette
Realization
Step 1
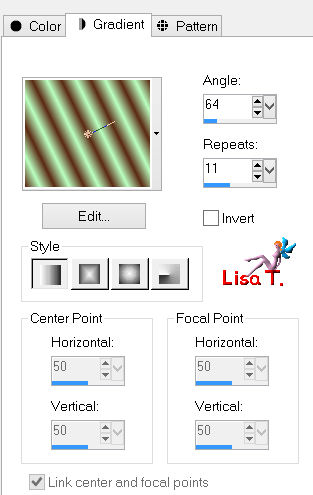
in the materials palette, prepare a linear gradient
Step 2
open a new transparent image 1000 * 650 pixels
fill with the gradient
selections/select all
Step 3
activate the tube of the landscape
edit/copy - back to your work - edit/paste into selection
selections/select none
Step 4
effects/image effects/seamless tiling/default settings
Step 5
adjust/blur/radial blur

effects/user defined filter/emboss 6
Step 6
effects/geometric effects/perspective-Horizontal
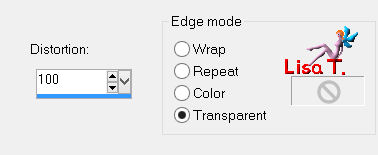
Step 7
effects/geometric effects/perspective-Horizontal
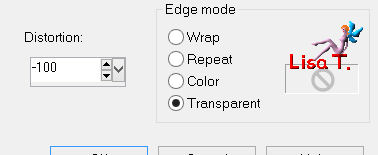
Step 8
effects/distortion effects/wave

Step 9
layers/duplicate - image/flip
layers/merge/merge down
Step 10
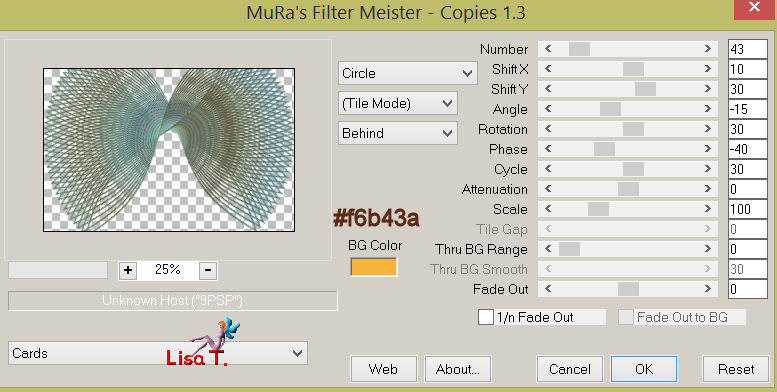
effects/plugins/Mura’s Meister/Copies
Step 11
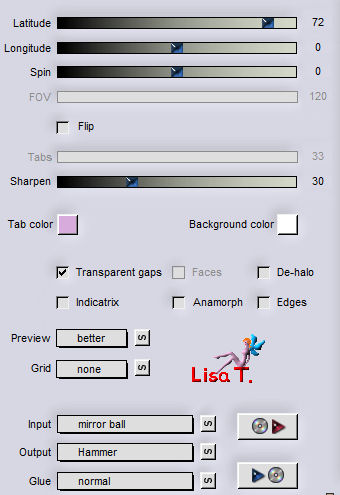
effects/plugins/Flaming Pear/Flexify 2
Step 12
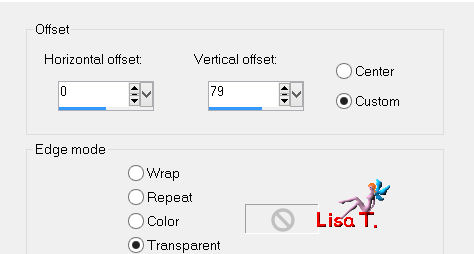
effects/image effects/offset
Step 13
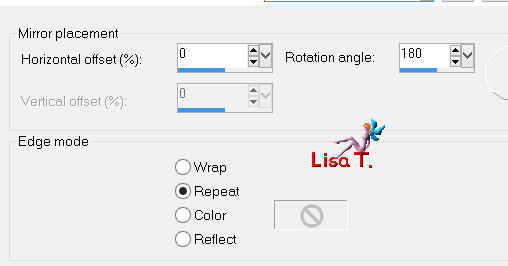
effects/reflection effects/Rotating Mirror
Step 14
layers/duplicate
image/resize/uncheck “resize all layers”/80%
effects/plugins/Mura’s Meister/Perspective Tiling
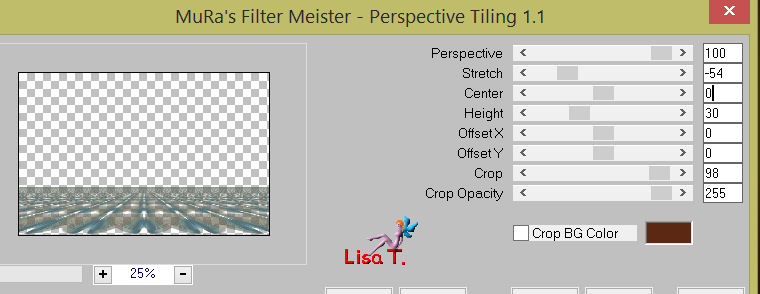
layers/arrange/move down
Step 15
acitvate the magic wand tool (default settings)
select the transparent part of the layer
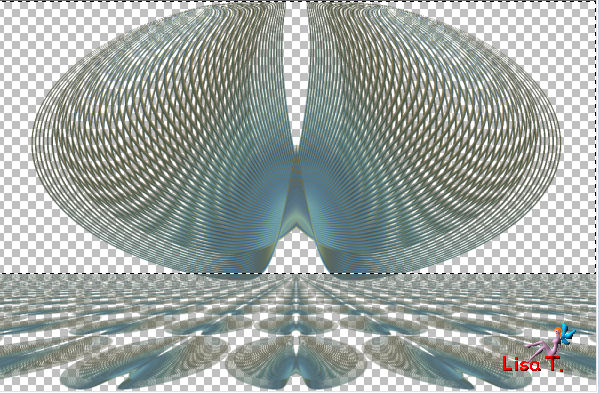
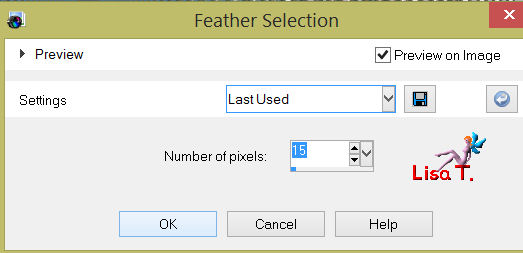
selections/modify/feather/15
press the delete key of your keyboard twice
selections/select none
Step 16
in the layers palette, activate “Raster 1”
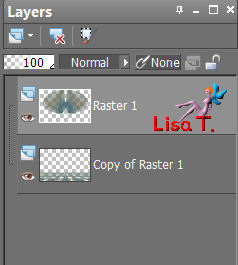
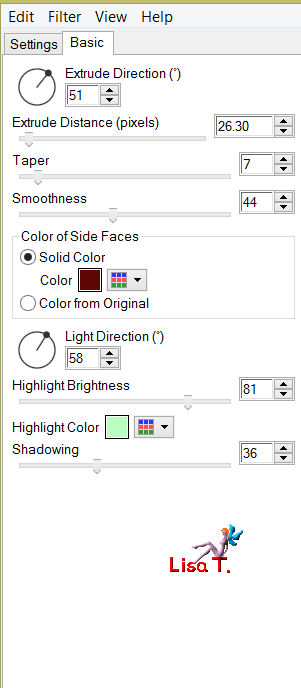
effects/plugins/Alien Skin Eye Candy 5/Impact/Extrude
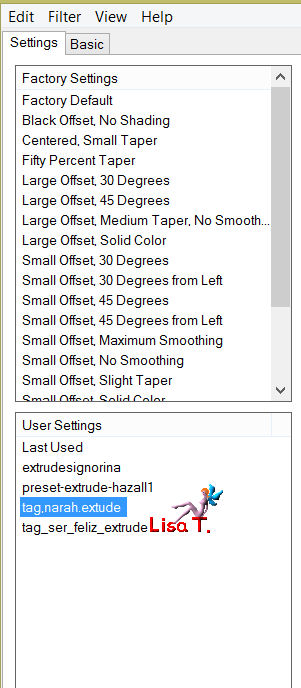
and apply the preset provided in the material (tag.narah.extrude)
Step 17
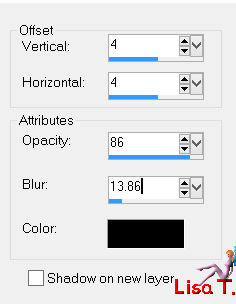
effects/3D effects/drop shadow
4 / 4 / 86 / 13.86 / black
-4 / -4 / 86 / 13.86 / black
Step 18
in the layers palette, activate “copy of raster 1”
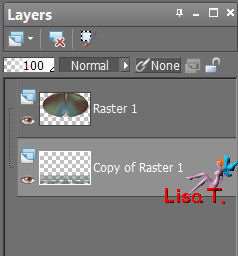
apply the same shadows as before

Step 19
layers/new raster layer
layers/arrange/send to bottom
fill with a linear gradient
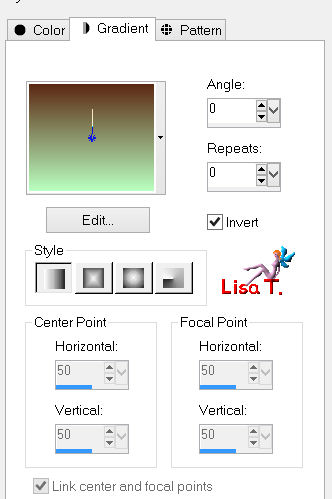
selections/select all
Step 20
activate the landscape tube
edit/copy - back to your work - edit/paste into selection
selections/select none
Step 21
adjust/blur/radial blur

effects/user defined filter/emboss 6
Step 22
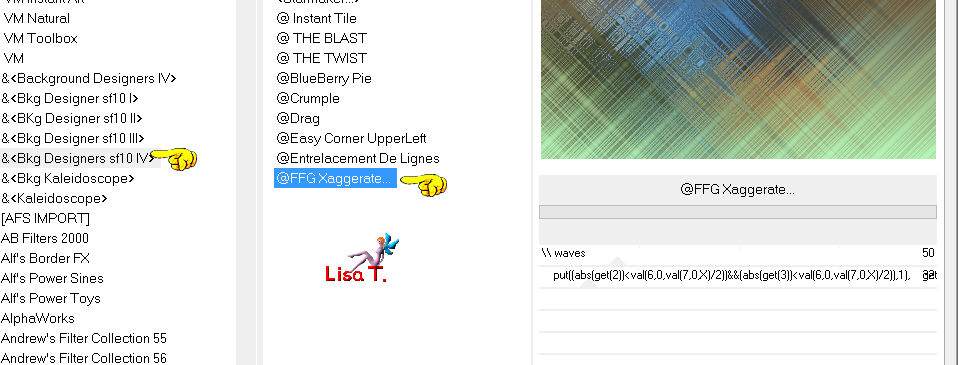
effects/plugins/&BKG Designers <Bkg SF10 IV>@FFG Xaggerate
Step 23
layers/new mask layer/from image/choose the mask “gradienteworisch”
layers/merge/merge group
Step 24
layers/new raster layer
layers/arrange/send to bottom
fill with color 1
Step 25
activate the landscape tube
image/resize/90%
edit/copy - back to your work
in the layers palette, activate “raster 1”
edit/paste as new layer
move it as shown in the final result
Step 26
activate the tube of the woman
image/resize/90%
edit/copy - back to your work - edit/paste as new layer
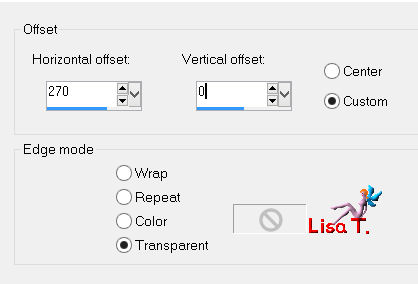
effects/image effects/offset
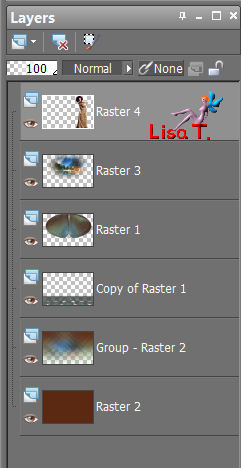
your layer palette looks like this
Step 27
edit/copy special/copy merged
edit/paste as new image. Set aside
Step 28
image/add borders/check “symmetric”
2 pixels/color 1
4 pixels color 2
2 pixels color 1
30 pixels with a contrasting color
Step 29
activate the magic wand tool (default settings)
select the large border
edit/paste into selection (the image you set aside in step 27)
Step 30
adjust/blur/radial blur

effects/user defined filter/emboss 6
Step 31
effects/plugins/Graphic Plus/Cross Shadow/default settings
selections/select none
Step 32
effects/plugins/AAA Frames/Foto Frame
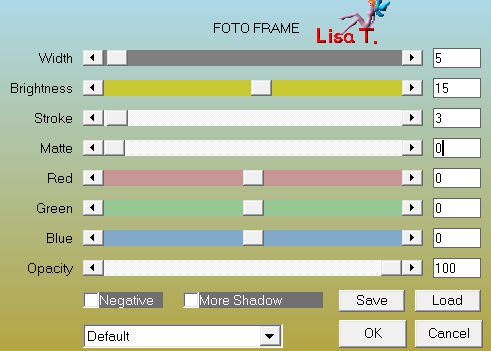
Step 33
image/resize/1000 pixels width
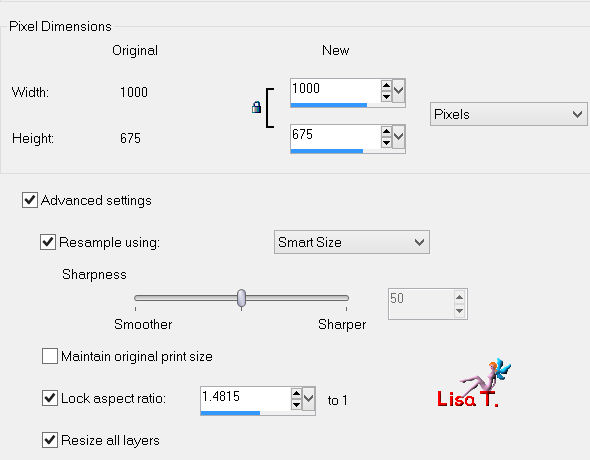
Step 34
activate Nara’s watermark
edit/copy - back to your work - edit/paste as new layer
move it in a corner
apply your signature
file/save as… type jpeg

your tag is finished
Thank you to have realized it

To write to Nara


Back to the board of Nara's tutorials
board 1 

|