Karen

You will find the original tutorial Here


This translation is my property,
it is strictly forbidden to copy or distribute it on the Net
Thanks to Nara for her kind permission
I work with PSP18, but it is possible to use another version.

The tubes provided are for personal use
you are not allowed to share them, or present them in another site
without the permission of the authors

Material
Open the tubes, duplicate them and work with the copies
open the masks, duplicate an minimize them
copy/paste selections into the folder « Selections » of « My PSP Files »
double-click on the presets to install them automatically


Filters
L en Ks Zitah
Plugin VM Instant Art
Plugin Alien Skin Eye Candy 5> Impact
Plugin & Bkg 101 sf Designers
Filter Factory Gallery A


Use the pencil to follow the steps
Left click to grab it


Colors
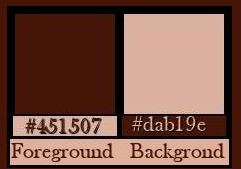
color 1 -> foreground color -> FG -> #451507
color 2 -> background color -> BG -> #dab19e

Realization
Step 1
open a new transparent raster layer 900 * 600 pixels
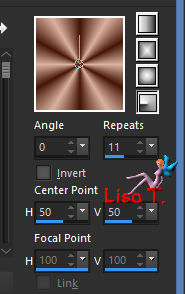
in the materials palette, prepare a radial gradient
Step 2
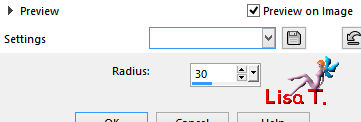
adjust/blur/gaussian blur
Step 3
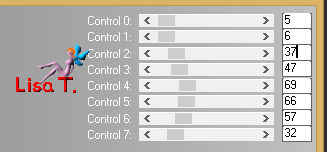
effects/plugins/L en K’s/Zitah
Step 4
adjust/sharpness/sharpen
Step 5
layers/new raster layer
flood fill with BG color
effects/plugins/VM Instant Art/Lightlines
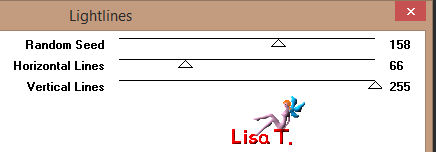
blend mode of the layer : « Hard Light » - opacity : 50%
layers/merge/merge down
Step 6
layers/new raster layer
flood fill with BG color
layers/new mas layer/from image/mask « maskcamerontags_geometric3 »
layers/merge/merge group
Step 7
selections/load-save selection/from disk/selection « sel.tagkaren.nara »
selections/modify/contract/10 pixels
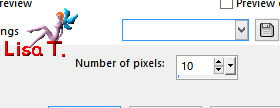
Step 8
effects/3D effects/chisel
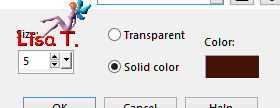
Step 9
effects/plugins/Alien Skin Eye Candy 5 ImpactGlass
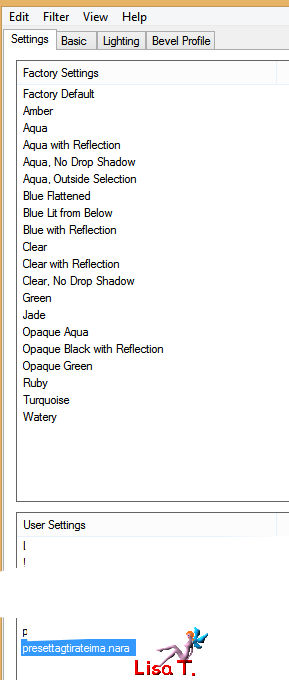
Step 10
effects/plugins/&<Bkg Dsigners sf 10 I>/BB String Thing
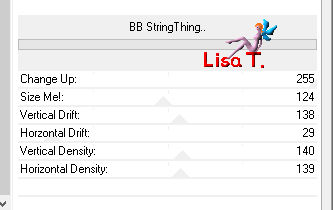
Step 11
effects/3D effects/Buttonize
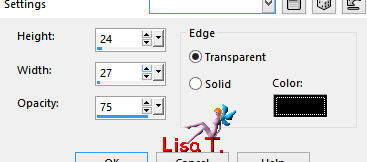
selections/select none
Step 12
activate Raster 1
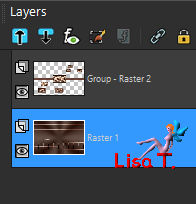
layers/new raster layer
flood fill with BG color
layers/new mask layer/from image/Nara_mask_0347
layers/merge/merge group
Step 13
layers/duplicate
image/mirror/mirror horizontal
layers/merge/merge down
adjust/sharpness/sharpen more
Step 14
activate the layer « group-raster 2 »
with the magic wand tool, tolerance 6, select the 2 rectangles without frame and delete
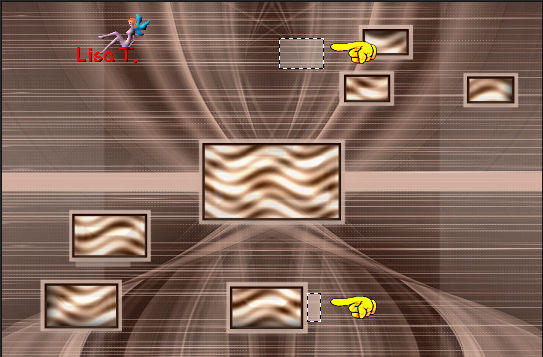
selections/select none
Step 15
activate the layer « group-raster 2 » (middle layer in the layers palette)
resize the tube of the couple to 80% - copy/paste as new layer
move it as shown in the final result
Step 16
copy/paste as new layer the tube of the woman
move it as on the example – opacity 50%
effects/3D effects/drop shadow as you like
layers/merge/merge visible
Step 17
activate the top layer
activate the tube of the flowers – image/resize/18%
copy/paste as new layer and move it into the largest frame of the mask (see final result)
effects/3D effects/drop shadow as you like
adjust/sharpness/sharpen
Step 18
layers/new raster layer
activate the paint brush tool (you may use another brush tip than the one provided of course)
(translator’s note : I couldn’t use the one provided, .... so I chose another one)
use the FG color, apply the brush tip on the horizontal band
layers/duplicate – image/mirror/mirror horizontal
layers/merge/merge down
drop shadow as you like
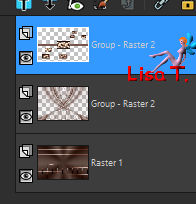
your layers palette looks like this
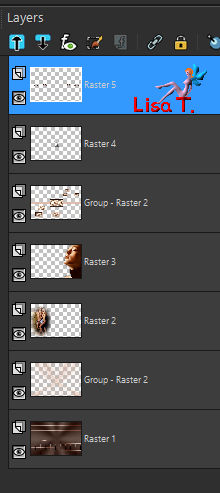
Step 19
layers/merge/merge all (flatten)
edit/COPY
Step 20
image/add borders/3 pixels/FG color
Step 21
image/add borders/30 pixels using a contrasting color
select this large border with the magic wand tool
Step 22
edit/paste into selection the image copied in step 19
Step 23
adjust/blur/gaussian blur/as in step 2
effects/plugins/Filter Factory Gallery « A »/Pool Shadow/default settings
selections/select none
Step 24
image/add borders/3 pixels/FG color
Step 25
apply Nara’s watermark, and your own watermark
file/save as ... type jpeg

your tag is finished
Thank you to have realized it

To write to Nara


Back to the board of Nara's Tutorials


|