Gueixa

You will find the original tutorial Here


This translation is my property,
it is strictly forbidden to copy or distribute it on the Net
Thanks to Nara for her kind permission
I work with PSP17, but it is possible to use another version.

no tube is provided, use the images you like
Nara Chose a misted tube
I used my own tubes you can get for free on my site
Material
1 mask

Open your tubes, duplicate them and work with the copies
copy the mask into the folder « mask » of My PSP Files
Filters
Flaming Pear/Flexify 2
Unlimited 2

Use the pencil to follow the steps
Left click to grab it

Realization
Step 1
open a new transparent raster layer 1024 ** 550
selections/select all
copy/paste your image into selection
Step 2
effects/image effects/seamless tiling/Side by Side
Step 3
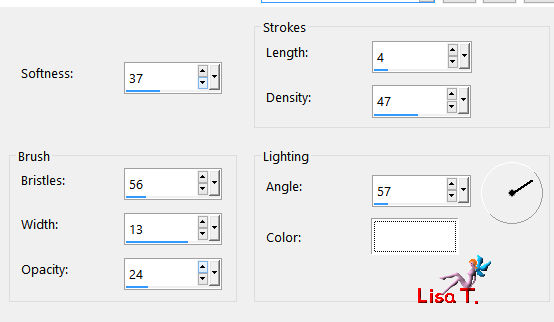
effects/art media effects/Brush strokes
Step 4
layers/new raster layer
selections/select all
selections/modify/contract/80 pixels
in the materials palette, prepare an linear gradient / 0 / 0 / with 2 colors picked into your image (dark and light)
flood fill the layer with the gradient
Step 5
close the eye of Raster 1
effects/plugins/Unlimited 2/buttons & frames/3DGlass Frame 2/ 50 / 128
selections/select none
Step 6
effects/distortion effects/wave/ 0 / 100 / 12 / 100 / transparent
Step 7
layers/duplicate
image/mirror/mirror horizontal
layers/merge/merge visible
Step 8
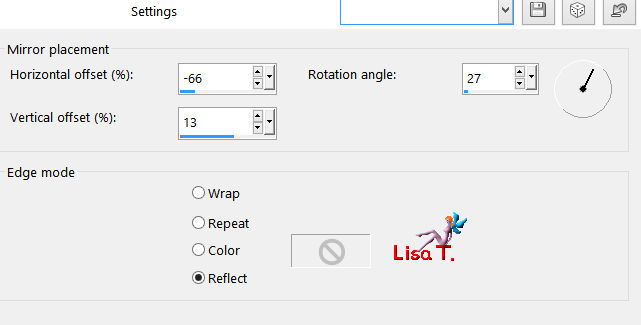
effects/reflection effects/rotating mirror
Step 9
effects/geometric effects/Skew/Vertical (-29)/transparent
Step 10
effects/geometric effects/circle/transparent
Step 11
layers/duplicate
image/mirror/mirror horizontal
layers/merge/merge visible
Step 12
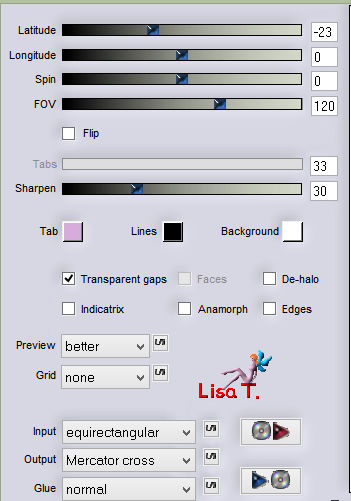
effects/plugins/Flaming Pear/Flexify 2
Step 13
layers/duplicate
image/mirror/mirror horizontal
layers/merge/merge visible
Step 14
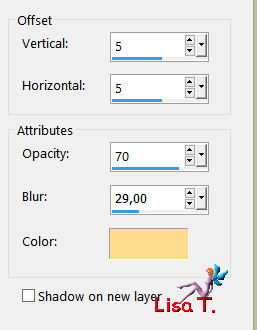
effects/3D effects/drop shadow/ 7 / 7 / 80 / 15 / black ** -7 / -7 / 80 / 15 ** black
Step 15
layers/new mask layer/from disk/choose the pask provided
layers/merge/merge group
layers/merge/merge visible
Step 16
open the eye of the bottom layer
copy/merge your misted tube
resize it if necessary
place it where you like
Translator’s note :
if you use a tube (it was my choice) drop a shadow, choosing a light color picked in your image
drop the same shadow changing (5) by (-5)
activate the bottom layer
new mask layer/from disk/choose the mask provided
layers/merge/merge group
Step 17
layers/new raster layer
layers/arrange/send to bottom
flood fill with the gradient
layers/merge/merge all (flatten)
translators note :
image/resize if necessary
as I intend to use this top as a tag, I added a symmetric border of 2 pixels,
using the dark color of the gradient
your tag is finished
Thank you to have followed it
To write to Nara

Back to the board of Nara's tutorials

|