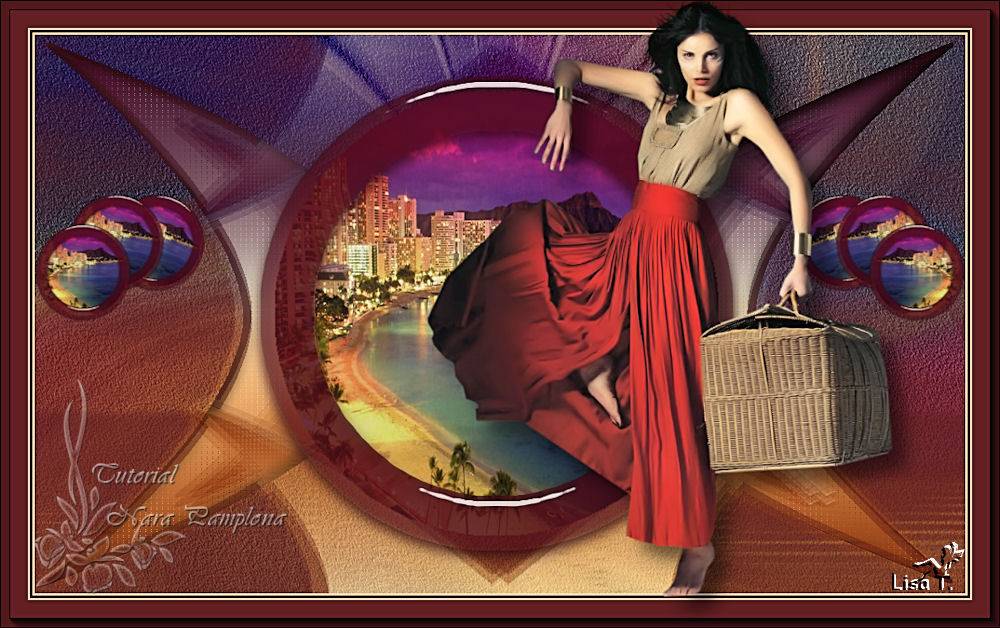
Be Happy !!
You will find the original tutorial Here

Nara Pamplona’s tutorials are written in portuguese
I do not speak this language, so I use Violette’s translations to transpose them into english.

I am member of TWInc
this translated tutorial is protected


These translations are our properties,
it is strictly forbidden to copy or distribute them on the Net
Thanks to Nara and Violette for their kind permissions
I work with PSP12, but it is possible to use another version.

The tubes provided are for personal use
you are not allowed to share them, or present them in another site
without the permission of the authors
Material
tubes by Nara
selections by Nara
(copy and paste into the special folder “selections” of “My PSP Files”)
1 preset “Glass”
(copy and paste into the folder “Glass” of “Alien Skin Eye Candy 5 Impact”)
1 preset Extrude
(copy and paste into the special folder “Extrude” of “Alien Skin Eye Candy 5 Impact”)
1 mask by Narah
1 watermark Nara
Open the tubes, duplicate them and work with the originals

Filters here

L & K’s/Zitah
Mura’s Meister/Copies
Alien Skin Eye Candy 5 Impact/Glass
Alien Skin Eye Candy 5 Impact/Extrude
Simple/Top Left Mirror
Simple/Top Bottom Wrap
Italian Editors Effects/Effeto Fantasma
Use the paint brush to follow the steps
Left click to grab them
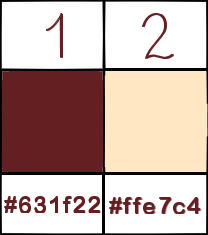
Colors
Realization
Step 1
Open a new transparent background raster layer 1000 * 600 pixels
selections/select all
Step 2
activate the image “imagemlinda”
edit/copy - back to your work - edit/paste into selection
selections/select none
effects/image effects/seamless tiling/default settings
Step 3
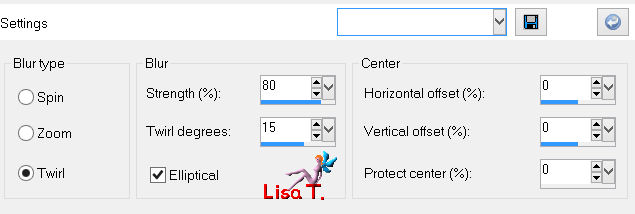
adjust/blur/radial blur
Step 4
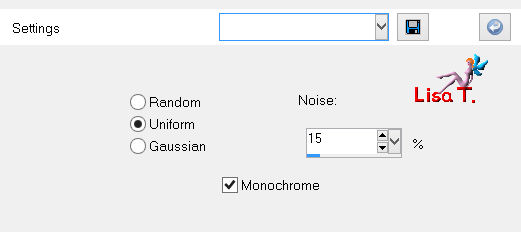
adjust/add-remove noise/add noise
Step 5
effects/user defined filter/Emboss 3
Step 6
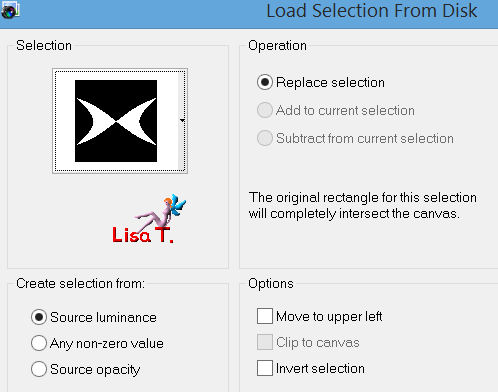
selections/load-save selection/from disk/selection “sel_nara_ser_feliz”
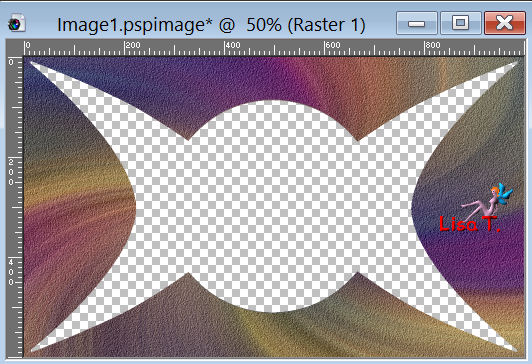
press the Delete key of your keyboard
selections/select none
Step 7
activate the Warp Brus tool with the following settings
size: 428 - hardness: 100 - strength: 100 - step: 1
edge mode: fixed - draft quality: high

place your cursor on the central point
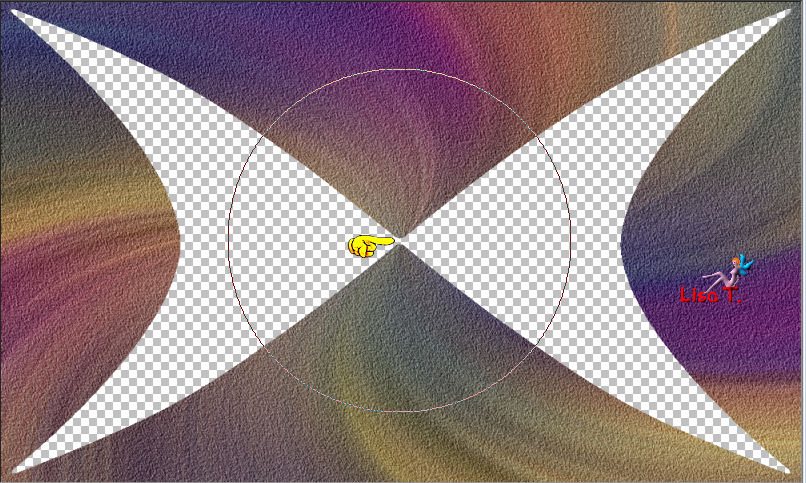
left click, and hold the click until you get the following image
Step 8
effects/3D effects/drop shadow/ 8 / 8 / 86 / 16.83 / black
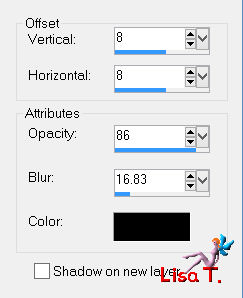
drop shadow once more changing (8) by ( -8)
Step 9
layers/new raster layer
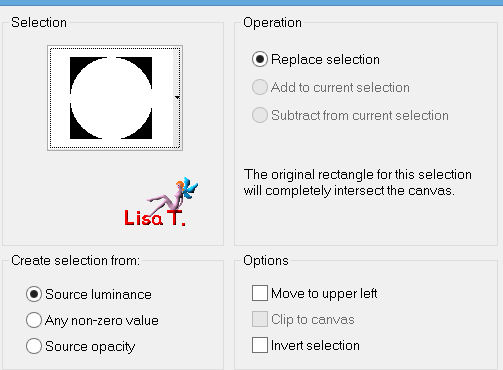
selections/load-save selection/from disk/selection “sel_nara_ser_feliz2”
activate the image “imagemlinda”
edit/copy - back to your work - edit/paste into selection
Step 10
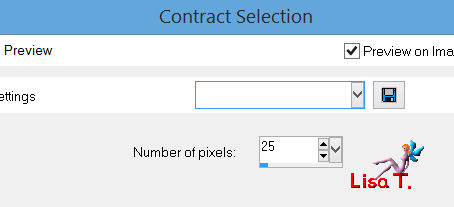
selections/modify/contract/25 pixels
Step 11
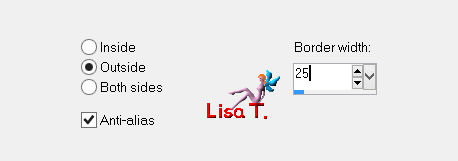
selections/modify/select selection borders
Step 12
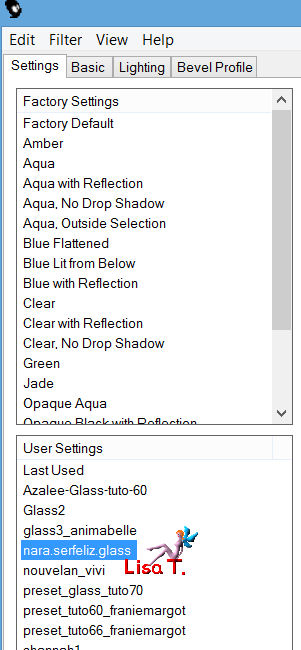
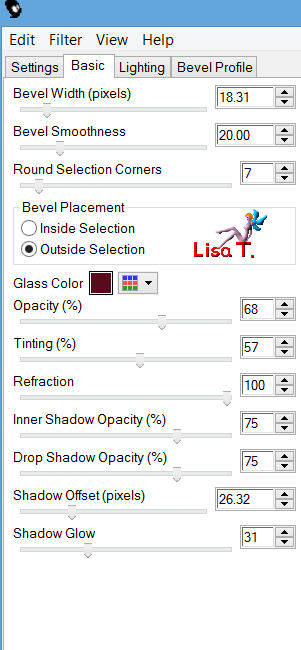
effects/plugins/Alien Skin Eye Candy 5 Impact/Glass
apply the preset “nara.serfeliz.glass”
selections/select none
Step 13
layers/new raster layer
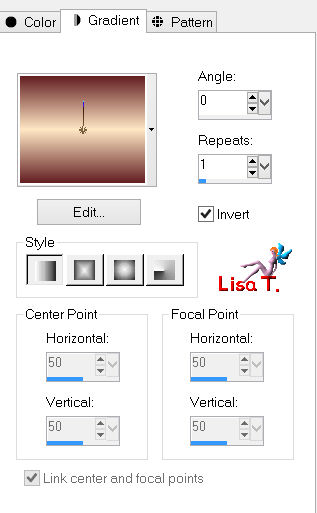
fill with with a linear gradient / 0 / 1
Step 14
selections/load-save selection/from disk/selection “sel_ser_feliz”
selections/invert
press the Delete key of your keyboard
selections/select none
Step 15
effects/plugins/L&K’s/Zitah
Step 16
in the layers palette, activate raster 3
layers/duplicate
image/resize/70%/uncheck “resize all layers”
Step 17
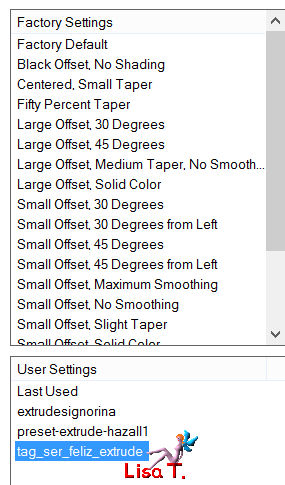
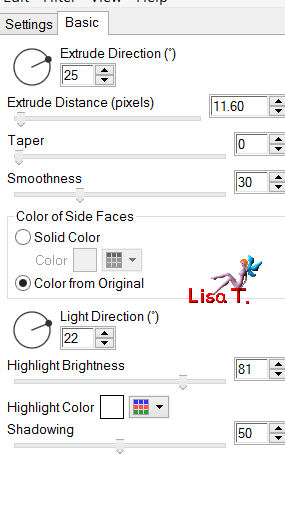
effects/plugins/Alien Skin Eye Candy 5 Impact/Extrude/preset “tag_ser_feliz_extrude”
Step 18
layers/duplicate
efefcts/plugins/Simple/Top Left Mirror
Step 19
effects/plugins/Simple/Top Bottom Wrap
layers/merge/merge down 2 times
Step 20
in the layers palette, activate raster 3
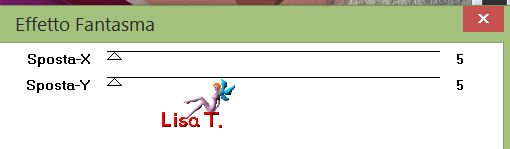
effects/plugins/Italian Editors Effects/Effeto Fantasma
Step 21
in the layers palette, activate raster 1
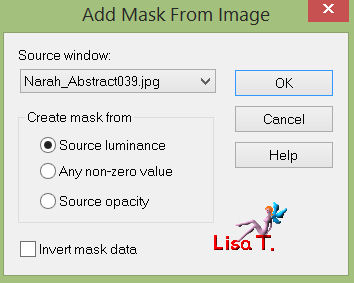
layers/new mask layer/from image/mask “Narah_Abstract039”
layers/merge/merge group
Step 22
layers/new raster layer
layers/arrange/send to bottom
fill with color 1
activate raster 3
layers/arrange/move down 2 times
Step 23
in the layers palette, activate raster 2
layers/duplicate
image/resize/20%/uncheck “resize all layers”
Step 24
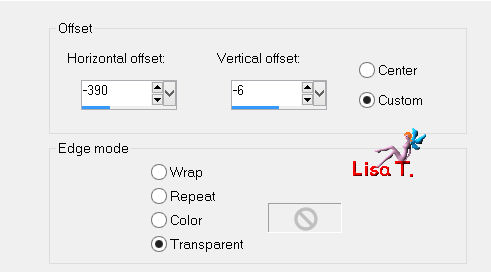
effects/image effects/offset
Step 25
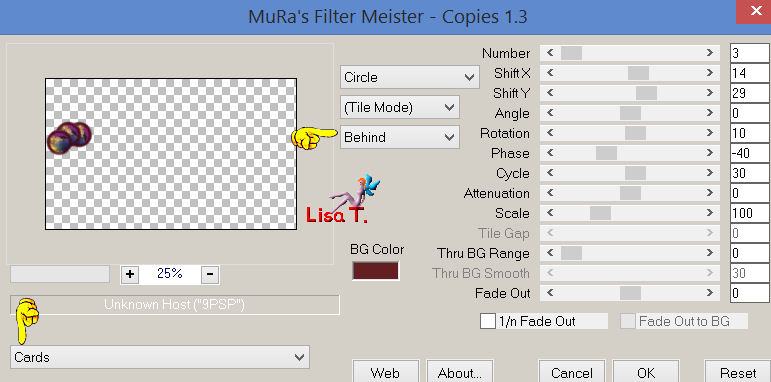
effects/plugins/Mura’s Meister/Copies
layers/duplicate - image/mirror
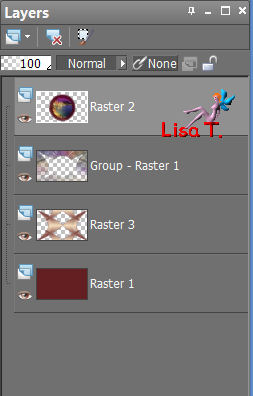
layers/merge/merge down
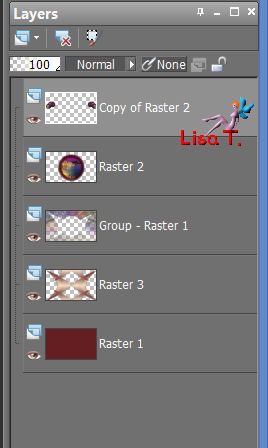
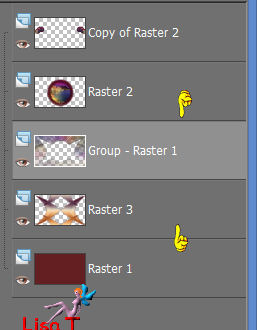
your layers palette looks like this
Step 27
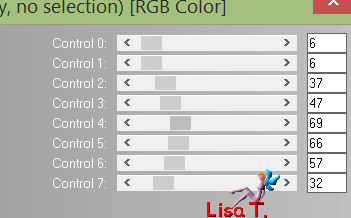
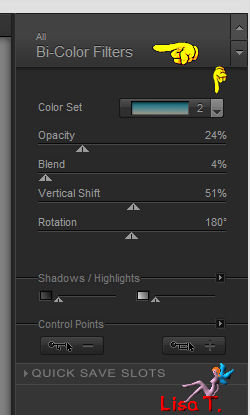
apply Nick Software/Color Effex Pro. 3.0 Complete
on raster 3 AND on the layer Group_raster 1
Bi-Color set/Warm 2
Step 28
image/add borders/2 pixels/color 2
Step 29
image/add borders/3 pixels/color 1
Step 30
image/add borders/2 pixels/color 2
Step 31
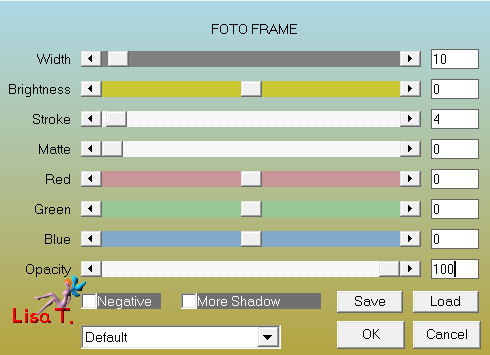
image/add borders/30 pixels/color 1
effects/plugins/AAA Frame/Foto Frame
Step 32
activate the tube “tubeNP1101”
edit/copy - back to your work - edit/paste as new layer
move as shown on final result
**note of Violette : drop shadow as you wish
she chose 16 / 16 / 50 / 25 / black **
layers/merge/merge visible
Step 33
image/resize/1000 pixels width/check “resize all layers”
**note of Lisa T. to make the image sharper,
I used -> adjust/sharpness/unsharp mask
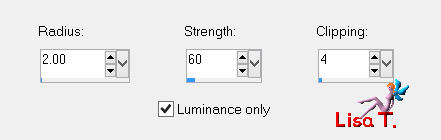 ** **
Step 34
activate Nara’s watermark , copy and paste as new layer
move it in one of the corners
apply your own watermark , or signature
Step 35
layers/merge/merge all (flatten)
save as… type jpeg
your tag is finished
Than you to have realized it
To write to Nara

Back to the board of Nara Pamplona's tutorials


|