Bachelor Party

You will find the original tutorial Here

I am member of TWInc
this translated tutorial is protected


This translation is my propery,
it is strictly forbidden to copy or distribute it on the Net
Thanks to Nara for her kind permission
I work with PSP12, but it is possible to use another version.
The tubes provided are for personal use
you are not allowed to share them, or present them in another site
without the permission of the authors

Material
landscape and woman tubed by Nara Pamplona
Nara’s watermark
Open the tubes, duplicate them and work with the originals

Plugins
Flaming Pear/Flexify 2
Filters here
Thank you to Violette for her kind permission

Use the paint brush to follow the steps
left click to grab it
 |
Colors
foreground color -> color 1 -> #cfb49f
background color -> color 2 -> #874729
Realization
Step 1
open a new transparent raster layer 800 * 600 pixels
in the materials palette, prepare a linear gradient
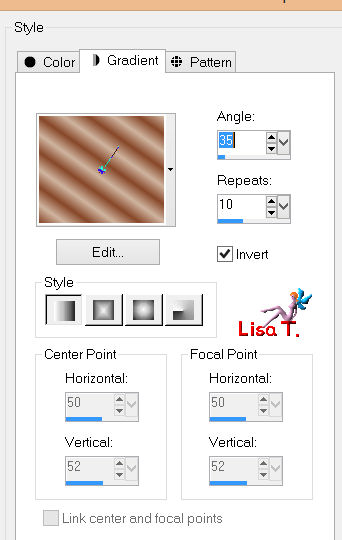
fill the layer with the gradient
Step 2
selections/select all
activate the tube of the woman,
edit/copy - back to your work - edit/paste into selection
selections/select none
Step 3
effects/image effects/seamless tiling/default settings
Step 4
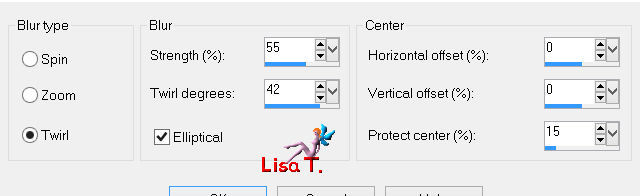
adjust/blur/radial blur
Step 5
layers/duplicate
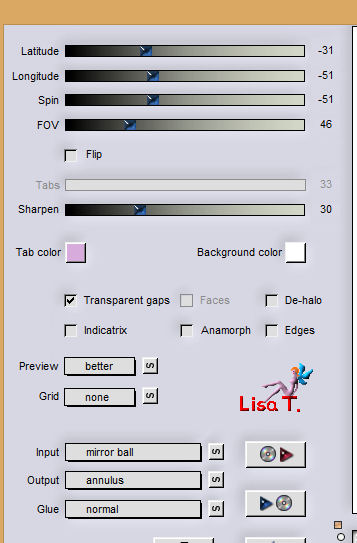
effects/plugins/Flaming Pear/Flexify 2
Step 6
with the magic wand tool, defautl settings, select inside of the circle
selections/modify/expand/10 pixels
layers/new raster layer
activate the tube of the landscape
edit/copy - back to your work - edit/paste into selection
selections/select none
layers/arrange/move down
Step 7
in the layers palette, activate the top layer
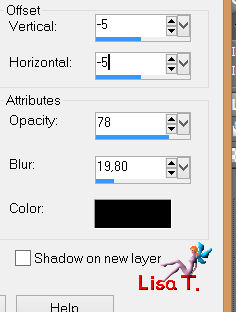
effects/3D effects/drop shadow/
5 / 5 / 78 / 19.80 * -5 / -5 / 78 / 19.80
Step 8
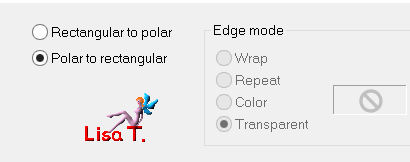
effects/distortion effects/polar coordinates/polar to rectangular
layers/duplicate - image/flip
layers/merge/merge down
Step 9
layers/duplicate
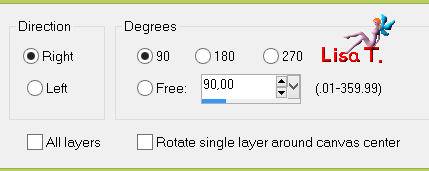
image/free rotate
Step 10
in the layers palette, activate the bottom layer
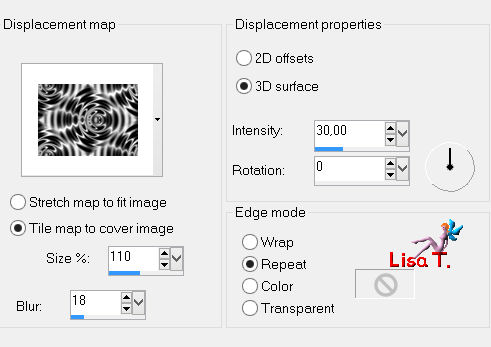
effects/distortion effects/displacement map/Puddle Drops texture
Step 11
activate the tube of the woman
edit/copy - back to your work - edit/paste as new layer
image/resize/uncheck “resize all layers”/80%
move it as shown on the final result
effects/3D effects/drop shadow/same settings as on step 7
Step 12
in the layers palette, activate the background layer
edit/copy - edit/paste as new image (set aside, you will need this image later)
back to your work
Step 13
image/add borders/check “symmetric” ->
3 pixels color #349664
30 pixels white
select this border with the magic wand tool
edit/paste into selection (the image you set aside on step 12)
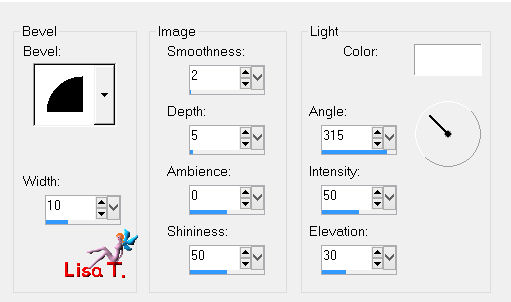
effects/3D effects/inner bevel
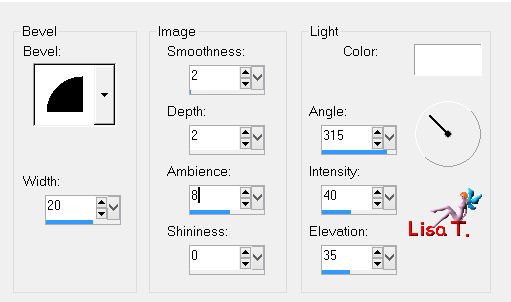
(note of the translator : I used different settings, see below)
Step 14
image/add borders/check “symmetric” ->
3 pixels color #349664
Step 15
copy the watermark and paste in one of the lower corners
Apply your signature
save as… type jpeg
your tag is finished
Than you to have realized it
To write to Nara

Back to the board of Nara's tutorials

|