Aliciar

You will find the original tutorial Here


This translation is my property,
it is strictly forbidden to copy or distribute it on the Net
Thanks to Nara for her kind permission
I work with PSP17, but it is possible to use another version.
The tubes provided are for personal use
you are not allowed to share them, or present them in another site
without the permission of the authors
Material
1 mask by Narah - 1 woman tube by Nara - 1 watermark - swans tube not provided
(translator’s note : I used one of my tubes
(you’ll find it on page 3 of the animals tube, number 0063)
Open the tubes, duplicate them and work with the copies
don't forget to erase the watermarks
open the mask, duplicate an minimize it
copy/paste selection into the folder « Selections » of « My PSP Files »

Filters
Alien Skin Eye Candy 5 Impact
Flaming Pear / Flexify2
Flaming Pear / Flood

Use the paint brush to follow the steps
Left click to grab it

Realization
Step 1
choose 2 colors in your main tube
in the materials palette, prepare a sunburst gradient/ angle and repeat : 0
set light color in the middle of the gradient
Step 2
open a new transparent raster layer 1000 * 600 pixels
selections/load selection from disk, and chose the selection provided
fill the selection with the gradient
Step 3
effects/texture effects/Blinds/dark color
repeat this effect, with the box « Horizontal » checked
selections/select none
image/resize/uncheck « resize all layers »/80%
Step 4
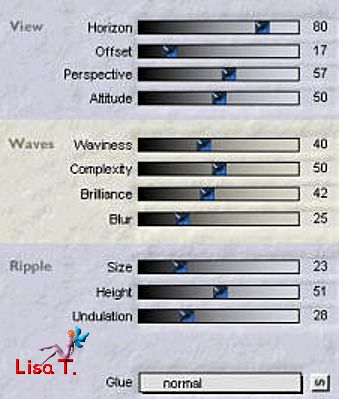
effects/plugins/Flaming Pear/Flexify 2
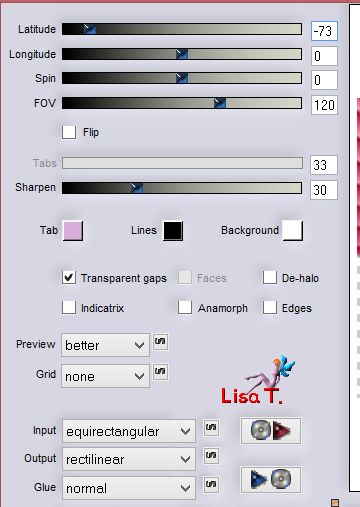
Step 5
effects/plugins/Flaming Pear/Flexify 2
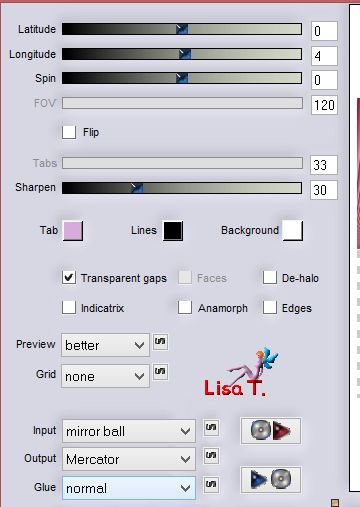
Step 6
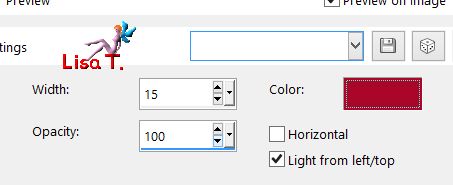
effects/plugins/Alien Skin Eye Candy 5 IMpact/Perspective Shadow
tab « settings » : drop shadow blurry
translator’s note : I used « drop shadow low » and set « overall opacity » on 66
layers/duplicate
effects/geometric effects/Spherize / strength : 100 / Shape : Circle
layers/merge/merge visible
Step 7
layers/new raster layer
fill with the gradient
layers/arrange/send to bottom
layers/new mask layer/from image
choose the mask provided in the material (uncheck « invert »)
layers/merge/merge group
Step 8
activate the Pick tool, and lower the layer to 150
adjust/sharpness/sharpen more
Step 9
layers/new raster layer
layers/arrange/send to bottom
fill with your the dark color of the gradient
lauers/merge/merge visible
Step 10
copy/paste the tube as new layer
translator’s note : I resized this tube to 80%
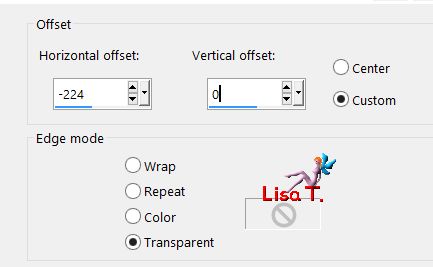
effects/image effects/offset
Step 11
effects/plugins/Flaming Pear/Flood/color white
Step 12
copy/paste the birds tube as new layer
blend mode : Screen - opacity : 80%
(I resized the tube with the Pick tool, and chose the blend mode : Luminance (Legacy) opacity 100%)
Step 13
layers/new raster layer
fill with the gradient you created at the begining
activate the Pick Tool, and lower the layer, leaving only a bar at the bottom of the tag
(translator’s note : I lowered to 580)
effects/texture effects/tiles
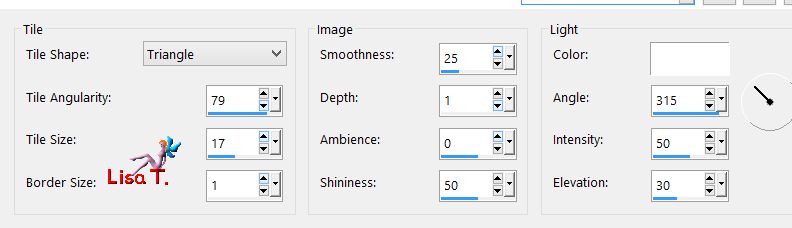
Step 14
copy/paste the Nara’s watermark, apply your signature
file/save as ... type jpeg
your tag is finished
Thank you to have realized it
To write to Nara

Back to the board of Nara's tutorials
Board 1 

|