Adilia

You will find the original tutorial Here


This translation is my property,
it is strictly forbidden to copy or distribute it on the Net
Thanks to Nara for her kind permission
I work with PSP17, but it is possible to use another version.

The tubes provided are for personal use
you are not allowed to share them, or present them in another site
without the permission of the authors
Material
Open the tubes, duplicate them and work with the copies
open the masks, duplicate an minimize them
copy/paste selections into the folder « Selections » of « My PSP Files »
tubes - selections - mask - watermark

Filters
Simple - Alien Skin Eye Candy 5 Impact - Vizros

Use the pencil to follow the steps
left click to grab it
 |
Colors
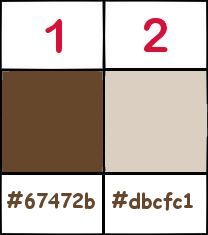
color 1 -> foreground color -> #
color 2 -> background color -> #
colors 3 -> #
color 4 -> #
Realization
Step 1
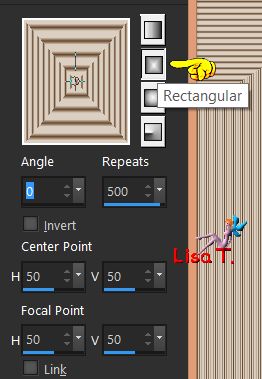
open a new transparent raster layer 900 *** 600 pixels
fill with a rectangular gradient
Step 2
layers/new raster layer
fill with color 1
layers/new mask layer/from image/mask « maskcameron_esfera5 »

layers/merge/merge group
Step 3
layers/new raster layer
selections/load-save selection/from disk/selection « sel.tagadilia1 »
activate « Raster 1 » and hit the delete key of your keyboard
keep the selection active
Step 4
copy/paste into selection the landscape image
selections/select none
effects/plugins/Alien skin Eye Candy 5 Impact/Perspective Shadow
Step 5
activate the layer « Group-Raster 2 » (middle layer)
layers/new raster layer
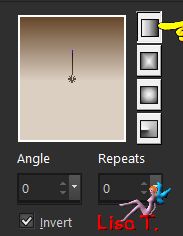
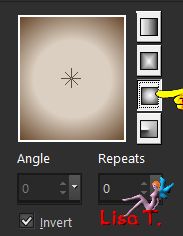
selections/load-save selection/from disk/selection « sel.tagadilia2 »
fill the selection with a linear gradient (opacity of the flood fill tool : 80%)
Step 6
selections/select none
effects/plugins/Simple/4 Way Average
effecs/plugins/Simple//Pizza Slice Mirror
layers/merge/merge down
Step 7
copy/paste as new image the tube of the woman
activate this copy
layers/new raster layer
layers/arrange/move down
fill with a sunburst gradient
layers/merge/merge visible
Step 8
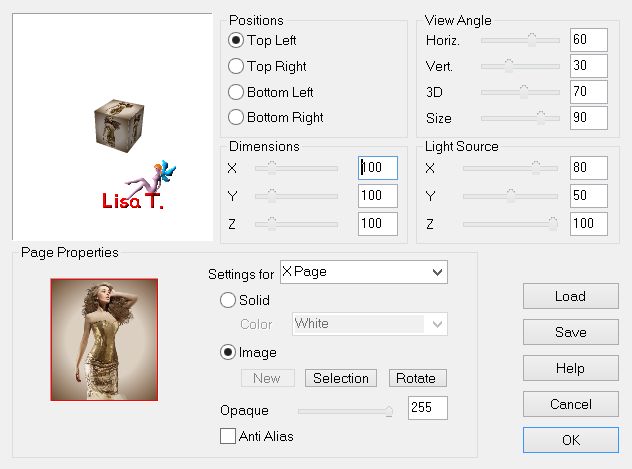
effects/plugins/Vizros/Box
Step 9
select the white part with the magic wand tool (defautl settings)
hit the delete key of your keyboard
selections/select none
edit/ copy
back to your work
edit/paste as new layer
Step 10
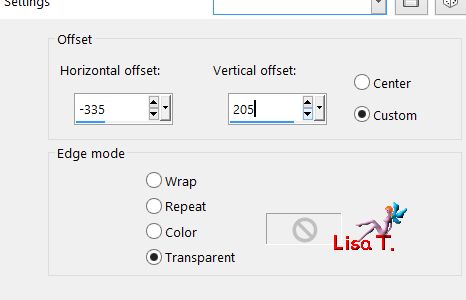
effecs/image effects/offset
Step 11
layers/duplicate
image/mirror/horizontal mirror
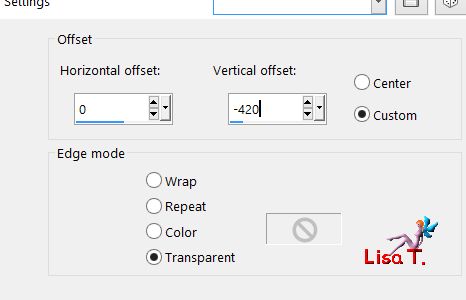
layers/duplicate - effects/image effects/offset
layers/merge/merge down twice
Step 12
effects/plugins/Alien skin Eye Candy 5 Impact/Perspective Shadow
layers/merge/merge all (flatten)
Step 13
copy/paste as new layer the woman tube
effects/image effects/offset

Step 14
image/add borders/check « symmetric »/2 pixels White
select this border with the magic wand tool
fill the selection with color 1
selecitons/invert
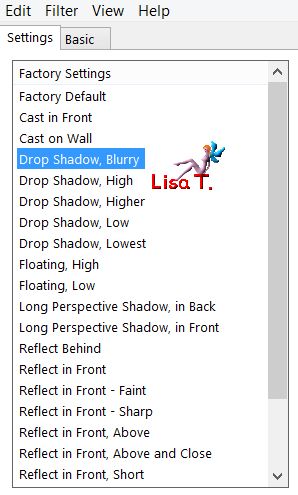
effects/3D effects/drop shadow
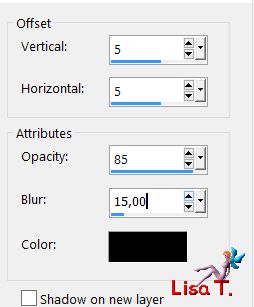
drop shadow again, changing (5) by (-5)
Step 15
image/add borders/30 pixels /white
select this border with the magic wand tool
fill with the gradient prepared in step
selections/invert
effects/3D effects/drop shadow as in step 14
Apply your signature
save as… type jpeg
your tag is finished
Thank you to have realized it
To write to Nara

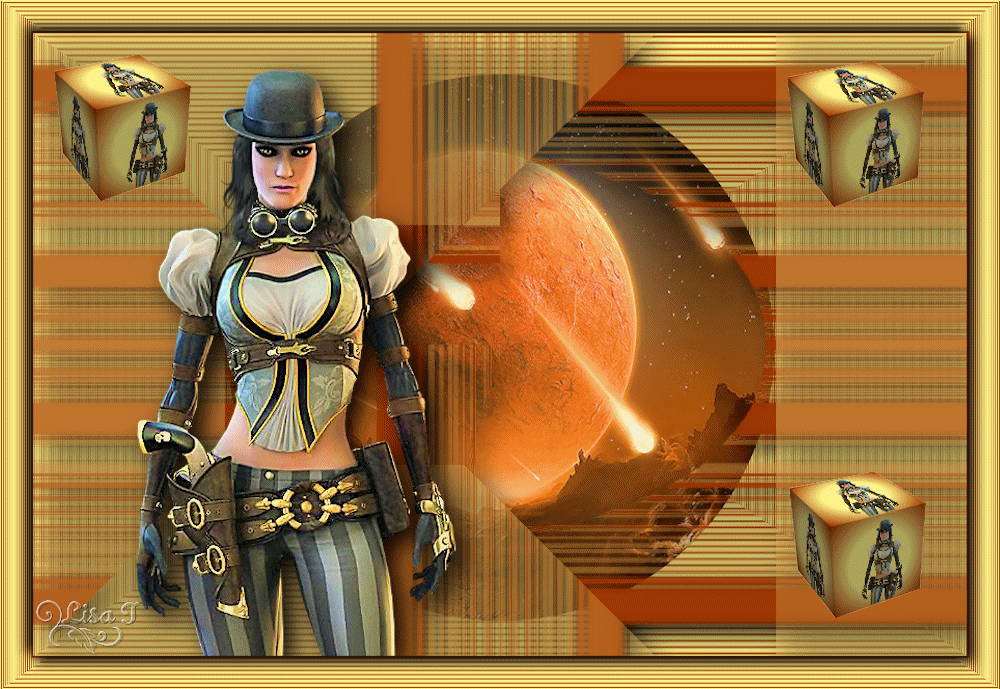
My tag with my tubes
Back to the board of Nara's tutorials

|