Modern
Dance Class

original tutorial in french. Click on MeryDesig’s
banner

Conditions of use of the material provided
It is forbidden to modifiy, change the name, take off the
watermarks or alter the tubes.
It is forbidden to share them in groups or offer them on
your site, blog or forum.
If you want to use them to create a tutorial, you must ask
the permission of the authors.
MaryDesig has the permission of the creators to use their
tubes, masks and decorations
Thank you to all of them for their work
Without their beautiful creations, no tutorials could be
written.

translator’s note : I use PSPX9 to create my tags
when translating
but you can follow this tutorial with any other version of
PSP
Merydesig uses Animation Shop to create her animations
I use Ulead Gif Animator. I added explanations for this software with
Merydesig’s kind permissions
Material

open all tubes and duplicate them (window -> duplicate)
Close original tubes and work with the copies (to preserve
the originals)
don’t forget to erase tubes’ watermarks before
using them
double click on plugins’ preset to install it
Plugins
Flaming Pear - Alien Skin Eye Candy

use this pencil to follow the steps
hold down Left click to grab it and move it

Realization
1
open a new transparent image 900 * 700 pixels
selections -> select all
copy / paste into selection « cm_p10 »
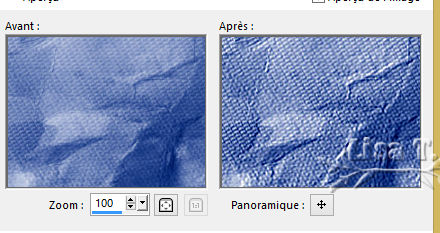
effects -> user defined filter -> emboss 3
selections -> select none
2
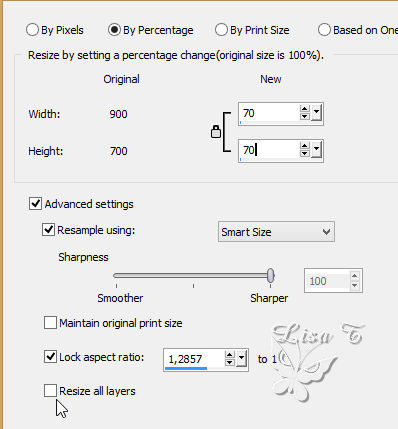
layers -> duplicate
image -> resize -> uncheck « resize all
layers » -> 70%
3
effects -> plugins -> Flaming Pear / Flexify 2 -> apply
twice

4
top layer is highlighted
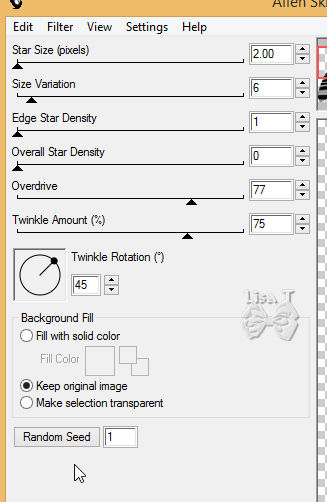
effects -> plugins -> Alien Skin Eye Candy 5-Impact
-> Backlight
use the preset « dance » provided
5
copy / paste « 82 » as new layer
layers -> duplicate
on original layer -> adjust -> add-remove noise -> add
noise (40)
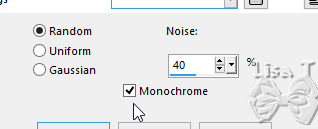
on copy add noise changing the setting -> 50
6
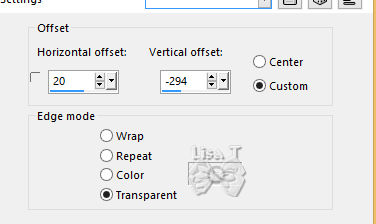
copy / paste « notes » as new layer
effects -> image effects -> offset
layers -> duplicate
adjust -> add-remove noise on original and copy as
before (40 and 50)
7
copy / paste « piano » as new layer
layers -> duplicate
effects -> plugins -> Alien Skin Xenofex 2 / Constellation
on original layer
on copy keep apply the same plugin with the same settings,
and click on « random »
8
copy / paste « merydesig_femme » as
new layer
layers -> duplicat
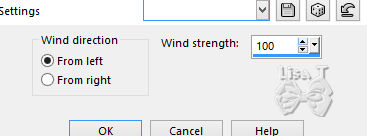
effects -> distortion effects -> wind
9
highlight « cm_p »(bottom layer)
effects -> plugins -> Flaming Pear / Flood
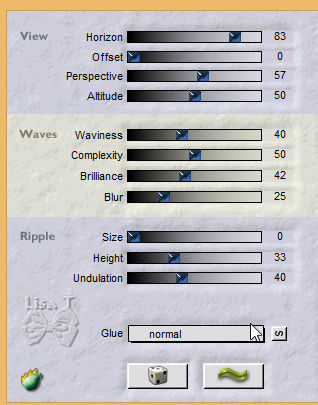
highlight copy of cm_p and apply the same effect
10
copy / paste as new layer « MD_cadre » (frame)
raster 1
layers -> duplicate -> add noise on original and
copy layers as in step 5
copy / paste « MD_cadre » (frame’s
decoration) raster 2 as new layer
11
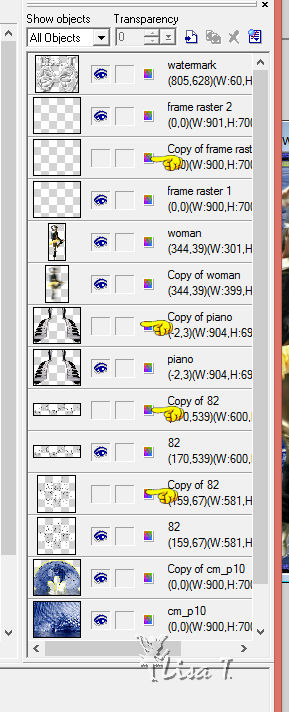
apply your watermark on new layer
your layers palette looks like this
Animation with Animation Shop
close the eyes of all copies
edit -> copy special -> copy merged
in Animation Shop -> paste as new animation
back into psp
close the eyes of orignals layers, open the eyes of their
copies
edit -> copy special -> copy merged
back into Animation Shop
paste after current frame
image properties -> 10
save as... type .gif
Animation with Ulead Gif Animator
close the eyes of all copies
edit -> saves as -> type .PSD
open Ulead Gif Animator
open your work
duplicate frame
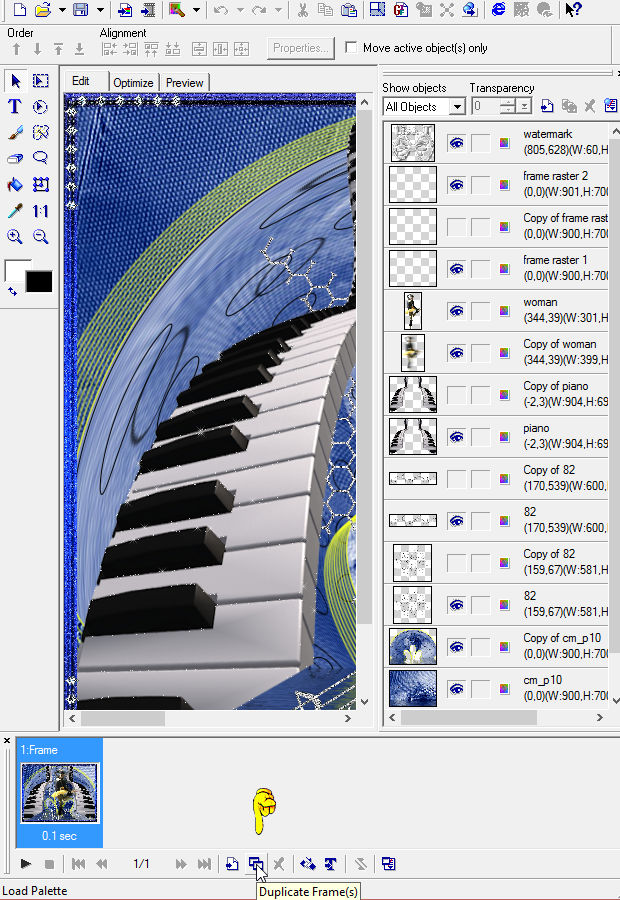
in the objects column, close the eyes of orignals and open
the eyes of copies
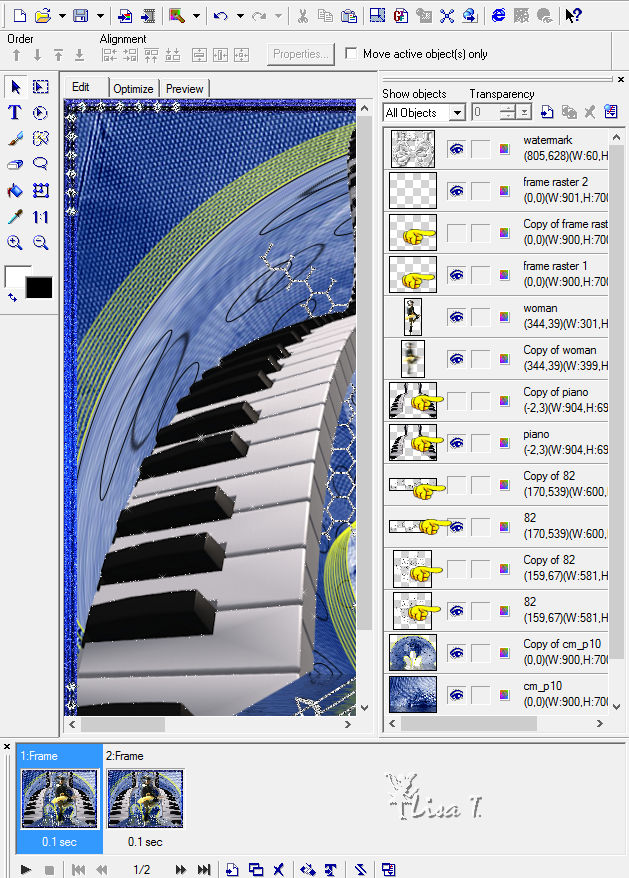
save your work as.... type .gif
your tag is finished
Thank you for following this tutorial
if you have any problem with this translation
Don’t hesitate to write to me

My tag with my tube

Back
to the board of MeryDesig’s tutorials
board 1 

|