
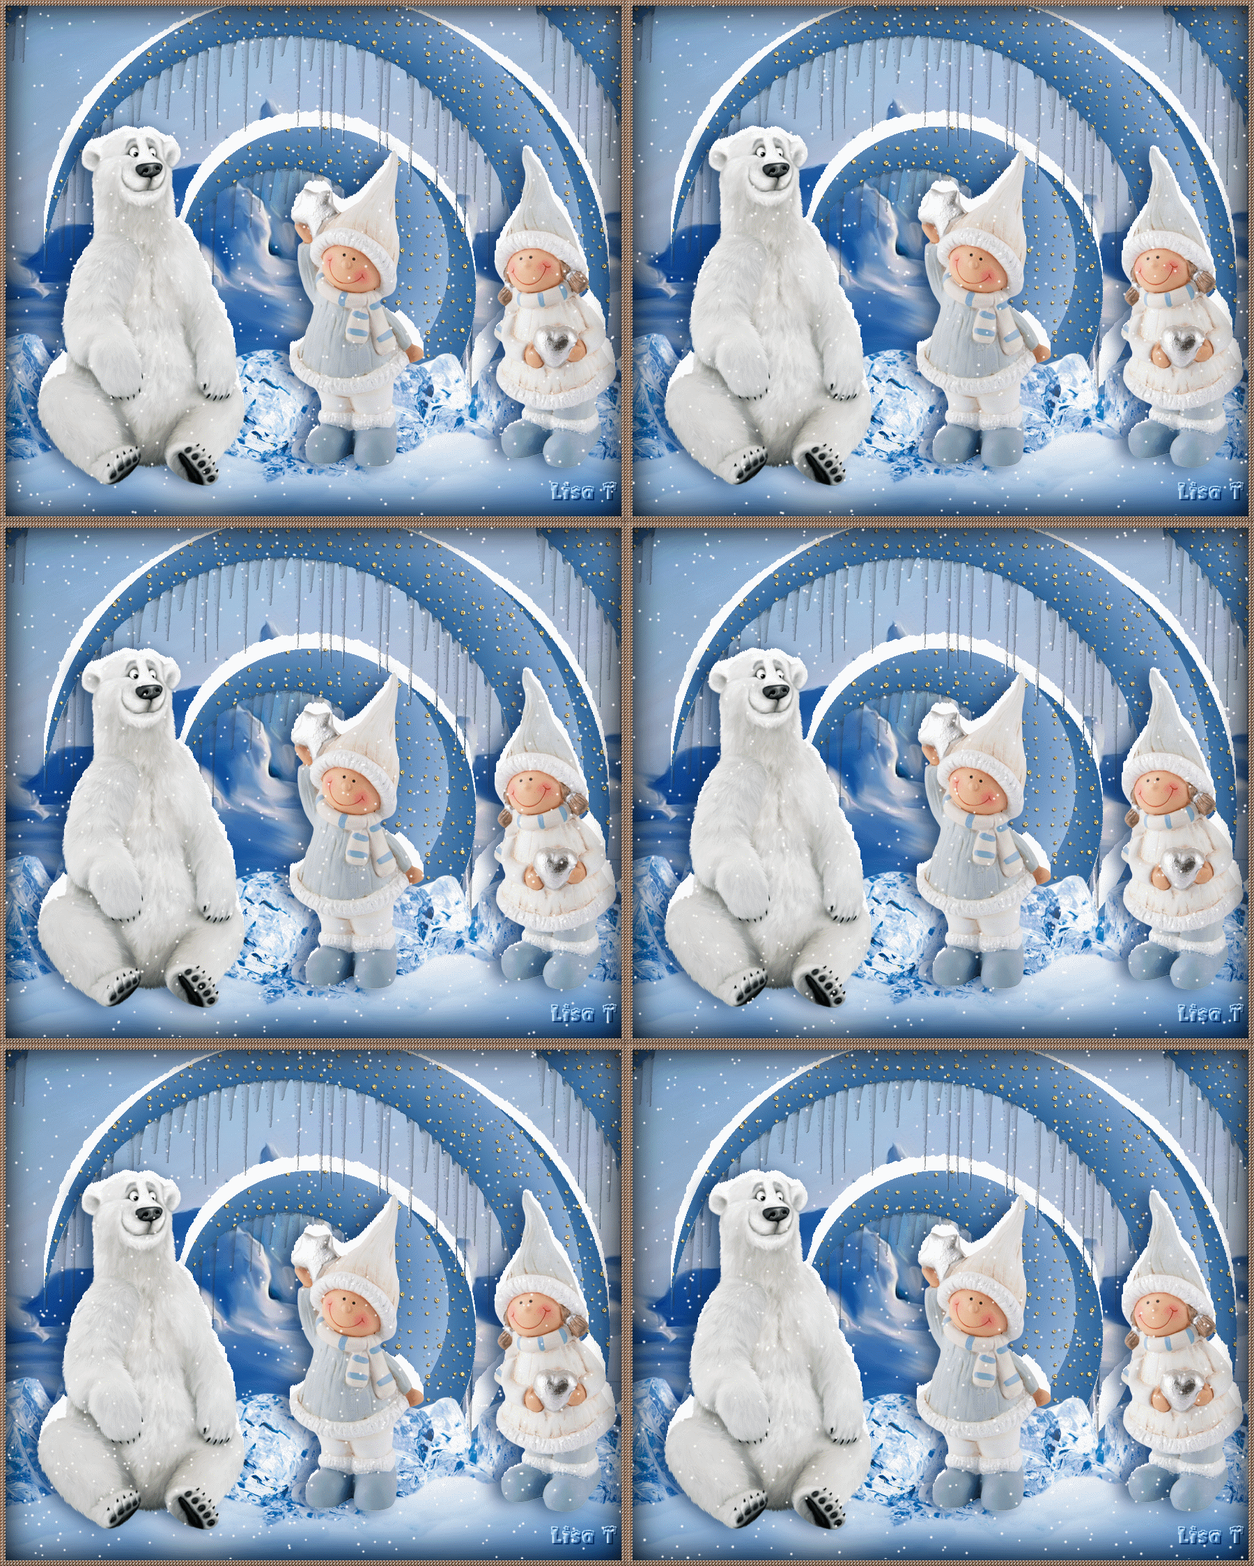
original tutorial in french. Click on MeryDesig’s
banner

Conditions of use of the material provided
It is forbidden to modifiy, change the name, take off the
watermarks or alter the tubes.
It is forbidden to share them in groups or offer them on
your site, blog or forum.
If you want to use them to create a tutorial, you must ask
the permission of the authors.
MaryDesig has the permission of the creators to use their
tubes, masks and decorations
Thank you to all of them for their work
Without their beautiful creations, no tutorials could be
written.

translator’s note : Merydesig uses PSPX9 and I use
PSP2018 to create our tags
but you can follow this tutorial with any other version of
PSP
according to the version you use, the results might be slightly
differents
Merydesig uses Animation Shop to create her animations
I use Ulead Gif Animator

Hints & Tips
TIP 1 -> if you don’t
want to install a font -->
open it in a software as « Nexus Font » (or
other font viewer software of you choice)
as long as both windows are opened (software and font), your
font will be available in your PSP
TIP 2 -> from PSPX4,
in the later versions of PSP the functions « Mirror » and « Flip » have
been replaced by -->
« Mirror » --> image -> mirror -> mirror horizontal
« Flip » --> image -> mirror -> mirror vertical

Material
tubes - decorations - gradient
xxxxxxxxxx matos xxxxxxxxx
open all tubes and duplicate them (window -> duplicate)
Close original tubes and work with the copies (to preserve
the originals)
don’t forget to erase tubes’ watermarks before
using them
copy / paste gradient(s) into « gradient » folder
of Corel PSP folder
open « brillante » and minimize
it to tray. You will use it as a pattern (without installation)

Plugins
VanDerLee -
Unlimited 2 - Sqirlz Reflect

 
use this pencil to follow the steps
hold down Left click to grab it and move it

 
Realization
1
open a new transparent image 900 * 750 pixels
selections -> select all
copy / paste into selection « GTD In the north »
selections -> select none
2
layers -> new raster layer
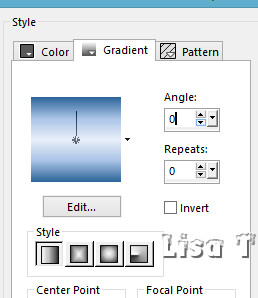
flood fill with the gradient « winterchaos_gradient022 »
3
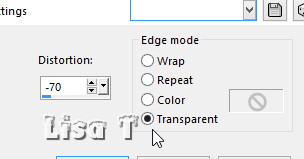
effects -> geometric effects -> perspective horizontal
4
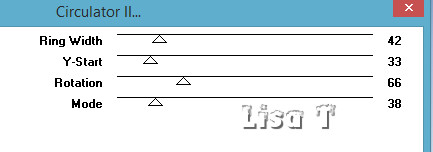
effects -> VM Distortion / Circulator II
5
into the materials palette, set the pattern « brillante » into
FG box
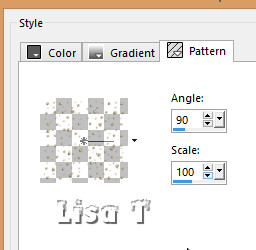
selections -> select all
selections -> float - selections -> defloat
flood fill selection with the « brillante » pattern
selections -> select none
6
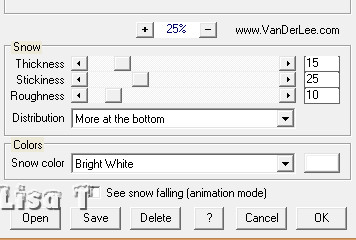
effects -> plugins -> VanDerLee Snowscape
7
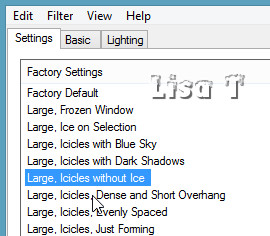
effects -> Alien Skin Nature / Icicles
8
copy / paste "decor_1" as new layer - don't move it
copy
/ paste as new layer « decor_2 »
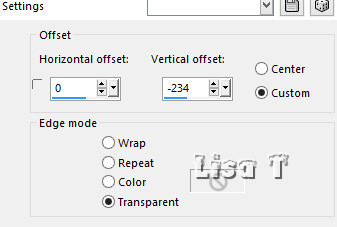
effects -> image effects -> offset
9
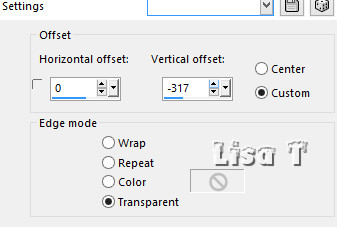
copy / paste as new layer « decor_3 »
effects -> image effects -> offset
10
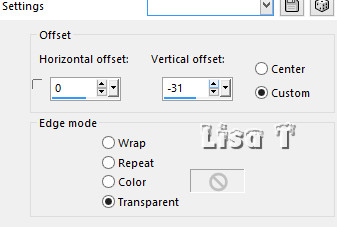
copy / paste as new layer « decor_4 »
effects -> image effects -> offset
11
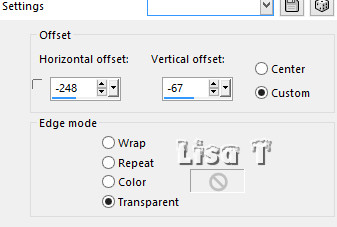
copy / paste as new layer « Ice kit_oso »
effects -> image effects -> offset
12
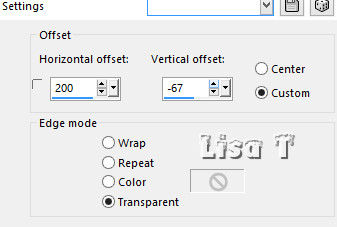
copy / paste as new layer « Ice kit_53 »
effects -> image effects -> offset
13
on both layers (bear and characters) apply the plugin VanDerLee
/ Snowscape
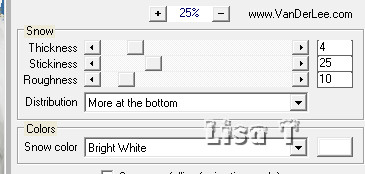
(translator’s note : on both layers (bear and characters)
I dropped a shadow -> 0 / -14 / 73 / 35 / #0e2d5a)
14
layers -> new raster layer
selections -> select all
copy / paste into selection « MD_cadre »
selections -> select none
15
apply your watermark on a new layer
layers -> merge -> merge all (flatten)
file -> save as... type .jpeg
16
to animate this tag, erydesign used the software « SqirlzReflect » (SR)
open the tag with SR
1 - select the frame, right click to close the selection
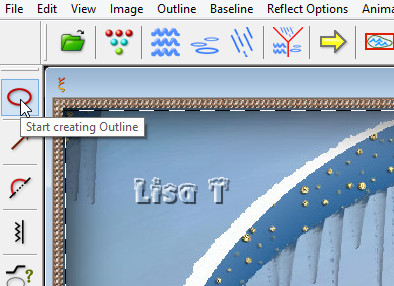
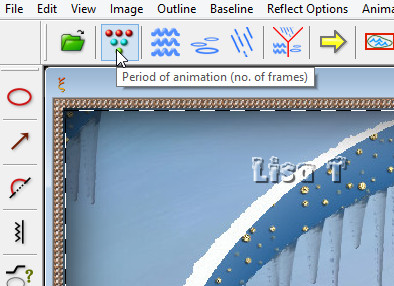
2 - select the period. Merydesig chose 20
3 - select rain/snow
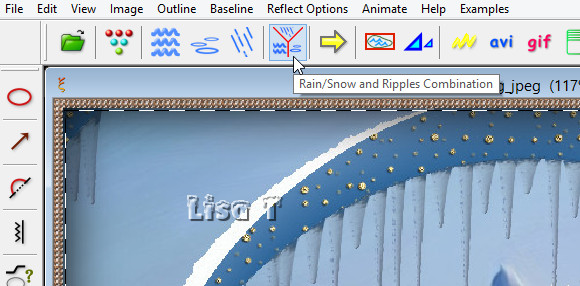
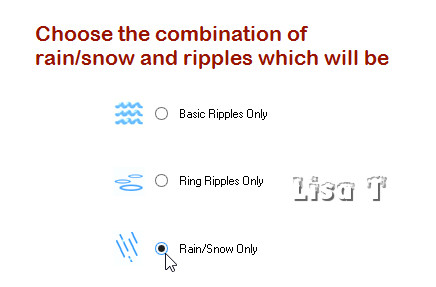
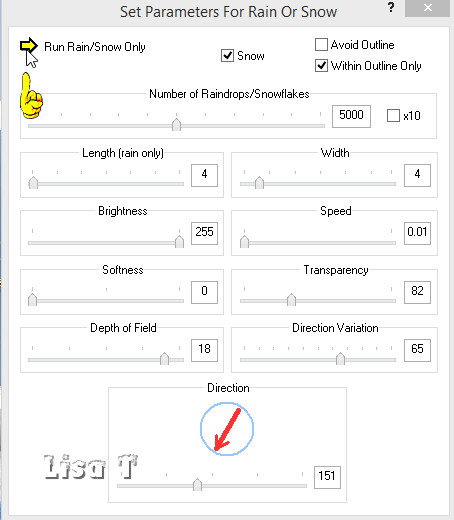
4 - select options. On the screenshots, I
show you my options. You can test the result by clicking
on the yellow arrow top left. Click again on the arrow
to stop the preview
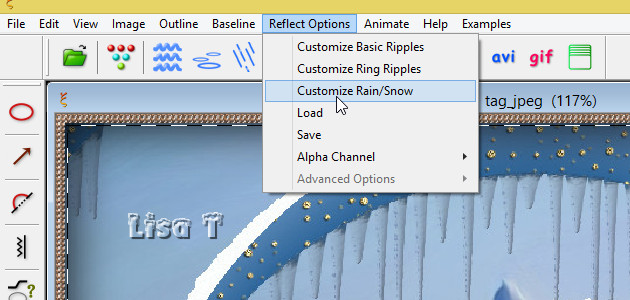
saves your work as GIF file.
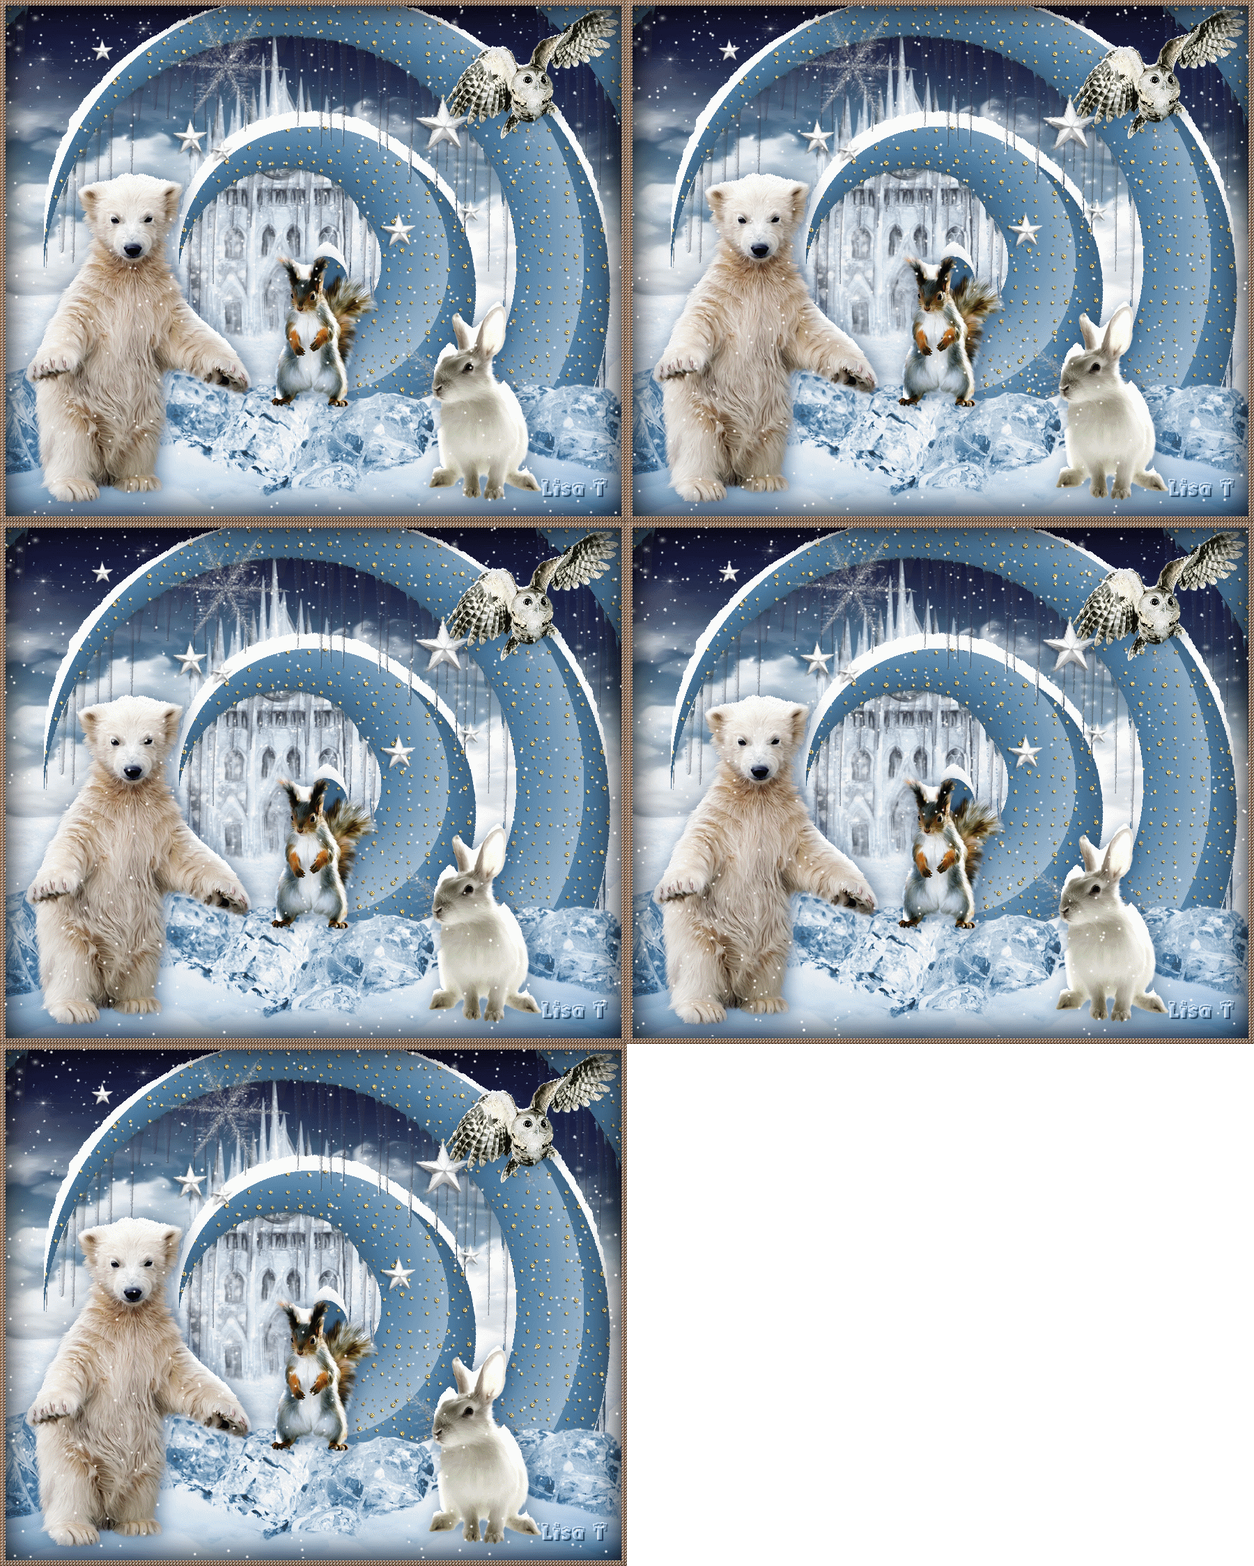
17
Translator’s adding : on the tag I present,
I animated in a different way,
I intention was to obtain a very lighter creation (only
511 Ko instead of 7,7 Mo....)
I duplicated the jpeg tag 4 times, (to have 5 layers ) and
selected inside the frame
on each layer, I applied the plugin VDL Adrenaline / snowflakes
with the following settings
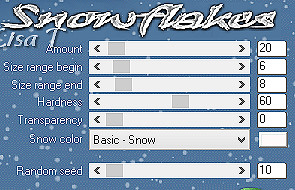
I just changed the seed on each layer -> 10 / 20 / 30
/ 40 / 50
then I animated with UGA (you may use Animation Shop, but
the weight will be higher)
 
your tag is finished
Thank you for following this tutorial

if you have any problem with this translation, or notice
any error, mistake or oversight
Don’t hesitate to write to me, I’ll fix the
problem as quickly as I can

My tag with other scrap elements
 
Back to the board of MeryDesig’s tutorials
board 1  board
2 board
2  board
3 board
3 

|