

original tutorial in french. Click on MeryDesig’s
banner

Conditions of use of the material provided
It is forbidden to modifiy, change the name, take off the
watermarks or alter the tubes.
It is forbidden to share them in groups or offer them on
your site, blog or forum.
If you want to use them to create a tutorial, you must
ask the permission of the authors.
MaryDesig has the permission of the creators to use their
tubes, masks and decorations
Thank you to all of them for their work
Without their beautiful creations, no tutorials could be
written.

translator’s note : Merydesig
uses PSPX9 and I use PSP2019
but you can follow this tutorial with any other version
of PSP
according to the version you use, the results might be
slightly differents
Merydesig uses Animation Shop to create her animations
I use Ulead Gif Animator

Hints & Tips
TIP 1 -> if you don’t want to install
a font -->
open it in a software as « Nexus Font » (or other
font viewer software of you choice)
as long as both windows are opened (software and font),
your font will be available in your PSP
TIP 2 -> from PSPX4,
in the later versions of PSP the functions « Mirror » and « Flip » have
been replaced by -->
« Mirror » --> image => mirror => mirror horizontal
« Flip » --> image => mirror => mirror vertical

Material
selection - tubes - preset - texture - gradient

open all tubes and duplicate them (window
-> duplicate)
Close original tubes and work with the copies (to preserve
the originals)
don’t forget to erase tubes’ watermarks before
using them
open a gold tile (« dorado » or other)
and minimize to tray. You will use it as a pattern (without
installation)
place the selection into the folder « selections » of
Corel PSP general folder
double click on the preset to install, or import
place the gradient into the folder « gradients » of
Corel PSP general folder

Plugins
Unlimited 2 - Alien Skin Eye Candy 5 Impact
Animation Shop for the animation


Use the pencil to follow the steps
hold down left click to grab and move it
 |

Realization
1
open a new transparent image 950 * 700 pixels
flood fill with the gradient « Lyndiegradient006 » provided
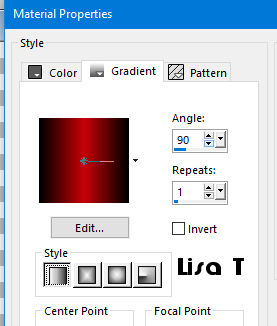
2
effects => texture effects => texture => use the
texture « Mesh » provided
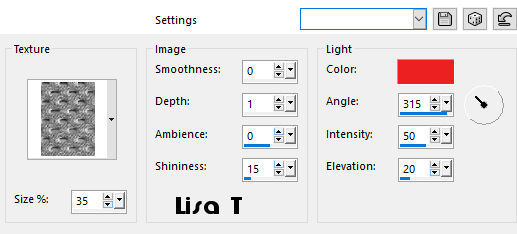
3
layers => duplicate
effects => distortion effects => wave

4
selections => select all
selections => modify => select selection borders
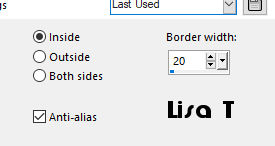
5
layers => new raster layer
flood fill selection with the gradient provided, changing
repeat => 20
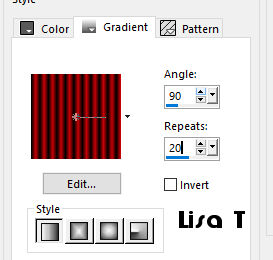
selections => select none
6
effects => Alien Skin Eye Candy 5 Impact - Extrude
apply the preset « dance » prodided
7
layers => new raster layer
flood fill with the new gradient
selections => select all
selections => contract => 20 px
DELETE on your keyboard
selections => select none
effects => distortion effects => wave (same settings
as before)
effects => Alien Skin Eye Candy 5 Impact - Extrude
apply the preset « dance » provided again
8
highlight the third layer from the bottom (with the extrude
effect)
enable the freehand selection tool => point to point
select the right part of the « floor »
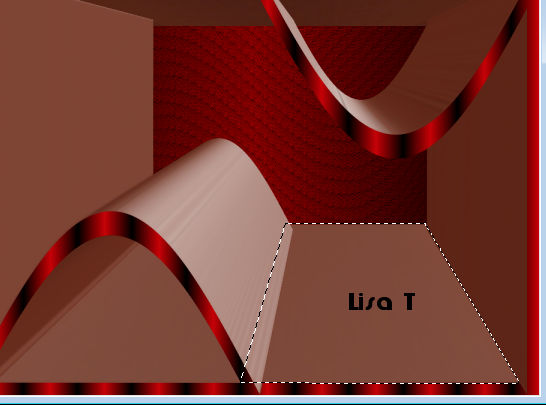
selections => promote selection to layer
selections => select none
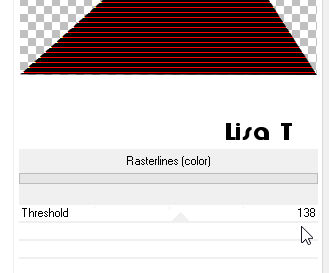
effects => plugins => Unlimited 2 => Special Effects
1 / Rasterlines (color)
9
close the eye of top layer (to see what you are doing properly)
highlight the third layer from the bottom (with the extrude
effect) again
enable the freehand selection tool => point to point
and select the other part of the « floor »
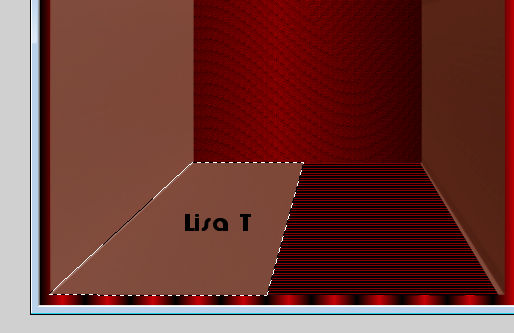
DELETE on your keyboard
open the eye of top layer and highlight this layer
10
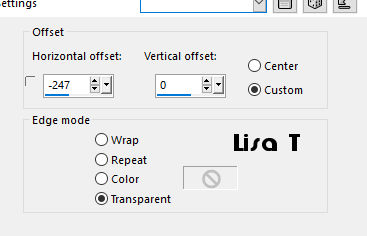
copy / paste as new layer « decor 1 »
effects => image effects => offset
11
copy / paste as new layer « KKribbon1 »
effects => image effects => offset

12
layers => new raster layer
flood fill with the gradient
selections => load - save selection => from disk
=> selection « MD_dancerouge »
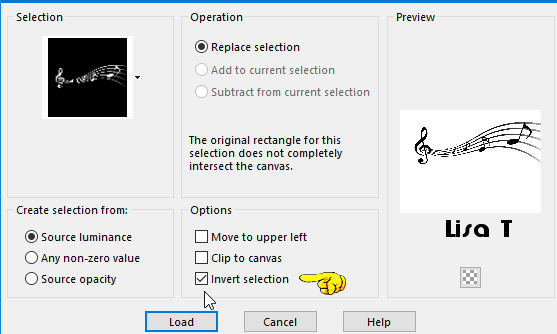
DELETE on your keyboard
13
selections => select none
14
layers => duplicate
rename both layers « music 1 » and « music
2 » (from bottom to top)
highlight « music 1 » => add
remove-noise => add noise
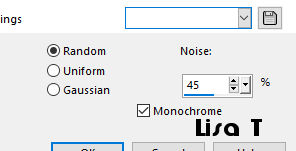
highlight « music 2 » => add remove-noise
=> add noise => 35
close the eye of the layer
15
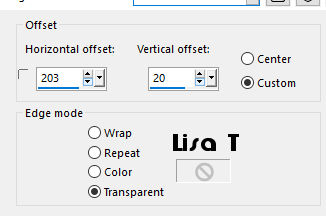
copy / paste as new layer the dancer tube
effects => image effects => offset
16
effects => 3D effects => drop shadow
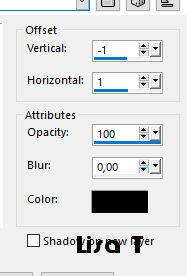
drop shadow again => changing V : 1 / H :
-1
17
copy / paste as new layer the flower tube
18
move as shown on the final result
opacity of the layer : 60% (or other)
19
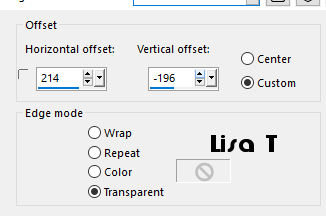
copy / paste as new layer « decor_1 »
effects => image effects => offset
20
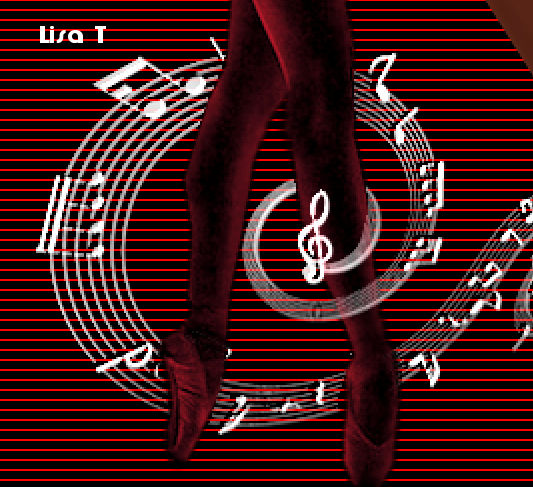
selections => select all
selections => float / selections => defloat
erase the parts of the tube you want to be hidden behind
the dancer
selections => select none
21
layers => duplicate
rename both layers « notes 1 » and « notes
2 » (from bottom to top)
highlight « notes 1 » => add
noise => 45
highlight « notes 2 » => add noise => 35
close the eye of this layer
22
layers => new raster layer
flood fill with the gradient
selections => select all
selections => modify => contract => 2 px
DELETE
selections => modify => contract => 2 px
flood fill selection with the gradient
selections => modify => contract => 2 px
DELETE
selections => select none
23
layers => duplicate
rename both layers « frame 1 » and « frame
2 » (from bottom top)
highlight « frame 1 » => add
noise => 45
highlight « frame 2 » => add noise => 35
close the eye of this layer
24
add your watermark (or signature) on a new layer
25
Animation
edit => copy special => copy merged
open Animation Shop and paste as new animation
back into PSP
close the eyes of « music 1 » « notes
1 » and « frame 1 »
open the eyes of « music 2 » « notes
2 » and « frame 2 »
edit => copy special => copy merged
back into Animation Shop and paste after current frame
image properties => 10 (default speed)
edit => save as... type .gif

your tag is finished
Thank you for following this tutorial
My tag with my dancer tube


if you have any problem with this translation,
or notice any error, mistake or oversight
Don’t hesitate to write to me, I’ll fix the
problem as quickly as I can


Back to the board of MeryDesig’s tutorials
board 1  board 2 board 2 board
3 board
3 board 4 board 4

|