

original tutorial in french. Click on MeryDesig’s
banner

Conditions of use of the material provided
It is forbidden to modifiy, change the name, take off the
watermarks or alter the tubes.
It is forbidden to share them in groups or offer them on
your site, blog or forum.
If you want to use them to create a tutorial, you must ask
the permission of the authors.
MaryDesig has the permission of the creators to use their
tubes, masks and decorations
Thank you to all of them for their work
Without their beautiful creations, no tutorials could be
written.

translator’s note : Merydesig and I use PSPX9 to create
our tags and translations
but you can follow this tutorial with any other version of
PSP
Merydesig uses Animation Shop to create her animations
I use Ulead Gif Animator. I added explanations for this software with
Merydesig’s kind permissions
Material
selections - tubes - decorations - pattern and gradients

open all tubes and duplicate them (window -> duplicate)
Close original tubes and work with the copies (to preserve
the originals)
don’t forget to erase tubes’ watermarks before
using them
Plugins
Photo Aging Kit - User defined filter - Eye
Cady 4000 - Alien Skin Eye Candy 5-Impact
optional : explaniations with Animation Shop or UGA
included

use this pencil to follow
the steps
hold down Left click to grab it and move it

|
Realization
1
open a new transparent image 900 * 700 pixels
selections -> select all
copy / paste « PinkLotty_Autumn_On_The_Way_pp_07 » into
selection
selections -> select none
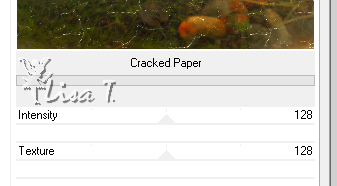
effects -> plugins -> Unlimited 2 -> Photo Aging
Kit / Cracked Paper
2
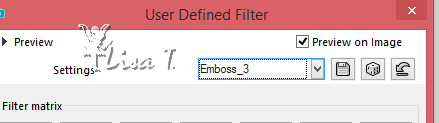
effects -> User Defined Filter -> Emboss 3
3
copy / paste as new layer « décor_Au »
layers -> duplicate -> duplicate 2 times (your now
have 3 identical layers)
rename these 3 layers « noise 1 » - « noise
2 » & « noise 3 »
4
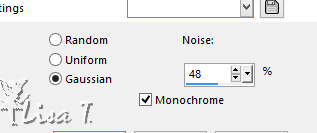
highlight « noise1 » -> adjust
-> add-remove noise -> add noise
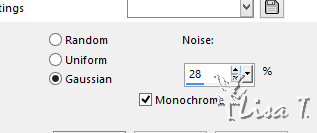
highlight « noise 2 » -> adjust -> add-remove
noise -> add noise
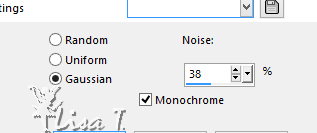
highlight « noise 3 » -> adjust -> add-remove
noise -> add noise
5
copy / paste as new layer « AutumnBreeze_MoleminaScrap_el
(74) »
select inside the frame with the magic wand tool
selection -> expand -> 2 pixels
6
layers -> new raster layer
copy / paste into selection « image_Aut »
layers -> arrange -> move down
selections -> select none
7
using Freehnad selection tool -> point to point -> tolerance
and smoothing : 1 -> select the river of
the image
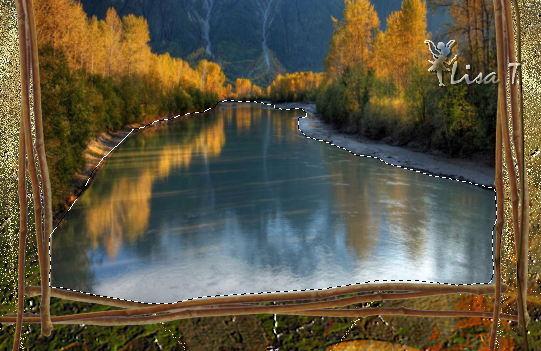
selections -> promote selection to layer
layers -> duplicate 2 times (you now have 3 identical
layers)
rename these 3 layers « river 1 » - « river
2 » - « river 3 »
8
highlight « river 1 » -> effects
-> Eye Candy 4000 -> Jiggle
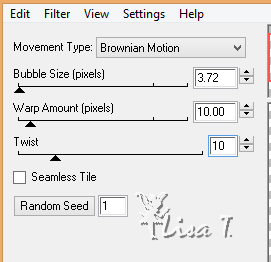
highlight « river 2 » -> effects -> Eye
Candy 4000 -> Jiggle
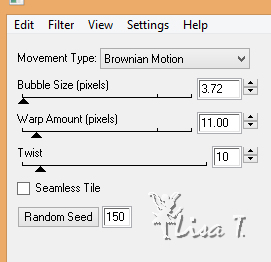
highlight « river 3 » -> effects -> Eye
Candy 4000 -> Jiggle

selections -> select none
9
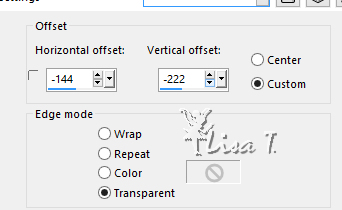
copy / paste « PinkLotty_Autumn_On_The_Way_ep014 » as
new layer
effets -> image effects -> offset
10
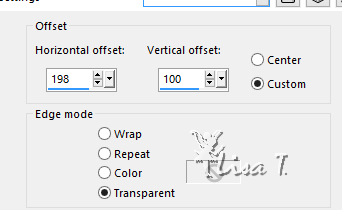
copy / paste « autumn dreams by_mago74 PNG (2) » as
new layer
effets -> image effects -> offset
11
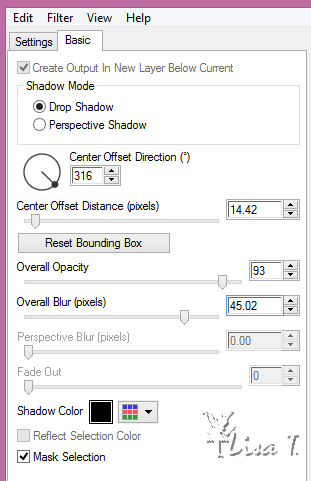
on the 3 decoration elements (the frame and the 2 decorations),
apply the following effet
Alien Skin Eye Candy-Impact / Perspective Shadow
12
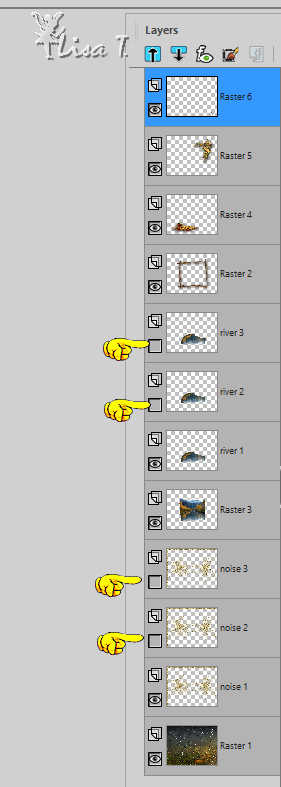
make sure Top layer is highlighted
layers -> new raster layer -> apply your watermark
in the layers palette, close the eyes of « noise
2 » - « noise 3 » - « river
2 » - « river 3 »
your layers palette looks like this
13
animation with Animation Shop
edit -> copy special -> copy merged
open Animation Shop -> paste as new animation
back into PSP
in the layers palette, close the eyes of « noise
1 » - « noise 3 » - « river
1 » - « river 3 »
open the eyes of « noise 2 » and « river
2 »
edit -> copy special -> copy merged
back into Animation Shop -> paste after current frame
back into PSP
in the layers palette, close the eyes of « noise
1 » - « noise 2 » - « river
1 » - « river 2 »
open the eyes of « noise 3 » and « river
3 »
edit -> copy special -> copy merged
back into Animation Shop -> paste after current frame
image properties : set the speed to 20
edit -> save as... type .gif
14
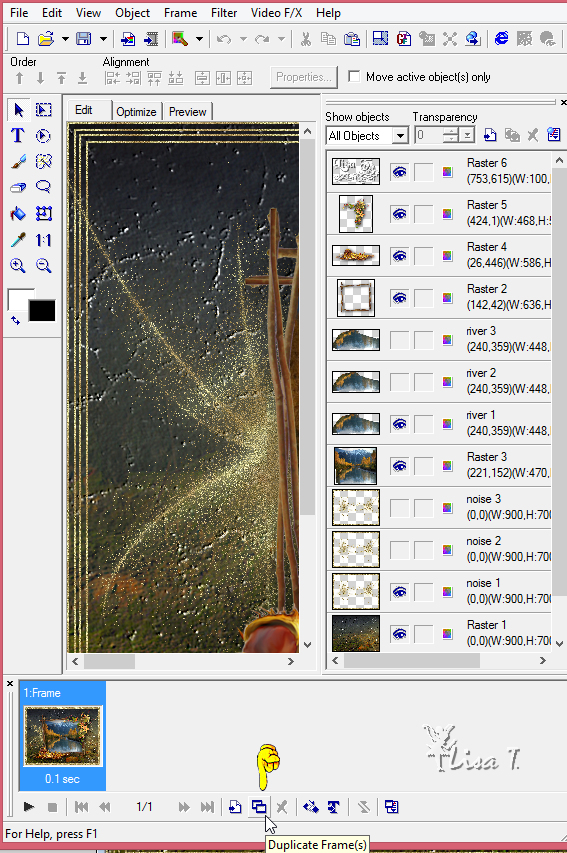
animation with Ulead Gif Animator
at the end of step 12, save your work type.PSD
open it into UGA - duplicate frame
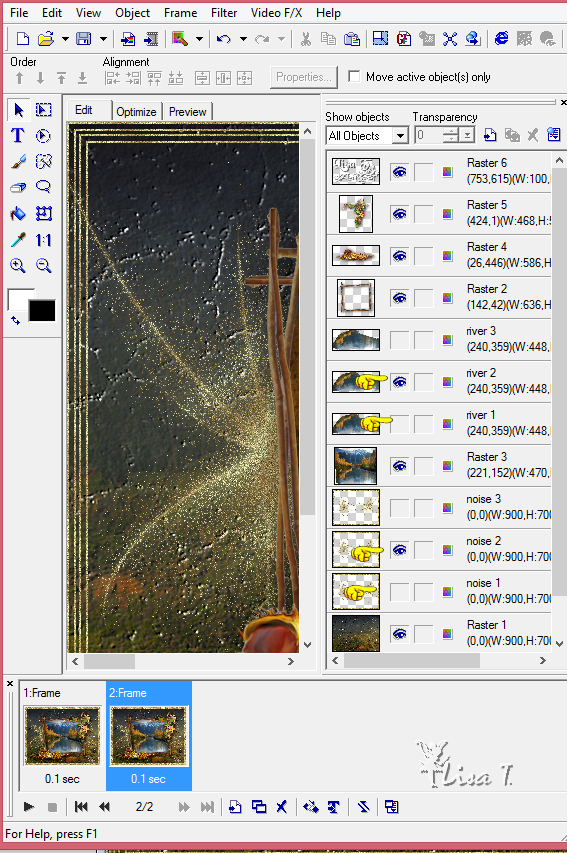
close the eyes of « noise 1 » - « noise
3 » - « river 1 » - « river 3 »
open the eyes of « noise 2 » and « river
2 »
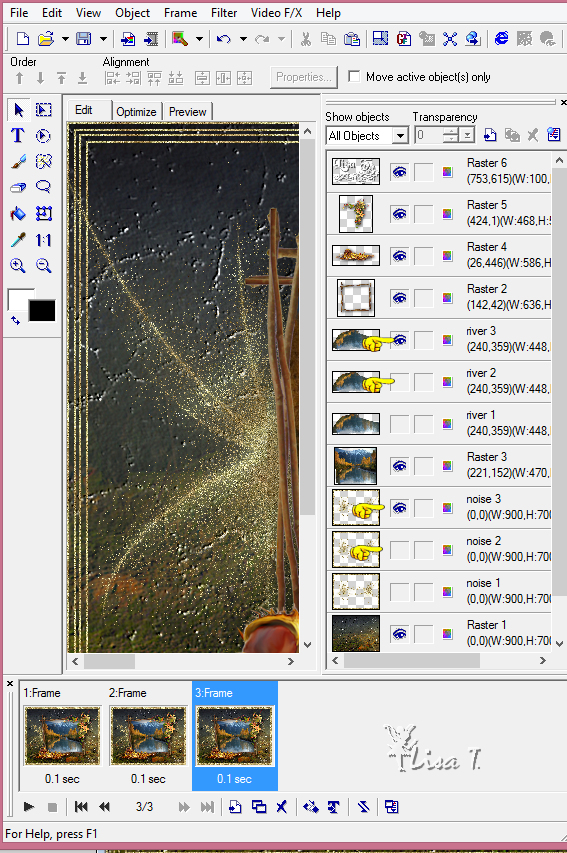
close the eyes of « noise 1 » - « noise
2 » - « river 1 » - « river 2 »
open the eyes of « noise 3 » and « river
3 »
select all frames, right click on one of them -> frame
properties
choose the speed (higher is the number, lower is the speed)
-> 20
save your work as... type .gif
your tag is finished
Thank you for following this tutorial
My tag with a personal image

if you have any problem with this translation, or notice
any error, mistake or oversight
Don’t hesitate to write to me, I’ll fix the
problem as quickly as I can

Back to the board of MeryDesig’s tutorials
board 1  board
2 board
2

|