
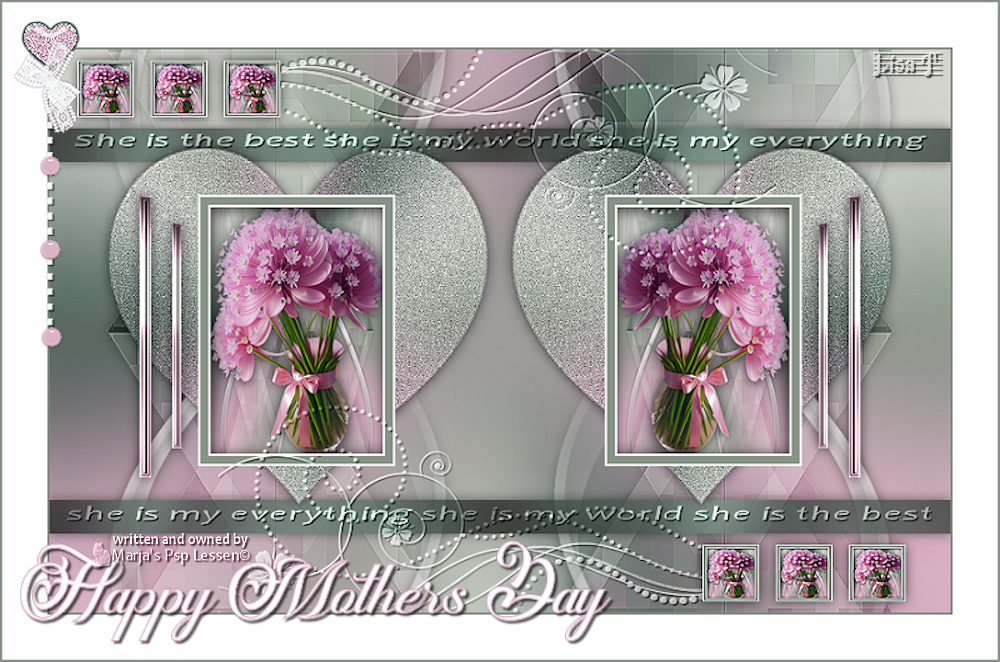
You will find the original tutorial here :
Thank you Marja for your permission to translate your work
This tutorial is a personal creation.
Any resemblance with another one would be only pure coincidence.
It is stricly forbidden to modify tubes, to change their name or take off the matermarks,
To present them on your sites or blog,
To share them in groups,
to make a bank of images, or to use them on lucrative purposes.

Thank you to respect Marja’s work and the tubers work.
Don’t hesitate to warn me if you have any trouble with this translation,
and I’ll try to fix the problem as quickly as I can

Marja worked with PSP X2 and I worked with PSP2020 Ultimate
you can follow this tutorial with another version of PSP, but the result might be slightly different
don’t hesitate to change blend modes and opacities of the layers to match your personal colors and tubes
place the tools and materials provided into the appropriate folders of My COREL PSP general folder
to import presets if any, double-click on them, or import
open the mask(s) and minimize to tray
duplicate all the tubes and decorations, and alpha layers, and work with the copies to preserve originals
install the plugins necessary
this tutorial is the property of Marja, and the translation is my property

Supplies
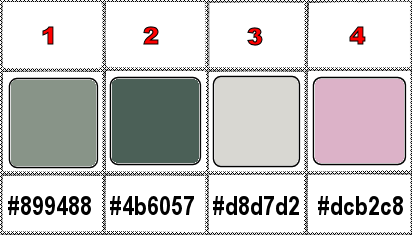
Palette
tube
Decorations tubes
masks
Marja’s watermark


Hints and Tips
TIP 1 -> if you don’t want to install a font -->
open it in a software as « Nexus Font » (or other font viewer software of you choice)
as long as both windows are opened (software and font), your font will be available in your PSP
TIP 2 -> from PSPX4, in the later versions of PSP the functions « Mirror » and « Flip » have been replaced by -->
« Mirror »has become --> image => mirror => mirror horizontal
« Flip » has become --> image => mirror => mirror vertical

Plugins needed
Mehdi – Wavy Lab 1.1 & Sorting Tiles
FunHouse – Vibes *
Filter Factory Gallery Q – Mosaic *
Harry's Button Tools – Prisma Button *
Plugins marked with * must be imported and used into Unlimited 2.0
Graphics Plus

Palette

Use the pencil to mark your place
along the way
hold down left click to grab and move it
 |

Preparation
To preserve originals => ALWAYS duplicate tubes, close the originals and work with the copies
Open the tubes and the color scheme in your psp
Create a transparent image of 800x500 pixels
2.
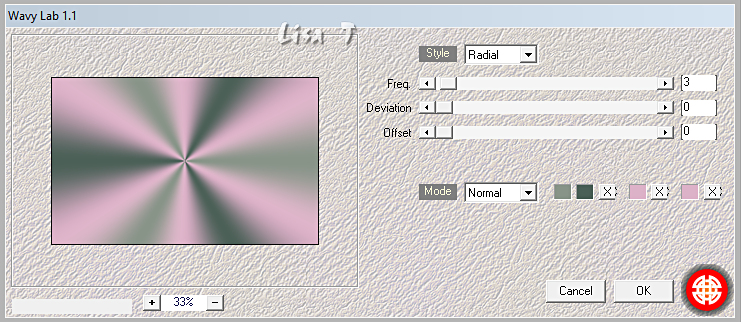
Effects / plug-in filter / Mehdi - Wavy Lab 1.1 / colors 1 – 2 – 3 – 4
3.
Adjust / blur / gaussian blur => 50.00
Layers / duplicate
4.
Effects / plugin / mehdi - sorting tiles
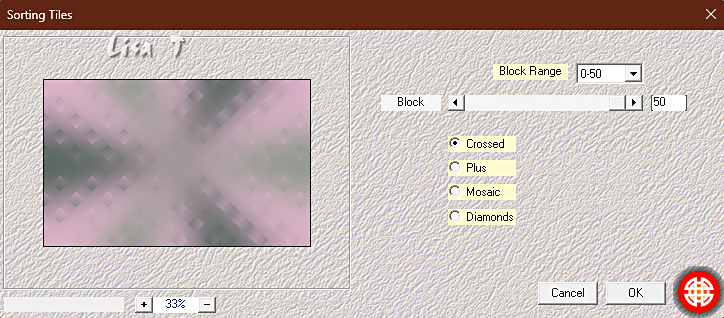
5.
Effects / plugin filter / Unlimited 2.0 / FunHouse - Vibes, default settings
Effects / edge effects / highlight
6.
Effects / plugin filter / Mock - Windo, default settings
Effects / unlimited 2.0 / Filter Factory Gallery Q - Mosaic, default settings
7.
Effects / Plugins / Unlimited 2.0 / Harry's Button Tools - Prisma Button, default settings
Take your magic wand, tolerance and feather at 0 / mode : add / tick « Inside »
and click in the gray areas to select the 4 zones
8.
Push the delete key once
Selections => Select nothing
Image resize with 60%, UNtick « resize all layers »
9.
Image / free rotate
Tick « right » - 90°
Nothing else checked
10.
effects => image effects => offset => H : -200 / V : 0 / tick « custom » and « transparent »
11.
Effects / image effects / seamless tiles
with these settings
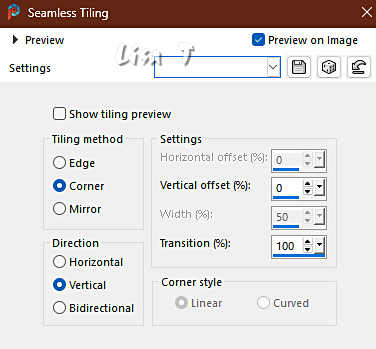
12.
Layers / duplicate
Image / mirror / horizontal
Layers / merge / merge down
Set the blend mode of this layer to « soft light »
Effects / edge effects / enhance
Effects / 3d effects / drop shadow => 0 / 0 / 65 / 15 / black
13.
Set your foreground to white in the materials palette
Layers / New raster layer
and fill white
14.
Layers / new mask layer / from image and search in the drop down menu for
Mask289mpd©designs
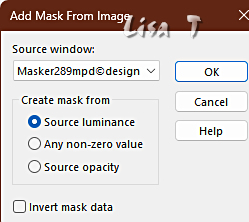
15.
Layers / merge / merge group
Effects / image effects / seamless tiling => default settings
EXCEPT => put at « direction » a check mark at Horizontal
16.
Image / free rotate
right with 90
nothing else checked
17.
effects => image effects => offset => H : -200 / V : 0 / tick « custom » and « transparent »
18.
Effects / 3d effects / drop shadow
Effects / 3d effects / drop shadow => 0 / 0 / 65 / 15 / black
Set the blend mode of this layer to Luminance (Legacy)
19.
Layers / duplicate
Image / mirror Horizontal
Layers / merge / merge visible layers
20.
Take your selection tool, rectangle, then choose custom selection
Top at 70
Left at 0
Bottom at 100
Right at 800
21.
In the materials palette, set your foreground to color #2
Layers / new raster layer
and fill the selection with your foreground
22.
Effects / plugin / graphics plus - cross shadow, default settings
Select nothing
Effects / 3d effects / drop shadow => 0 / 0 / 65 / 15 / black
23.
Layers / duplicate
image => mirror => mirror vertical
Layers / merge / merge down
Bring the layer opacity of this layer back to 75%
24.
Activate “2 hearts tube by mpd©”
Edit / copy and return to your main work
Edit / paste as a new layer
Don’t move it
25.
Effects / 3d effects / drop shadow => 0 / 0 / 65 / 15 / black
26.
Activate “L638 Frame by mpd©.”
Duplicate the window (Shift + D) & close the original
we continue with the copy
27.
Take your magic wand, tolerance and feather at 0 / mode : add / tick « Inside »
click in the middle of the frame
Selections / modify / expand => 2 pixels
28.
Return to your main work
In your layer palette, activate the bottom layer
Edit / copy
and return to your frame
29.
Layers / new raster layer
Edit / paste into selection.
Adjust / sharpness / sharpen
30.
Layers / new raster layer
Activate « Renee-TUBES-Fleurs-Mais-2024-8 »
In your layer palette activate the middle layer
Edit / copy and return to your frame
31.
Edit / paste into selection
Adjust / sharpness / sharpen
Select nothing
32.
Effects / 3d effects / drop shadow => 0 / 0 / 65 / 15 / black
33.
Layers / merge / merge down
Layers / arrange / move down
Activate the top layer in your layer palette
34.
Effects / 3d effects / drop shadow => 2 / 2 / 65 / 20 / black
35.
Layers / merge / merge all layers
Edit / copy
return to your main work
**Don't close your frame yet!!!** but minimize to tray
Activate the top layer in your layers palette
Edit / paste as a new layer
36.
effects => image effects => offset => H : -180 / V : 0 / tick « custom » and « transparent »
37.
Layers / duplicate
image => mirror => mirror horizontal
Layers / merge / merge down
38.
Set your foreground to color #4
Take your selection tool, rectangle, and choose custom selection
Top to 150
Left at 50
Bottom at 400
Right at 60
39.
Layers / new raster layer
and fill the selection with your Foreground color
Effects / plugin / graphics plus - cross shadow, default settings
40.
Effects / 3d effects / inner bevel
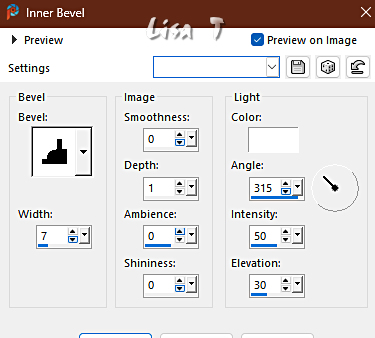
41.
Select nothing
Effects / edge effects / enhance
42.
effects => image effects => offset => H : 30 / V : 20 / tick « custom » and « transparent »
43.
Layers / duplicate
image => resize => untick « resize all layers » => 80%
44.
effects => image effects => offset => H : -35 / V : 0 / tick « custom » and « transparent »
45.
Layers / merge / merge down
Effects / 3d effects / drop shadow => 0 / 0 / 65 / 15 / black
46.
Layers / duplicate
image => mirror => mirror horizontal
Layers / merge / merge down
47.
Take your selection tool, rectangle, then choose custom selection
Top at 50
Left at 70
Bottom at 100
Right at 120
48.
Layers / New raster layer
Activate your frame again
(We minimized this one in step 35)
Edit / copy and return to your main work
49.
Edit / paste into selection
Adjust / sharpness / sharpen more
Select nothing
50.
effects => image effects => offset => H : -45 / V : 40 / tick « custom » and « transparent »
51.
Layers / duplicate
Effects / image effects / offset
horizontal at 65
vertical at 0
Custom and transparent
52.
effects => image effects => offset => H : 65 / V : 0 / tick « custom » and « transparent »
53.
Layers / merge / merge down TWICE (all 3 small frames are now on the same layer)
Repeat this 1x
54.
Effects / 3d effects / drop shadow => 0 / 0 / 65 / 15 / black
55.
effects => image effects => offset => H : 555 / V : -430 / tick « custom » and « transparent »
56.
Activate in your layer palette « raster 1 »
(this is the layer with the 2 green lines)
Activate “text 1 by mpd©”
Edit / copy and return to your main work
Edit / paste as a new layer
57.
Don’t move it
Put the blend mode of this layer on overlay
Activate the top layer in your layer palette
58.
Set your foreground to white
Layers / New raster layer
and fill with white
59.
Layers / new mask layer / from image and search in the dropdown menu for
“Narah_Mask_0975”
Settings are still correct
60.
Layers / merge / merge group
image => resize => untick « resize all layers » => 55s%
61.
effects => image effects => offset => H : -30 / V : -120 / tick « custom » and « transparent »
62.
Layers / arrange / move down
Effects / 3d effects / drop shadow => 1 / 1 / 85 / 1 / black
63.
Layers / duplicate
image => mirror => mirror horizontal
image => mirror => mirror vertical
64.
effects => image effects => offset => H : -5 / V : 0 / tick « custom » and « transparent »
Layers / merge / merge down
Set the blend mode of this layer to overlay
65.
Set your foreground to color nr 1
Layers / merge / merge all layers
66.
image => add borders => tick « symmetric » => ...
2 pixels foreground
40 pixels white
2 pixels foreground
67.
Image / resize and type at width 800 pixels
Check mark at resize all layers
68.
Activate left corner by mpd©
Edit / copy and return to your main work
Edit / paste as a new layer
Move to the left top (see final result)
69.
Activate text 2 by mpd©
Edit / copy and return to your main work
Edit / paste as a new layer
Place the text as shown on final result (or qhere you like)
70.
Layers / new raster layer
and place your name / watermark on it
!! don't forget Marja’s watermark !!!
Layers / merge / merge all layers
Save your work as a jpeg file

This brings you to the end of this lesson.
I hope you liked it.

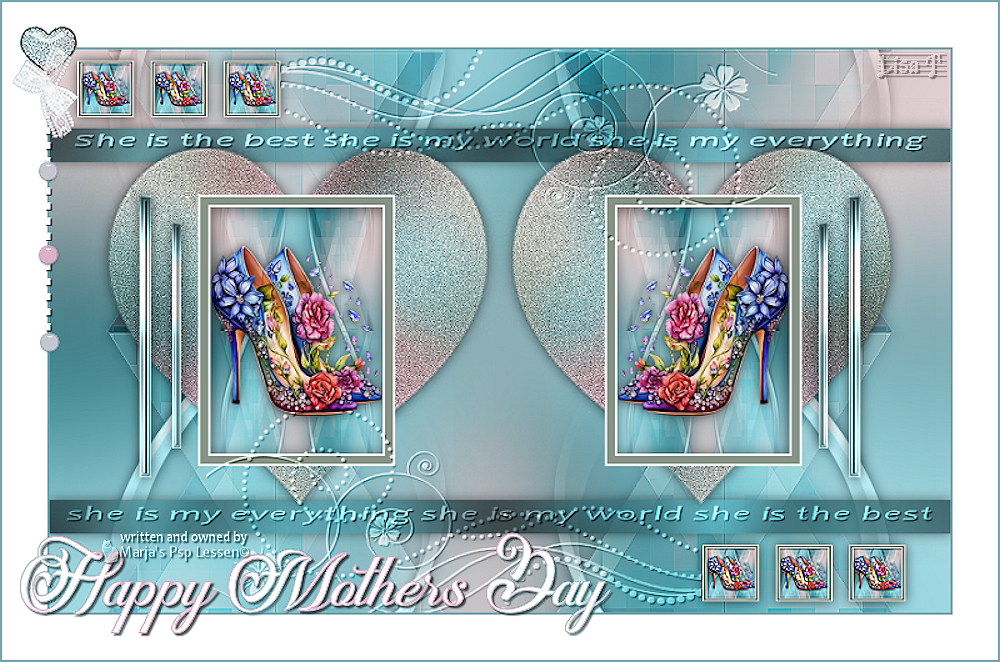
My tag with one of my tubes
Do you want me to show your creation in the gallery below ?
You can send it to me by email and I will post it for you in the gallery of my translation on my site
Thanks for choosing this tutorial
Don't hesitate to write to me if you have any trouble with this translation
Thanks for choosing this tutorial


created by ▼ Birte
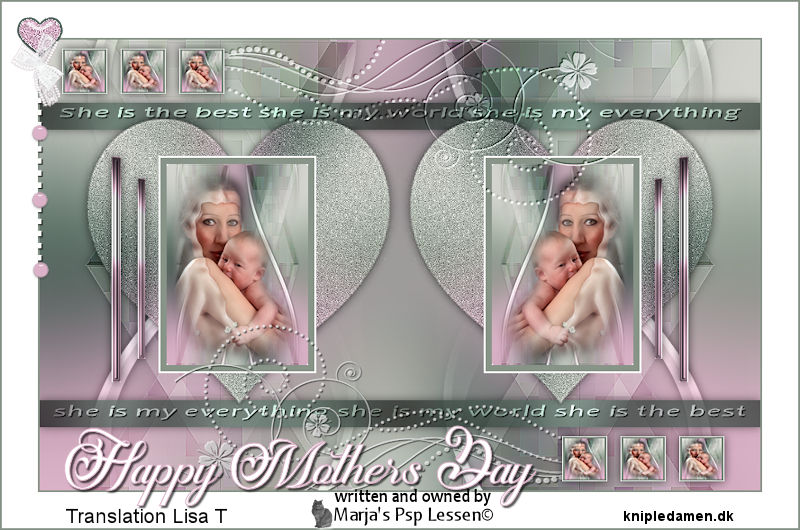

back to the boards of Marja’s tutorials
20 tutorials on each board
board 1 => 
at the bottom of each board you will find arrows allowing you to navigate from one board to another


|