Tomoe Gozen

Original tutorial can be found here


This tutorial was created using PSPX2
I use PSPX7
but it can be realized with other versions

General conditions
This tutorial is an original and personal design of Libellule.
any resemblance with another one would be pure coincidence.
You can share your creations, create signatures for your friends or for groups
but you are not allowed to use this tutorial in your site, or claim it as yours
You must indicate the copyrights of the artists.
Thank you to respect the rules.

If you are interested by translating this tutorial in another language
thank you to ask Libellule.
a link towards her site will be asked

It is strictly forbidden to use the material provided for your tutorials
and to share it in groups or forums

Libellule has received the authorizations to use the tubes she provides
see here


Implementation
install the plugins
copy the masks in the folder “mask” of “My PSP Files” or open with PSP and minimize it (best method)
open the tubes and duplicate them. Work with the copies, close the originals

Colors
color 1/foreground color/#bc0300
color 2/background color/#161616
color 3 -> #ffffff -> b9b9b9

prepare the colors in the materials palette
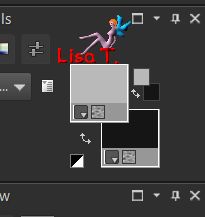
set color 2 as foreground and color 3 as background
if you change the colors, choose 2 contrasting colors
and a color lighter than color 2 (in the same hue)

Filters
Caroline And Sensibility - Simple - AP01 [Innovations] - Background Designer IV - [AFS Import] - Mura's Meister


Material
1 color palette - 1 alpha layer - 1 character tube by Libellule - 1 mask by Narah - 2 decoration tubes by Libellule


Use the pencil to follow the steps
left click to grab it


Realization
Step 1
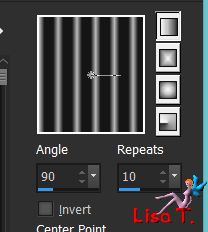
prepare a linear gradient
Step 2
open the alpha layer, window/duplicate
close the original and work with the copy, fill with the gradient
Step 3
layers/duplicate
effects/plugins/Carolaine & Sensibility/CS-Linear-H (be careful to choose the right name !)

Step 4
effects/plugins/Simple/Pizza Slice Mirror/default settings
Step 5
effects/edge effects/enhance
Step 6
selections/load selection/from alpha channel/selection #1
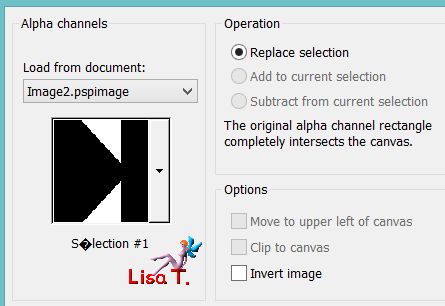
hit he delete key of your keyboard
Step 7
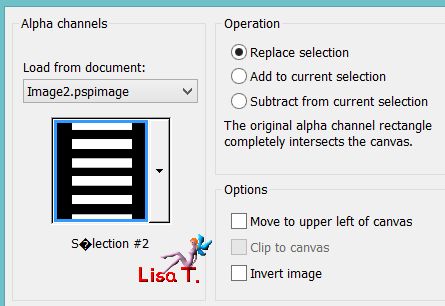
selections/load selection/from alpha channel/selection #2
Step 8
layers/new raster layer/fill with color 2
Step 9
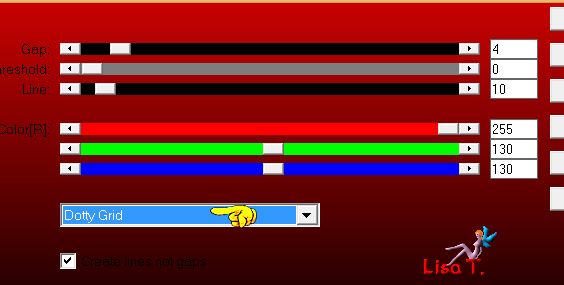
effects/plugins/AP01[Innovations]/Lines Silverlining
Step 10
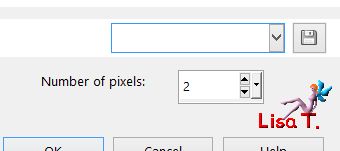
selections/modify/expand/2 pixels
Step 11
layers/new raster layer/fill with color 1
selections/select none
Step 12
layers/arrange/move down
Step 13
keep this layer active (Raster 3, red stripes)
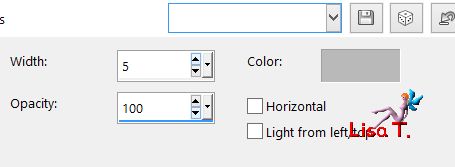
effects/texture effects/blinds/color 3
Step 14
activate the top layer
layers/merge/merge down
Step 15
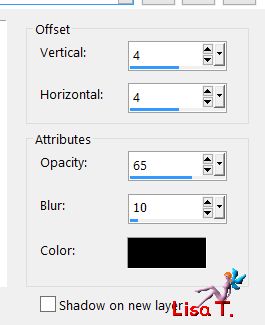
effects/3D effects/drop shadow
Step 16
effects/image effects/offset
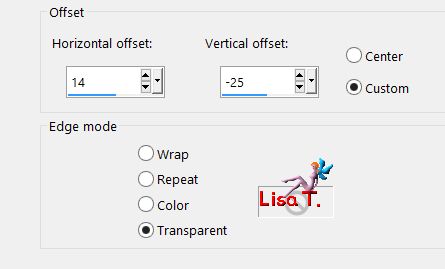
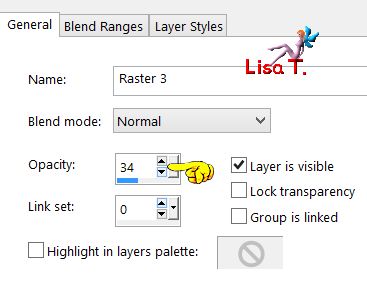
Step 17
layers/propertie/opacity 34%
Step 18
effects/edge effects/enhance
Step 19
layers/duplicate
effects/image effects/seamless tiling
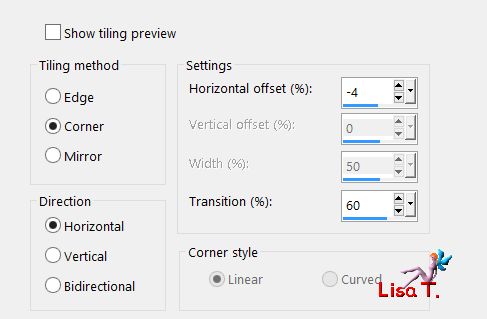
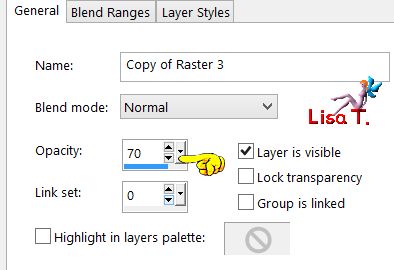
Step 20
layers/properties/opacity 70%
Step 21
adjsut/sharpness/sharpen
Step 22
layers/arrange/move down
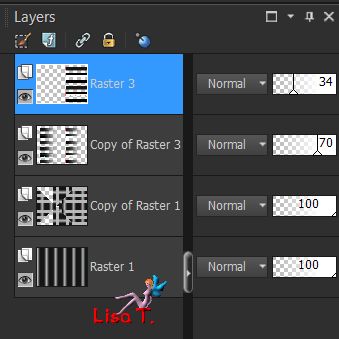
your layers palette looks like this
Step 23
activate the background layer (Raster 1)
effects/plugins/Simple/Blintz/default settings
effects/edge effects/enhance more
Step 24
activate the layer « Copy of Raster 3 »
effects/plugins/Simple/Pizza Slice Mirror/default settings
Step 25
layers/merge/merge visible
Step 26
effects/plugins/Simple/Top Left Mirror
adjust/sharpness/sharpen
Step 27
selections/load selection/from alpha channel/selection #3
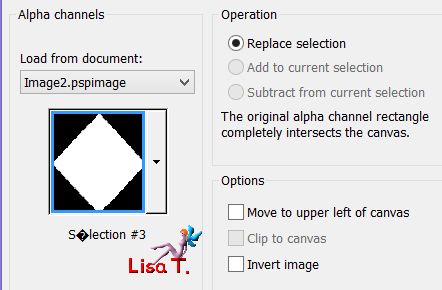
selections/promote selection to layer
Step 28
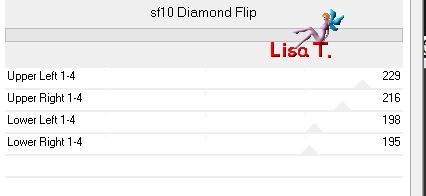
effects/plugins/&<Background Designers IV>/ sf10 Diamond Flip/default settings
Step 29
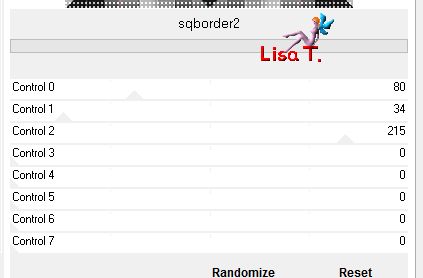
effects/plugins/[AFS Import]/Sqborder2
Step 30
effects/3D effects/drop shadow

drop shadow again changing (4) by (-4)
Step 31
selections/select none
Step 32
image/duplicate - image/resize/80% (unchek « all layers »)
Step 33
effects/image effects/offset
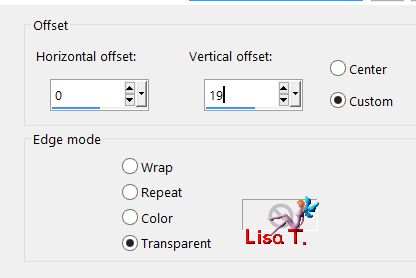
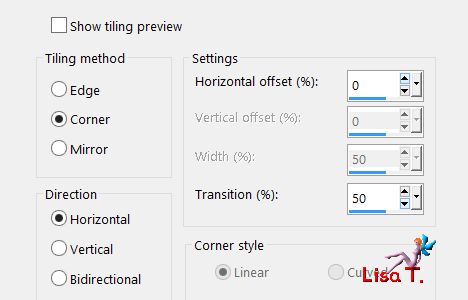
Step 34
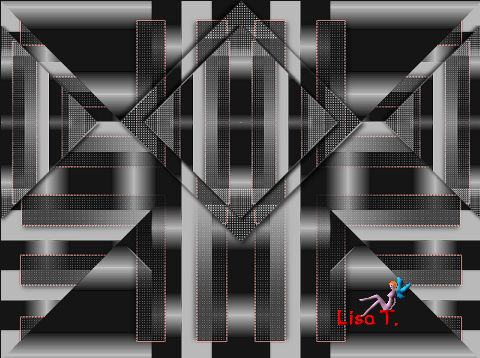
layers/duplicate - effects/image effects/seamless tiling
your tag looks like this
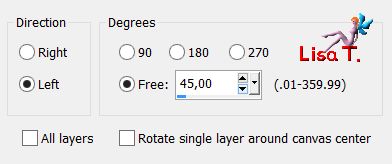
Step 35
activate the layer « copy of promoted selection »
image/free rotate/45°/left
Step 36
activate the background layer (Merged)
layers/duplicate
effects/plugins/Mura’s Meister/Perspective Tiling
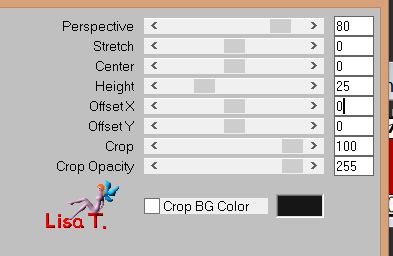
Step 37
effects/3D effects/drop shadow/ -4 / -4 / 65 / 10 / black
Step 38
layers/new raster layer/flood fill white
Step 39
open the mask and minimize to tray
layers/new mask layer/from image
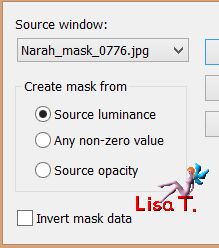
effects/edge effects/enhance more
layers/merge/merge group
Step 40
image/resize/uncheck both boxes : « lock aspect ratio » and « resize all layers »
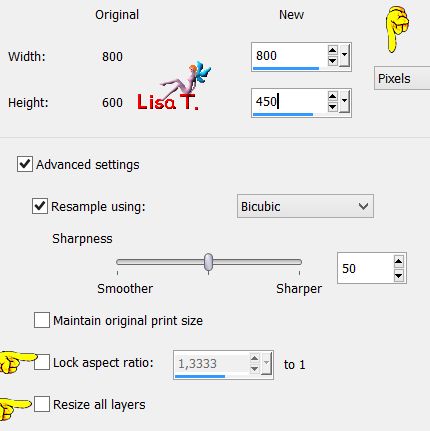
Step 41
opacity : 80% - blend mode : screen
layers/arrange/move down
Step 42
activate the top layer
copy/paste as new layer the character tube (don’t forget to erase the watermark)
Step 43
image/resize/uncheck « resize all layers » and check « lock aspect ratio »
move to the left (see example)
layers/duplicate - adjuxt/blur/gaussian blur : 5
layers/arrange/move down
Step 44
copy/paste the word art as new layer
move it to the right (see example)
Step 45
image/add borders -->
3 pixels color 1
1 pixel color 2
50 pixels white
1 pixel color 2
Step 46
copy/paste the tube « libellulegraphisme_tomoe_gozen_coins » as new layer
don’t move it
Step 47
apply your signature
layers/merge/merge all (flatten) and save as... type jpeg

to write to Libellule

If
you create a tag with this tutorial, don’t hesitate to send it to me
And I'll add yout creation in the gallery below


created by ▼ Birte


Back to the boards of Libellule’s tutorials
board 1  board
2 board
2 

|