Spooky

Original tutorial can be found here


This tutorial was created using PSPX2
I use PSPX7
but it can be realized with other versions

General conditions
This tutorial is an original and personal design of Libellule.
any resemblance with another one would be pure coincidence.
You can share your creations, create signatures for your friends or for groups
but you are not allowed to use this tutorial in your site, or claim it as yours
You must indicate the copyrights of the artists.
Thank you to respect the rules.

If you are interested by translating this tutorial in another language
thank you to ask Libellule.
a link towards her site will be asked

It is strictly forbidden to use the material provided for your tutorials
and to share it in groups or forums

Libellule has received the authorizations to use the tubes she provides
see here


Implementation
install the plugins if necessary
copy the selections into the folder “selections” of “My PSP Files”
copy the masks in the folder “mask” of “My PSP Files” or open with PSP and minimize it (best method)
open the tubes and duplicate them. Work with the copies, close the originals

Filters
Simple - FM Tile Tools - Lumieres, Ambiances (import in Unlimited 2) - Adjust Variations


Material
2 masks (one has no signature, if it is yours, thank you to let us know)
one by Prelestnayap Design  - 6 tubes and 1 paper of the scrap kit Halloween Magic - 6 tubes and 1 paper of the scrap kit Halloween Magic
1 tube by Libellule - 1 bow by Sekada Design


Use the pencil to follow the steps
left click to grab it
 |

Realization
Step 1
open a new raster layer 800 * 800 pixels
Step 2
selections/select all
activate the paper « SkyScraps-Halloween-pp2 »
copy/paste into selection
selections/select none (Ctrl + D)
Step 3
activate the mask « 034msk_tbk »
layers/new mask layer/from image
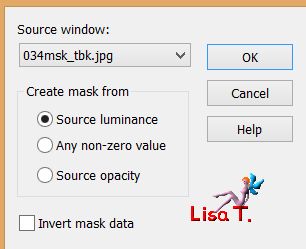
layers/merge/merge group
Step 4
effects/plugins/FM Tiles Tools/Blend Emboss
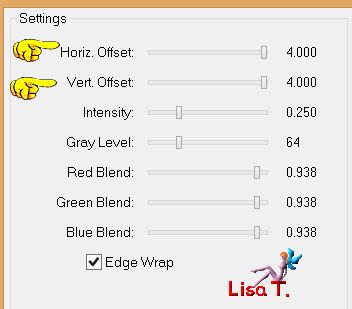
Step 5
layers/new raster layer
paint black
Step 6
activate the mask « Vix_MaskHalloween0901 »
layers/new mask layer/from image
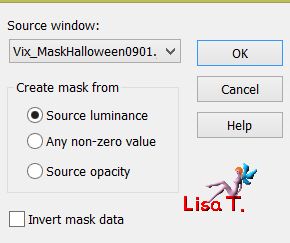
layers/merge/merge group
Step 7
image/resize/uncheck « resize all layers »/110%
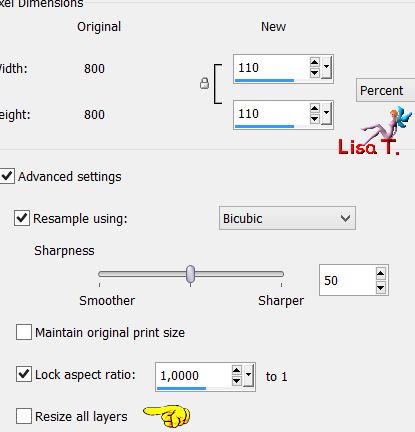
Step 8
effects/plugins/Unlimited 2/Lumieres, Ambiances/Almodovar
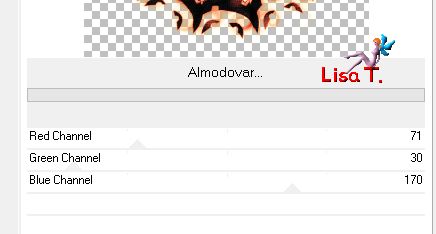
attention ! if you use this plugin directly (not using Unlimited 2), the result might be slightly different
Step 9
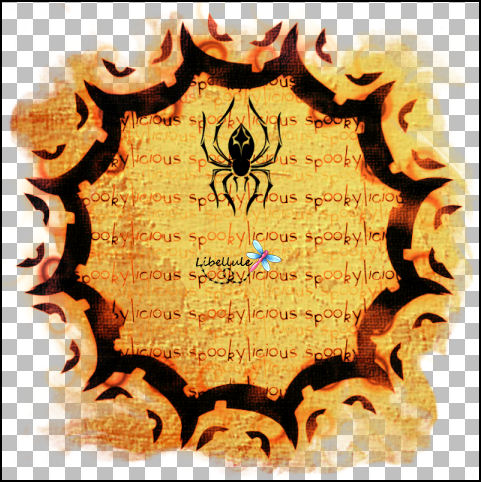
activate the tube « LF-Spiders-11092014 »
with the freehand selection tool, select the spider down on the right (you may choose another one of course)
copy/paste as new layer
image/mirror/mirror vertical
move the tube top, under the frame
Step 10
layers/new raster layer
selections/select all
Step 11
activate the tube « deco digiscrap »
copy/paste into selection
selections/select none
Step 12
adjust/hue and saturation/colorize

Step 13
activate the tube « Achtergrond »
copy/paste as new layer
Step 14
adjust/sharpness/sharpen
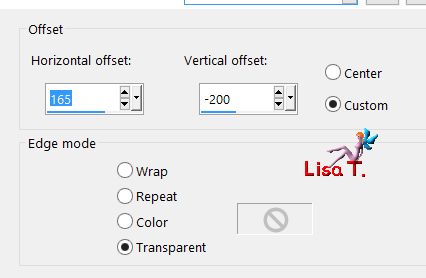
effects/image effects/offset
Step 15
layers/duplicate
effects/plugins/Simple/Diamonds/default settings
layers/merge/merge down
Step 16
open the bow « SekadaDesigns_element(57) »
copy/paste as new layer
image/resize/uncheck « resize all layers »/80%
move it at the top right
Step 17
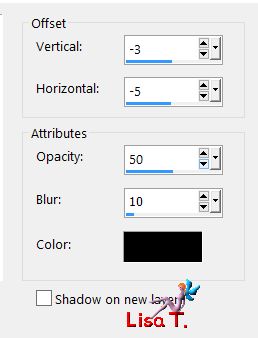
effects/3D effects/drop shadow
Step 18
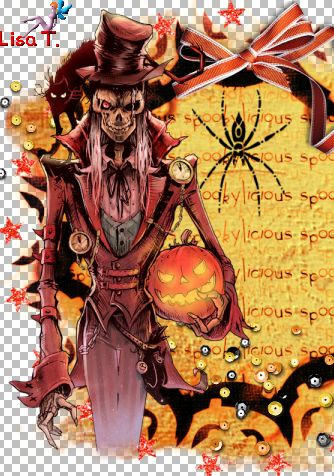
activate the tube « libellulegraphisme_monstre_a_la_citrouille »
copy/paste as new layer
image/resize/uncheck « resize all layers »/95%
move the tube on the left
Step 19 (optional)
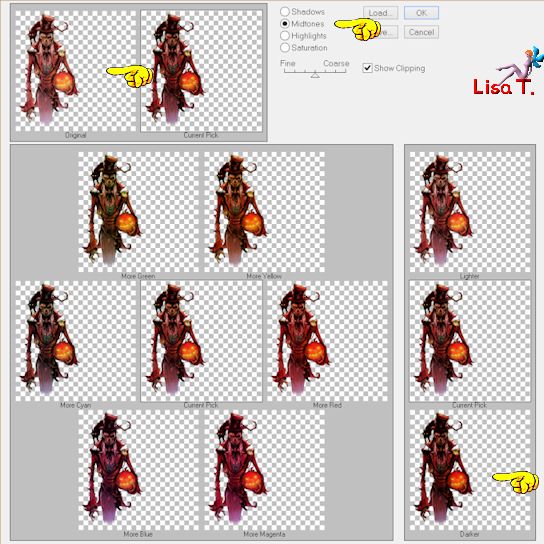
effects/plugins/Adjust/Variations/Darker/twice
according to your tube, you may not use this plugin
Step 20
layers/duplicate
activate the layer below (the original tube)
Step 21
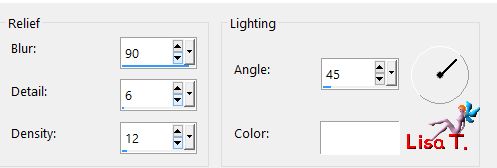
effects/texture effects/soft plastic
Step 22
activate the top layer (the copy of the tube)
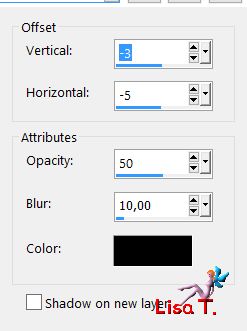
effects/3D effects/drop shadow
Step 23
make sure the top layer is the active layer
Step 24
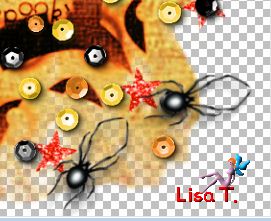
activate the tube « Spinnen »
copy/paste as new layer
move it at the bottom right
Step 25
adjust/sharpness/unsharp mask

Step 26
activate the tube « AD_HalloweenMagic(42) »
copy/paste as new layer
image/resize/uncheck « resize all layers »/70%
move it as shown on the example
Step 27
effects/3D effects

Step 28
activate the tube « SQ_ele2_XX »
copy/paste as new layer
move on top of the stack of books
adjust/sharpness/sharpen
Step 29
effects/3D effects/drop shadow

Step 30
apply your signature
layers/merge/merge visible
if you want the background to be transparent, save as... type .png
if you merge all layers (flatten) the background will be white

to write to Libellule


If you create a tag with this tutorial, don’t hesitate to send it toLibellule
She will be very glad to see it and present it in her galery
at the end of the tutorial on her site
Your gallery

soon !!!!
If you want to be informed about Libellule’s new tutorials and work
join her newsletter


my tag with other elements

Back to the board of Libellule’s tutorials
board 1  board 2 board 2 

|