

Original tutorial can be found here

This tutorial was created by Libellule with PSPXIX
I use PSPX2018
but it can be realized with other versions
General conditions of use
This tutorial is an original and personal design
of Libellule.
any resemblance with another one would be pure coincidence.
You can share your creations, create signatures for
your friends or for groups
but you are not allowed to use this tutorial in your site,
or claim it as yours
You must indicate the artists’ copyrights
Thank you to respect the rules.

If you are interested by translating this tutorial in
another language
thank you to ask Libellule.
a link towards her site will be asked

It is strictly forbidden to use the material provided
for your tutorials
and to share it in groups or forums
Libellule has received the authorizations to use the tubes
she provides
see here

if you use a tube with a copyright, you must write your
licence number on the tag
thank you to respect tuber’s work

   
Preparation
install the plugins if necessary (double click on
them)
copy the masks into the folder “mask” of Corel
Folder or open with PSP and minimize it (best method)
open the tubes and duplicate them. Work with copies, close
original images
   
Hints & Tips
TIP 1 -> if you don’t
want to install a font -->
open it in a software as « Nexus Font » (or
other font viewer software of you choice)
as long as this software’s window is opened, your
font will be available in your PSP
TIP 2 -> from PSPX4,
in the later versions of PSP the functions « Mirror » and « Flip » have
been replaced by -->
« Mirror » --> image => mirror => mirror horizontal
« Flip » --> image => mirror => mirror vertical
   
Colors
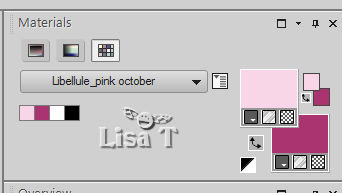
color 1 --> foreground color --> FG --> #f8d6e7
color 2 --> background color --> BG --> #a9346f
color 3 -> #ffffff
color 4 -> #000000

don’t hesitate to change colors, blend modes and
opacities of the layers to match your tubes
prepare colors 1 and 2 as FG and BG colors int the materials
palette
   
Filters
Medhi, Kang2, Alien Skin Eye Candy 5 : Impact, VM
Distortion

if you have troubles with the filters, if you are
looking for one, see at Renée Salon’s site

   
Material
masks - tubes - preset

open the masks and minimize to tray
open the tubes, duplicate and work with the copies
   
Use the pencil to follow the steps
hold down left click to grab it and move it
 |
   
This tutorial is dedicated to all people suffering from
breast cancer
Realization
1
open a new transparent image 900 * 500 px
2
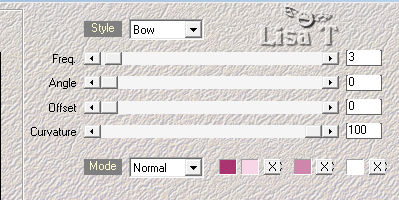
effects => plugins => Mehdi => Wavy Lab 1.1 /
Bow / colors 2 and 1
in the fourth box set white
3
image => mirror => mirror vertical
4
layers => duplicate
5
adjust => blur => gaussian blur / 30
6
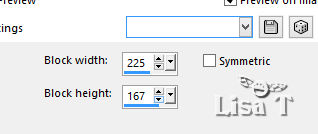
effects => distortion effects => pixelate
7
effects => edge effects => enhance more
8
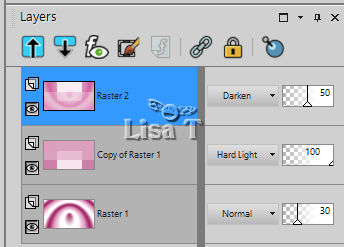
blend mode of the layer : Hard Light
9
highlight bottom layer
opacity of the layer : 30%
10
highlight top layer
edit => copy special => copy merged
11
edit => paste as new layer
12
image => mirror => mirror vertical
13
blend mode of the layer : Darken - opacity : 50%
your layers palette looks like this
14
layers => new raster layer
flood fill with color 1
15
layers => new mask layer => from image
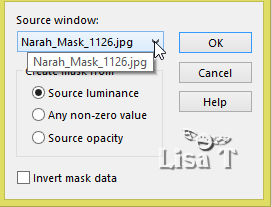
layers => merge => merge group
16
effects => image effects => seamless tiling
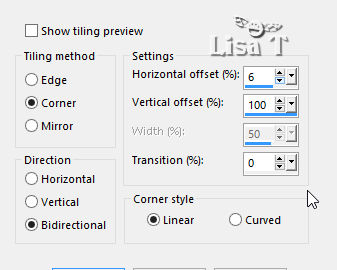
17
effects => 3D effects => drop shadow => 1 / 1
/ 80 / 0 / color 2
effects => 3D effects => drop shadow => 0 / 0
/ 80 / 30 / color 1
18
highlight bottom layer
adjust => blur => radial blur
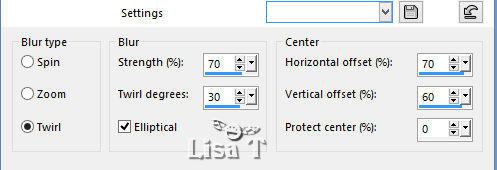
19
adjust => add/remove noise => add noise => tick « uniform » and « monochrom » /
20
20
layers => duplicate
effects => plugins => Kang 2 => X-cubes / default
settings
21
opacity of the layer : 40%
your layers palette looks like this
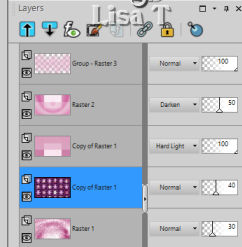
your work looks like this
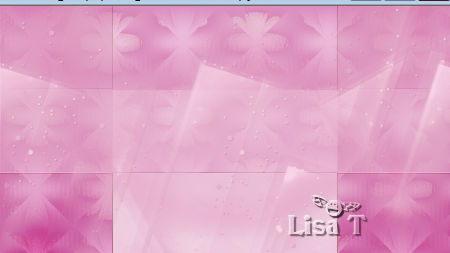
22
highlight top layer
layers => new raster layer
flood fill white
23
layers => new mask layer => from image
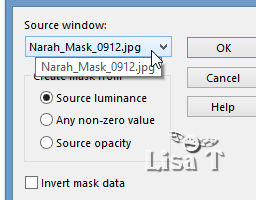
layers => merge => merge group
24
blend mode of the layer : Hard Light
25
layers => duplicate
blend mode of the layer : Normal
26
copy / paste as new layer « octobre_rose_fleur »
27
image => mirror => mirror horizontal
28
enable the Pick tool to move the tube

disable the tool with th M key of your keyboard
29
adjust => sharpness => sharpen
30
effects => plugins => Alien Skin Eye Candy 5 Impact
/ Perspective Shadow
use the preset provided
xxxxxxxx 12 xxxxxxxxxxxxxxxx
if you use another tube, change these settings according
to your tube
31
image => add borders => tick « symmetric » => ...
2 px color 4
5 px color 1
2 px color 4
25 px color 3
1 px color 4
25 px color 3
2 px color 4
5 px color 1
2 px color 4
32
selections => select all
33
image => add borders => tick « symmetric » => 20
px color 3
34
selections => invert
35
effects => plugins => Mehdi => Wavy Lab as
in step 2

36
adjust => add/remove noise => add noise => tick « uniform » and « monochrom » /
40
37
selections => select all
selections => modify => contract / 89 px
38
layers => new raster layer
39
effects => 3D effects => cutout
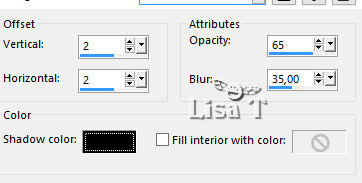
40
selections => select none
41
copy / paste as new layer the woman tube
don’t forget to erase the watermark
42
image => resize => untick « resize all
layers » => 70%
move to the left (see final result)
43
layers => duplicate
adjust => blur => gaussian blur / 10
44
effects => plugins => VM Distortion => Radiator
/ defalt settings
45
layers => arrange => move down
46
blend mode of the layer : Overlay
(change the blend mode according to your tube, and change
the opacity if necessary)
47
highight top layer again
effects => 3D effects => drop shadow => 0 / 0
/ 45 / 20 / black
48
apply your watermark
image => add borders => tick « symmetric » => 2
px color 4
file -> save as... -> type .jpeg
your tag is finished
   
My tag with 2 tubes created by Animabelle
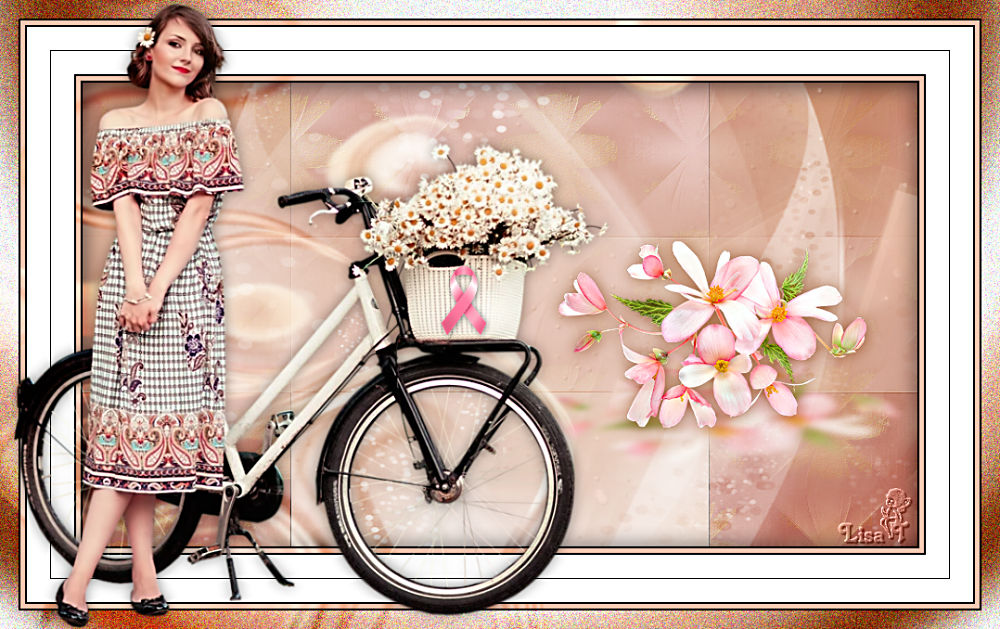
to write to Libellule

   
If you create a tag with this tutorial, don’t hesitate
to send it to Libellule
She will be very glad to see it and present it in her galery
at the bottom of the tutorial on her site
If you want to be informed about Libellule’s new
tutorials and work
subscribe to her newsletter

   
Back to the boards of Libellule’s tutorials
board 1 board 2 board 2 board
3 board
3 board
4 board
4 

|