Pink Flowers

Original tutorial can be found here

I am member of TWInc
this tutorial is protected

This tutorial was created using PSPX2
but it can be realized with other versions

General conditions
This tutorial is an original and personal design of Libellule.
any resemblance with another one would be pure coincidence.
You can share your creations, create signatures for your friends or for groups
but you are not allowed to use this tutorial in your site, or claim it as yours
You must indicate the copyrights of the artists.
Thank you to respect the rules.

If you are interested by translating this tutorial in another language
thank you to ask Libellule.
a link towards her site will be asked

It is strictly forbidden to use the material provided for your tutorials
and to share it in groups or forums

Libellule has received the authorizations to use the tubes she provides
see here


Implementation
install the plugins
copy the selection in the folder “selection” of “My PSP Files”
copy the mask in the folder “mask” of “My PSP Files” or open with PSP and minimize it
note of the author: the last method is better, as the first one is much slower

Colors
color 1/#e43a3e
color 2/#fed6cb
color 3/#ffffff

don’t hesitate to change the main colors, according to your tubes,
but keep the other color unchanged

Material
1 color palette
1 mask by Animabelle
2 selections
1 tube by Guismo2 mists by Libellule
2 decoration tubes by Libellule


Plugins
Alien Skin Eye Cndy 5/Impact
Contours
&<Bkg Designers sf10III (import in Unlimited 2)
AAA Frames
Mura’s Meister

Use the paint brush to follow the steps
left click to grab it
 |

Realization
Step 1
open a new transparent raster layers 800 * 600 pixels
Step 2
in the materials palette, prepare color 1 as background and color 2 as foreground

prepare a linear gradient/ 45 / 3

fill the layer with the gradient
Step 3
adjust/blur/gaussian blur/30

Step 4
effects/plugins/Unlimited 2/&<Bkg Designers sf10III/Sprierpenski’s Mirror/default settings

effects/edge effects/enhance
Step 5
selections/load selection from disk/”libellule_pink_flowers”

selections/promote selection to layer
adjust/blur/motion blur/ 0 / 100

keep the selection active
adjust/blur/motion blur/ 180 / 100

keep the selection active
layers/merge/merge down
Step 6
activate the misted tube “libellulegraphisme_fleurs_rose” (or other of your choice, of course)
image/rotate left (height must be bigger than width)
image/resize/30%
edit/copy - back to your work - edit/paste as new layer
move it in the middle the selection
selections/invert, and press the delete key of your keyboard
again, selections/invert
in the layers palette, set the opacity on 70%
layers/merge/merge down
Step 7
effects/plugins/AAA Frames/Texture Frames

Step 8
selections/modify/select selection borders/48 pixels

effects/plugins/Alien Skin Eye Candy Impact/Glass

selections/select none
effects/3D effects/drop shadow/ 0 / 0 / 100 / 15 / black

layers/duplicate - image/mirror
layers/merge/merge down
effects/image effects/offset/ 0 / 60

Step 9
in the layers palette, activate the background layer
layers/duplicate
effects/plugins/Mura’s Meister/Perspective Tilling

Step 10
layers/new raster layer/fill with white
open the mask “animabelle_035_masques” and minimize it
back to your work
layers/new mask layer/from image and find animabelle’s mask

layers/merge/merge group
image/resize/uncheck “resize all layers” and uncheck “lock aspect ratio”
800 pixels width and 520 pixels height

layers/arrange/move down
in the layers palette, set the blend mode on “Luminance (Legacy)” and the opacity on 60%
effects/image effects/seamless tiling

layers/merge/merge down
Step 11
in the layers palette, make sure the background layer is still active
selections/load selection/from disk/”libellule_pink_flowers2”
selections/promote selection to layer
effcts/plugins/brush Strokes (or Contours)/Angled strokes

selections/select none
layers/duplicate - image/mirror
in the layers palette, set the opacity on 50%
layers/merge/merge down
selections/load selection/from disk/”libellule_pink_flowers2”
effects/distortion effects/punch

Step 12
open the misted image “libellulegraphisme_chambre_rose” (or one of your choice)
image/resize/don’t forget to lock aspect ratio again/60%
edit/copy - back to your work - edit/paste as new layer
move it, so as to place the flowers visible in the selection

selections/invert/press the delete key of your keyboard
selections/select none
in the layers paeltte, set the blend mode on “soft light” (or other)
if you think your misted image hides your work, don’t hesitate to lower the opacity
Step 13
open the decoration tube “pink_flower_deco”
edit/copy - back to your work - edit/paste as new layer
effects/image effects/offset

in the layers palette, set the blend mode on “lighten”
Step 14
in the layers palette, activate the upper layer
open the tube “calguispinup23032012”(or other)
edit/copy - back to your work -edit/paste as new layer
image/resize/uncheck “resize all layers”/90%
move it as shown on the final result
Step 15
layers/duplicate
adjust/blur/gaussian blur/20
layers/arrange/move down
step 16
in the layers palette, activate the upper layer
effects/3D effects/drop shadow/ 4 / 4 / 50 / 15 / black

The Frame
Step 17
image/add borders/check “symmetric”
2 pixels color 1 (red)
1 pixels color 2 (pink)
50 pixels color 3 (white)
Step 18
select the large border with the magic wand tool (default settings)
fill the selection with the gradient you prepared at the beginning

Step 19
selections/promote selection to layer
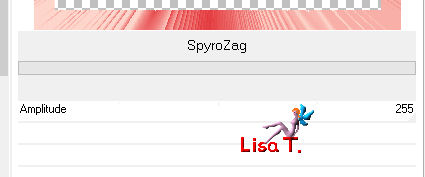
effects/plugins/&<Bkg Designersf10III/SpyroZag

effects/edge effects/enhance more
Step 20
effects/plugins/Alien Skin Eye Candy Impact/Glass

selections/select none
Step 21
open the decoration tube “pink_flowers_deco2”
edit/copy - back to your work -edit/paste as new layer
don’t move it
Step 22
image/add borders/2 pixels/color 1 (red)
Step 23
apply your signature
Step 24
image/resize/800 pixels (or other of your choice)

Your tag is finished

to write to Libellule, open her home page

and click on the link "me contacter"


If you create a tag with this tutorial, don’t hesitate to send it toLibellule
She will be very glad to see it and present it in her galery

If you want to be informed about Libellule’s new tutorials ans work
join her newsletter


Back to the board of Libellule’s tutorials


|