

Original tutorial can be found here

This tutorial was created by Libellule with PSPXIX
I use PSPX2018
but it can be realized with other versions
General conditions of use
This tutorial is an original and personal design of Libellule.
any resemblance with another one would be pure coincidence.
You can share your creations, create signatures for your
friends or for groups
but you are not allowed to use this tutorial in your site,
or claim it as yours
You must indicate the artists’ copyrights
Thank you to respect the rules.

If you are interested by translating this tutorial in another
language
thank you to ask Libellule.
a link towards her site will be asked
It is strictly forbidden to use the material provided for
your tutorials
and to share it in groups or forums
Libellule has received the authorizations to use the tubes
she provides
see here


Preparation
install all plugins if necessary (double click on them)
copy the masks into the folder “mask” of Corel
Folder or open with PSP and minimize it (best method)
open the tubes and duplicate them. Work with copies, close
original images
Hints & Tips
TIP 1 -> if you don’t
want to install a font -->
open it in a software as « Nexus Font » (or
other font viewer software of you choice)
as long as this software’s window is opened, your
font will be available in your PSP
TIP 2 -> from PSPX4,
in the later versions of PSP the functions « Mirror » and « Flip » have
been replaced by -->
« Mirror » --> image -> mirror -> mirror horizontal
« Flip » --> image -> mirror -> mirror vertical
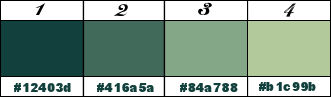
Colors
color 1 --> foreground color --> FG --> #12403d
color 2 --> background color --> BG --> #416a5a
color 3 -> #84a788
color 4 -> #b1c99b
don’t hesitate to change colors, blend modes and
opacities of the layers to match your tubes
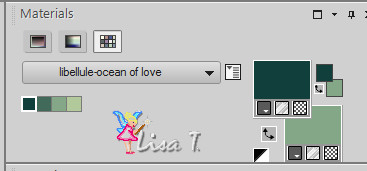
prepare the colors 1 & 3 into the materials palette
Filters
Medhi, Toadies, Faming Pear, Alien Skin Eye Candy5 Impact

Material

use this Pencil to follow the steps
hold down left click to grab it and move it

Realization
1
open the alpha layer « canal_alpha_ocean_of_love.pspimage »
2
window -> duplicate
close the orignal image and work with the copy
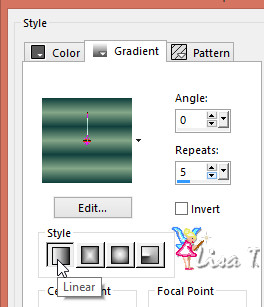
3
prepare a linear gradient into the materials palette
4
flood fill the layer with the gradient
5
adjust -> blur -> gaussian blur / 15
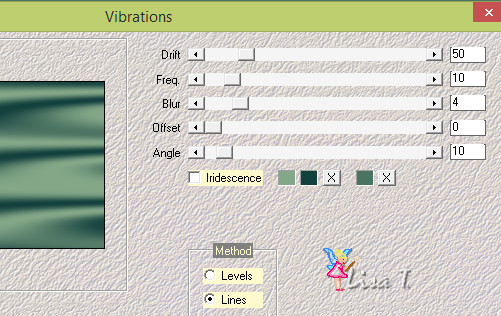
6
effects -> plugins -> Mehdi / Vibrations -> colors
4 / 1 / 2
7
effects -> plugins -> Mehdi / / Sorting Tiles
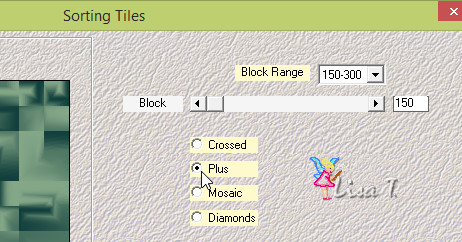
8
effects -> edge effects -> enhance more
9
layers -> duplicate
10
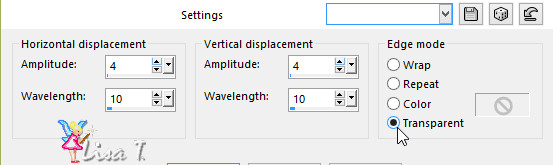
effects -> distortion effects -> wave
11
blend mode of the layer : Overlay - opacity :
45%
12
layers -> merge -> merge down
13
adjust -> sharpness -> sharpen
14
layers -> duplicate
15
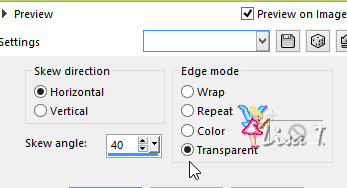
effects -> geometric effects -> Skew
16
effects -> distortion effects -> pinch / 60
17
blend mode of the layer : Screen - opacity
: 60%
18
layers -> merge -> merge down
19
layers -> new raster layer
20
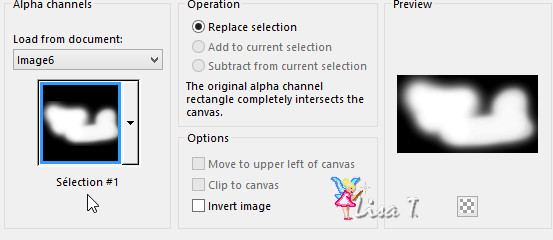
selections -> load-save selections -> from alpha
channel -> selection #1
21
flood fill selection with color 4 (a single click !!)
22
selections -> select none
23
effects -> texture effects -> weave -> colors
2 and 1

24
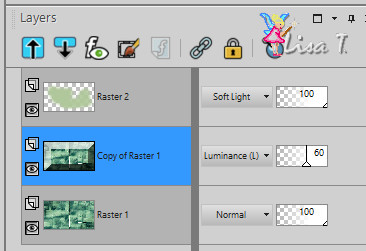
blend mode of the layer : Soft Light
25
highlight Background layer
26
layers -> duplicate
27
effects -> plugins -> Toadies / *Sucking Toad* Bevel
II 2 / default settings
28
blend mode of the layer : Luminance (Legacy) - opacity :
60%
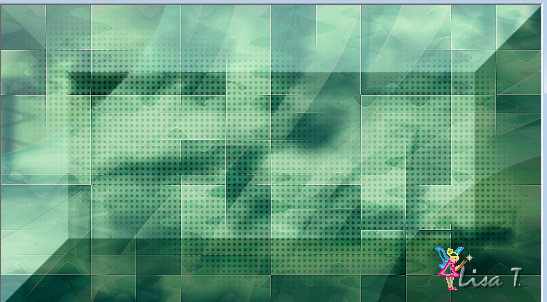
your layers palette looks like this
your tag looks like this
29
layers -> merge -> merge visible
30
layers -> new raster layer
31
flood fill white
32
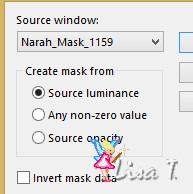
open Narah’s mask and minimize it to tray
layers -> new mask layer -> from image « Narah_Mask_1159 »
33
effects -> edge effects -> enhance more
34
layers -> merge -> merge group
35
image -> mirror -> mirror vertical
36
effects -> image effects -> offset -> H :
300 / V : 110
37
copy / paste as new layer « ocean_decor1.png »
38
objects -> align -> bottom
39
blend mode of the layer : Hard Light
40
copy / paste as new layer « libellulegraphisme_mouette »
40bis
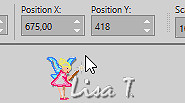
enable the Pick tool (K)
with these settings to move the layer
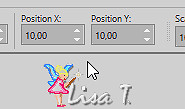
press the M key of your keyboard to disable the tool
41
copy / paste as new layer « libellulegraphisme_mouette »
erase the watermark
42
image -> resize -> untick « resize all
layers » -> 60%
43
adjust -> sharpness -> sharpen
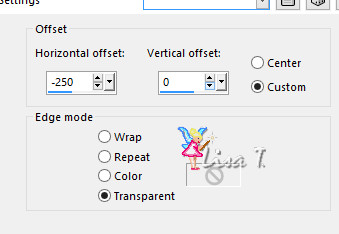
44
effects -> image effects -> offset
45
layers -> duplicate
46
adjust -> blur -> guassian blur -> 5
47
layers -> arrange -> move down
48
blend mode of the layer : Multiply - opacity : 50%
49
highlight layer above (original)
50
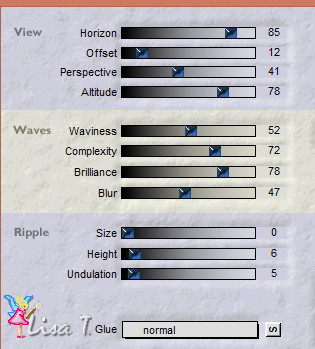
effects -> plugins -> Flaming Pear / Flood
preset provided « ocean_of_love »
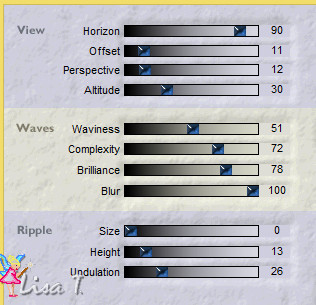
if you use another tube, adjust the setting of the line « horizon »
51
edit -> repeat
52
copy / paste as new layer « ocean_decor3 »
objects -> align -> top
53
layers -> arrange -> move down twice
54
blend mode of the layer : Multiply - opacity : 79%
55
highlight top layer
56
copy / paste as new layer « ocean_decor2 »
57
enable the Pick tool (K)
with these settings to move the layer
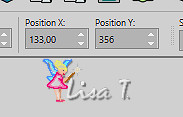
press the M key of your keyboard to disable the tool
58
layers -> duplicate
59
blend mode of the layer : Hard Light - opacity : 45%
60
copy / paste as new layer « ocean_titre »
61
enable the Pick tool (K)
with these settings to move the layer
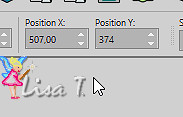
press the M key of your keyboard to disable the tool
62
effects -> plugins -> Alien Skin Eye Candy5-Impact
/ Extrude
use the preset « Liberllule_ocean » provided

63
layers -> duplicate
64
adjust -> blur -> guassian blur -> 5
65
layers -> arrange -> move down
66
highlight top layer
67
effects -> plugins -> Flaming Pear / Flood
preset provided « ocean_of_love2 » (click
on the red arrow and find the preset into your material
folder)
68
blend mode of the layer : Luminance (Legacy)
69
effects -> 3D effects -> drop shadow -> 0 / 0
/ 80 / 30 / color 3
70
copy / paste as new layer « calguisoiseaux17022014 »
image -> resize -> untick « resize all
layers » -> 55%
move the tube top right
71
copy / paste as new layer « ocean_texte2 »
72
enable the Pick tool (K)
with these settings to move the layer
press the M key of your keyboard to disable the tool
73
effects -> 3D effects -> drop shadow -> 2 / 2
/ 100 / 1 / color 4
74
image -> add borders -> ticke « symmetric » ->...
1 pixel color 1
5 pixels white
1 pixel color 1
50 pixels white
1 pixel color 1
75
copy / paste as new layer « ocean_decor4 »
76
apply your watermark
layers -> merge -> merge all (flatten)
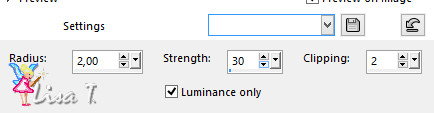
adjust -> sharpness -> unsharp mask
77
file -> saves as... type .jpeg
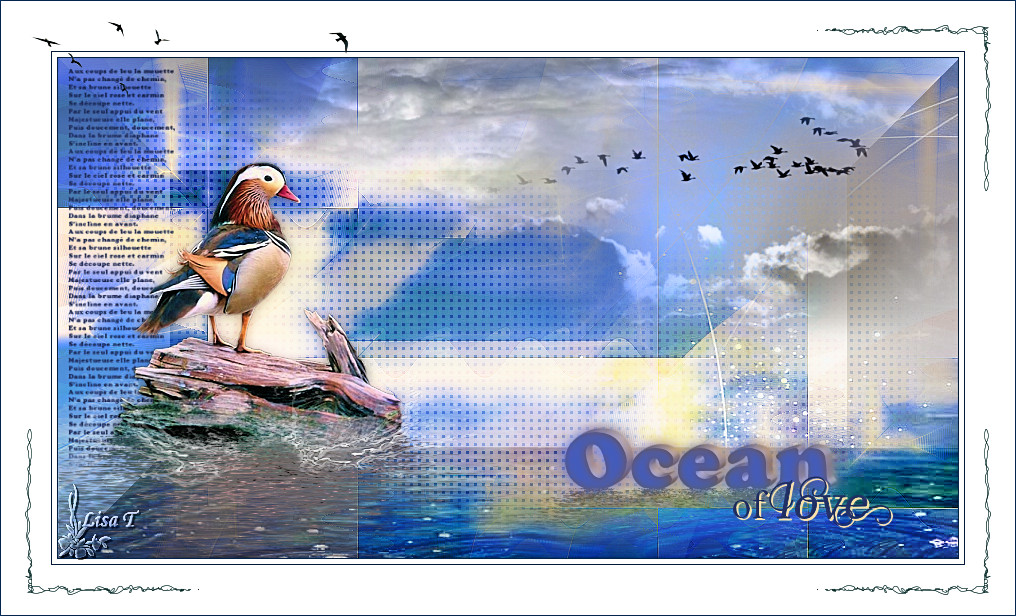
your tag is finished
my tag with my tubes
to write to Libellule

If you create a tag with this tutorial, don’t hesitate
to send it to Libellule
She will be very glad to see it and present it in her galery
at the bottom of the tutorial on her site
If you want to be informed about Libellule’s new
tutorials and work
subscribe to her newsletter

Back to the boards of Libellule’s tutorials
board 1 board
2 board
3 board
4

|