

Original tutorial can be found here

This tutorial was created by Libellule with PSPX9
I use PSPX9
but it can be realized with other versions

General conditions of use
This tutorial is an original and personal design of Libellule.
any resemblance with another one would be pure coincidence.
You can share your creations, create signatures for your
friends or for groups
but you are not allowed to use this tutorial in your site,
or claim it as yours
You must indicate the artists’ copyrights
Thank you to respect the rules.

If you are interested by translating this tutorial in another
language
thank you to ask Libellule.
a link towards her site will be asked

It is strictly forbidden to use the material provided for
your tutorials
and to share it in groups or forums
Libellule has received the authorizations to use the tubes
she provides
see here


Preparation
install all plugins if necessary (double click on them)
copy the masks into the folder “mask” of Corel
PSP folder or open with PSP and minimize it (best method)
open the tubes and duplicate them. Work with copies, close
original images
copy / paste gradients into the folder « gradients » of
Corel PSP folder
import the brushes
This tutorial is dedicated to Martine, who works with the
pseudonym « Lecture 33 »
thank you Martine for being as you are, and for your beautiful
work testing my tutorials

Colors
color 1 --> foreground color --> FG --> #eacfab
color 2 --> background color --> BG --> #5e302b
color 3 -> #000000 (black)

don’t hesitate to change colors, blend modes and opacities
to match your tubes
prepare colors 1 and 2 as FG and BG colors into the materials
palette


Filters
Simple - user defined filter -> Emboss 3


Material


Use the pencil to follow the steps
hold down left click to grab it and move it
 |

Realization
1
open your materials palette, and set the gradient « RBF_grd_tut.1.13_044 »

2
open a new transparent image 900 * 500 pixels
3
flood fill with the gradient
4
layers -> duplicate
5
effects -> plugins -> Simple / 4 Way Average
6
image -> free rotate -> left / 90°
7
highlight bottom layer
8
effects -> textures effects -> Mosaic Antique
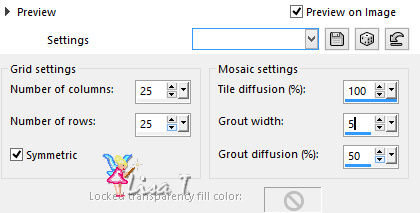
9
selections -> select all
10
image -> crop to selection
11
highlight top layer
12
layers -> duplicate
13
effects -> distortion effects -> pixelate / tall
blocks
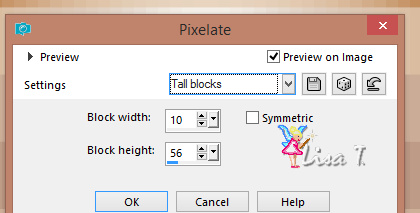
14
effects -> edge effects -> enhance
15
effects -> image effects -> seamless tiling / default
settings
16
layers -> arrange -> move down
17
opacity of the layer : 80%
18
highlight top layer
19
blend mode of the layer : Multiply - opacity :
40%
your work looks like this
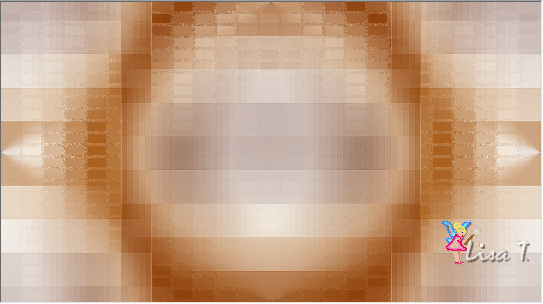
20
layers -> merge -> merge visible
21
layers -> duplicate
22
effects -> geometric effects -> skew
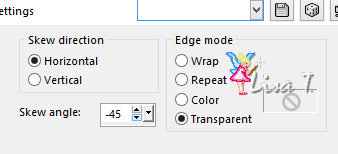
23
adjust -> sharpness -> sharpen
24
effects -> 3D effects -> drop shadow -> 0 / 0
/ 80 / 20 / color 3
25
effects -> image effects -> seamless tiling / side
by side
26
effects -> 3D effects -> drop shadow -> 2 / 2
/ 50 / 3 / color 2
27
opacity of the layer : 60%
28
layers -> new raster layer
29
flood fill white
30
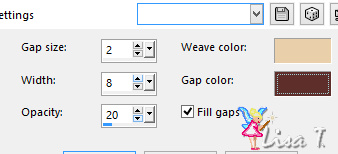
effects -> texture effects -> weave / colors 1 and
2
31
open mask « mask_narah_dupla » and
minimize it to tray
32
back to your tag
33
layers -> new mask layer -> from image

34
layrs -> merge -> merge group
35
image -> resize -> uncheck « resize all
layers » and uncheck « lock aspect
ratio »

36
effects -> edge effects -> enhance
37
blend mode of the layer : Soft Light
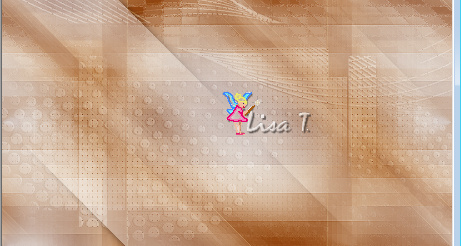
your tag looks like this
38
layers -> new raster layer
39
flood fill with color 2 --> opacity of the flood
fill tool : 40%

(don’t forget to reset the opacity on 100% afterwards)
40
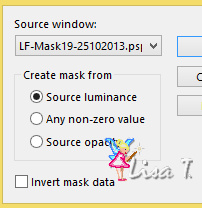
open mask « LF-Mask19-25102013 » and
minimize it to tray
(keep the eye of the watermark closed, otherwise it will
appear on your tag)
41
back to your tag
42
layers -> new mask layer -> from image
43
layers -> merge -> merge group
44
image -> resize -> 110% -> check « keep
aspect ratio » and uncheck « resize
all layers »
45
image -> mirror -> mirror horizontal
46
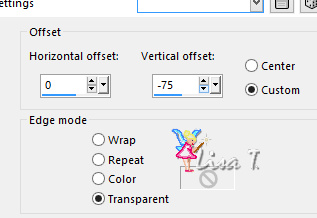
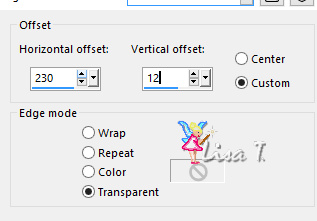
effects -> image effects -> offset
47
blend mode of the layer : Burn
48
open « etoiles »
edit -> copy
49
back to your work
50
layers -> new raster layer
51
selections -> select all
52
edit -> paste into selection
53
selections -> select none
54
opacity of the layer : 60%
55
layers -> new raster layer
56
activa te the Brush tool
find Linda’s tip / white / opacity : 50%

place the tip brush top left

57
open Kath’s misted tube « KAR_2007_020390 »
edit -> copy
58
back to your work
59
edit -> paste as new layer
60
image -> mirror -> horizontal mirror
(if you don’t have this function, skip this step)
61
effects -> image effects -> offset
62
effects -> user defined filter -> Emboss 3
63
opacity of the layer : 25%
(colorize your tube if there is too much difference with
your colors, or set teh blend mode on : Luminance
(Legacy))
64
open Cibi’s tube « Lady_and_owl_by_Cibi !Bijoux »
65
erase the watermark
66
edit -> copy
67
back to your work
68
edit -> paste as new layer
69
image -> resize -> 80%
70
image -> mirror -> mirror horizontal
71
adjust -> sharpness -> sharpen
72
move the tube to the left
73
layers -> duplicate
74
adjust -> blur -> gaussian blur -> 10
75
layers -> arrange -> move down
76
blend mode of the layer : Multiply - opacity
of the layer : 62%
77
copy the text tube « martine_titre_libellule »
78
back to your tag
highlight top layer
paste as new layer
79
activate the Pick Tool with the following settings

80
effects -> 3D effects -> drop shadow -> 0 / 0
/ 80 / 20 / color 2
81
adjust -> softness -> soften
82
image -> add borders -> symmetric -> 1 pixel color
2
83
edit -> copy
84
image -> add borders -> symmetric -> 10 pixels
white
85
image -> add borders -> symmetric -> 1 pixel color
2
86
selections -> select all
87
image -> add borders -> symmetric -> 50 pixels
white
88
effects -> 3D effects -> drop shadow -> 0 / 0
/ 80 / 20 / color 3 (be careful, color has changed)
89
selections -> select none
90
image -> add borders -> symmetric -> 1 pixel color
2
91
selections -> select all
92
image -> add borders -> symmetric -> 10 pixels
white
93
selections -> invert
94
edit -> paste into selection
95
selections -> promote selection to layer
96
effects -> terxture effects -> mosaic antique
xxx 18 comme 3 xxxxxxxxxx
97
effects -> 3D effects -> drop shadow -> 0 / 0
/ 80 / 20 / color 3
98
selections -> select none
99
copy « decor1_martine_libellule »
100
back to y our tag, paste as new layer
don ‘t move it
101
apply your watermark
102
image -> add borders -> symmetric -> 1 pixel black
103
save as... type .jpeg
your tag is finished

to write to Libellule


If you create a tag with this tutorial, don’t hesitate
to send it to Libellule
She will be very glad to see it and present it in her galery
at the end of the tutorial on her site
If you want to be informed about Libellule’s new
tutorials and work
subscribe to her newsletter


My tag with my tube

Back to the boards of Libellule’s tutorials
board 1  board
2 board
2  board
3 board
3  board
4 board
4 

|