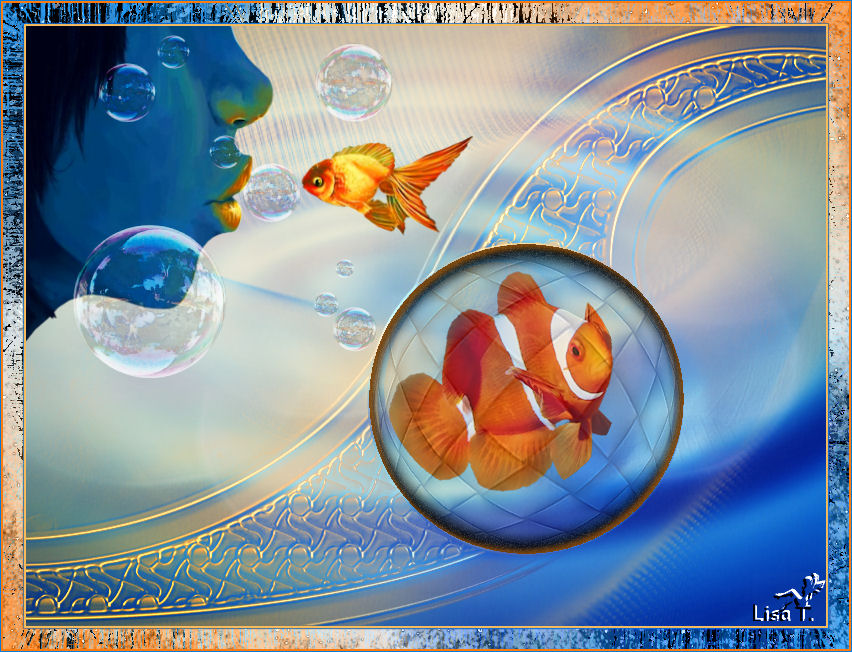
KOÏ

Original tutorial can be found here
I am member of TWInc
this tutorial is protected

This tutorial was created using PSPX2
but it can be realized with other versions

medium level
material in the chest

General conditions
This tutorial is an original and personal design of Libellule.
any resemblance with another one would be pure coincidence.
You can share your creations, create signatures for your friends or for groups
but you are not allowed to use this tutorial in your site, or claim it as being yours
You must indicate the copyrights of the artists.
Thank you to respect the rules.

If you are interested by translating this tutorial in another language
thank you to ask Libellule.
a link towards her site will be asked

the tubes “poissons” (fishes) , frame and Fractale, were tubed by Libellule
the mask was created by Narah
the “fractale” image was found on the site of Freehqimage
you wil need the plugin REDFIELD (click on the word to get it if you don’t have it yet)

Implementation
install the plugin
copy the selection in the folder “selection” of “My PSP Files”
copy the mask in the folder “mask” of “My PSP Files” or open with PSP and minimize it

Colors
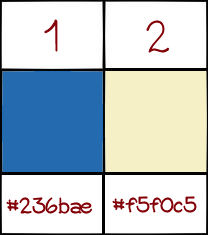
foreground color/#236bae /color 1
background color/#f5f0c5/color 2
you may change the main color, according to your tubes, but keep the other color unchanged

Use the Paint Brush to follow the steps
Left click to grab it


Realization
Step 1
open a new image/transparent/ 800 * 600 pixels
paint with color 1
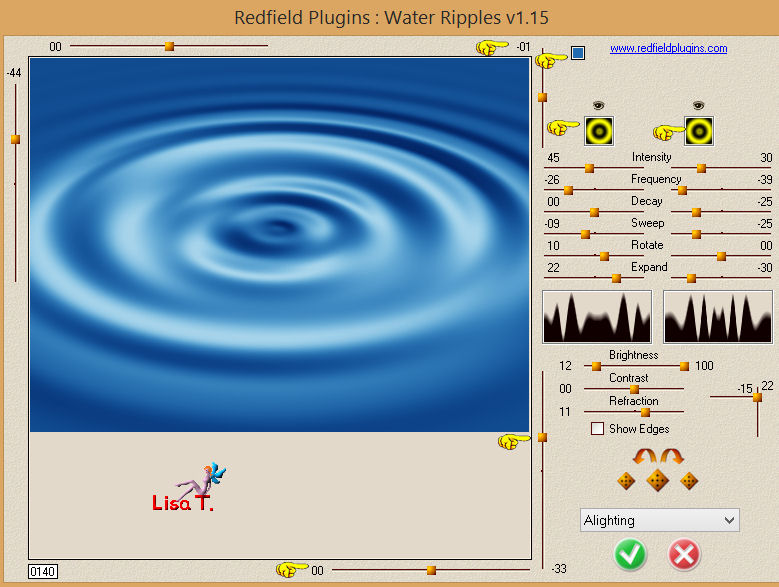
effects/plugins/Redfield/Water Ripples
be careful, you must change many settings
don’t touch the button just above the validation, or you will have to start all over again
image/resize/120%/uncheck “resize all layers”
Step 2
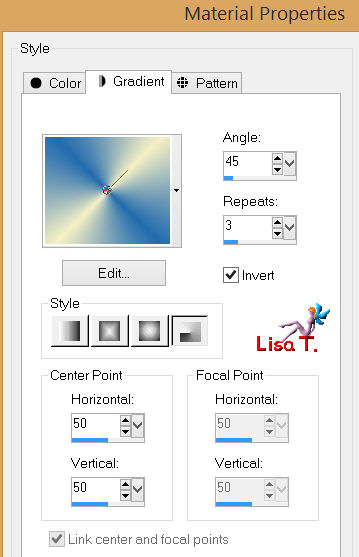
in the materials palette, prepare a radial gradient - 45 / 3
layers/new raster layer/paint with the gradient
Step 3
open the image “fractals-image-wallpapers-freehqimage.com” and minimize it
layers/new mask layer/from image
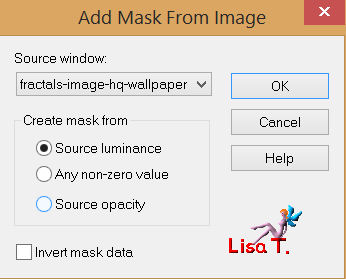
layers/merge/merge group
effects/user defined filter/emboss 3
Step 4
open the mask “Narah_mask_Abstract051” and minimize it
layers/new raster layer/paint with a pastel color (Libellule chose #a7d3eb, a light blue)
layers/new mask layers/from image
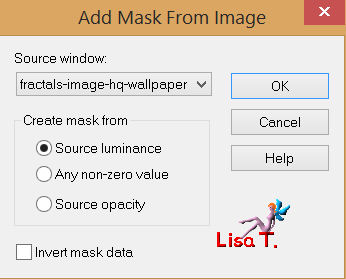
layers/merge/merge group
Step 5
activate the image “Dreams_pt_2_by_19mona90”
edit/copy
back to your work - layers/new raster layer
selections/select all
edit/paste into selection
selections/select none
in the layers palette, set the blend mode on “overlay”
Step 6
activate the tube “libellulegraphisme_animaux27”
edit/copy
back to your work
layers/new raster layer
selections - load-save selection - from disk, and find the selection “libellule_koi”
edit/paste into selection
Step 7
layers/new raster layer
paint with the gradient prepared on step 2
adjust/blur/radial blur/default settings
effects/plugins/Redfield/Lattice Composer1.59
be careful to ask for the good numbers in each setting
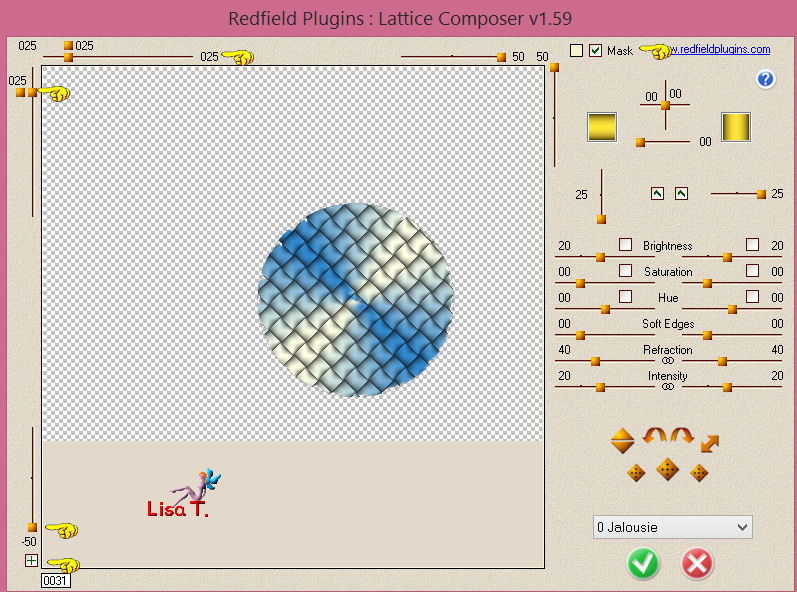
Step 8
effects/distortion effects/punch
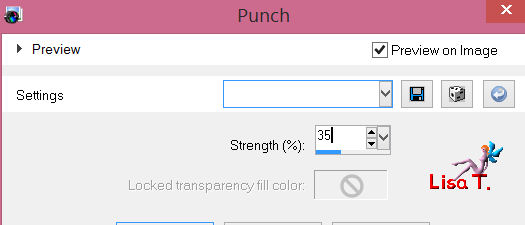
apply the same effect once more
efefcts/geometric effects/spherize
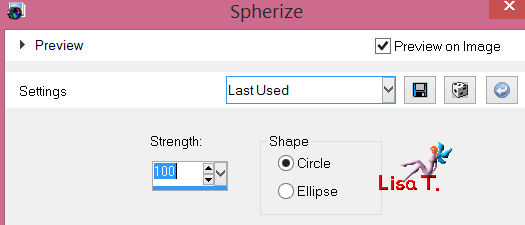
in the layers palette, set the blend mode on 20%
effects/edge effects/enhance
keep the selection active
layers/new raster layer
effects/3D effects/cutout
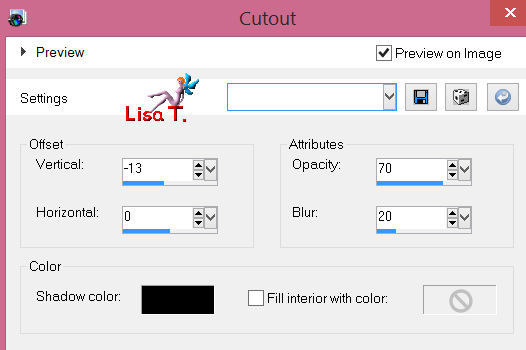
layers/new raster layer
effects/3D effects/cutout
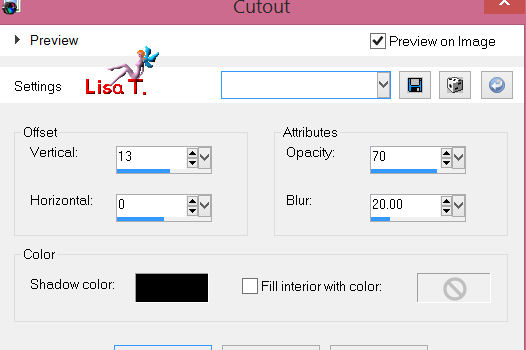
keep the selection active
layers/merge/merge down
layers/duplicate
adjust/add-remove noise/add noise/40
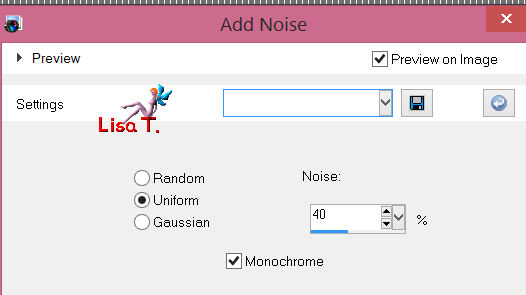
layers/merge/merge down
selections/invert
layers/new raster layer
effects/3D effects/drop shadow/ 4 / 4 / 65 / 8 / color #124976
and again, replacing (4 ) by (-4)
selections/select none
Step 9
activate the tube “sneuglebubbles”
edit/copy - back to your work - edit/paste as a new layer
place at the top of the tag, on the left (see final result)
in the layers palette, set the blend mode on “Luminance” (or other) and the opacity on 80%
Step 10 the frame
image/add borders/check “symmetric” :
pixels color 1
pixel color 2
20 pixels color 1
with the magic wand tool (default settings), select the large border
paint the selection with the gradient prepared on step 2
effects/texture effects/fur
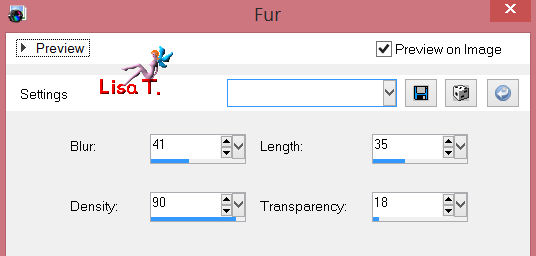
adjustsharpness/sharpen more
layers/promote selection to layer
effects/plugins/Redfield/Sketch Master
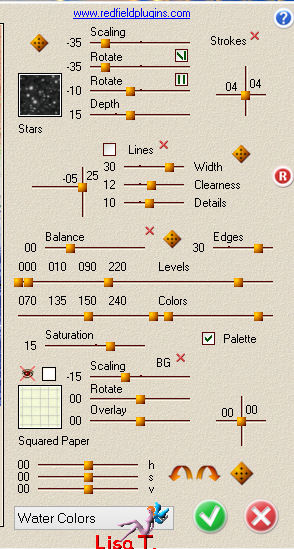
selections/select none
in the layers palette, set the blend mode on “luminance “ (or other)
Step 12
image/add borders/2 pixels/color 2
image/add borders/1 pixel/color 1

apply your signature
adjust/sharpness/sharpen
image/resize/800 pixels width (or other)
save as.. type jpeg

to write to Libellule, open her home page
and click on the link "me contacter"
If you create a tag with this tutorial, don’t hesitate to send it to Libellule
She will be very glad to see it and present it in her galery
If you want to be informed about Libellule’s new tutorials and work
join her newsletter

My tag with my tubes
Back to the board of Libellule's tutorials


|