Inventing summers
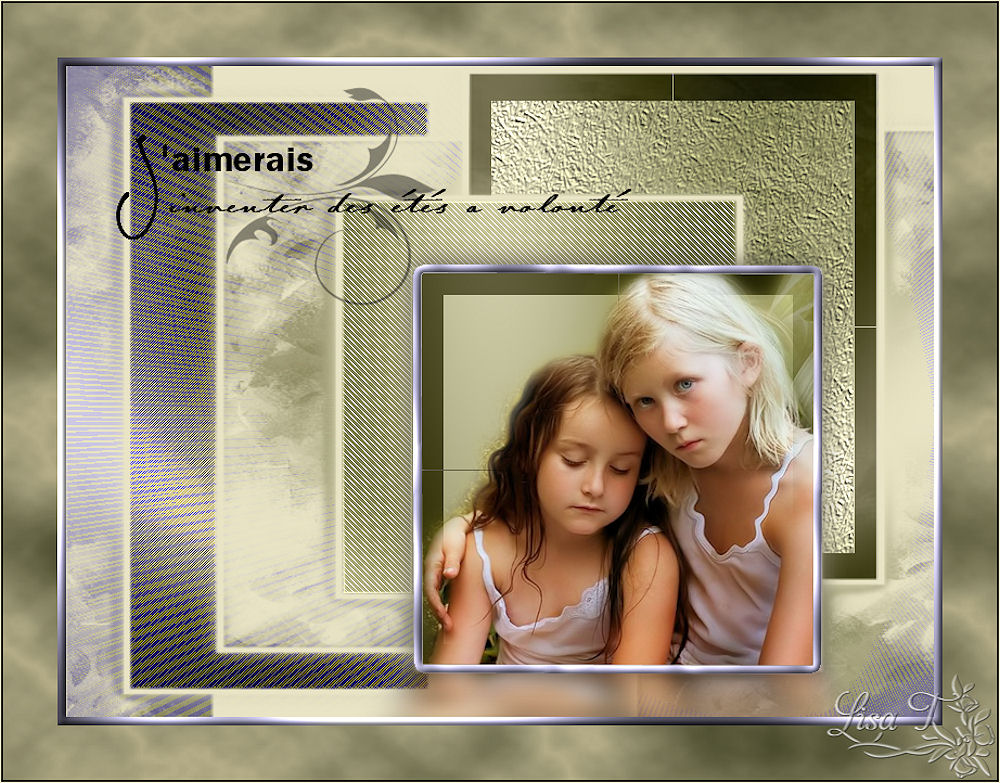
Original tutorial can be found here


I am member of TWInc
this tutorial is protected


This tutorial was created using PSPX2
but it can be realized with other versions

General conditions
This tutorial is an original and personal design of Libellule.
any resemblance with another one would be pure coincidence.
You can share your creations, create signatures for your friends or for groups
but you are not allowed to use this tutorial in your site, or claim it as yours
You must indicate the copyrights of the artists.
Thank you to respect the rules.

If you are interested by translating this tutorial in another language
thank you to ask the permission to Libellule.
a link towards her site will be asked

It is strictly forbidden to use the material provided for your tutorials
and to share it in groups or forums

Libellule has received the authorizations to use the tubes she provides
see here


Material
1 color palette - 1 alpha layer (selections) - 1 tube of children (created by Libellule) -
1 mask (by Krys) - 1 word art (by Libellule) - 1 gradient - 2 presets - 1 texture

Implementation
install the plugins if necessary
copy the mask and paste it into the folder “mask” of “My PSP Files”
or open it with PSP and minimize it (best method)
open the tubes and duplicate them. Work with the copies, close the originals
import the presets into the plugins, or double-click on them (it installs them automatically)
copy and paste the gradient into the folder « gradient » of « My PSP Files »
Colors
color 1/foreground color/#787a4b
color 2/background color/#e9e4c5
color 3 -> #ffffff ->cfcbf2

prepare the colors in the materials palette
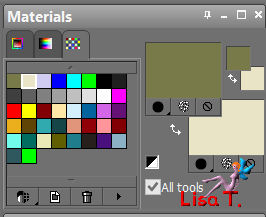
if you change the colors, choose a dark color as color 1 in your main tube, and a light color as color 2
Filters
Almathera Wraper - Graphic Plus - Mock - AP01[Innovations] - Alien Skin - Unlimited 2


Use the pencil to follow the steps
left click to grab it
 |

Realization
Step 1
in the materials palette, find the gradient « angele purple1 »
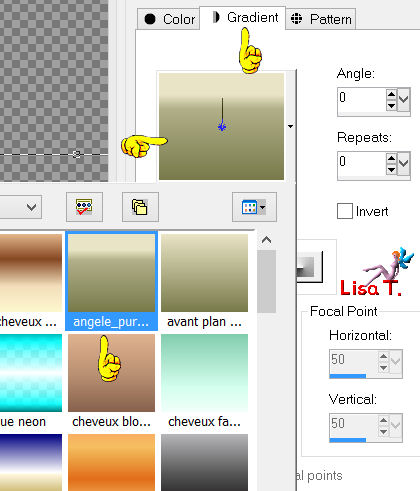
prepare your gradient with the following settings
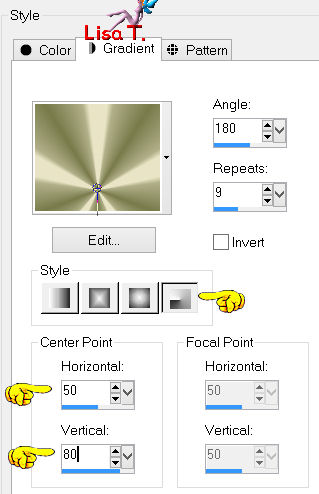
Step 2
activate the alpha layer « inventer_etes_canal_alpha »
window/duplicate
close the original and work with the copy
fill the layer with the gradient
Step 3
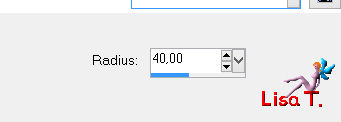
adjust/blur/gaussian blur/40
Step 4
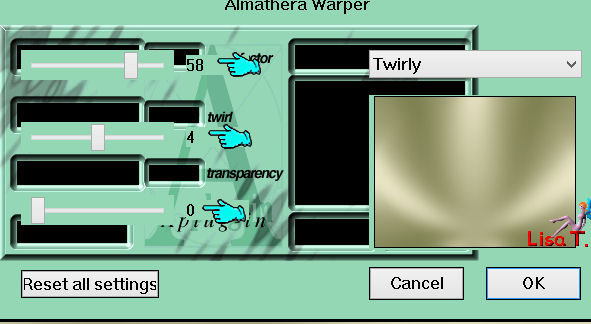
effects/plugins/Almathera/A Warper
Step 5
layers/new raster layer
fill with color 2
layers/new mask layer/from image/find « 418-Krys », chack « invert mask data »
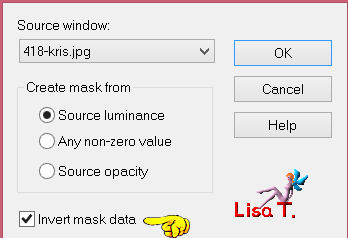
layers/merge/merge group
Step 6
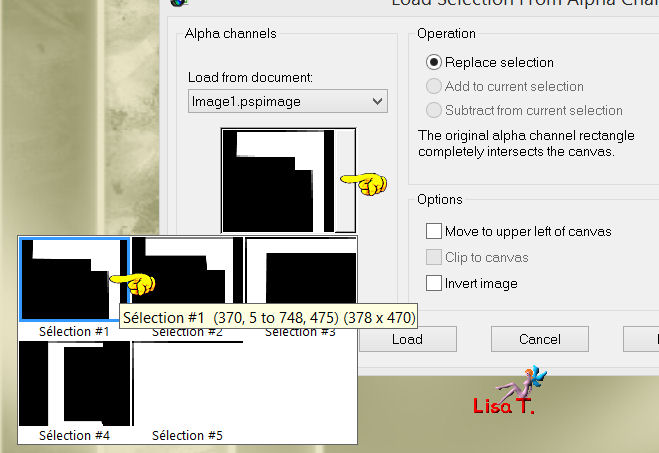
selections/load-save selection/from alpha channel/selection #1
Step 7
in the layers palette, activate the background layer

selections/promote selection to layer
effects/plugins/Mock/Windo
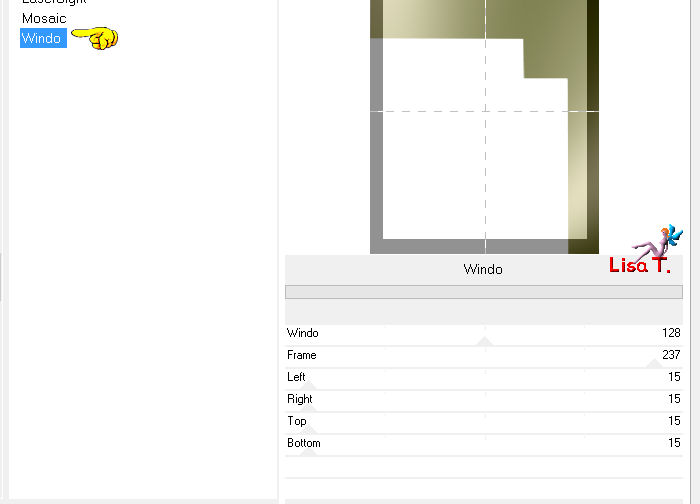
Step 8
selections/load-save selection/from alpha channel/selection #2
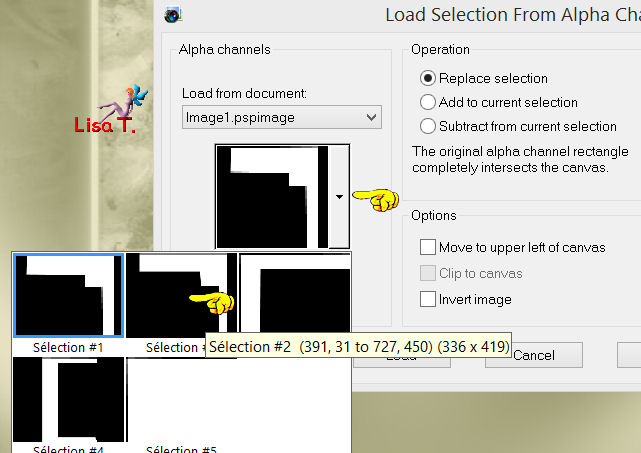
Step 9
effects/texture effets/texture
find the texture « grass » (corel15_040.bmp provided in the material in case you don’t have it )
(you can choose another texture of course)
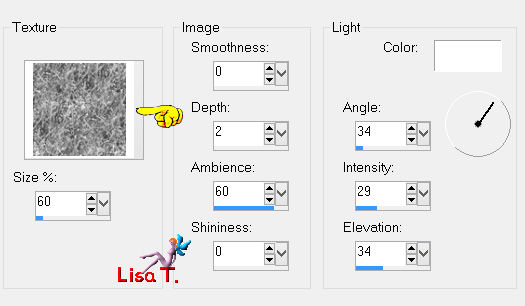
selections/select none (or press on the keys Ctrl and D of your keyboard together)
Step 10
selections/load-save selection/from alpha channel/selection #3
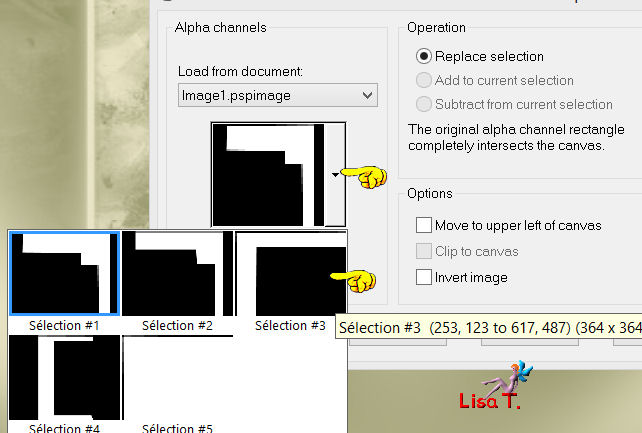
Step 11
in the layers palette,a ctivate the backgroud layer

selections/promote selections to layer
effects/plugins/AP01[Innovations]/Lines Silverlining
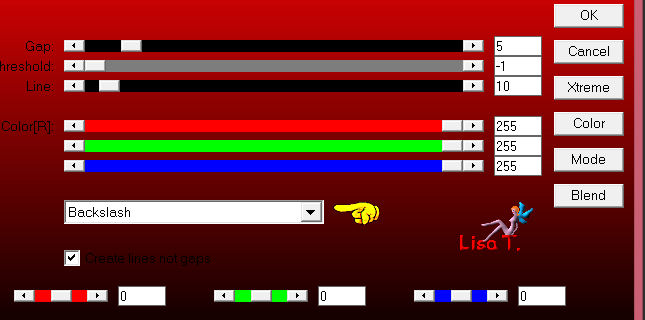
effects/edge effects/enhance
selections/select none (Ctrl + D)
Step 12
selections/load-save selection/from alpha channel/selection #4
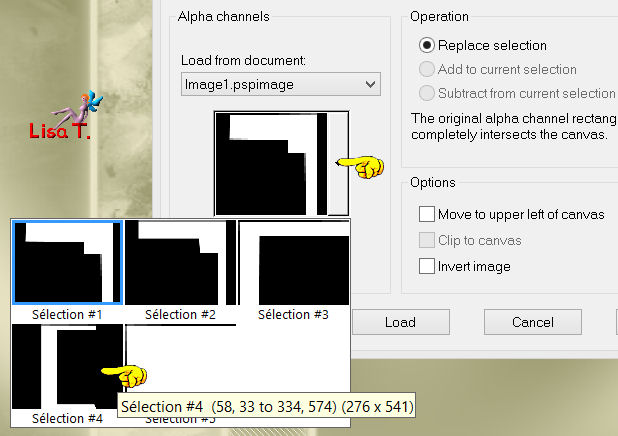
Step 13
in the layers palette, activate the background layer

selections/promote selection to layer
effects/plugins/AP01[Innovations]/Lines Silverlining (new settings)
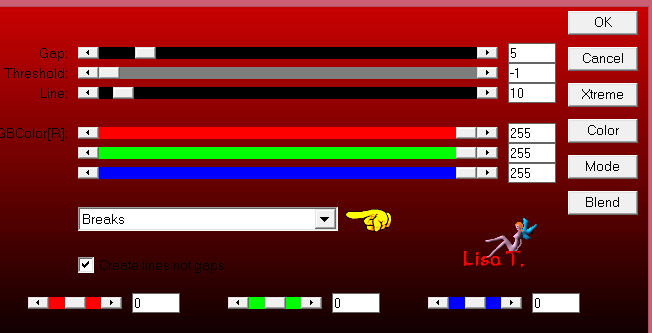
selections/select none (Ctrl + D)
effects/edge effects/enhance
in the layers palette, set the blend mode on « burn »
Step 14
in the layers palette, activate the top layer
layers/duplicate
effects/distortion effects/spiky halo
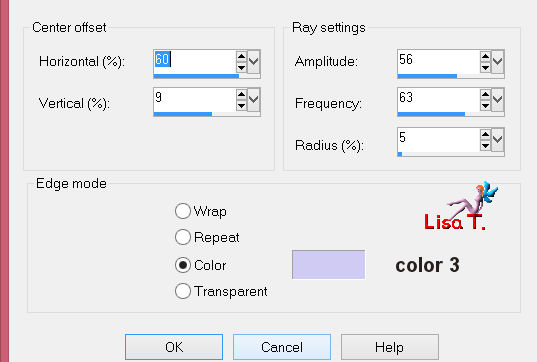
set the blend mode of the layer on « hue » (or other according to your colors)
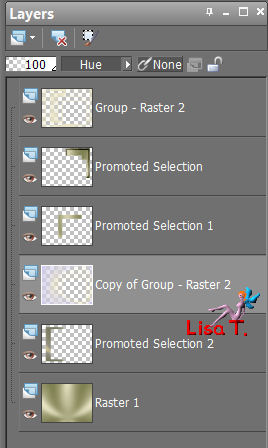
layers/arrange/move down 3 times
your layers palette looks like this
Step 15
selections/load-save selection/from alpha channel/selection #5
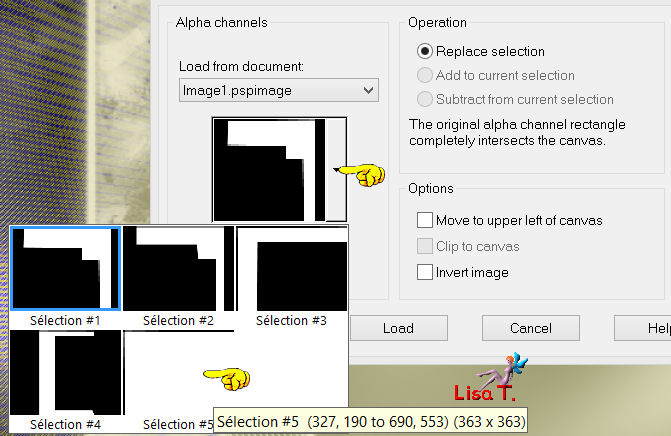
edit/cut or press the delete key of your keyboard
Step 16
in the layers palette, activate the background layer

selections/promote selection to layer
Step 17
effects/plugins/Mock/Windo
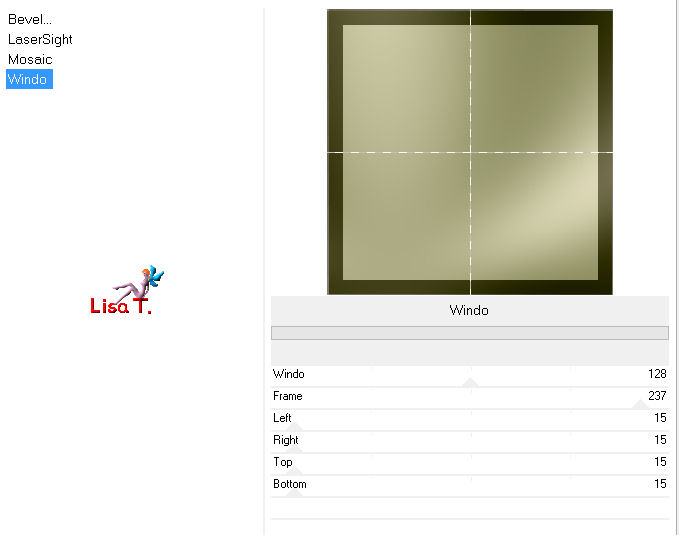
layers/arrange/bring to the top
Step 18
activate the tube « libellulegraphisme_enfant_feerique » (orone of your choice)
window/duplicate
image/resize/70%
Step 19
edit/copy - back to your work - edit/paste as new layer
move it over the selection until the children are in the middle
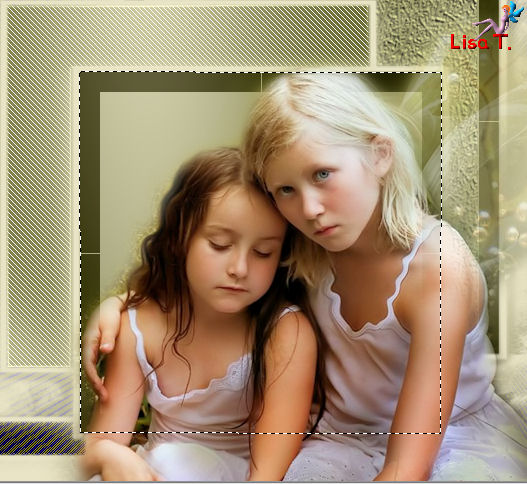
selections/invert
edit/cut (or press the delete key of your keyboard)
Step 20
again ! selections/invert
selections/modify/select selection borders
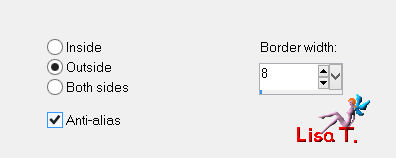
layers/new raster layer
fill the selection with color 3
Step 21
effects/plugins/Graphic Plus/Cross Shadow
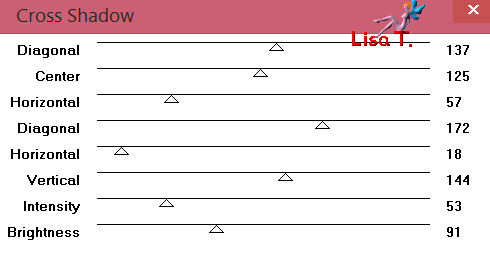
keep the selection active
Step 22
effects/3D effects/inner bevel
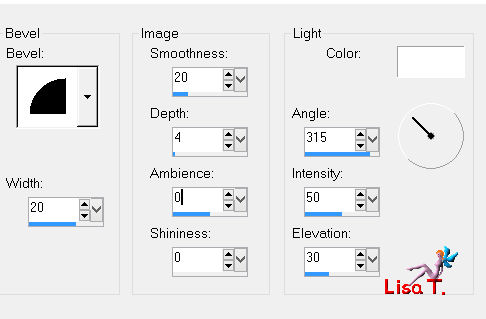
selections/select none (Ctrl + D)
Step 23
layers/merge/merge down twice
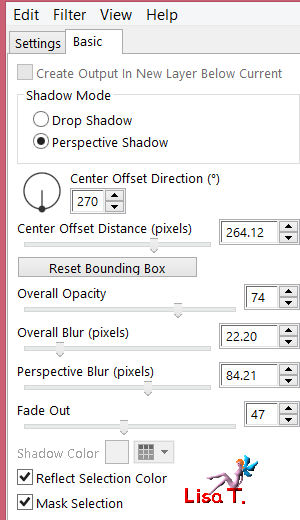
effects/plugins/Alien Skin Eye Cady 5 Impact/Perspective Shadow
find the preset « libellule_inventer_etes1 »
if you coudn’t import the preset, here are the settings
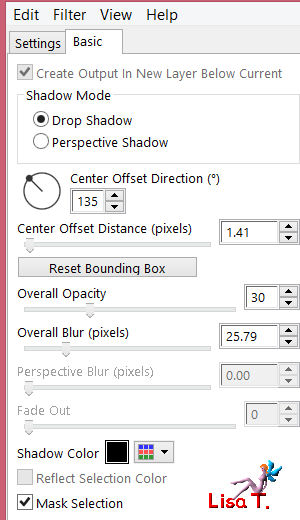
apply this effect once more
Step 24
effects/plugins/Alien Skin Eye Candy Impact/Perspective Shadow/ « libellule_inventer_etes2 »
here are the settings
Step 25
acitvate the word art « libellulegraphisme_mot_art1 »
edit/copy - back to your work - edit/paste as new layer
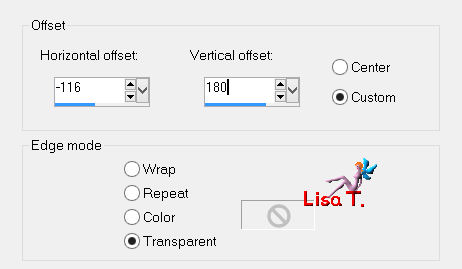
effects/image effects/offset
Step 26
the frame
image/add borders/8 pixels/color 3
activate the magic wand tool, feather 0, check « anti-alias » and « inside »
click on the color
effects/plugins/Graphic Plus/Cross Shadow/default settings
Step 27
keep the selection active
effects/3D effects/inner bevel

Step 28
selections/select all
image/add borders/50 pixels/white
selections/invert
make sure colors 1 and 2 are properly installed in the materials palette

Step 29
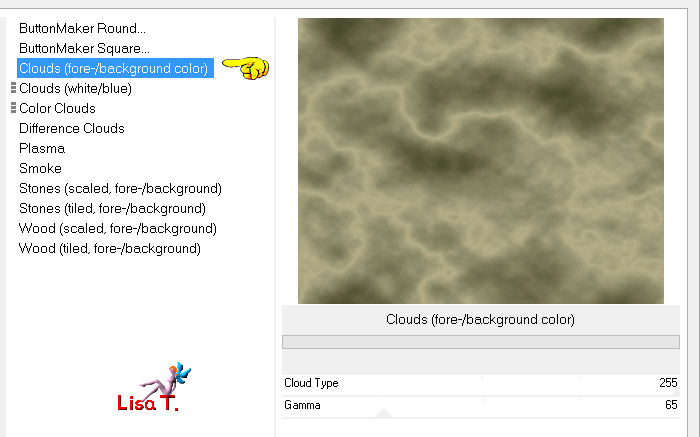
effects/plugins/Unlimited 2/Render/Clouds
selections/select none (Ctrl + D)
image/add borders ->
2 pixels/black
1 pixel/color 2
Step 30
apply your signature
layers/merge/merge all (flatten)
Step 31
image/resize/width 800 pixels (or other)
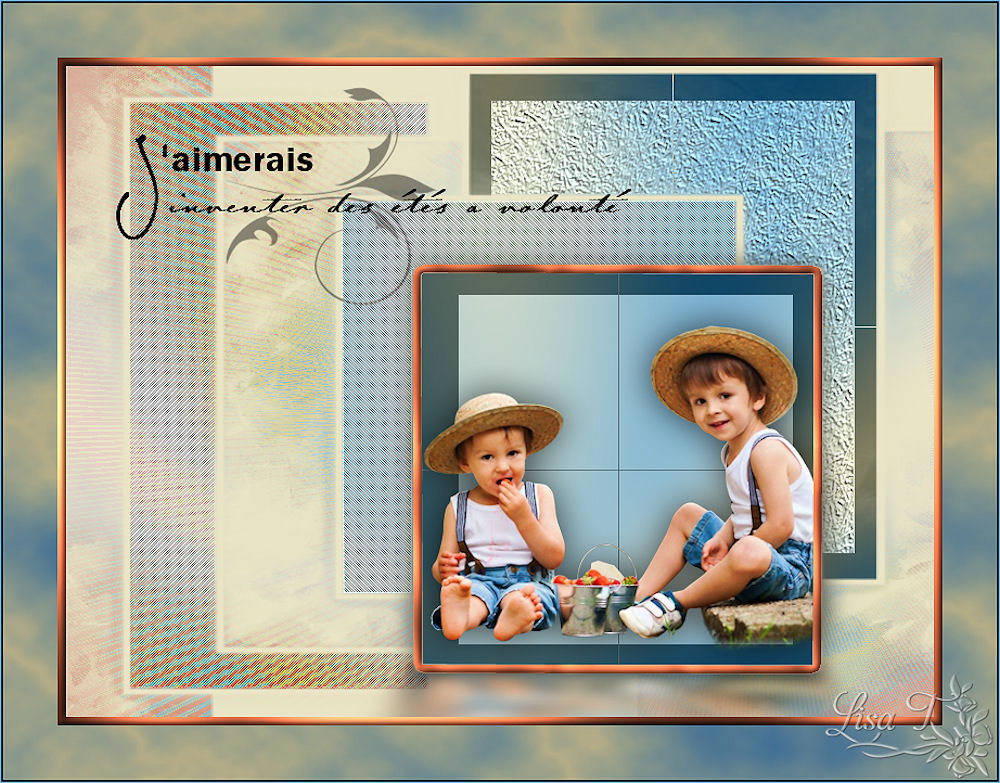
your tag is finished
we hope you enjoyed it

to write to Libellule


If you create a tag with this tutorial, don’t hesitate to send it toLibellule
She will be very glad to see it and present it in her galery
at the end of the tutorial on her site

If you want to be informed about Libellule’s new tutorials and work
join her newsletter


my tag with my tube
Back to the board of Libellule’s tutorials


|