Graphic
art

Original tutorial can be found here

This tutorial was created by Libellule with PSPX9
but it can be realized with other versions - if you use another
version, the results might be slightly different

General conditions of use
This tutorial is an original and personal design of Libellule.
any resemblance with another one would be pure coincidence.
You can share your creations, create signatures for your
friends or for groups
but you are not allowed to use this tutorial in your site,
or claim it as yours
You must indicate the artists’ copyrights
Thank you to respect the rules.

If you are interested by translating this tutorial in another
language
thank you to ask Libellule.
a link towards her site will be asked

It is strictly forbidden to use the material provided for
your tutorials
and to share it in groups or forums
Libellule has received the authorizations to use the tubes
she provides
see here


Preparation
install all plugins if necessary (double click on them)
copy the masks into the folder “mask” of Corel
Folder or open with PSP and minimize it (best method)
open the tubes and duplicate them. Work with copies, close
original images

Colors
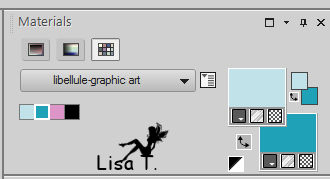
color 1 --> foreground color --> FG --> #c1e2e9
color 2 --> background color --> BG --> #1fa1b7
color 3 -> #dd95c7
color 4 -> #000000
color 5 -> #e0ddd7

don’t hesitate to change colors, blend modes
and opacities to match your tubes
if you change the oclors,, keep blackk as color 4
colors 5 is the woman’s face color
prepare colors 1 & 2 as FG and BG colors into materials
palette

Filters
Mock - Photo Aging Kit - AAA Frames - Simple


Material

copy / paste « Watercolor » into the
folder « Textures » of Corel PSP
Folder

use this Pencil to follow the steps
hold down left click to grab it and move it


Realization
1
open alpha-channel image
2
window -> duplicate
close original image and work with the copy
3
flood fill layer with color 1
4
in materials palette, set color 3 as FG color
5
open AirBrush tool

6
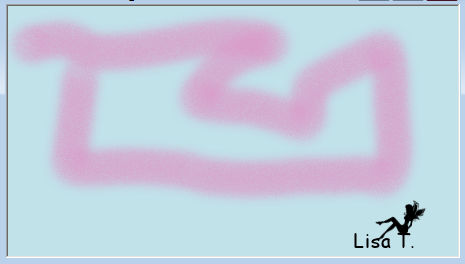
hold down left click and draw some lines as shown
7
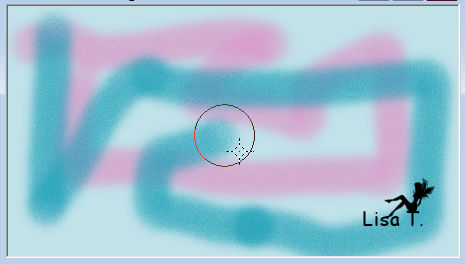
hold down right clik and draw some lines, don’t cover
light blue background
8
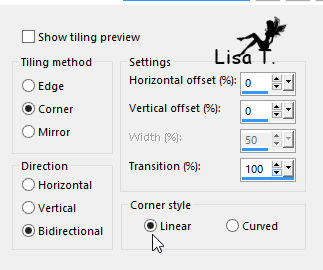
effects -> image effects -> seamless tiling
9
adjust -> blur -> gaussian blur / 35
10
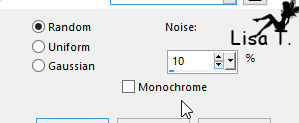
adjust -> add -remove noise -> add noise -> 10
11
layers -> new raster layer
12
selections -> select all
13
open « graphic art_peintures »
14
edit -> copy
15
back to your work
edit -> paste into selection
16
selections -> select none
17
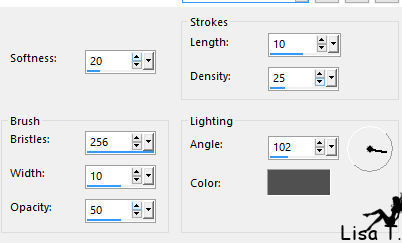
effects -> art media effects -> brush strokes
18
blend mode of the layer : Luminance (Legacy) - opacity :
30%
19
effects -> edge effects -> enhance more
20
layers -> merge -> merge down
21
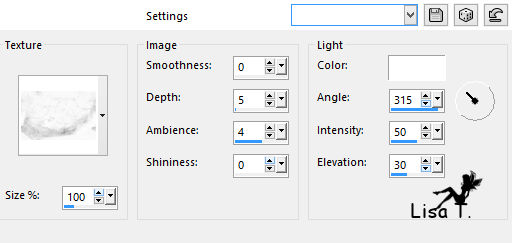
effects -> texture effects - Texture / Water Color (provided)
22
adjust -> sharpness -> sharpen
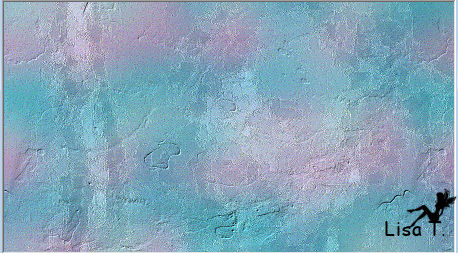
your tag looks like this
23
layers -> new raster layer
24
flood fill with color 1
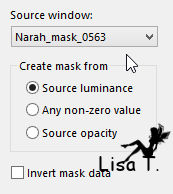
25
open « Narah_mask_0563 »
26
back to your work
27
layers -> new mask layer -> from image
28
effects -> edge effects -> enhance
29
layers -> merge -> merge group
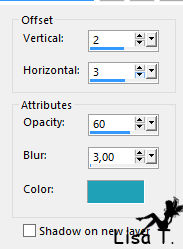
30
effects -> 3D effects -> drop shadow / color 2
31
image -> free rotate -> right / 90
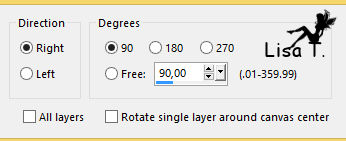
32
object -> align / right
33
highlight bottom layer
34
selections -> select all
35
highlight top layer
36
image -> crop to selection
37
layers -> duplicate
38
image -> mirror -> mirror horizontal
39
image -> mirror -> mirror vertical
40
layers -> merge -> merge down
41
blend mode of the layer : Luminance (Legacy) - opacity
: 80%
42
adjust -> sharpness -> sharpen
43
layers -> duplicate
44
effects -> distortion effects -> wind -> from
left / 100
45
layers -> arrange -> move down
46
blend mode of the layer : Multiply - opacity : 100%
47
effects -> edge effects -> erode
48
highlight top layer
49
layers -> merge -> merge visible
50
layers -> duplicate
51
effects -> plugins -> Mock / Windo
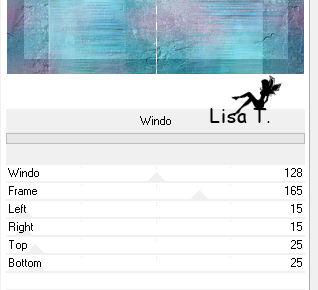
52
open « libellulegraphisme_procrastination »
53
edit -> copy
54
back to your work
55
edit -> paste as new layer
56
image -> resize -> uncheck « resize all
layers » -> 55%
57
adjust -> sharpness -> sharpen
58
objects -> align -> center in canvas
59
activate « Pick Tool », and using
the down arrow of your keyboard, move the layer down so
you can see the top of the head
60
opacity of the layer : 80%
61
layers -> duplicate
62
adjust -> blur -> gaussian blur / 20
63
opacity of the layer : 100%
64
layers -> arrange -> move down
65
highlight top layer
66
open « graphic art decor1 »
67
edit -> copy
68
back to your work
69
edit -> paste as new layer
70
activate Eraser Tool

71
erase stains on face and neck (see final result)
72
open « graphic art decor2 »
73
edit -> copy
74
back to your work
75
edit -> paste as new layer
76
erase stains on face and neck (see final result)
your work looks like this
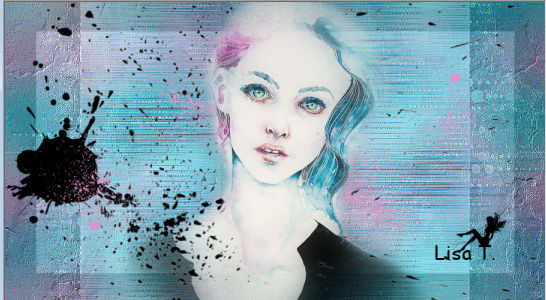
77
layers -> merge -> merge visible
78
effects -> plugins -> Unlimitmed 2 -> Photo Aging
Kit / Border Fade / 80
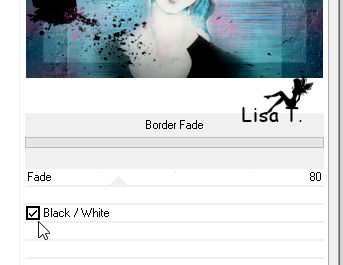
79
layers -> new raster layer
80
flood fill with color 1
81
open « Nara_Mask_0975 »
82
back to your work
83
layers -> new mask layer -> from image
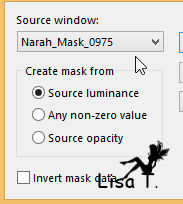
84
layers -> merge -> merge group
use Eraser tool if stains appear on the face
85
edit -> copy / copy Special / Copy merged
86
edit -> paste as new image
work on this image
87
image -> resize -> check « resize all
layers » -> 20%
88
effects -> plugins -> AAA Frames / Foto Frame / Dark
with Gray Shadow
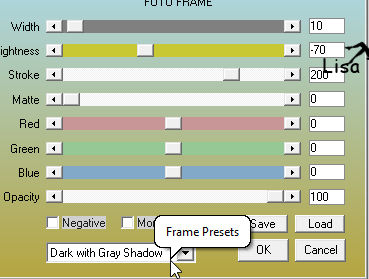
89
edit -> copy
90
back to your work
91
layers -> new raster layer
92
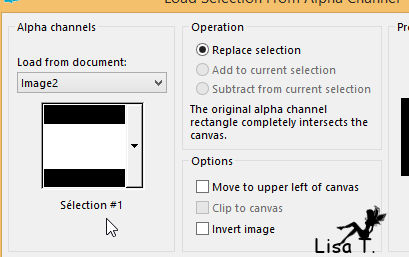
selections -> load-save selection -> from alpha channel
-> selection #1
93
edit -> paste into selection
94
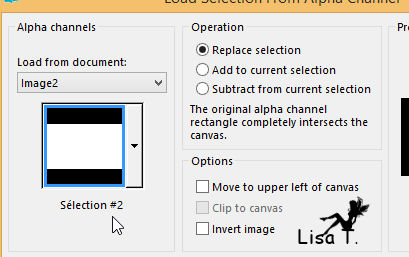
selections -> load-save selection -> from alpha channel
-> selection #2
95
edit -> paste into selection
96
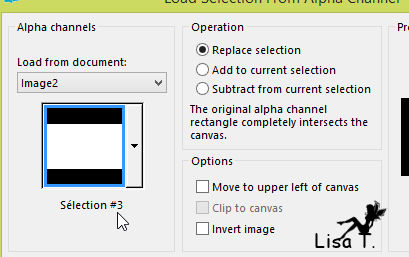
selections -> load-save selection -> from alpha channel
-> selection #3
97
edit -> paste into selection
98
selections -> select none
99
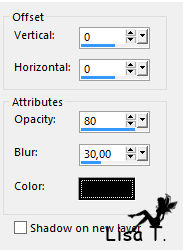
effects -> 3D effects -> drop shadow
100
image -> add borders -> symmetric -> 2 pixels
color 4
101
edit -> copy
102
image -> add borders -> symmetric ->...
1 pixels color 3
2 pixels color 4
25 pixels color 5
1 pixels color 4
25 pixels color 5
103
selections -> select all
104
image -> add borders -> symmetric -> 35 pixels
any color
105
selections -> invert
106
edit -> paste into selection
107
effects -> plugins -> Simple -> 4 Way Average
108
effects -> plugins -> AAA Frames / Foto Frame
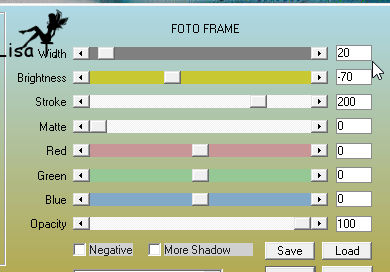
109
selections -> invert
110
effects -> 3D effects -> drop shadow
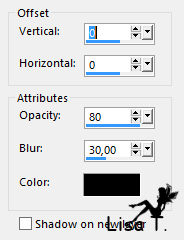
111
edit -> repeat « drop shadow »
112
selections -> select none
113
open « graphic art decor3 »
114
edit -> copy
115
back to your work
116
edit -> paste as new layer
don’t move it
117
open text « graphic_art_texte »
118
edit -> copy
119
back to your work
120
edit -> paste as new layer
move it top left
121
apply your watermark
122
layers -> merge -> merge all (flatten)
file -> save as... type .jpeg
your tag is finished

to write to Libellule


If you create a tag with this tutorial, don’t hesitate
to send it to Libellule
She will be very glad to see it and present it in her galery
at the end of the tutorial on her site
If you want to be informed about Libellule’s new
tutorials and work
subscribe to her newsletter


My tag with my tube


Back to the boards of Libellule’s tutorials
board 1  board
2 board
2  board
3 board
3 

|