Garden
(1)

Original tutorial can be found here

This tutorial was created by Libellule with PSPX7
I use PSPX9
but it can be realized with other versions

General conditions of use
This tutorial is an original and personal design of Libellule.
any resemblance with another one would be pure coincidence.
You can share your creations, create signatures for your
friends or for groups
but you are not allowed to use this tutorial in your site,
or claim it as yours
You must indicate the artists’ copyrights
Thank you to respect the rules.

If you are interested by translating this tutorial in another
language
thank you to ask Libellule.
a link towards her site will be asked

It is strictly forbidden to use the material provided for
your tutorials
and to share it in groups or forums
Libellule has received the authorizations to use the tubes
she provides
see here


Preparation
install all plugins if necessary (double click on them)
copy the masks into the folder “mask” of Corel
Folder or open with PSP and minimize it to tray (best method)
open the tubes and duplicate them. Work with copies, close
original images
copy gradient into « gradient » folder
of Corel PSP folder
no filter needed

Material


use this Pencil to follow the steps
hold down left click to grab it and move it


Realization
1
open a new transparent image 800 * 800 pixels
2
selections -> select all
copy / paste into selection « fond »
selections -> select none
3
layers -> new mask layer -> from image
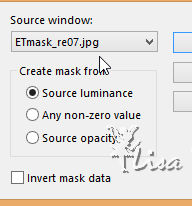
4
adjust -> sharpness -> sharpen
layers -> merge -> merge - merge group
5
open « libellulegraphisme_Twins_Girls.png »
erase the watermark
window -> duplicate - work with this copy
6
open mask 20-20 if you don’t have it already into
the folder « masks » of your Corel
PDP Folder
minimize it to tray
7
layers -> new mask layer -> from image -> mask
20-20
layers -> merge -> merge - merge group
8
edit -> copy
9
highlight your work
edit -> paste as new layer
10
image -> resize -> uncheck « resize all
layers » -> 80%
11
opacity of the layer : 60%
12
copy / paste as new layer « garden_décor1_libellule.png »
opacity of the layer : 75%
13
into materials palette, set gradient «CatoeCountry58 » as
FG color
close BG box
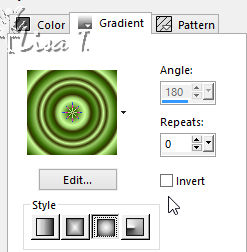
14
activate ellipse tool / vyp_point

start drawing from top left, to bottom right
layers -> convert to raster layer
resize if you wish
15
object -> align -> center in canvas
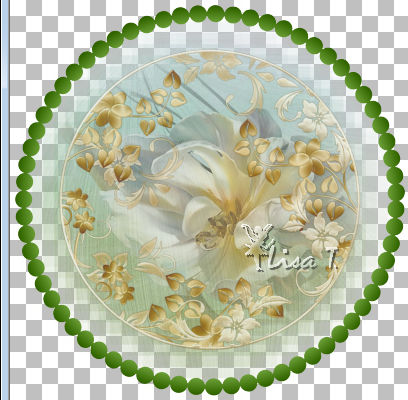
16
effects -> 3D effects -> inner bevel
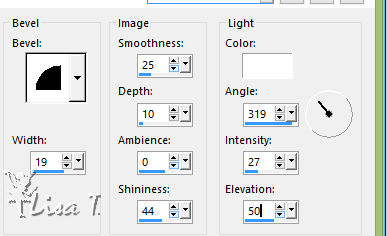
if you don’t want to draw the frame yourself, Libellule
provides it (garden_decor2_libellule.png)
17
effects -> 3D effects -> drop shadow
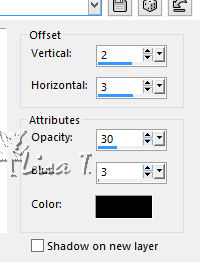
18
copy / paste « garden_decor3_libellule.png » as
new layer
layers -> arrange -> move down
layers -> merge -> merge visible
19
effects -> image effects - offset -> H : 0 /
V : 20 / check « custom » and « transparent »
20
copy / paste « ScrapAngeline (5).png » as
new layer
21
object > align -> bottom
22
copy / paste « barrière.png » as
new layer
image -> resize -> uncheck « resize all layers » -> 60%
23
translator’s note :
to this point of the tutorial, to be able to move elements
more easily
I added a transparent frame of 50 pixels to my work
(canvas size + 50 pixels on each side)
image -> mirror -> mirror horizontal
move it to the left
24
copy / paste « libellulegraphisme_F_10_Fairy_grill.png » as
new layer
move it bottom right
your work looks like this
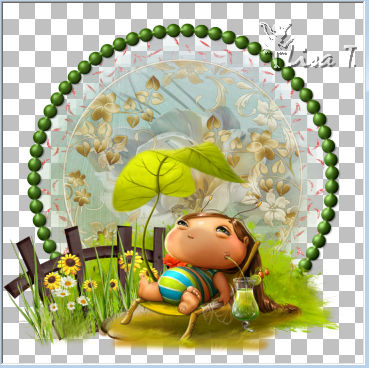
25
copy / paste « herbe » as new layer
move it bottom left
26
layers -> duplicate
27
image -> mirror -> mirror horizontal
28
move this layer under fairy’s layer
your work looks like this
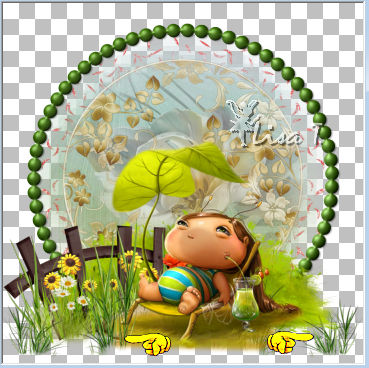
29
highlight top layer
30
copy / paste « lampes » as new layer
move it left, on the frame, above the barrier
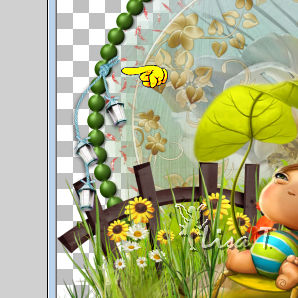
31
copy / paste « garden_decor5_libellule.png » as
new layer
move it top left
32
copy / paste « garden_decor4_libellule.png » as
new layer
move it to the right of the frame
33
apply your watermrk
34
layers -> merge -> merge visible
save as ... type .png if you want to see your work with
a transparent background
if you want to see a white background, merge all and save
as ... type. jpeg

to write to Libellule

If you create a tag with this tutorial, don’t hesitate
to send it to Libellule
She will be very glad to see it and present it in her galery
at the end of the tutorial on her site
If you want to be informed about Libellule’s new
tutorials and work
subscribe to her newsletter


Back to the boards of Libellule’s tutorials
board 1  board
2 board
2  board
3 board
3  board
4 board
4 

|