Duality

Original tutorial can be found here

I am member of TWInc
this tutorial is protected


This tutorial was created using PSPX2
but it can be realized with other versions

General conditions
This tutorial is an original and personal design of Libellule.
any resemblance with another one would be pure coincidence.
You can share your creations, create signatures for your friends or for groups
but you are not allowed to use this tutorial in your site, or claim it as yours
You must indicate the copyrights of the artists.
Thank you to respect the rules.

If you are interested by translating this tutorial in another language
thank you to ask Libellule.
a link towards her site will be asked

It is strictly forbidden to use the material provided for your tutorials
and to share it in groups or forums

Libellule has received the authorizations to use the tubes she provides
see  here here


Colors
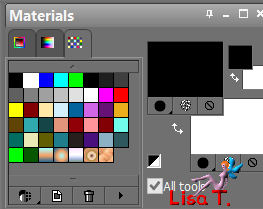
color 1/foreground color/#000000
color 2/background color/#ffffff
if you change the dark color, keep white
if you change the ligth color, keep black

prepare the colors in the materials palette
Filters
Textures - Tramages - XE Xtras - Simple - AP Lines/Lines Silverlining


Material
1 color palette - 1 tube by Nicole - 1 tube by Mago74 - 1 fractal by Karella - 1 word art by Libellule


Use the pencil to follow the steps
left click to grab it
 |

Implementation
install the plugins
open the tubes and duplicate them. Work with the copies, close the originals

Realization
Step 1
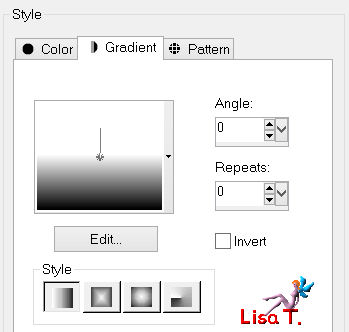
in the materials palette, prepare a linear gradient
Step 2
open a new transparent raster layer 800 ** 600 pixels
fill with the gradient
Step 3
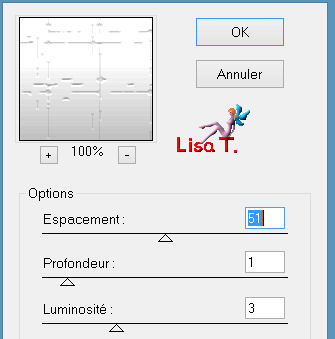
effects/plugins/Textures/Craquelure
Step 4
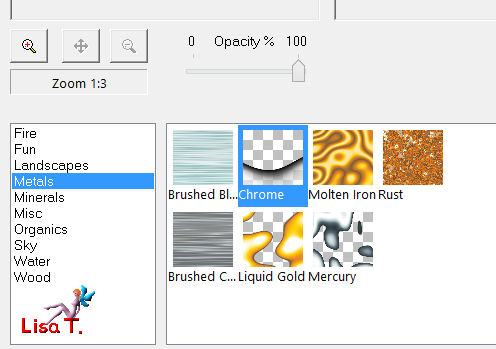
effects/plugins/XE Extras/Elemental/Metal
Step 5
layers/duplicate
Step 6
effects/image effects/seamless tiling
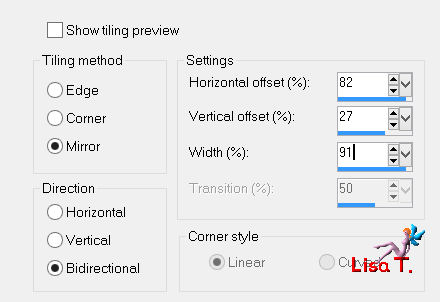
your layers palette look like this
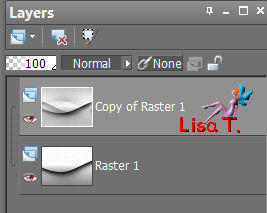
Step 7
in the layers palette, set the opacity on 50%
activate the layer below (Raster 1)
image/flip
Step 8
layers/merge/merge visible
effects/image effects/seamless tiling as in step 6
Step 9
effects/plugins/Simple/4 Way Average/default settings
effects/edge effects/enhance
Step 10
layers/new raster layer
fill with color 2
effects/plugins/Tramage/Moving Screen

set the opacity on 20% and the blend mode on « difference »
Step 11
effects/distortion effects/warp
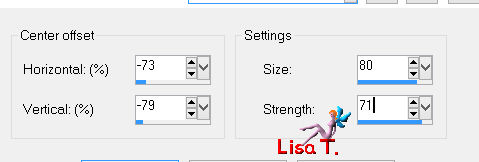
Step 12
image/add borders/2 pixels/black
Step 13
layers/duplicate
image/resize/uncheck « resize all layers »/80%
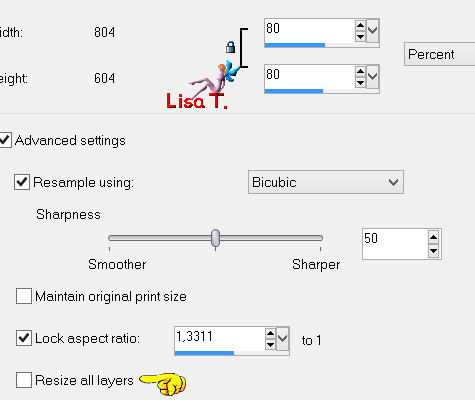
layers/duplicate (again)
Step 14
in the layers palette, activate the layer below (copy of background)
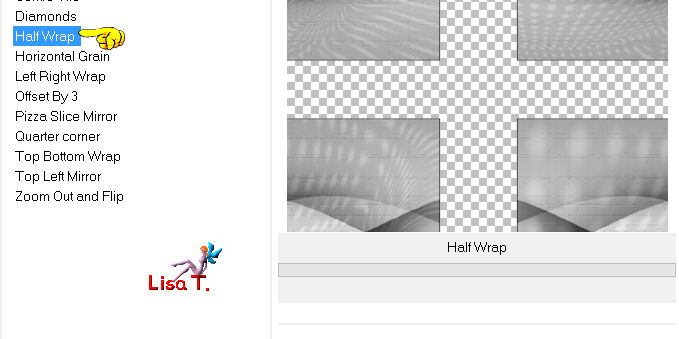
effects/plugins/Simple/Half Warp/default settings
Step 15
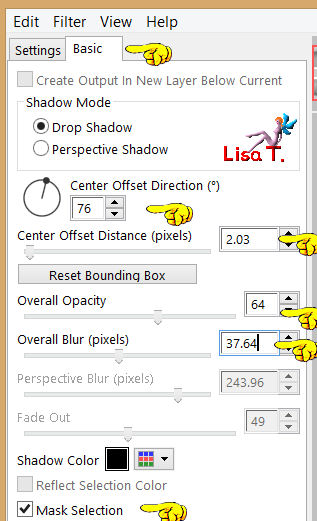
effects/plugins/Alien Skin Eye Candy 5 Impact/Perspective Shadow
Step 16
in the layers palette, activate the top layer
effects/plugins/Alien Skin Eye Candy 5 Impact/Perspective Shadow (as before)

Step 17
activate the tube « Lila by-mago74 »
edit/copy - back to your work - edit/paste as new layer
image/resize/uncheck « resize all layers »/60%
Step 18
effects/plugins/AP[ Lines]/Lines-Silverlining/Arrow
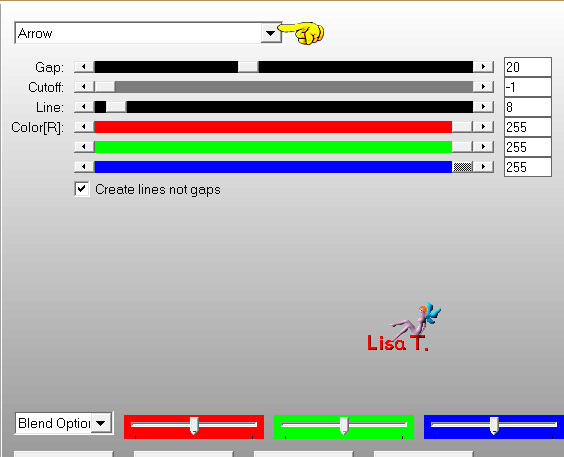
in the layers palette, set the blend mode on « soft light » (or other)
Step 19
activate the fractal « Karela1022Fractal10006 »
edit/copy
Step 20
back to your work
layers/new raster layer
selections/select alla
edit/paste into selection
selections/select none (Ctrl + D)
Step 21
effects/plugins/Simple/4 Way Average/default settings
Step 22
in the layers palette, set the blend mode on « saturation »
adjust/sharpness/sharpen
Step 23
layers/duplicate
layers/merge/merge down
Step 24
layers/new raster layer
fill with color 1
selections/select all
selections/modify/contract/3 pixels
Step 25
edit/clear/delete
selections/select none (Ctrl + D)
Step 26
activate the tube « nicole-etrange-femme2-2012 »
edit/copy - back to your work - edit/paste as new layer
Step 27
image/resize/uncheck « resize all layers »/80%
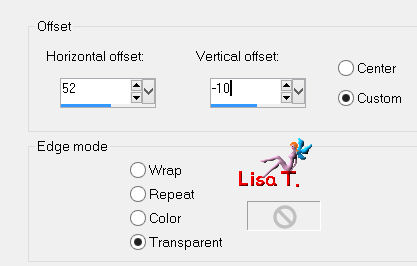
effects/image effects/offset
Step 28
layers/duplicate
in the layers palette, activate the layer below (Raster 4)
effects/artistic effects/colored edges
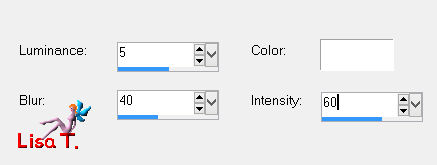
Step 29
in the layers palettes, activate the top layer
adjust/sharpness/unsharp mask
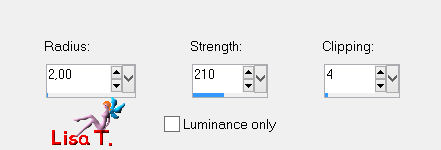
Step 30
activate the word art « duality_wordart_libellule »
edit/copy - back to your work - edit/paste as new layer
Step 31
image/free rotate/left/90°
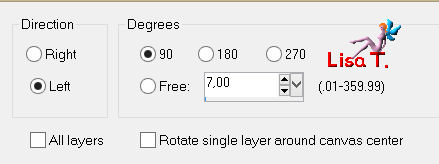
effects/image effects/offset
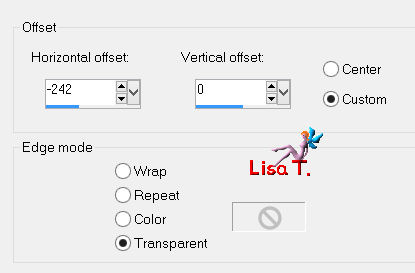
apply your signature
layers/merge/merge all (flatten)

to write to Libellule


If you create a tag with this tutorial, don’t hesitate to send it to Libellule
She will be very glad to see it and present it in her galery
at the end of the tutorial on her site
Your gallery


If you want to be informed about Libellule’s new tutorials and work
join her newsletter


my tag with my tubes


Back to the board of Libellule’s tutorials


|