I love body painting
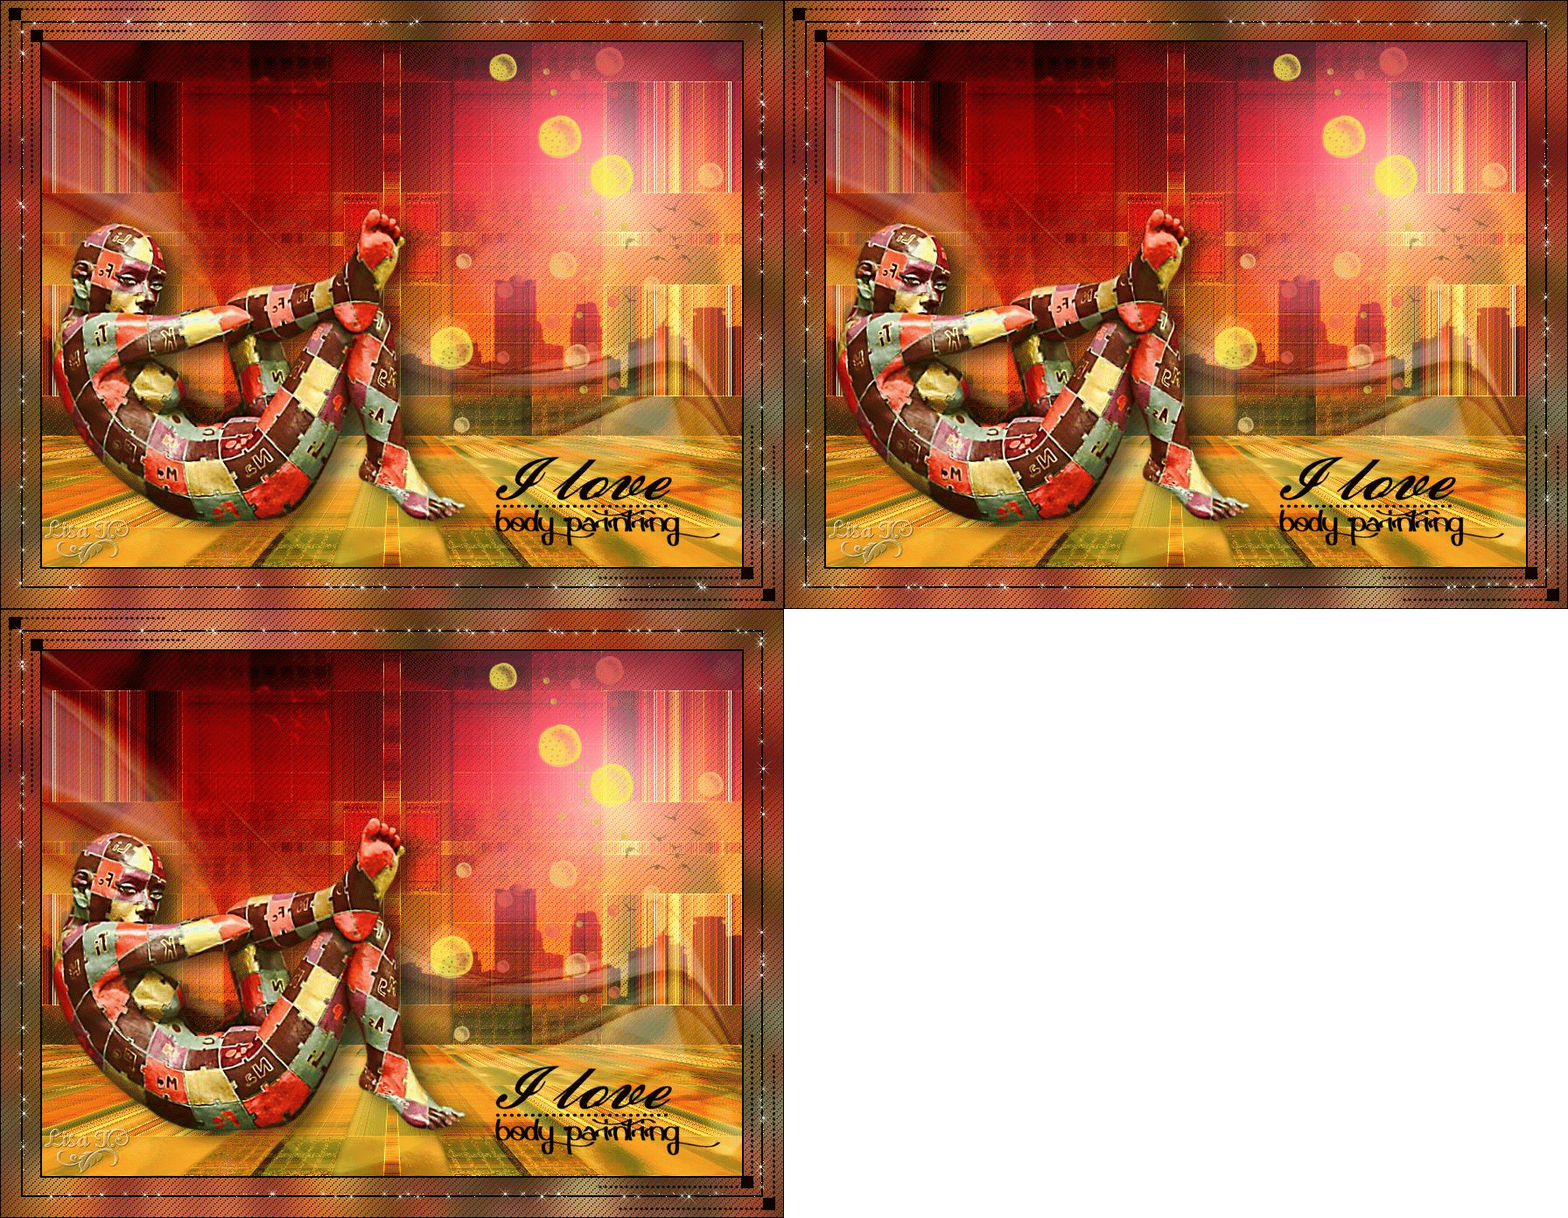
Original tutorial can be found here


This tutorial was created using PSPX2
I use PSPX7
but it can be realized with other versions

General conditions
This tutorial is an original and personal design of Libellule.
any resemblance with another one would be pure coincidence.
You can share your creations, create signatures for your friends or for groups
but you are not allowed to use this tutorial in your site, or claim it as yours
You must indicate the copyrights of the artists.
Thank you to respect the rules.

If you are interested by translating this tutorial in another language
thank you to ask Libellule.
a link towards her site will be asked

It is strictly forbidden to use the material provided for your tutorials
and to share it in groups or forums

Libellule has received the authorizations to use the tubes she provides
see here
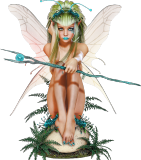

Implementation
install the plugins if necessary
copy the masks in the folder “mask” of “My PSP Files” or open with PSP and minimize it to tray(best method)
open the tubes and duplicate them. Work with the copies, close the originals
import the brush tip as custom brush

Colors
color 1/foreground color/#f9e1d7
color 2/background color/#07a2d
color 3 -> #ffffff -> 393b3e

prepare the colors in the materials palette, using colors 2 and 3
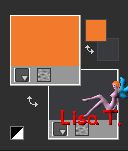
you may change the main colors, according to your tubes
in the materials palette, prepare a radial gradient
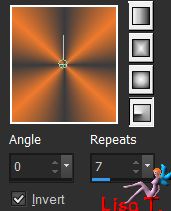

Filters
BKG Designer III (import in Unlimited2), Italian Editor Effect,
Simple, harry Button Tools, Murameister Perspective Tiling,
Nik Software Color Effex 3, Lens Flares (import in Unlimited2)


Material
1 alpha layers, 1 color palette, 1 tube by Maëlle Dreams,
1 element by Ptitesouris, 1 mask by Linda, 1 word art, 1 frame.


Use the Pencil to follow the steps
left click to grab it


Realization
Step 1
open the alpha layer, window/duplicate
close the original and work with the copy
fill the layer with the gradient
Step 2
adjust/blur/gaussian blur/50
Step 3
activate the character tube
erase the watermark
edit/copy
Step 4
back to your work
layers/new raster layer
selections/select all
edit/paste into selection
selections/select none
Step 5
adjust/blur/radial blur

Step 6
effects/image effects/seamless tiling/default settings
Step 7
layers/merge/merge visible
effects/edge effects/enhance more
Step 8
effects/plugins/Unlimited 2/&<Bkg Designers sf10 III>/Whirl

Step 9
layers/duplicate
effects/plugins/Italian Editors Effect/Effeto TV

Step 10
effects/plugins/Simple/Top Left Mirror/default settings
Step 11
effects/edge effects/enhance
Step 12
activate the background layer (merged)
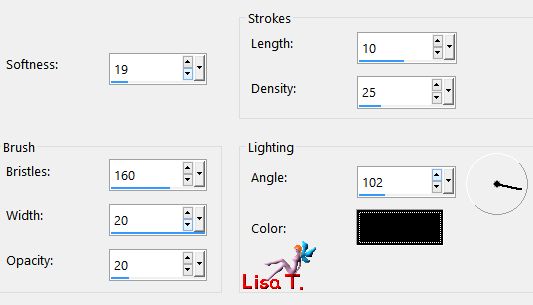
effects/art media effects/brush strokes
your tag looks like this
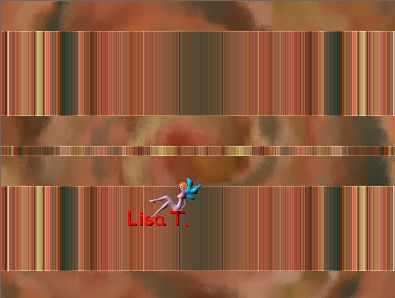
Step 13
activate the top layer
layers/duplicate – image/free rotate/right/90°
Step 14
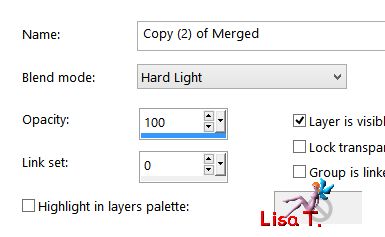
layers/properties/blend mode « hard light »
Step 15
layers/merge/merge visible
Step 16
selections/load selection/from alpha channel/selection #1
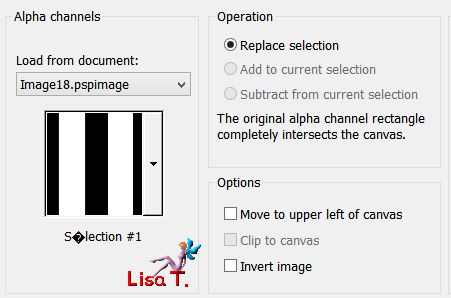
selections/promote selection to layer
Step 17
keep the selection active
effects/texture effects/mosaic antique

Step 18
keep the selection active/effects/3D effects/drop shadow
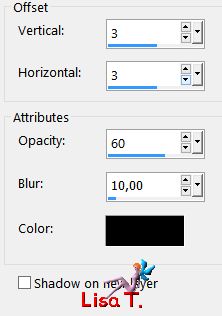
drop shadow again changing (3) by (-3)
selections/select none
Step 19
effects/reflection effects/feedback

Step 20
effects/plugins/Simple/Quick Tile/default settings
Step 21
activate the bacground layer (merged)
selections/load selection/from alpha channel/selection #2
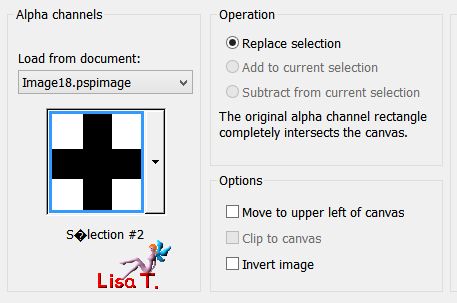
selections/promote selection to layer
Step 22
effects/plugins/Unlimited 2/Harry Button Tools/Fiat Button II
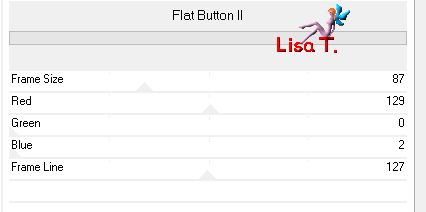
according to the colors of your tube, change the position of the cursors corresponding to the colors
selections/select none
Step 23
layers/arrange/bring to top
Step 24
opacity of the layer : 50%
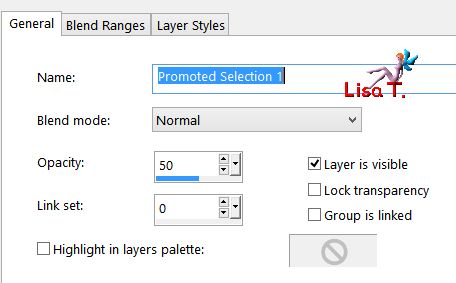
your layers palette looks like this
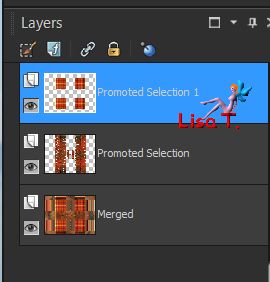
Step 25
layers/merge/merge visible
Step 26
layers/duplicate
effects/plugins/Mura’s Meister/Perspective Tiling
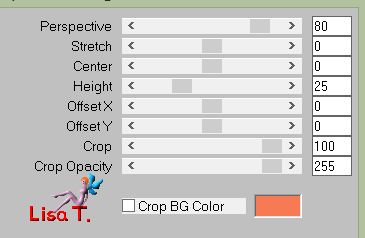
Step 27
activate the bottom layer (merged)
image/resize/uncheck « all layers »/height 450 pixels
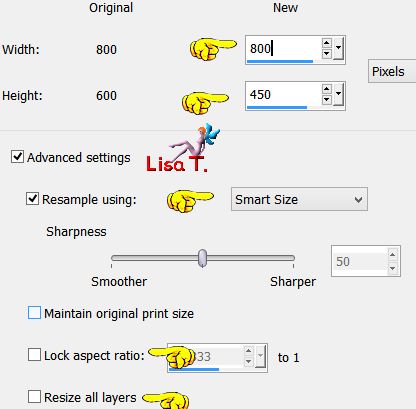
Step 28
selections/load selection/from alpha channel/selection #3
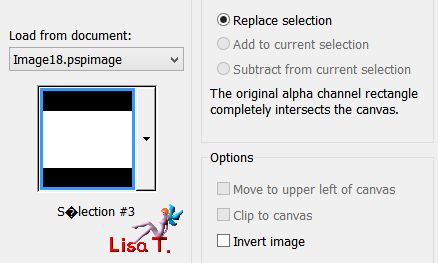
layers/new raster layer
Step 29
copy/paste into selection the mask « LF-Mask24-30102013 »
Step 30
adjust/hue and saturation/colorize

Step 31
blend mode of the layer : soft light
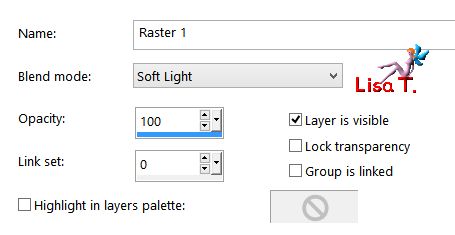
Step 32
effects/texture effects/weave/color 3
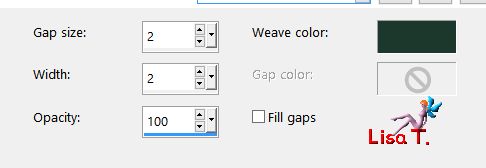
Step 33
layers/merge/merge visible
Step 34
effects/plugins/Nik Software Color Effex 3
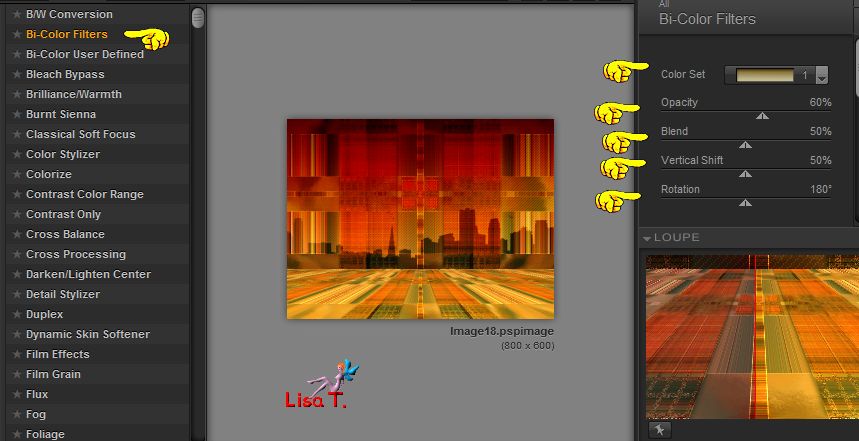
click on the image to view it full size
Step 35
copy/paste as new layer the tube « 2014EXCLUSIF-Maelledreams-Femme2015 »
(don’t forget to erase the watermark)
image/resize/70%/uncheck « all layers »/check « lock aspect ratio »
Step 36
image/mirror/mirror horizontal
effects/image effects/offset
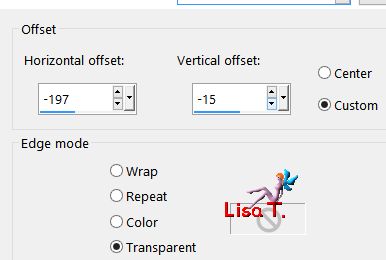
Step 37
adjust/sharpness/high pass sharpness

Step 38
effects/3D effects/drop shadow
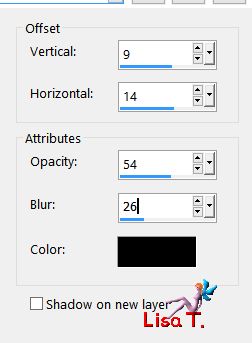
Step 39
activate the bottom layer (merged)
effects/plugins/Unlimited 2/Lens Flare
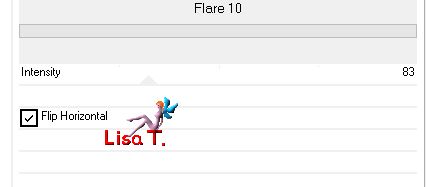
Step 40
copy/paste as new layer the tube « 9 ptitesouris element 62 »
effects/image effects/offset
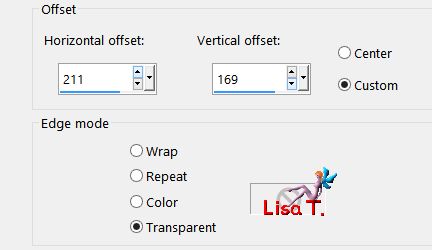
Step 41
layers/new raster layer
activate the paint brush tool, and find the brush tip « crow_006 »
apply with color 3

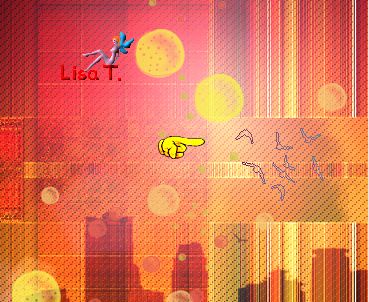
Step 42
edit/copy the tube « voile »
back to your work -> layers/new raster layer - selections/select all
edit/paste into selection
selections/select none
Step 43
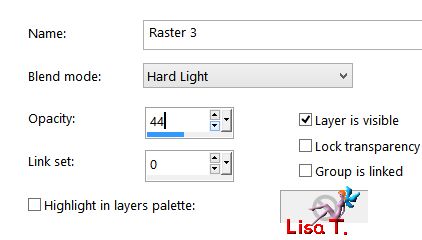
blend mode of the layer : hard light – opacity : 44%
Step 44
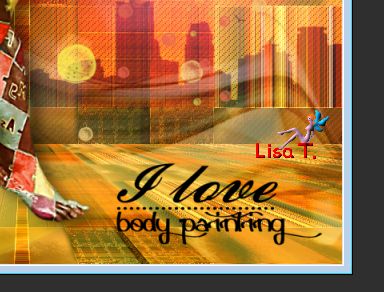
copy/paste as new layer the word art
place it where you like
Step 45
image/add borders/2 pixels black
Step 46
selections/select all
image/add borders/45 pixels white
selections/invert
Step 47
effects/plguins/Simple/Center Tile/default settings
image/mirror/mirror horizontal
Step 48
adjust/blur/gaussian blur/20
Step 49
effects/texture effects/weave/color 3

selections/select none
Step 50
image/add borders/1 pixel black
Step 51
copy/paste as new layer the frame tube
don’t move it
Step 52
apply your signature
layers/merge/merge all (flatten)
save as... type jpeg
your tag is finished
we hope you had fun following this tutorial

to write to Libellule


If you create a tag with this tutorial, don’t hesitate to send it toLibellule
She will be very glad to see it and present it in her galery
at the end of the tutorial on her site
Your gallery

If you want to be informed about Libellule’s new tutorials and work
join her newsletter


Back to the boards of Libellule’s tutorials
board 1  board 2 board 2 

|