Blue Flower

Original tutorial can be found here


This tutorial was created using PSPX2
I use PSPX8
but it can be realized with other versions

General conditions
This tutorial is an original and personal design of Libellule.
any resemblance with another one would be pure coincidence.
You can share your creations, create signatures for your friends or for groups
but you are not allowed to use this tutorial in your site, or claim it as yours
You must indicate the copyrights of the artists.
Thank you to respect the rules.

If you are interested by translating this tutorial in another language
thank you to ask Libellule.
a link towards her site will be asked

It is strictly forbidden to use the material provided for your tutorials
and to share it in groups or forums

Libellule has received the authorizations to use the tubes she provides
see here


Implementation
install the plugins if necessary
copy the mask in the folder “mask” of “My PSP Files” or open it with PSP and minimize it to tray (best method)
open the tubes and duplicate them. Work with the copies, close the originals

Colors
color 1/foreground > FG > #acebf4
color 2/background > BG > #377d3

prepare the colors in the materials palette
you may change the main colors, according to your tubes, and « play » with the blend modes of the layers

Filters
Toadies - Graphic Plus


Material


Use the Pencil to follow the steps
left click to grab it


Realization
Step 1
open a new raster layer 800 * 600 pixels
Step 2
selections > select all
copy / paste into selection the paper «libellule_texture_fleur_bleue.jpg »
selections > select none
Step 3
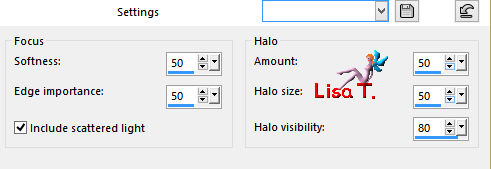
adjust > soften > soft focus
Step 4
new raster layer
selections > select all
copy / paste into seleciton the tube « sekadadesigns_springcomes_paper(14).jpg »
selections > select none
Step 5
layers > new mask layer > from image > mask « sharlimarMask20.jpg »
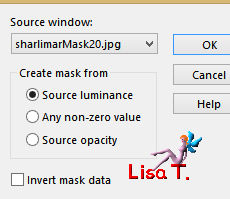
layers > merge > merge group
Step 6
effects > plugins > Toadies > *Sucking Toad*BevelI > default settings
Libellule imported this plugin into Unlimited 2

Step 7
adjust > sharpness > sharpen
Step 8
activate « Raster 1 »
copy / paste as new layer the tube «5116_lila.pspimage »
Step 9
image > mirror > mirror horizontal
Step 10
image > resize > uncheck « all layers » > 75%
Step 11
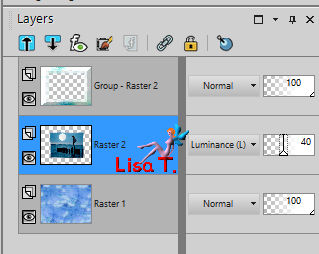
blend mode of the layer : Luminance (Legacy) – opacity 40%
your layers palette looks like this
Step 12
activate the top layer
layers > new raster layer – selections > select all
copy / paste into selection the tube « TURKIS by_Mago74 elem (8).png »
selections > select none
Step 13
image > mirror > mirror horizontal
Step 14
layers > properties > blend mode « Difference » - opacity 20%
Step 15
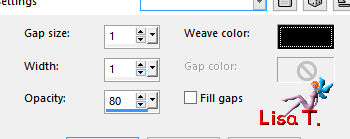
effects > texture effects > weave
Step 16
adjust > sharpness > sharpen
adjust > sharpness > sharpen more
Step 17
image > add borders > 2 pixels > color 2, and 1 pixel color 1
Step 18
image > add borders > 25 pixels white
Step 19
copy / paste as new layer the tube « LF-Woman-17102013.pspimage »
Step 20
image > resize > uncheck « resize all layers » > 110%
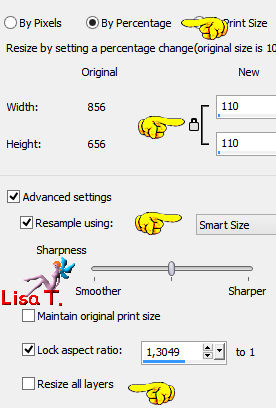
adjust > sharpness > sharpen
Step 21
effects > image effects > offset
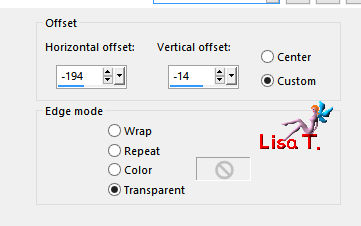
Libellule didn’t drop any shadow but according to your own tube, you can drop one of course
Step 22
selections > select all
image > add borders >25 pixels color 2
selections > invert
Step 23
effects > plugins > Graphic Plus > Cross Shadow > default settings
Step 24
selections > invert once more !
Step 25
effects < 3D effects > drop shadow
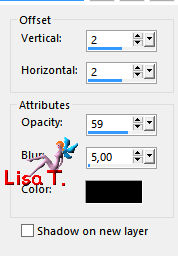
drop shadow again changing (2) by (-2)
selections > select none
Step 26
image > add borders > 1 pixel black
Step 27
copy / paste as new layer the Word Art tube
place it bottom right
Step 28
effects > 3D effects > drop shadow with color 1
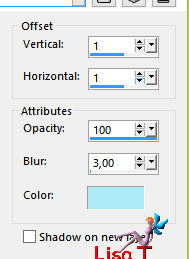
Step 29
apply your watermark
layers > merge > merge all (flatten)
file > save as.. type jpeg

to write to Libellule


If you create a tag with this tutorial, don’t hesitate to send it toLibellule
She will be very glad to see it and present it in her galery
at the end of the tutorial on her site
Your gallery

If you want to be informed about Libellule’s new tutorials and work
subscribe to her newsletter


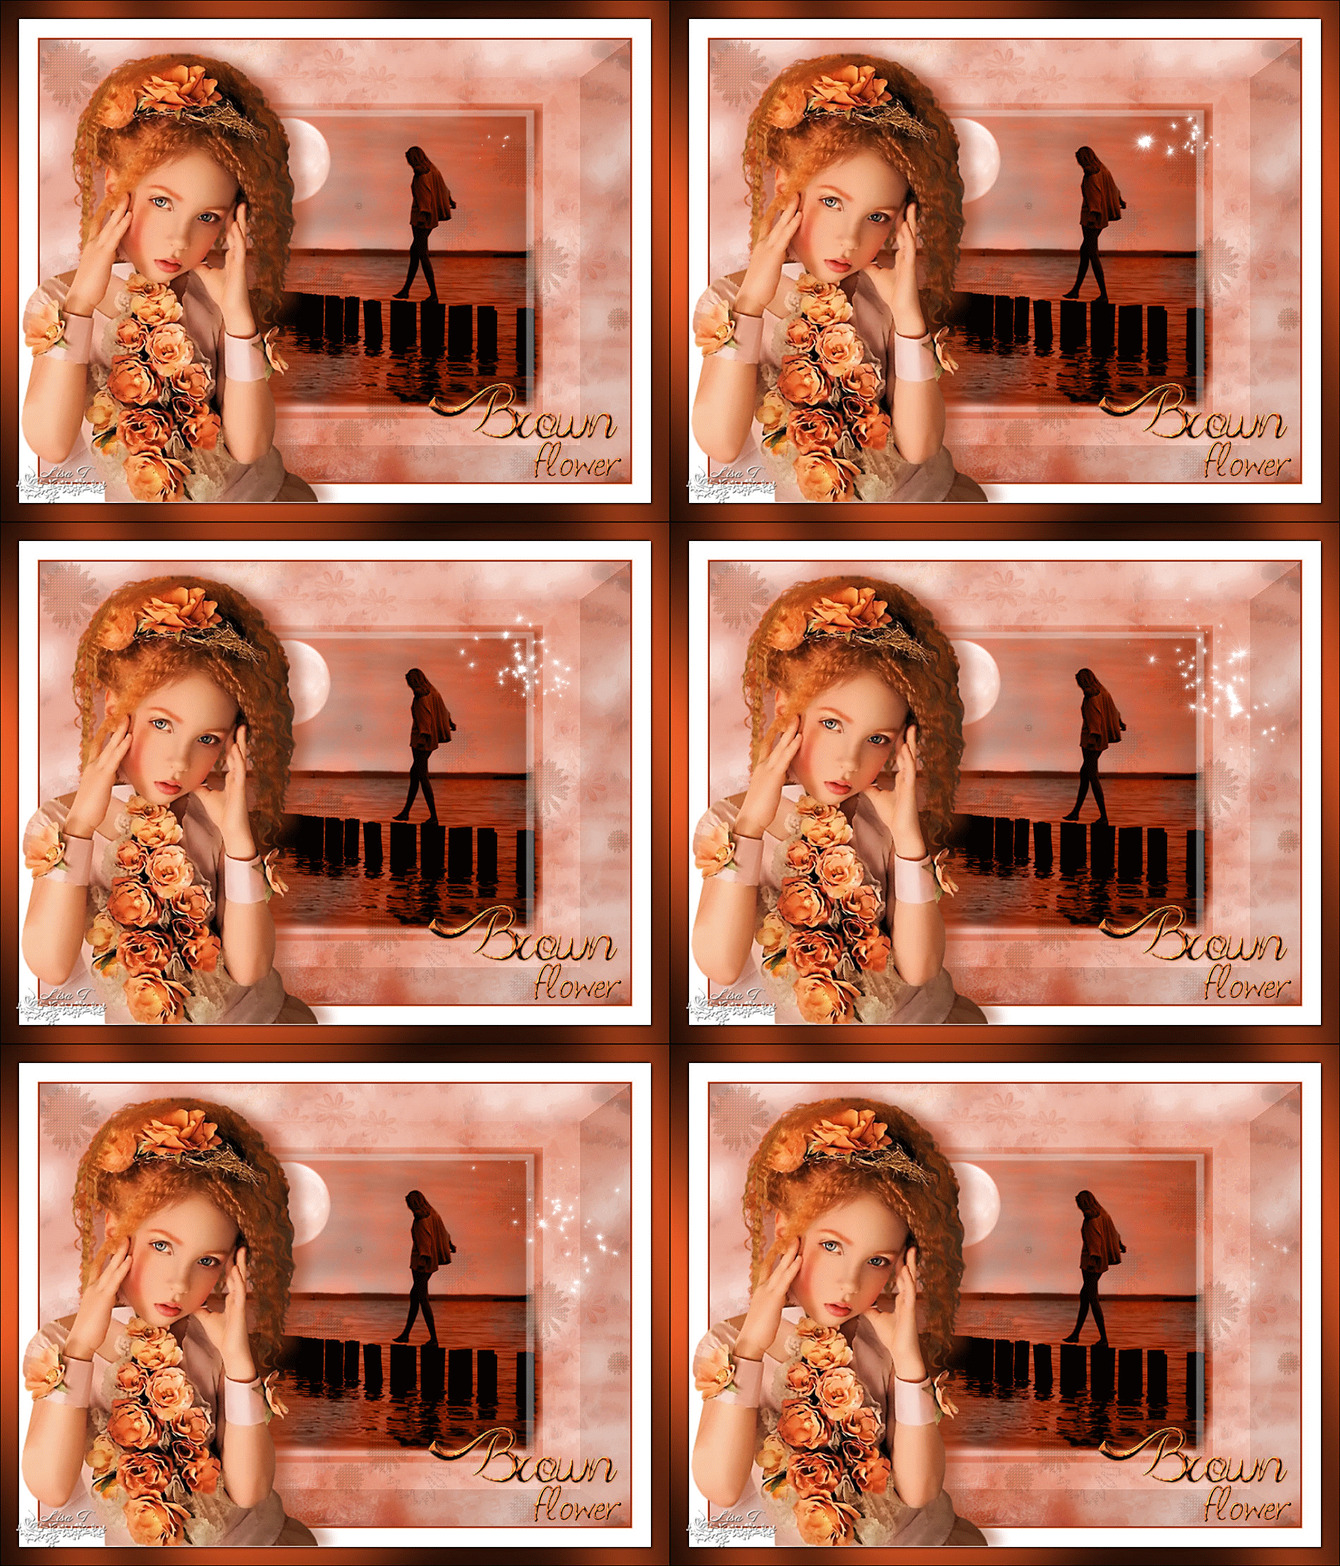
my tag with my tube (animated version)
Back to the boards of Libellule’s tutorials
board 1  board 2 board 2 

|