Alvilda the pirate

Original tutorial can be found here

I am member of TWInc
this tutorial is protected


This tutorial was created using PSPX2
but it can be realized with other versions

General conditions
This tutorial is an original and personal design of Libellule.
any resemblance with another one would be pure coincidence.
You can share your creations, create signatures for your friends or for groups
but you are not allowed to use this tutorial in your site, or claim it as yours
You must indicate the copyrights of the artists.
Thank you to respect the rules.

If you are interested by translating this tutorial in another language
thank you to ask Libellule.
a link towards her site will be asked
It is strictly forbidden to use the material provided for your tutorials
and to share it in groups or forums
Libellule has received the authorizations to use the tubes she provides
see  here here


Implementation
install the plugin
copy the mask in the folder “mask” of “My PSP Files” or open with PSP and minimize it
(Libellule prefers this method, because the first one slows down the software)
Colors
color 1/foreground color/#ffffff (white)
color 2/background color/#0e49a6 (blue)
Material
tubes and 1 mask
the tube of the “woman” was created by Odette : authorizations
the tubes “net” “bird” “coins” were created by Jennys Designz

Plugins
Unlimited 2 - RCS Pack 1 - Toadies

Use the paint brush to follow the steps
left click to grab it
 |

Realization
the tag
prepare your colors in the material palette
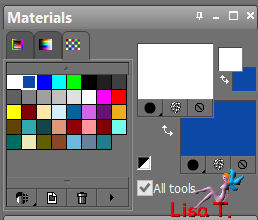
if you choose a different color, keep white as foreground
Step 1
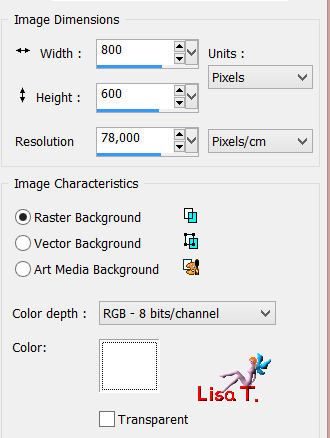
open a new background layer 800 * 600 pixels
uncheck “transparent” and set white as background color
Step 2
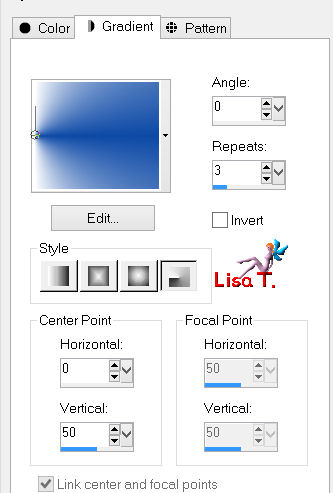
in the material palette, prepare a radial gradient (angle 0 - repeat 3 - H : 0 and V : 50)
Step 3
layers/new raster layer/fill with the gradient
adjust/blur/gaussian blur/5
Step 4
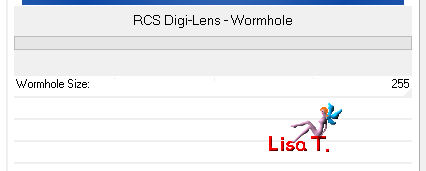
effects/Unlimited 2/RCS Pak 1/Digi-Lens-Wormhole/255
Step 5
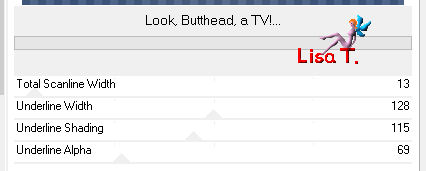
effects/plugins/Toadies/Look, Butthead, a TV!/default settings
Step 6
layers/new mask layer/from image/choose “Apwavey1”
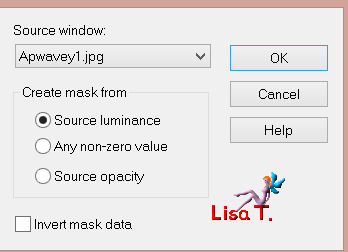
layers/merge/merge group
effects/edge effects/enhance more
Step 7
activate the tube “alvida_frame”
edit/copy - back to your work - edit/paste as new layer
image/resize/uncheck “resize all layers”/55%
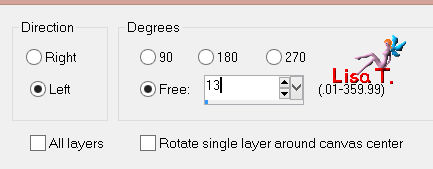
image/free rotate/left/13
Step 8
activate the image “paysage”
edit/copy - back to your work - edit/paste as new layer
image/mirror
image/resize/80%/don’t move it
layers/arrange/move down
Step 9
in the layers palette, activate the top layer (the frame raster)
activate the magic wand tool (default settings)
select inside the frame
selections/modicy/expand/4 pixels
selections/invert
in the layers palette, activate raster 2 (the landscape)
edit/clear(delete) (or press the delete key of your keyboard)
selections/select none (or press Ctrl+D)
Step 10
activate the tube “coins2”
edit/copy - back to your work - edit/paste as new layer
move it at the top right
layers/duplicate - image/flip - image/mirror
layers/merge/merge down
layers/arrange/move down
Step 11
in the layers palette, activate the top layer
activate the tube “net”
edit/copy - back to your work - edit/paste as new layer
image/resize/80%
Step 12
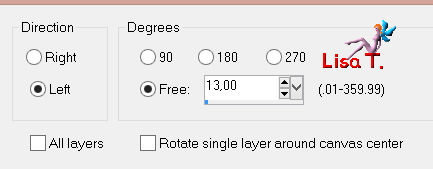
image/free rotate/left/free/13
move it to the left of the frame (see final result)
Step 13
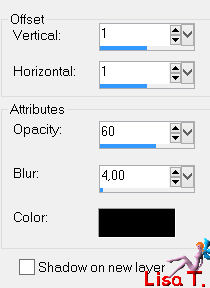
effects/3D effects/drop shadow/ 1 / 1 / 60 / 4 / black
Step 14
activate the tube “cloud”
edit/copy - back to your work - edit/paste as new layer
image/mirror
image/resize/70%
move it upper-left
Step 15
activate the tube “birds”
edit/copy - back to your work - edit/paste as new layer
image/mirror
image/resize/20%
move it upper-left, above the cloud (see final result)
Step 16
activate the tube “libellulegraphisme-alvilda-fleur”
edit/copy - back to your work - edit/paste as new layer
image/resize/50%
move it down to the left
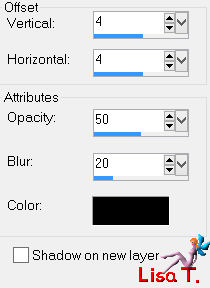
effects/3D effects/drop shadow/ 4 / 4 / 50 / 20 / black
Step 17
activate the tube “la pirate-art-emilie-fiala” (or other)
erase the watermark
edit/copy - back to your work - edit/paste as new layer
image/mirror
image/resize/85%
move it to the right
effects/3D effects/drop shadow as before
Step 18
activate the tube “bird”
edit/copy - back to your work - edit/paste as new layer
image/resize/40%
layers/arrange/move down
place the bird as if he rode on the cage
effects/3D effects/drop shadow as before
Step 19
in the layers palette, activate the top layer
activate the tube “libellulegraphisme_alvilda_mot_art”
edit/copy - back to your work - edit/paste as new layer
place the tube down in the middle (see example)
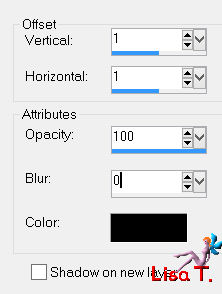
effects/3D effects/drop shadow/ 1 / 1 / 100 / 0 / black
Step 20
apply your signature
Step 21
layers/merge/merge all (flatten)
filesave as... type jpeg

to write to Libellule

If you create a tag with this tutorial, don’t hesitate to send it toLibellule
She will be very glad to see it and present it in her galery
at the end of the tutorial on her site

If you want to be informed about Libellule’s new tutorials and work
join her newsletter


Back to the board of Libellule’s tutorials


|