Alain

Original tutorial can be found here

This tutorial was created by Libellule with PSPX7
I use PSPX9
but it can be realized with other versions

General conditions of use
This tutorial is an original and personal design of Libellule.
any resemblance with another one would be pure coincidence.
You can share your creations, create signatures for your
friends or for groups
but you are not allowed to use this tutorial in your site,
or claim it as yours
You must indicate the artists’ copyrights
Thank you to respect the rules.

If you are interested by translating this tutorial in another
language
thank you to ask Libellule.
a link towards her site will be asked

It is strictly forbidden to use the material provided for
your tutorials
and to share it in groups or forums
Libellule has received the authorizations to use the tubes
she provides
see here


Preparation
install all plugins if necessary (double click on them)
copy the masks into the folder “mask” of Corel
Folder or open with PSP and minimize it (best method)
open the tubes and duplicate them. Work with copies, close
original images

Colors
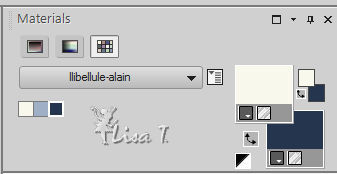
color 1 --> foreground color --> FG --> #f8f7ec
color 2 --> background color --> BG --> #9fafc6
color 3 -> #26364e

don’t hesitate to change colors, blend modes and opacities
to match your tubes
if you change colors, keep color 1
prepare materials palette

Filters
FM Tile Tools, Plugin Galaxy, Penta.com, Carolaine and Sensibility
S
Material


use this Pencil to follow the steps
hold down left click to grab it and move it


Realization
1
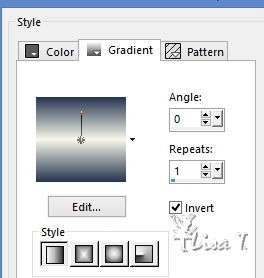
prepare a linear gradient in FG box of your materials palette
2
open alpha layer
3
flood fill with the gradient
4
edit -> copy « libellulegraphisme_alain.png »
5
back to your work
selections -> select all
6
layers -> new raster layer
7
edit -> paste into selection
8
selections -> select none
9
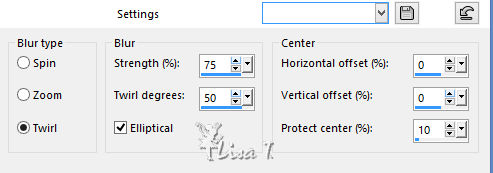
adjust -> blur -> radial blur
10
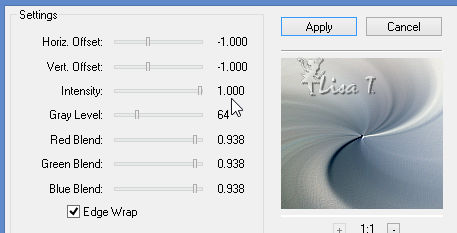
effects -> plugins -> FM Tile Tools / Blend Emboss
11
layers -> merge -> merge down
12
effects -> distortion effects -> pixelate
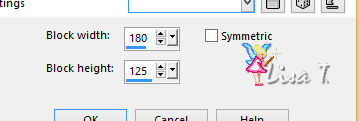
13
effects -> edge effects -> enhance
14
effects -> edge effects -> enhance more
15
layers -> duplicate
16
selections -> load-save selection -> from alpha channel
-> selection 1
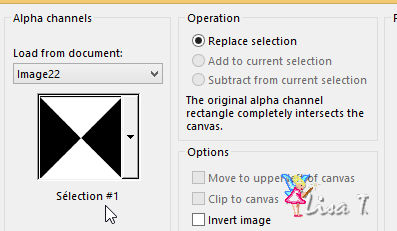
17
DELETE (delete key of your keyboard)
no visible difference ! don’t worry
18
selections -> select none
19
effectzs -> plugins -> Plugin Galaxy / Instant Mirror
/ Quadrant SE
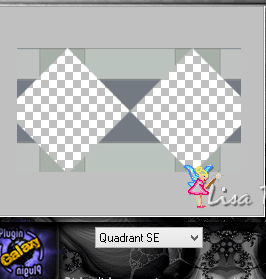
20
highlight background layer
21
selections -> load-save selection -> from alpha channel
-> selection 2
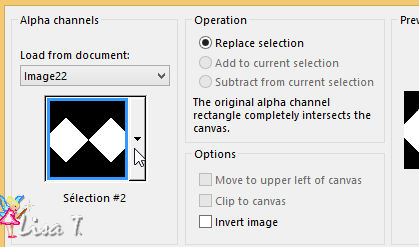
22
adjust -> blur -> gaussian blur -> 30
23
effects -> plugins -> Penta.com / Jeans

24
keep selection active
highlight top layer
25
layers -> new raster layer
26
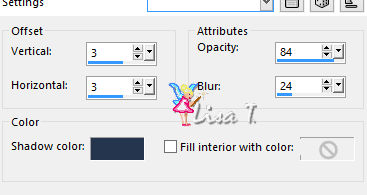
effects -> 3D effects -> cutout / color 3
27
effects -> 3D effects -> cutout / color 3 -> changing
(3) by (-3)
28
selections -> select none
29
highlight background layer
30
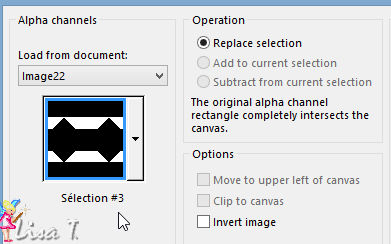
selections -> load-save selection -> from alpha channel
-> selection 3
31
selections -> promote seletion to layer
32
layers -> arrange -> bring to top
33
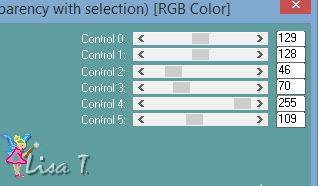
effects -> plugins -> Carolaine and Sensibility /
CS Reflexion
34
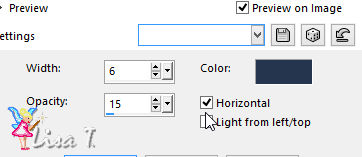
effects -> texture effects -> blinds / color 3
35
effects -> plugins -> Penta.com / VTR
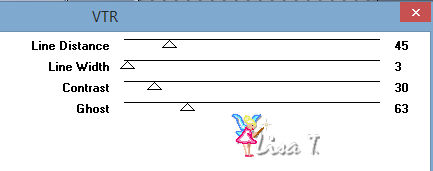
your work looks like this (maybe slightly different if
you use different colors)
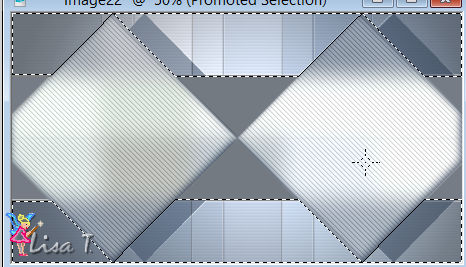
36
selections -> select none
37
layers -> merge -> merge visible
38
effects -> plugins -> Simple / Top Left Mirror /
default settings
39
layers -> duplicate
40
effects -> plugins -> Simple / Diamonds / default
settings
41
blend mode of the layer : Multiply - opacity :
77%
42
effects -> distortion effects -> wave

43
effects -> image effects -> seamless tiling
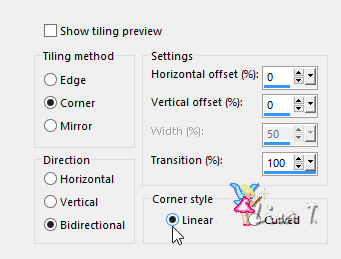
44
effects -> image effects -> seamless tiling
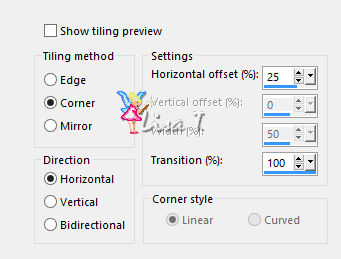
45
layers -> new raster layer
46
edit -> copy « © Alice Kelley (94).jpg »
47
back to your work -> selections -> select all
48
edit -> paste into selection
49
selections -> select none
50
effects -> plugins -> FM Tile Tools / Blend Emboss
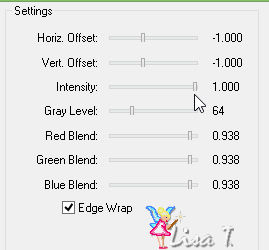
51
blend mode of the layer : Luminance (Legacy) - opacity :
20%
52
layers -> new raster layer
53
flood fill with color 1
54
open mask « Gabry Gabry-Mask 5-16.jpg » and
minimize it to tray
55
back to your work
56
layers -> new mask layer -> from image
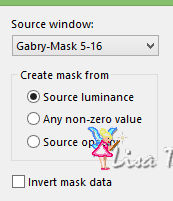
57
layers -> merge -> merge group
58
opacity of the layer : 50%
59
adjust -> sharpness -> sharpen more
60
layers -> merge -> merge visible
61
layers -> duplicate
62
effects -> plugins -> Mura’s Meister / Perspective
Tiling
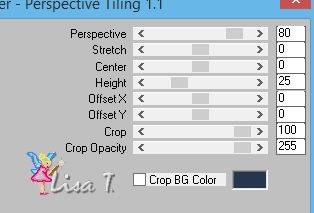
63
layers -> duplicate
64
highlight original layer underneath
65
adjust -> blur -> motion blur
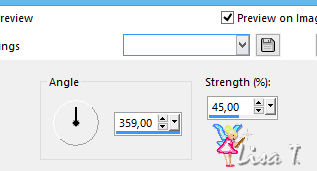
66
blend mode of the layer : Multiply - opacity :
60%
67
highlight background layer
68
image -> resize
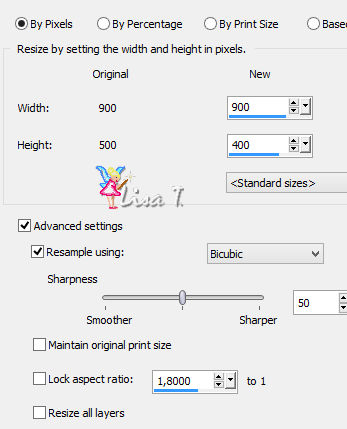
69
highlight top layer
70
edit -> copy « alain_decor1.png »
71
back to your work
edit -> paste as new layer
if you changed colors, set blend mode to « Luminance
(Legacy) »
72
adjust -> add-remove noise -> add noise
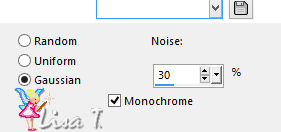
73
edit -> copy « alain_texte »
74
back to your work
edit -> paste as new layer
75
effects -> image effects -> offset
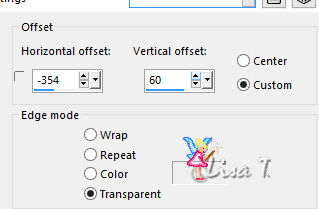
76
layer’s opacity : 50%
77
image -> add borders -> 2 pixels color 3
78
image -> add borders -> 5 pixels color 1
79
image -> add borders -> 2 pixels color 3
80
image -> add borders -> 50 pixels color 1
81
image -> add borders -> 2 pixels color 3
82
image -> add borders -> 5 pixels color 1
83
image -> add borders -> 2 pixels color 3
84
open « alain_decor2 »
edit -> copy
85
back to your work
edit -> paste as new layer
86
open « libellulegraphisme_alain »
erase the watermark
87
edit -> copy
88
back to your work -> edit -> paste as new layer
89
image -> resize -> 70% -> uncheck « resize
all layers »
90
adjust -> sharpness -> sharpen
91
move layer to the left
92
effects -> plugins -> Alien Skin Eye Candy 5 - Impact/
Perspective Shadow
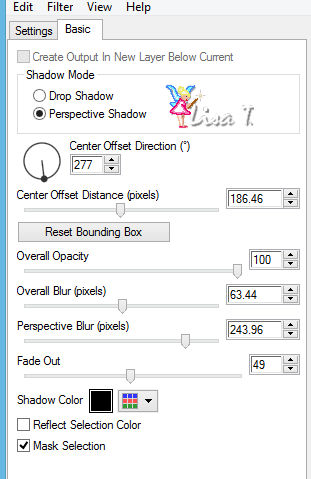
93
open « bulles-gina-relaxed.pspimage »
edit -> copy
94
back to your work -> edit -> paste as new layer
95
image -> resize -> 75% -> uncheck « resize
all layers »
96
move layer to the right
97
layers -> duplicate
98
highlight original layer
99
adjust -> blur -> gaussian blur -> 5
100
blend mode of the layer : Screen (or other)
101
highlight top layer
102
opacity of the layer : 70%
103
edit -> copy « alain_texte2.png »
104
back to your work
edit -> paste as new layer
105
effects -> image effects -> offset
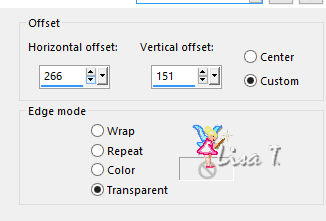
106
apply your watermark
107
image -> add border -> chack « symmetric » -> 1
pixel black
108
file -> save as... type .jpeg
your tag is finished

to write to Libellule


If you create a tag with this tutorial, don’t hesitate
to send it to Libellule
She will be very glad to see it and present it in her galery
at the end of the tutorial on her site
If you want to be informed about Libellule’s new
tutorials and work
subscribe to her newsletter


my tag with my tube


cretaed by Nadège Nadège


Back to the boards of Libellule’s tutorials
board 1  board
2 board
2  board
3 board
3 

|