Adeline

Original tutorial can be found here

I am member of TWInc
this tutorial is protected


This tutorial was created using PSPX2
but it can be realized with other versions

General conditions
This tutorial is an original and personal design of Libellule.
any resemblance with another one would be pure coincidence.
You can share your creations, create signatures for your friends or for groups
but you are not allowed to use this tutorial in your site, or claim it as yours
You must indicate the copyrights of the artists.
Thank you to respect the rules.

If you are interested by translating this tutorial in another language
thank you to ask Libellule.
a link towards her site will be asked

It is strictly forbidden to use the material provided for your tutorials
and to share it in groups or forums

Libellule has received the authorizations to use the tubes she provides
see here


Implementation
install the plugins
copy the selections into the folder “selection” of “My PSP Files”
open the tubes and duplicate them. Work with the copies, close the originals
Colors
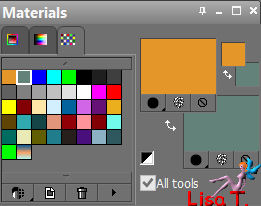
color 1/foreground color/#e4962a
color 2/background color/#63827a

you can change the colors of course
choose vivid colors to enhance the elements
prepare the colors in the materials palette
Filters
Unlimited 2 (Photo Agin kit & paper Textures)


Material
1 color palette - 1 tube by Libellule - 3 selections - 1 doodle tube by Maëlle
2 tubes « flowers » and « leaves » by Nicole _ 1 scrap kit by Gwyneth (her site is no longer active, alas)


Use the pencil to follow the steps
left click to grab it
 |

Realization
Step 1
open the scrap kit « gwyn_kit16 », keep it opened , you will need it from time to time
activate « raster 3 » - edit/copy
Step 2
open a new transparent raster layer 800 *600 pixels
selections/select all
edit/paste into selection
selections/select none ( or press the keys « CTRL + D » together on your keyboard)
Step 3
adjust/hue and saturation/colorize

Step 4
layers/new raster layer/fill with color 1
Step 5
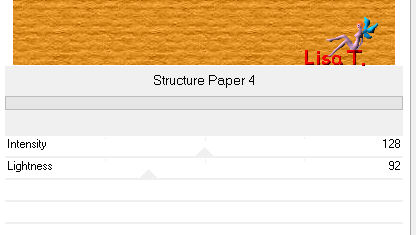
effects/plugins/Unlimited 2/Paper Textures/Structure Paper 4/default settings
Step 6
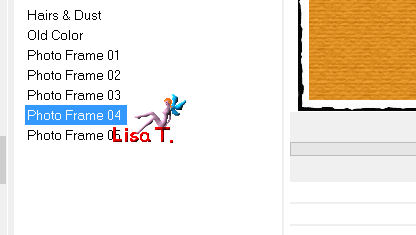
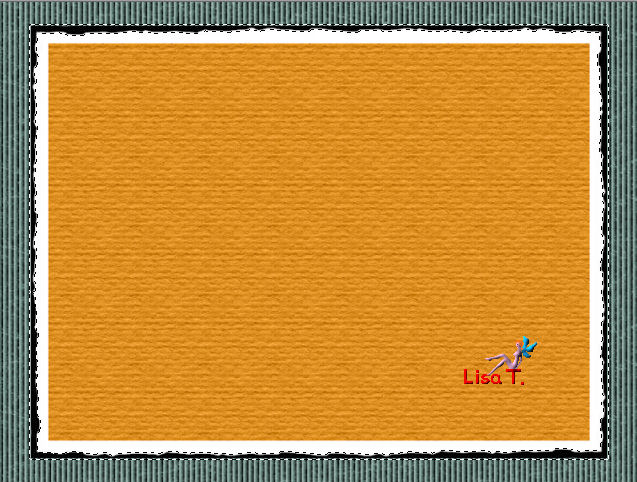
effects/plugins/Unlimited 2/Phot Agin Kit/Photo Frame 04/default settings
Step 7
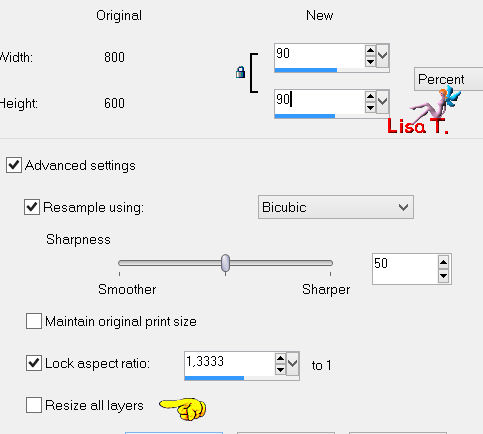
image/resize/uncheck « resize all layers »/90%
Step 8
activate the magic wand tool tolerance 3 and feather 2

according to the version of PSP you use, you might have to change the tolerance. Try other settings.
select the black border, clicking all around while locking the shift key of your keyboard
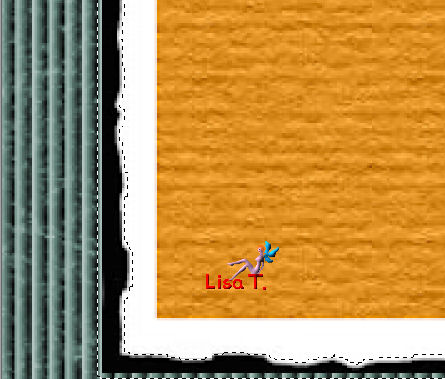
edit/cut 2 or 3 times (or press the delete key of your keyboard)
Step 9
effects/3D effects/drop shadow
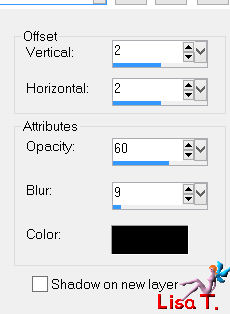
and again, changing (2) by (-2)
Step 10
layers/new raster layer
activate the tube « nicole-fleur2-2012 »
edit/copy
selections/load selection from disk/find the selection « adeline_libellule1 »
edit/paste into selection
selections/select none (ctrl + D)
don’t close the tube, you will need it later
Step 11
effects/plugins/Unlimited 2/Paper Textures/Structure Paper 4/default settings

layers/merge/merge down
Step 12
activate the scrap kit, and activate « raster 1 »
edit/copy - back to your work
Step 13
selections/load selection from disk/selection « adeline_libellule2 »
layers/new raster layer
edit/paste into selection
selections/select none (ctrl + D)
Step 14
in the layers palette, set the opacity on 92%
Step 15
adjust/hue and saturation/colorize

Step 16
activate the scrap kit, and « raster 5 » (the ribbon)
edit/copy - back to your work - edit/paste as new layer
image/free rotate/90°
Step 17
effects/image effects/offset
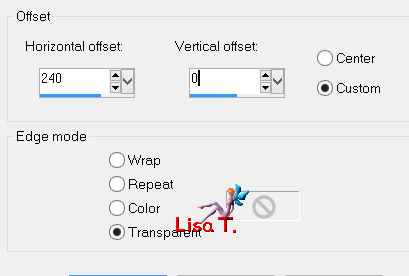
Step 18
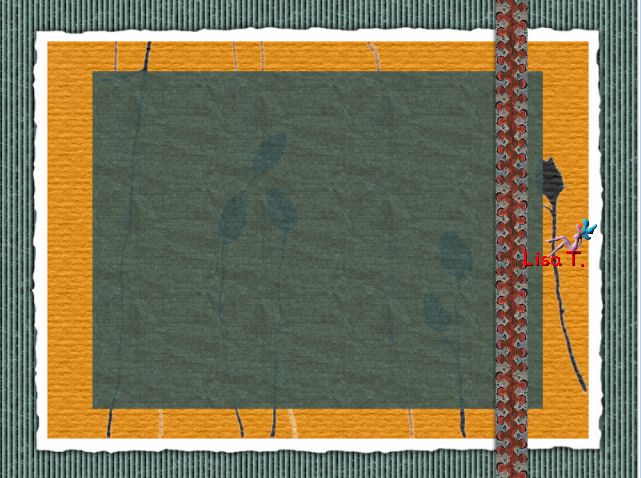
your tag looks like this
Step 19
we are going to delete the part of the ribbon we don’t need
selections/load selection from disk/selection « adeline_libellule3 »
edit/cut (or press the delete key of ypur keyboard)
selections/select none (ctrl + D)
Step 20
layers/merge/merge down
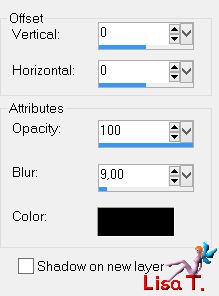
effects/3D effects/drop shadow
Step 21
layers/duplicate - image/mirror
Step 22
activate the tube « nicole-fleur2-2012 »
edit/copy - back to your work
Step 23
selections/load selection from disk/selection « adeline_libellule2 »
layers/new raster layer
edit/paste into selection
selections/select none (ctrl + D)
Step 24
set the blend mode of the layer on « difference » (or other)
layers/merge/merge down
Step 25
image/free rotate/left/10°
Step 26
activate the tube « nicole-feuille1 -2012 »
edit/copy the upper layer (the opened layer) -back to your work - edit/paste as new layer
don’t move it
set the blend mode of the layer on « burn » (or other)
Step 27
activate the tube « 2014EXCLUSIF-maelledreams-doodleDeco3 »
erase the watermark with the freehand selection
edit/copy - back to your work - edit/paste as new layer
Step 28
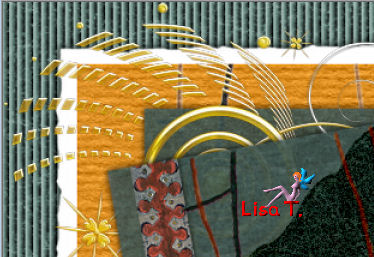
image/flip
place the top of the tube in the top left corner
layers/arrange/move down twice
Step 29
in the layers palette, activate the top layer
activate the scrap kit and copy « raster 9 » (the clip)
Step 30
back to your work - edit/paste as new layer
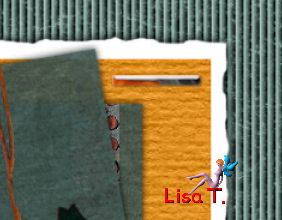
image/resize/uncheck « resize all layers »/80% and place the clip on the top right
Step 31
layers/duplicate - image/mirror - image/flip
Step 32
activate the scrap kit and copy « raster 8 » (the cross)
step 33
back to your work - edit/paste as new layer
image/resize/uncheck « resize all layers »/80% and place the cross on the side
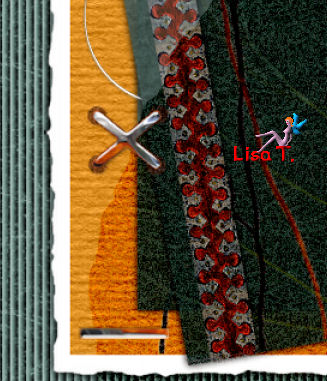
Step 34
layers/duplicate - image/mirror - image/flip
Step 35
activate the tube « libellulegraphisme-danicla-uhlig » (or one of your choice)
edit/copy - back to your work - edit/paste as new layer
Step 36
image/resize/uncheck « resize all layers »/65% and move it to the right
Step 37
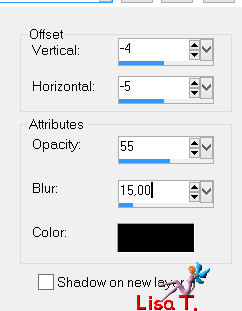
effects/3D effects/drop shadow
Step 38
image/add borders/2 pixels/color 1
Step 39
image/add borders/2 pixels/color 2
Step 40
apply your signature
layers/merge/merge all (flatten)
file/save as... type jpeg

to write to Libellule


If you create a tag with this tutorial, don’t hesitate to send it toLibellule
She will be very glad to see it and present it in her galery
at the end of the tutorial on her site


If you want to be informed about Libellule’s new tutorials and work
join her newsletter


My tag with my tube

Back to the board of Libellule’s tutorials


|