Lena
tag with Animabelle's tubes
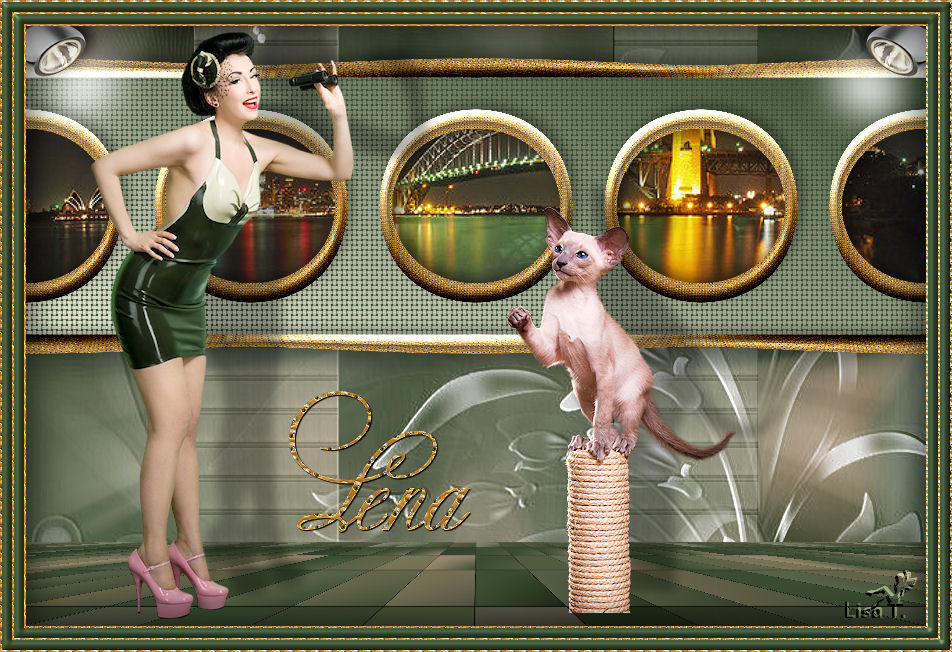
Tag with my tubes

You will find the original tutorial here :


This tutorial is a personal creation.
Any resemblance with another one would be only pure coincidence.
It is stricly forbidden to modify images, to change their name or take off the matermarks,
To present them on your sites or blog,
To share them in groups,
to make a bank of images, or to use them on lucrative purposes.

Thank you to respect Animabelle’s work and the tubers work.
Don’t hesitate to warn her if you have any trouble with this tutorial.


Material
2 tubes – Animabelle (not provided)
1 mask Tine http://espace.tine.free.fr/masques/masques.htm
a small image , format JPEG
1 selection


Animabelle’s important note
Tubers have been warned that disrespectful and dishonest bloggers come steeling our tubes
they grab them into the folders of material we use to provide for our tutorials.
These people rename and convert the tubes to png type,
and then they offer them for download in their blogs, pretending they have done the work.

To protect my work, I am therefore forced to no longer provide my tubes with the material.
Honest people will understand my way of doing, I hope.
I thank them for their understanding.
Very important Tip:
never take your tubes on these blogs, because most of the time all of these tubes are stolen tubes.
Always make sure that the tubes you take have been signed by their authors.
Thank you.
|
Filters used
It@lian Editors effects
BackgroundManiac
Emboss at Alpha
User Defined Filter
Toadies
Mura’s Meister
Alin Skin-Eye Candy 5-Textures
Bordermania

“Renée Graphisme” filters, with her kind permission


translator’s note : I use PSP17, but this tutorial can be realized with another version.
I translate exactly the indications of Animabelle
I use my own tubes and colors to create my tag

Colors used by Animabelle
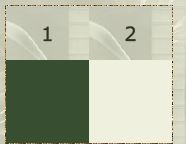
Don't hesitate to change the colors and the blend mode of the layers, and the shadows,
according to your tubes and images.

Important
Open all images in PSP, duplicate them and close the originals.
work with the copies

use the pencil to follow the steps
left click to grab it


Execution
Step 1
open a new transparent raster layer *** 900 X 600 pixels
flood fill with color 1
layers/new raster layer
selections/select all
copy/paste into selection the character tube
selections/select none
effects/image effects/seamless tiling/default settings
adjust/blur/radial blur/Zoom

layers/merge/merge down
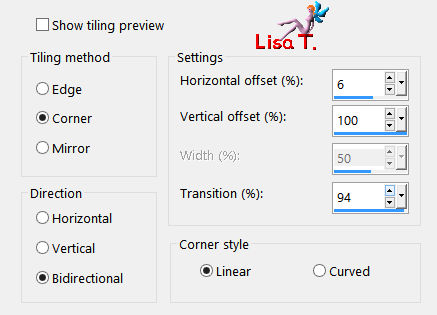
effects/image effects/seamless tiling
Step 2
layers/duplicate
image/free rotate/90 degrees right (disable the 2 bottom boxes)
image/resize/disable “resize all layers”/70%
effects/It@lian Editors effects/effeto fantasma

Step 3
selections/load-save selection/from disk
choose selection (lena1_tuto_animabelle.PspSelection)
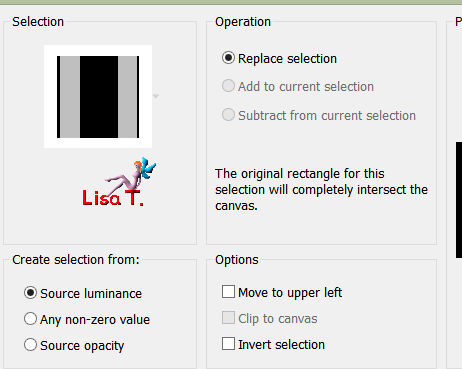
effects/plugins/BackGroundManiac/Coarsed Embroidery
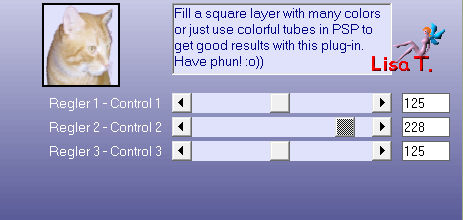
selections/select none
effects/plugins/Mura’s Seamless/Emboss at Alpha/default settings
Step 4
layers/new raster layer
flood fill with color 2
layers/new mask layer/from image
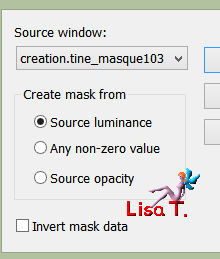
layers/merge/merge group
effects/user defined filter/emboss 3
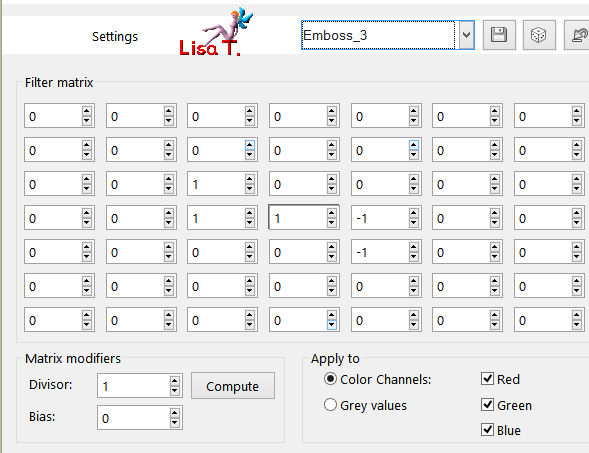
image/mirror
Step 5
activate the bottom layer (raster 1)
layers/duplicate
layers/arrange/bring to top
effects/plugins/Toadies/Plain Mosaic Blur
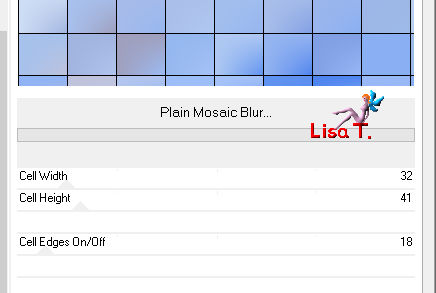
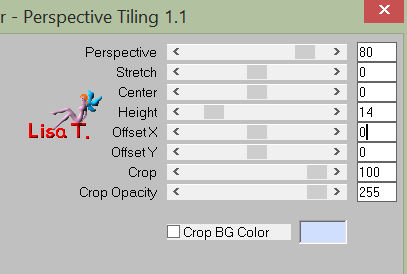
effects/plugins/Mura’s Meister/Perspective Tiling
Step 6
layers/new raser layer
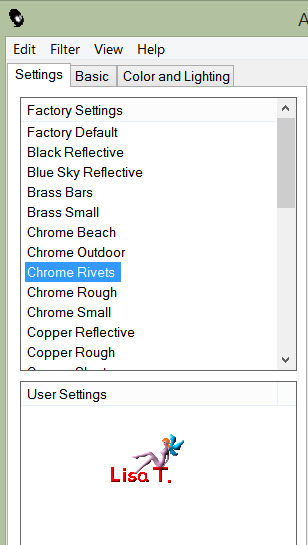
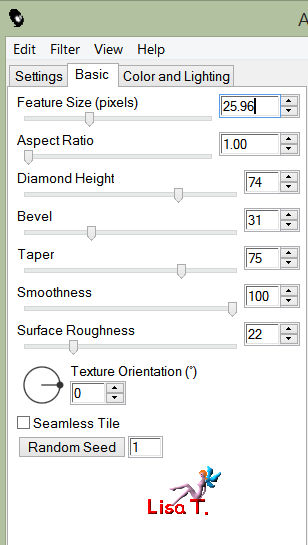
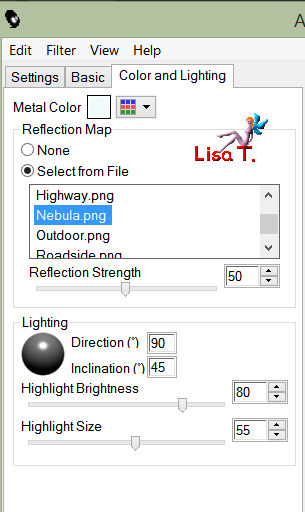
effects/plugins/Alien Skin-Eye Candy 5 – Textures/Diamond Plate
effects/plugins/Bordermania/Ellipse
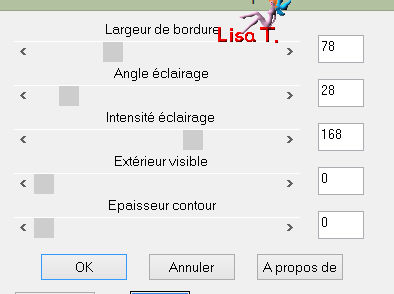
image/resize/disable « resize all layers »/80%
Selections/select all
selections/float
selections/modify/contract/60 pixels
edit/cut
selections/select none
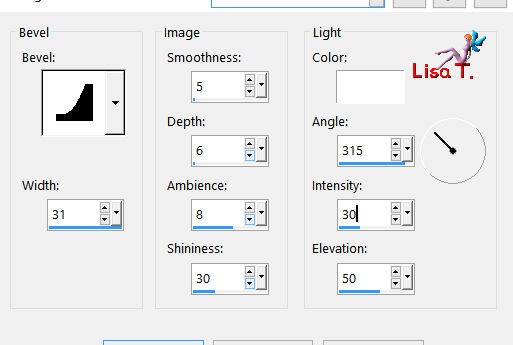
effects/3D effects/inner bevel
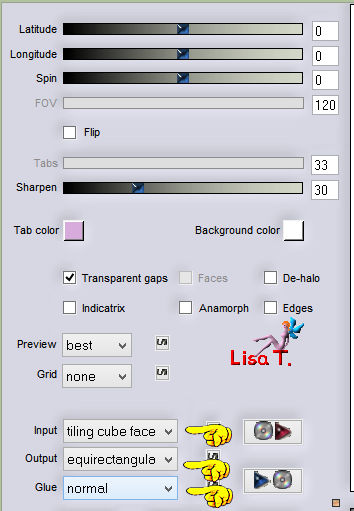
effects/plugins/Flaming Pear/Flexify 2
effects/image effects/offset
0 / 120 / custom / transparent
Step 7
activate the selection tool/rectangle/custom selection

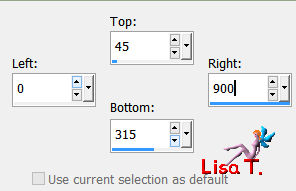
layers/new raster layer
layers/arrange/move down
flood fill with the following gradient (colors 1 and 2)
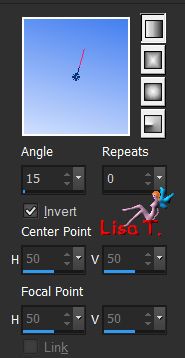
selections/select none
effects/texture effects/weave/color 1 for both settings
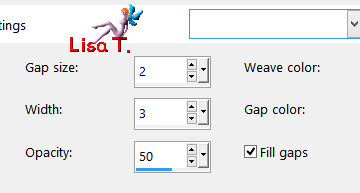
Step 8
activate the upper layer (raster 2)
activate the magic wand tool with the following settings

select the inside of the 3 circles and the 2 semi-circles
selections/modify/expand/4 pixels
activate the layer underneath (raster 3)
edit/cut
effects/3D effects/cutout
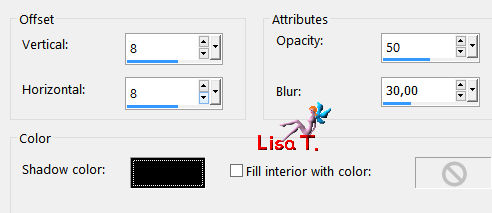
selections/select none
Step 9
activate the layer underneath (copy of raster 1)
layers/new raster layer
activate the selection toot/rectangle/custom selection

copy the landscape, and paste into selection
adjust/sharpness/sharpen (if necessary)
selections/select none
Step 10
activate the top layer (raster 2)
effects/3D effects/drop shadow
-6 / 6 / 30 / 15 / black
layers/merge/merge down (2 times) (the 3 layers of the band of the portholes)
effects/3D effects/drop shadow
0 / 0 / 70 / 60 / black
Step 11
copy and paste the image of the lady as new layer
image/resize/70% (disable « resize all layers »)
move to the left (see final result)
effects/3D effects/drop shadow
(-22) / 76 / 30 / 15 / black
Step 12
copy and paste the tube of the cat as new layer
image/mirror/mirror horizontal
image/resize/50% (disable « resize all layers »)
adjust/sharpness/sharpen
move to the right (see final result)
effects/3D effects/drop shadow
(-22) / 46 / 30 / 15 / black
Step 13
copy/paste as new layer the tube of the spot (spot_tuto_lena_animabelle.pspimage)
effects/image effects/offset

effects/3D effects/drop shadow
(-6) / 6 / 80 / 20 / black
again, drop a new shadow (to make a light effect)
39 / 30 / 100 / 55 / white
layers/duplicate
image/mirror/mirror horizontal
Step 14
layers/merge/merge all (flatten)
selections/select all
effects/3D effects/cutout/black
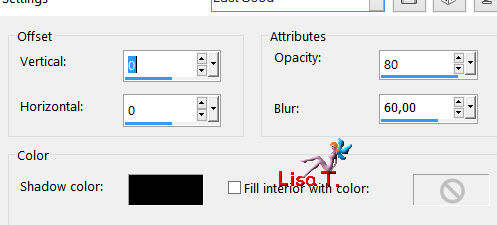
selections/select none
Step 15
image/add borders/26 pixels/color 1
layers/new raster layer
effects/plugins/Alien Skin/Eye Candy 5 – Textures/Diamond Plate
(same settings as before)
selections/select all
selections/modify/contract/2 pixels
edit/cut
selections/modify/contract/10 pixels
effects/plugins/Alien Skin/Eye Candy 5/Textures/Diamond Plate
(same settings as before)
selections/modify/contract/2 pixels
edit/cut
selections/modify/contract/10 pixels
effects/Alien Skin/Eye Candy 5/Textures/Diamond Plate
(same settings as before)
selections/modify/contract/2 pixels
edit/cut
selections/select none
adjust/sharpness/sharpen
Step 16
layers/merge/merge all (flatten)
activate the magic wand tool and select the 2 large borders (10 pixels)
effects/3D effects/inner bevel
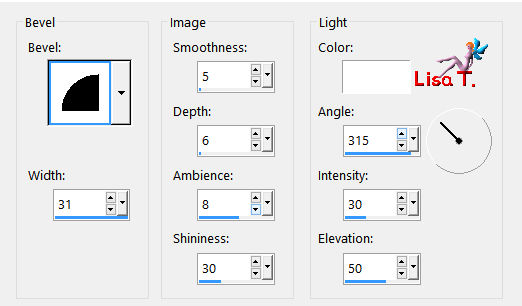
selections/select none
Step 17
open a new raster background, transparent, 500 X 500 pixels
effects/Alien Skin/Eye Candy 5/Textures/Diamond Plate
(same settings as before)
in the materials palette, set this tile as « pattern » (foreground & background)
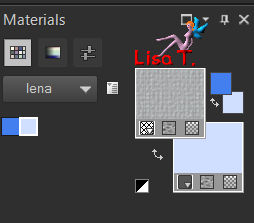
activate the text tool


with the police you like (Animabelle chose Copper Alt Caps Expert)
write the word “Lena”
layers/convert to raster layer
activate the move tool, and place the text properly
effects/3D effects/drop shadow
1 / 1 / 100 / 1 / black
apply your watermark and save as... type JPEG, resize eventually.

Don't hesitate to write to Animabelle if you have any trouble with her tutorial
To be informed about her new tutorials, join her NewsLetter

If you created a tag with her tutorial and wish it to be shown,
send it to Animabelle !
It will be her pleasure to add it to the gallery at the end of the tutorial
don’t resize your tag under 800 pixels width if you want her to present your tag


Back to the board of Animabelle's tutorials


|