

You will find the original tutorial here
:
Thank you Laurette for your permission to translate your
work
This tutorial is a personal creation.
Any resemblance with another one would be only pure coincidence.
It is stricly forbidden to modify tubes, to change their
name or take off the matermarks,
To present them on your sites or blog,
To share them in groups,
to make a bank of images, or to use them on lucrative purposes.

Thank you to respect Laurette’s work and the tubers
work.
Don’t hesitate to warn me if you have any trouble
with this translation,
and I’ll try to fix the problem as quickly as I can

Laurette works with PSPX9 and I work with PSP 2019
you can follow this tutorial with another version of PSP,
but the result might be slightly different
don’t hesitate to change blend modes and opacities
of the layers to match your personal colors and tubes
place the tools provided into the appropriate folders of
My COREL PSP general folder
to import presets, double-click on them
this tutorial is the property of Luarette, and the translation
is my property

Supplies
1 alpha layer « Sybile »
1 preset emboss 3
2 masks
2 decoration tubes
1 Text
1 texture

some tubes are not provided (licensed
tubes) - you can puchase them HERE
duplicate all the tubes and decorations, and alpha layers,
and work with the copies to preserve originals
open the mask(s) and minimize to tray
place selections, patterns, gradients..... into the dedicated
folders of My Corel PSP General folder
double click on presets to install (or import)
TIP 1 -> if you don’t want to install
a font -->
open it in a software as « Nexus Font » (or
other font viewer software of you choice)
as long as both windows are opened (software and font),
your font will be available in your PSP
TIP 2 -> from PSPX4,
in the later versions of PSP the functions « Mirror » and « Flip » have
been replaced by -->
« Mirror »has become --> image => mirror => mirror
horizontal
« Flip » has become --> image => mirror => mirror
vertical

Plugins needed
Effets /Modules externes / Mehdi / Wavy Lab 1.1
Effets/ Modules Externes/ Texture / Effets mosaïques
Effets/ Modules Externes/ DSB Flux - Linear Transmission
Filter Options
Effets / Modules Externes / Toadies - Weaver,
Effets / Modules / Filters Unlimited 2.0 - Distortion Filters
- Scanline Shifter
Effets / Modules externes / MuRa's Meister -Perpective
Tiling 1.1
Effets/ Modules externes / MuRa's Meister / Emboss at Alpha
Effets / Modules externes / MuRa's Meister / Copies
Effets / Modules externe / Simple / Diamonds
Effets / Modules externe / Grafic Plus / Cross Shadow

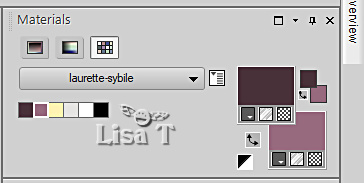
colors

set colors 1 and 2 as FG and BG colors
into the materials palette
 
Use the pencil to mark your place
along the way
hold down left click to grab and move it
 |
 
1
open the copy of the alpha layer
effects => plugins => Mehdi => Wavy Lab 1.1 => colors
2 / 6 / 3 / 4
2
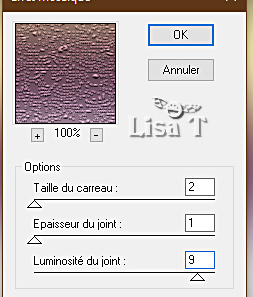
effects = > plugins => Textures => Effet Mosaïque
3
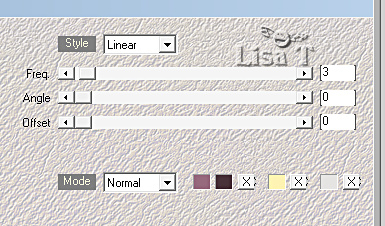
effects => plugins => DSB Flux / Linear Transmission
Filter Options

4
effects => plugins => Toadies => Weaver / default
settings
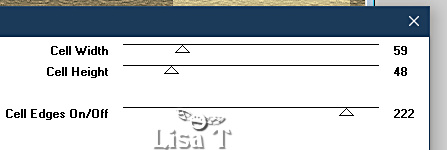
5
effects => plugins => Unlimited 2 => Distortion
Filters / Scanline Shifter
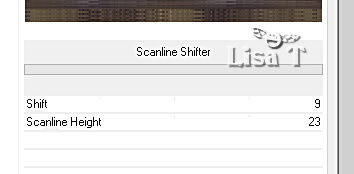
adjust => sharpness => sharpen
edit => repeat => sharpen
6
copy / paste the « Deco_fond1 » tube
as new layer
effects => image effects => seamless tiling => default
settings
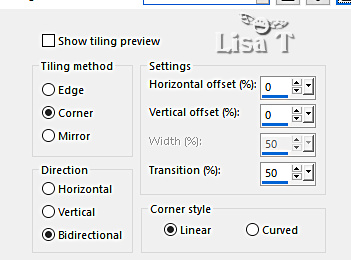
blend mode of the layer : Hard Light
layers => merge => merge down
7
layers => duplicate
selections => load-save selection => from alpha channel
=> selection # 1
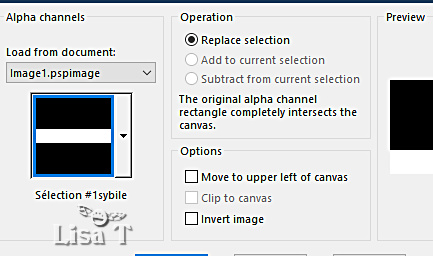
selections => promote selection to layer
8
effects => plugins => Mura’s Meister => Perspective
Tiling
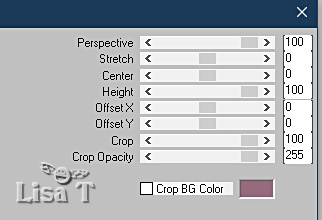
effects => plugins => Used Defined Filter => Emboss
3
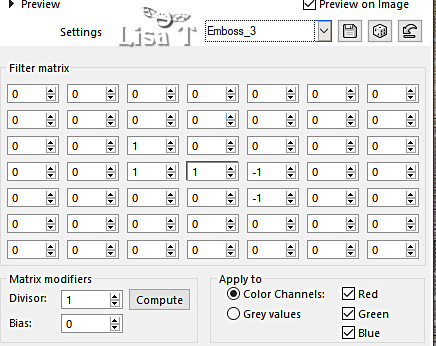
selections => select none
layers => merge => merge visible
9
layers => new raster layer / Raster 1
effects => plugins => Mehdi => Wavy Lab 1.1 => colors
1 / 6 / 3 / 4

layers => new mask layer => from
image
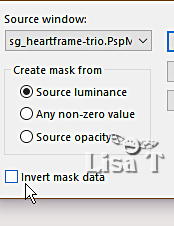
adjust => sharpness => sharpen
layers => merge => merge group
10
selections => load-save selection => from alpha channel
=> selection # 3
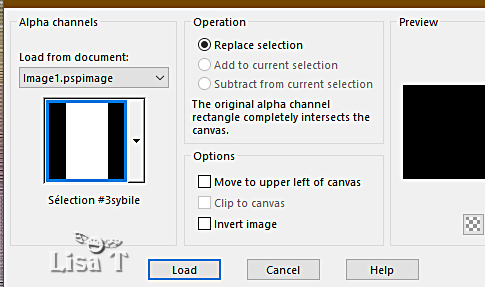
hit the DELETE key of your keyboard
selections => select none
11
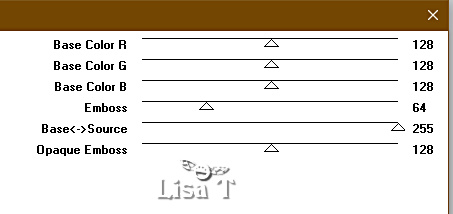
effects => plugins => Mura’s Seamless => Emboss
at Alpha => default settings
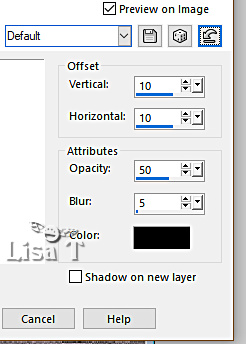
effects => 3D effects => drop shadow => => default
settings => 10 / 10 / 50 / 5 / black
12
layers => new raster layer / Raster 1
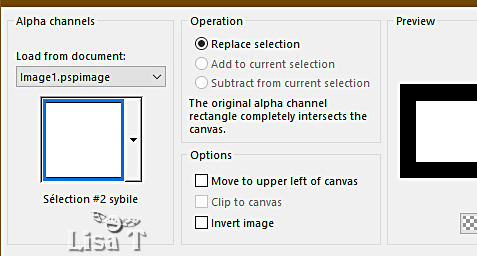
selections => load-save selection => from alpha channel
=> selection # 2
open the « Texture » tube (Audrey
15)
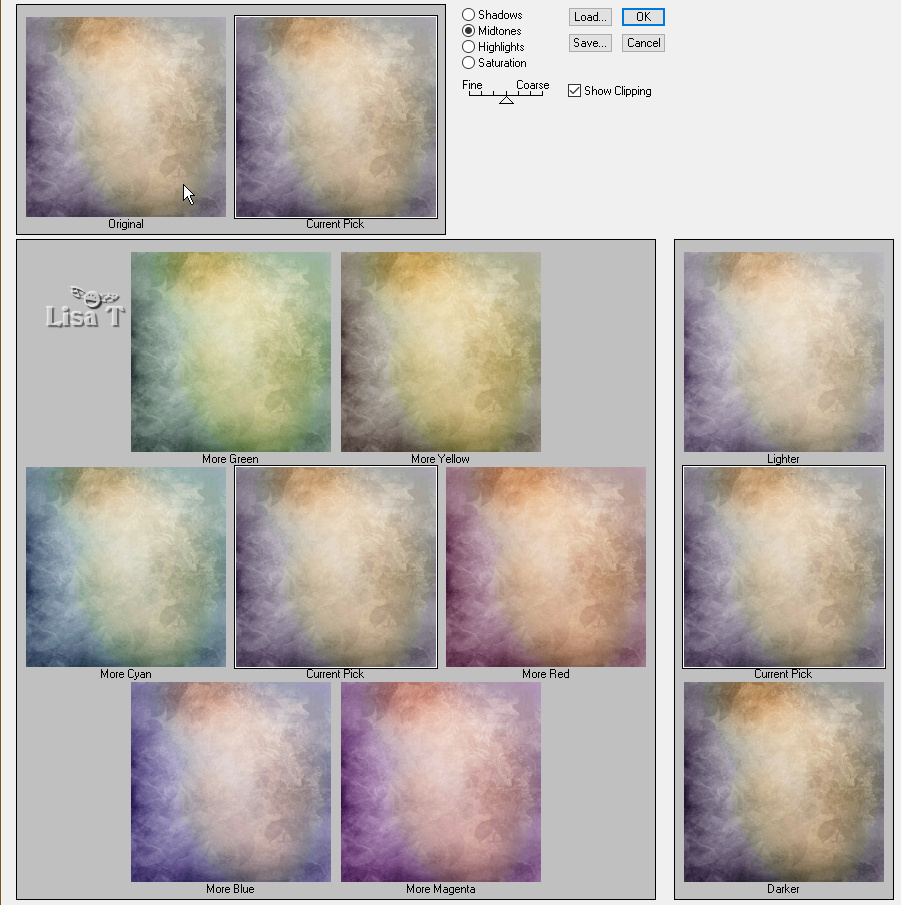
colorize if necessary => effects => plugins => Adjust
=> Variations
edit => copy
back to your work
edit => paste into selection
copy / paste the fruit basket tube into selection
effects => plugins => Alien Skin Eye Candy 5 Impact
/ Glass
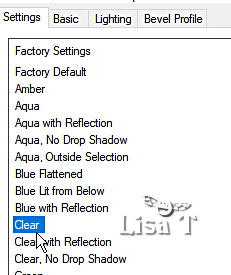
layers => new raster layer / Raster 2
effects => 3D effects => cutout
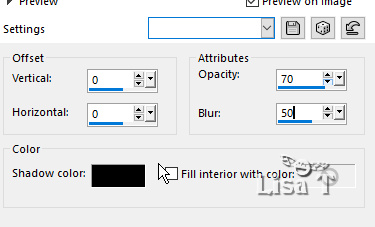
layers => merge => merge down
layers => arrange => move down
selections => select none
highlight top layer
layers => merge => merge down
13
layers => duplicate
image => resize => untick « resize all layers » => 30%
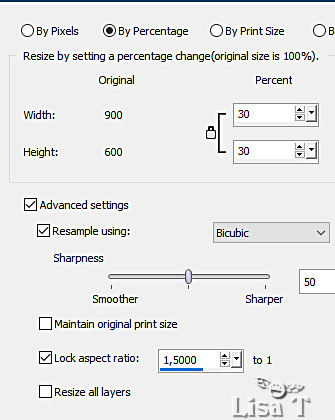
effects => image effects => offset
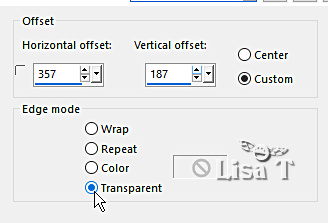
effects => 3D effects => drop shadow => => default
settings => 10 / 10 / 50 / 5 / black
14
layers => duplicate
highlight layer below (copy of Raster 1)
effects => plugins => Mura’s Meister => Copies
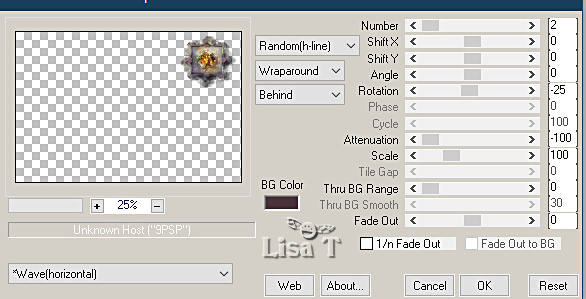
highlight top layer
layers => merge => merge down
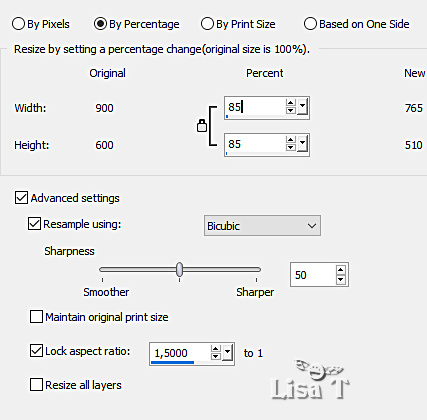
layers => duplicate
image => resize => untick « resize all layers » => 85%
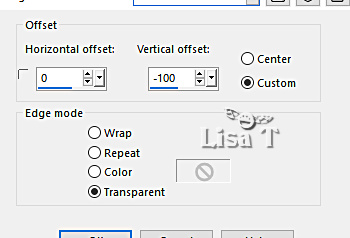
effects => image effects => offset
layers => duplicate
image => resize => untick « resize all layers » => 85%
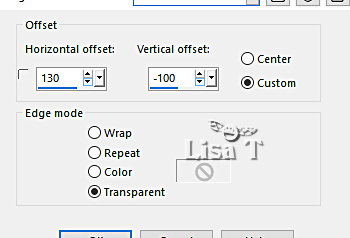
effects => image effects => offset
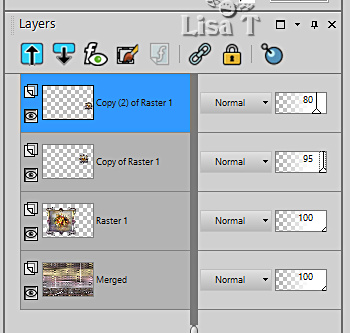
opacity of the layer : 80%
opacity of the layer below : 95%
15
highlight top layer
layers => new raster layer / Raster 2
flood fill with color 4
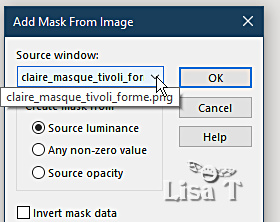
layers => new mask layer => from image
layers => duplicate TWICE
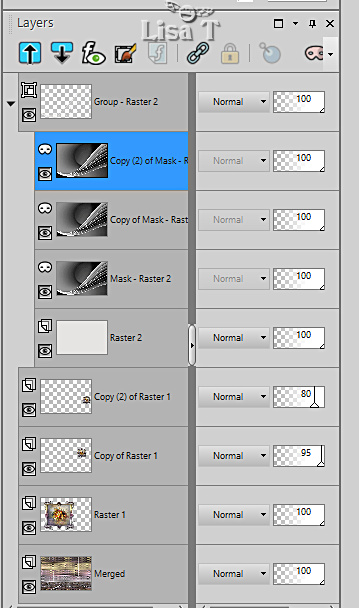
layers => merge => merge group
opacity of the layer : 50%
16
copy / paste the « deco cl 2 » as
new layer
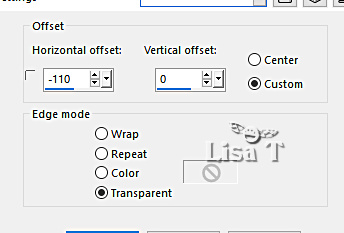
effects => image effects => offset
adjust => sharpness => sharpen
to change the color => see step 12 (Plugin Adjust Variations)
17
image => add borders => tick « symmetric » => ...
1 px white
3 px color 1
1 px white
selections => select all
image => add borders => tick « symmetric » => ...
25 px white
selections => invert
effects => plugins => Mehdi => Wavy Lab 1.1 => colors
1 / 6 / 3 / 4

effects => plugins => Graphic Plus => Cross Shadow
/ default settings
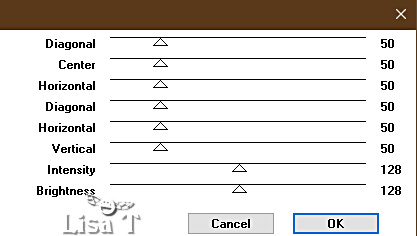
selections => select none
18
image => add borders => tick « symmetric » => ...
1 px white
3 px color 1
1 px white
selections => select all
image => add borders => tick « symmetric » => ...
25 px white
effects => 3D effects => drop shadow => => default
settings => 0 / 0 / 80 / 40 / black
selections => select none
19
image => add borders => tick « symmetric » => ...
1 px color 1
3 px white
1 px color 1
selections => select all
image => add borders => tick « symmetric » => ...
40 px white
selections => invert
effects = > plugins => Simple => Diamonds
effects => reflection effects => rotating Mirror
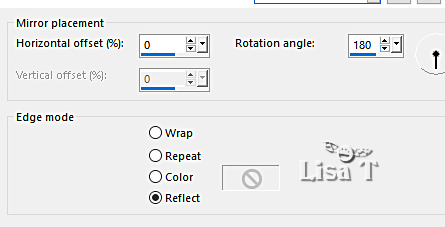
selections => invert
effects => 3D effects => drop shadow => => default
settings => 0 / 0 / 80 / 40 / black
selections => select none
20
image => add borders => tick « symmetric » => ...
1 px color 1
3 px white
1 px color 1
21
copy / paste the text tube as new layer
place bottom left (see final result)
to change the color see step 12 (Adjust Variations)
22
copy / paste the character tube of your choice as new layer
place where you like, drop a nice shadow
image => add borders => tick « symmetric » => 1
px color 1
23
apply your watermark or signature
write your licence number if you used a licenced tube
image => resize => tick « resize all layers » => 900
px width
save your work as... type .jpeg
 
My tag
with my tube and misted image
(available
on my site- topic : special occasions)


Don't hesitate to write to me if you have
any trouble with this translation
If you create a tag (using other tubes than those provided)
with this tutorial
and wish it to be shown, send it to Laurette !
It will be a real pleasure for her to add it to the gallery
at the end of the tutorial


back to the boards of Laurette’s tutorials
board 1


|