
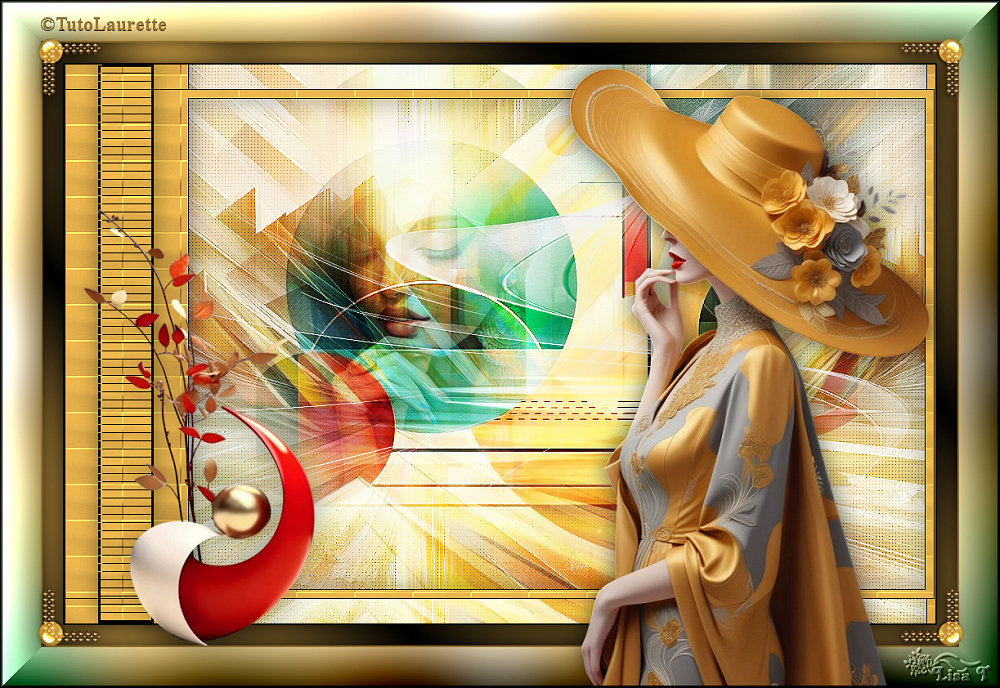
You will find the original tutorial here :

Thank you Laurette for your permission to translate your work
This tutorial is a personal creation.
Any resemblance with another one would be only pure coincidence.
It is stricly forbidden to modify tubes, to change their name or take off the matermarks,
To present them on your sites or blog,
To share them in groups,
to make a bank of images, or to use them on lucrative purposes.

Thank you to respect Laurette’s work and the tubers work.
Don’t hesitate to warn me if you have any trouble with this translation,
and I’ll try to fix the problem as quickly as I can

Laurette and I work with PSP2020 Ultimate
you can follow this tutorial with another version of PSP, but the result might be slightly different
don’t hesitate to change blend modes and opacities of the layers to match your personal colors and tubes
place the tools and materials provided into the appropriate folders of My COREL PSP general folder
to import presets, double-click on them, or import
open the masks and minimize to tray
duplicate all the tubes and decorations, and alpha layers, and work with the copies to preserve originals
install the plugins necessary
this tutorial is the property of Laurette, and the translation is my property

Supplies
tubes and decorations
color palette
masks
Laurette’s watermark


Hints and Tips
TIP 1 -> if you don’t want to install a font -->
open it in a software as « Nexus Font » (or other font viewer software of you choice)
as long as both windows are opened (software and font), your font will be available in your PSP
TIP 2 -> from PSPX4, in the later versions of PSP the functions « Mirror » and « Flip » have been replaced by -->
« Mirror »has become --> image => mirror => mirror horizontal
« Flip » has become --> image => mirror => mirror vertical

Plugins needed
FM Tile Tools / Saturation Emboss
FM Tiles Tool / Blen emboss
DC Spécial / Crystal
Frame foto frame / TRANSPARENT FRAME
AP [Distor] Distor- SwiftMesh
Graphics Plus / Cross Shadow
Filter Unlimited 2.0 /Button & Frame

colors

set FG to color 1 and BG to color 2 (white) in your materials palette
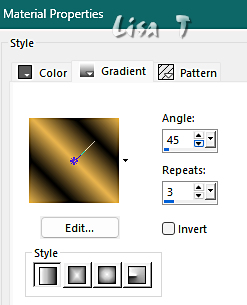
prepare a linear gradient with colors 1 and 4

Use the pencil to mark your place
along the way
hold down left click to grab and move it
 |

1
duplicate the tubes, close the originals and work with the copies
open the masks and minimize to tray
open a new image => transparent => 900 * 600 px
selections => select all
copy / paste the background image into selection (Image de fond)
selections => select none
2
effects => image effects => seamless tiling => default settings
adjust => blur => gaussian blur => 50
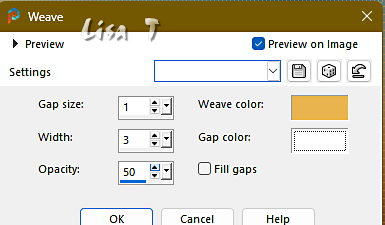
effects => texture effects => Weave / colors 1 and 2
2
layers => new raster layer
flood fill white
layers => new mask layer => from image
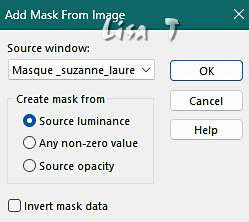
effects => edge effects => enhance
layers => merge => merge group
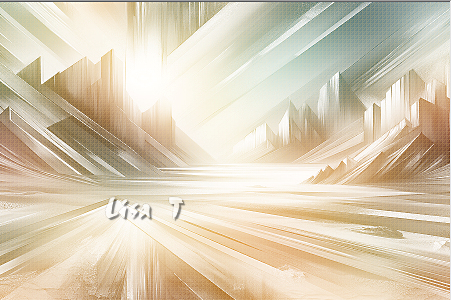
your work looks like this
3
copy / paste « paysage abstrait n°1 » as new layer
don’t move it
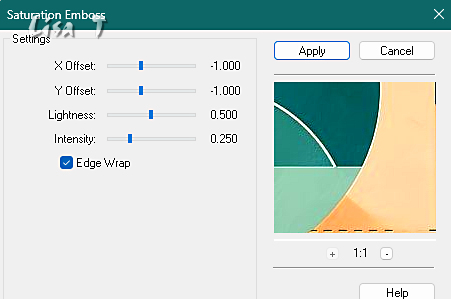
effects => plugins => FM Tile Tools / Saturation Emboss
4
copy / paste « paysage abstrait n°2 » as new layer
don’t move it
blend mode of the layer : Overlay
5
layers => new raster layer
flood fill white
layers => new mask layer => from image
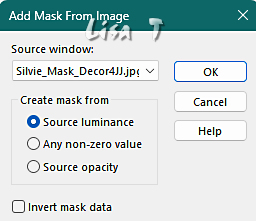
effects => edge effects => enhance
layers => merge => merge group
effects => plugins => FM Tile Tools / Blend Emboss
6
copy / paste « femme floutée » as new layer
don’t forget to erase the watermark
image => resize => untick « resize all layers » => 75%
enable the Pick tool with the following settings, to move the layer acurately => position X : 85 / position Y : -1
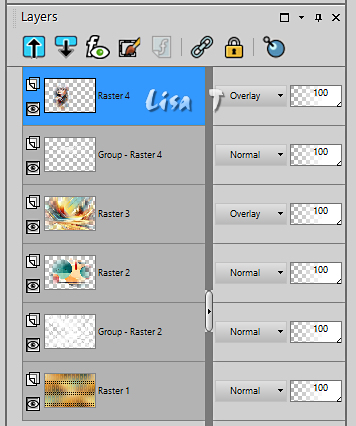
blend mode of the layer : Overlay (or other of your choice)
your layers palette looks like this
7
image => add borders => tick « symmetric » => 1 px black
selections => select all
image => add borders => UNtick « symmetric » =>… / color 1
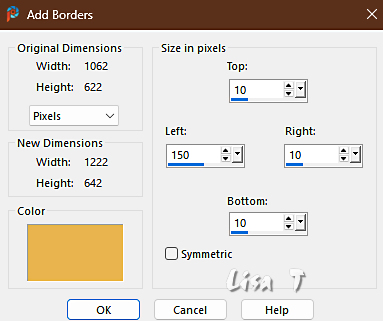
selections => invert
keep selection active
8
effects => texture effect => Texture => choose image 3 (provided)

adjust => sharpness => sharpen
your work looks like this
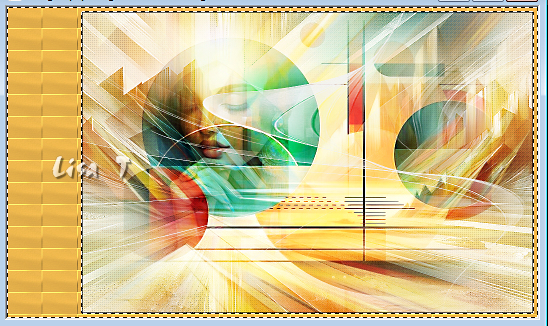
effects => 3D effects => drop shadow => 0 / 0 / 60 / 40 / black
selections => select none
9
image => add borders => tick « symmetric » => 1 px black
selections => select all
image => add borders => tick « symmetric » => 30 px color 1
selections => invert
effects => plugins => DC Special => Crystal

your work looks like this
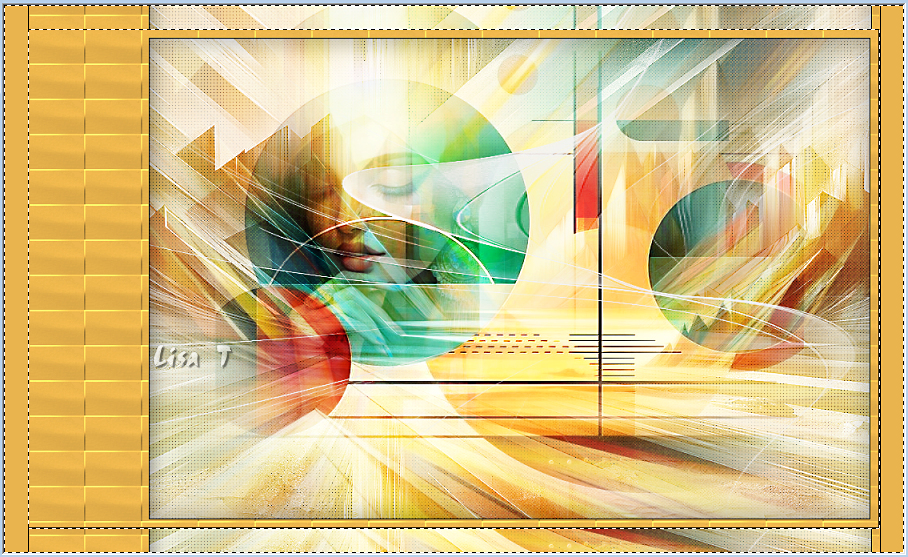
selections => select none
10
enable the Selection tool / custom selection
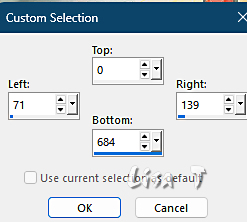
selections => promote selection to layer
effects => plugins => AAA Filters / Transparent Frame
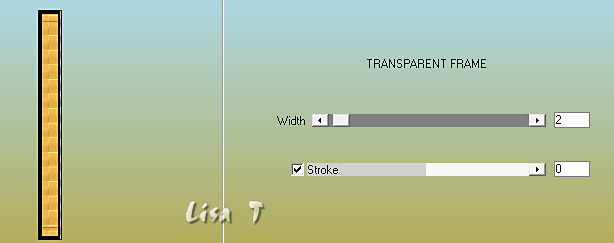
keep selection active
11
effects => plugins => AP Distort => SwiftMesh
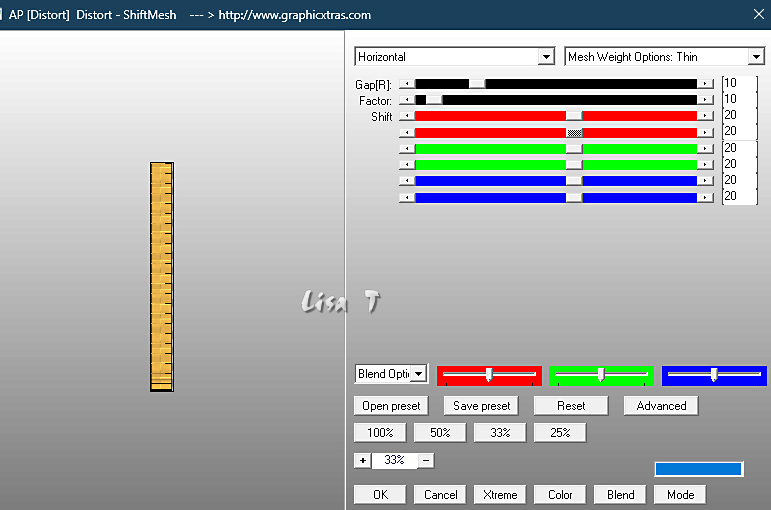
edit => repeat SwiftMesh twice more
effects => 3D effects => drop shadow => 0 / 0 / 40 / 40 / black
selections => select none
12
Highlight bottom layer
layers => convert to raster layer
enable the selection tool / rectangle
draw a selection on either left and right side as shown on screenshot below
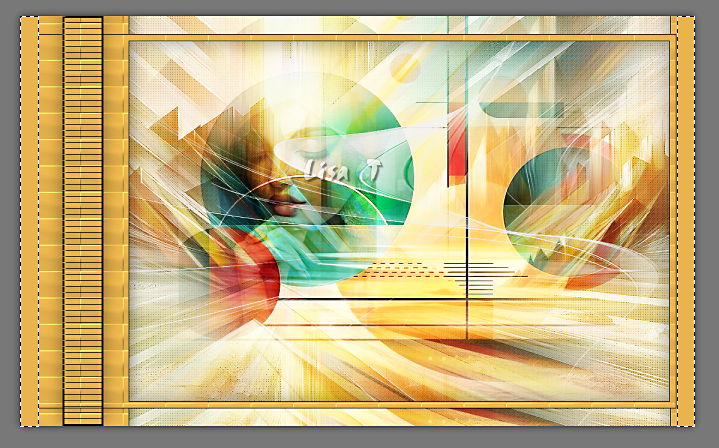
hit the DELETE key of your keyboard
selections => invert
image => crop to selection
your tag and layers palette look like this
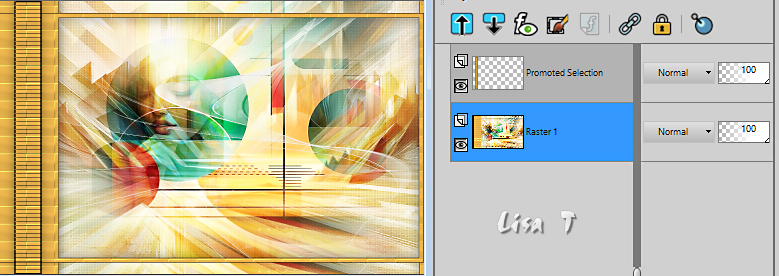
13
image => add borders => tick « symmetric » => 2 px black
selections => select all
image => add borders => tick « symmetric » => 25 px color 1
selections => invert
prepare a linear gradient as at the beginning of this tutorial

flood fill selection with the gradient
effects => plugins => Graphics Plus => Cross Shadow / default settings
selections => invert
effects => 3D effects => drop shadow => 0 / 0 / 80 / 40 / black
selections => select none
14
image => add borders => tick « symmetric » => 2 px color 1
selections => select all
image => add borders => tick « symmetric » => 50 px white
effects => image effects => seamless tiling => default settings
selections => invert
adjust => blur => gaussian blur => 50
effects => plugins => Unlimited 2 => Buttons & Frames / 3 D Glass Frame 2 / default settings
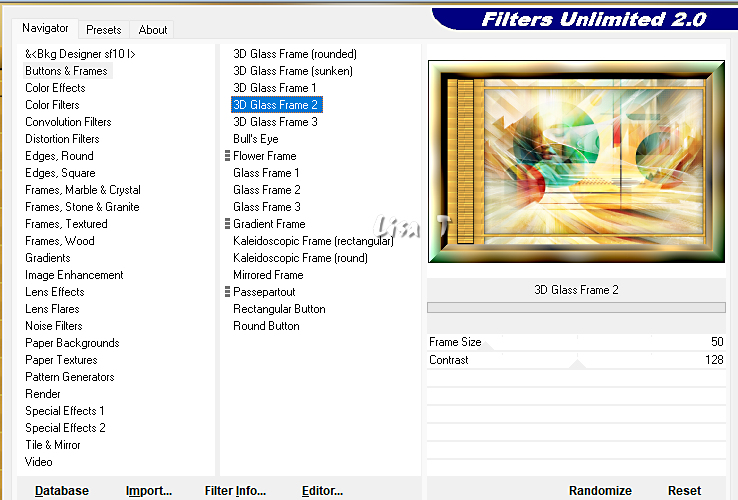
selections => invert
effects => 3D effects => drop shadow => 0 / 0 / 100 / 50 / black
selections => select none
15
copy / paste the character tube as new layer
don’t forget to erase the watermark
image => resize => untick « resize all layers » => 80%
place properly (see final result)
effects => 3D effects => drop shadow => 0 / 0 / 60 / 40 / black
16
copy / paste the flower decoration tube as new layer
don’t forget to erase the watermark
place properly (see final result)
effects => 3D effects => drop shadow => 0 / 0 / 60 / 40 / black
17
copy / paste the corners tube as new layer
don’t move it
effects => 3D effects => drop shadow => 0 / 0 / 60 / 40 / black
18
layers => merge => merge visible
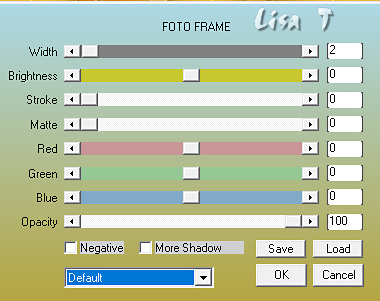
effects => plugins => AAA Frames => Foto Frame
19
apply your watermark or signature on a new layer
add Laurette’s watermark if you wish
write your licence number if you used a licenced tube
image => add borders => tick « symmetric » => 1 px black
layers => merge => merge all (flatten)
resize to 950 px width

My tag with my tubes
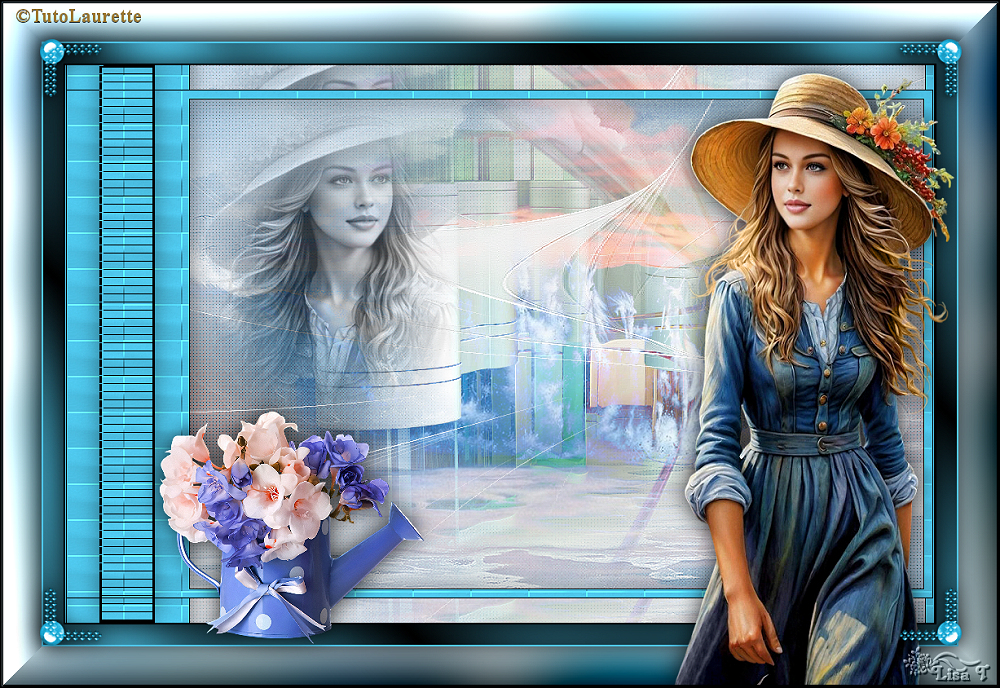
Don't hesitate to write to me if you have any trouble with this translation
If you create a tag (using other tubes than those provided) with this tutorial
and wish it to be shown, send it to me !
It will be a real pleasure for me to add it to the gallery below



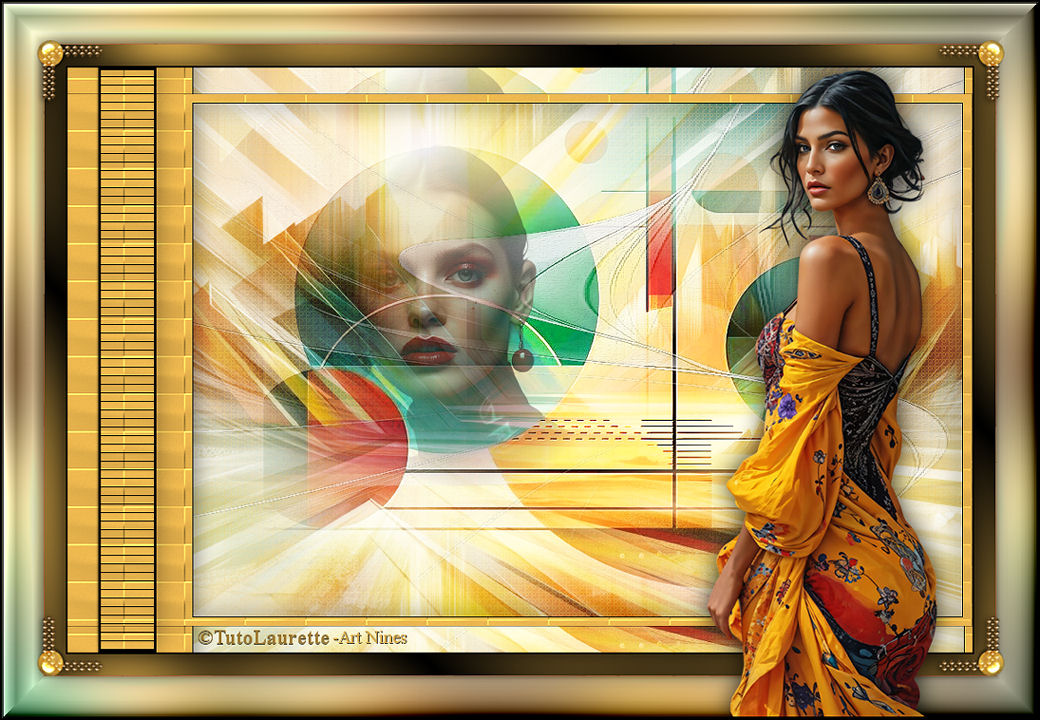
created by ▼ Nines

back to the boards of Laurette’s tutorials
20 tutorials on each board
board 4 => 
at the bottom of each board you will find arrows allowing you to navigate from one board to another


|