

You will find the original tutorial here :

Thank you Laurette for your permission to translate your work
This tutorial is a personal creation.
Any resemblance with another one would be only pure coincidence.
It is stricly forbidden to modify tubes, to change their name or take off the matermarks,
To present them on your sites or blog,
To share them in groups,
to make a bank of images, or to use them on lucrative purposes.

Thank you to respect Laurette’s work and the tubers work.
Don’t hesitate to warn me if you have any trouble with this translation,
and I’ll try to fix the problem as quickly as I can

Laurette and I work with PSP2020 Ultimate
you can follow this tutorial with another version of PSP, but the result might be slightly different
don’t hesitate to change blend modes and opacities of the layers to match your personal colors and tubes
place the tools and materials provided into the appropriate folders of My COREL PSP general folder
to import presets, double-click on them, or import
open the mask(s) and minimize to tray
duplicate all the tubes and decorations, and alpha layers, and work with the copies to preserve originals
install the plugins necessary
doublie-click on the presets ton install
this tutorial is the property of Laurette, and the translation is my property

Supplies
1 alpha layer
1 Palette
1 woman Tube by Nara Pamplona
2 masks by Narah
1 mask received in a group
1 Image
1 flower Tube
5 personal Tubes
2 Presets


Hints and Tips
TIP 1 -> if you don’t want to install a font -->
open it in a software as « Nexus Font » (or other font viewer software of you choice)
as long as both windows are opened (software and font), your font will be available in your PSP
TIP 2 -> from PSPX4, in the later versions of PSP the functions « Mirror » and « Flip » have been replaced by -->
« Mirror »has become --> image => mirror => mirror horizontal
« Flip » has become --> image => mirror => mirror vertical

Plugins needed
Alien Skin I Eye Candy 5 Impact I Glass
MuRa's Seamless / Embross at Alpha
Graphic Plus Cross Shadow
Alien Skin / Perspective Shadow
L en K's Zitah

colors

 
Use the pencil to mark your place
along the way
hold down left click to grab and move it
 |
 
1
prepare colors 8 and 2 as FG and BG colors into the materials palette
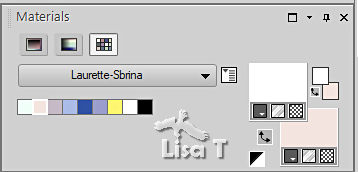
open the alpha layer, duplicate, close the original and work with the copy
rename « Raster 1 »
selections => select all
copy / paste the image provided into selection
selections => select none
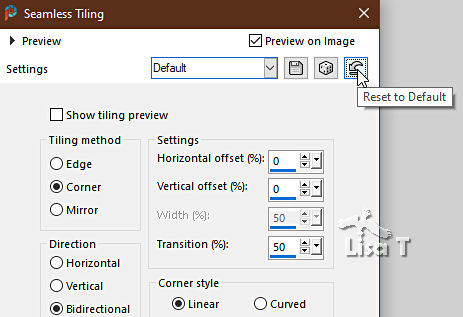
effects => image effects => seamless tiling => default settings
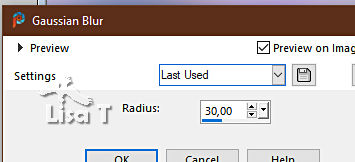
adjust => blur => gaussian blur => 30
2
layers => duplicate
blend mode of the copy : Multiply
effects => edge effects => enhance more
layers => merge => merge visible
3
layers => new raster layer
flood fill white
layers => new mask layer => from image
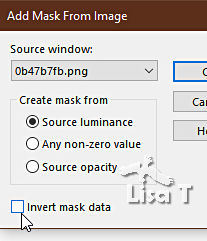
effects => edge effects => enhance
layers => merge => merge group
effects => 3D effects => drop shadow => 0 / 0 / 80 / 40 / color 6
adjust => sharpness => sharpen
layers => merge => merge down
4
layers => new raster layer
flood fill with color 2
layers => new mask layer => from image
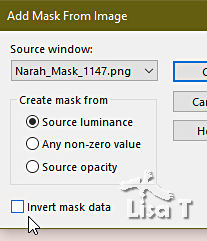
effects => edge effects => enhance
layers => merge => merge group
adjust => sharpness => sharpen
effects => 3D effects => drop shadow => 0 / 0 / 80 / 40 / color 6
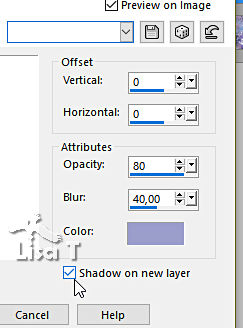
« Group - Raster 1 Shadow 1 » is highlighted
effects => plugins => AP Lines => Lines Silverlining
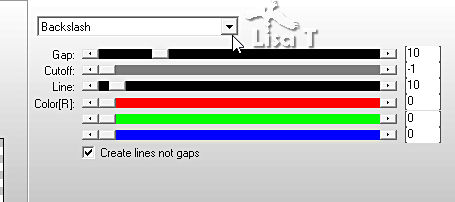
blend mode of the copy : Luminance (Legacy)
highlight top layer
opacity of the layer : 50% - blend mode of the copy : Luminance (Legacy)
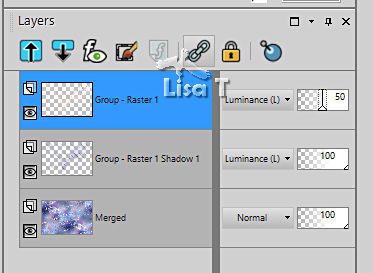
layers => merge => merge visible
5
layers => new raster layer
flood fill with color 7
layers => new mask layer => from image
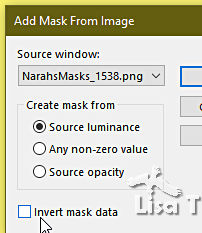
effects => edge effects => enhance
layers => merge => merge group
effects => plugins => AP Lines => Lines Silverlining
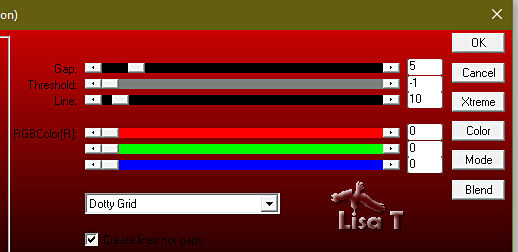
effects => image effects => seamless tiling => default settings
effects => 3D effects => drop shadow => 0 / 0 / 80 / 40 / color 3
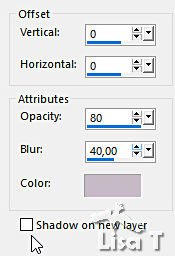
opacity of the layer : 65%
adjust => sharpness => sharpen
6
highlight bottom layer
effects => plugins => L en K’s => Zitha => default settings
edit => repeat => Zitha => default settings
layers => merge => merge visible
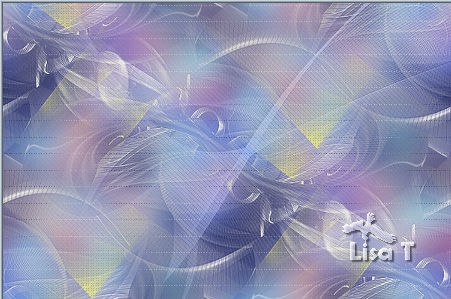
your tag looks like this
7
copy / paste the frame tube as new layer (tube cadre)
don’t move it
enable the Magic Wand tool

click in the middle of the square frame
layers => new raster layer
flood fill selection with the following linear gradient / colors 1 and 2
 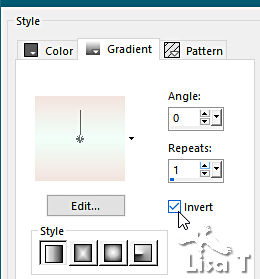
keep selection active
copy / paste « déco fleur perso » as new layer
selections => invert
hit the DELETE key of your keyboard
selections => invert
effects => plugins => Alien Skin Eye Candy 5 Impact / Glass => use the preset provided
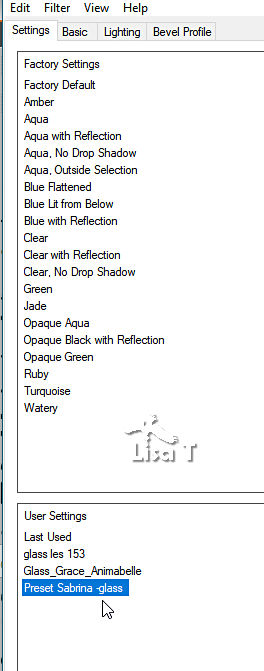
the settings
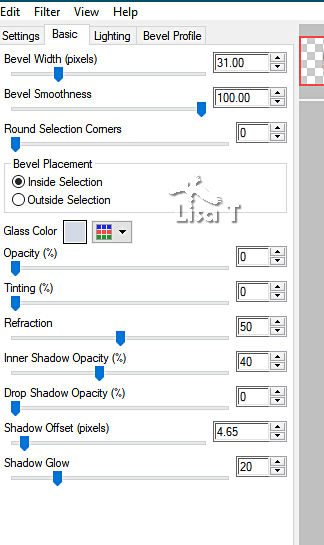
selections => select none
layers => merge => merge down TWICE
effects => 3D effects => drop shadow => 0 / 0 / 80 / 40 / color 5
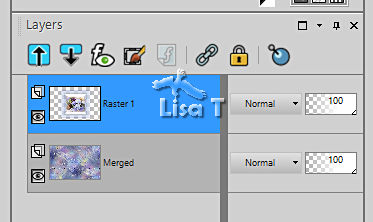
8
selections => load-save selection => from alpha channel => selection # 1
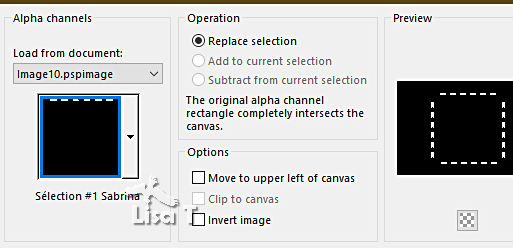
layers => new raster layer
flood fill selection with color 6
effects => plugins => Alien Skin Eye Candy 5 Impact / Glass => use the preset provided
selections => select none
effects => 3D effects => drop shadow => 0 / 0 / 40 / 20 / black
9
selections => load-save selection => from alpha channel => selection # 2
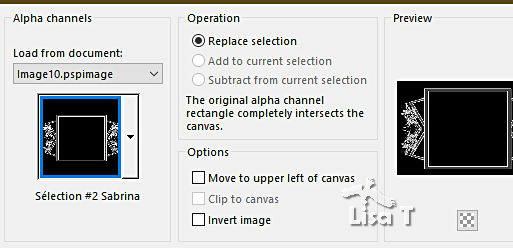
layers => new raster layer
flood fill white (2 clicks)
selections => select none
effects => plugins => Mura’s Seamless => Emboss at Alpha
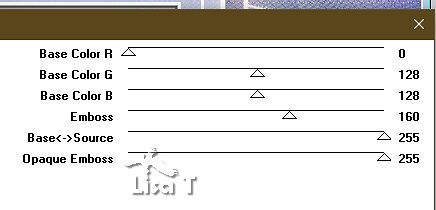
effects => 3D effects => drop shadow => 0 / 0 / 40 / 20 / black
10
copy / paste « déco coins 1 » as new layer
don’t move it
effects => 3D effects => drop shadow => 0 / 0 / 40 / 20 / black
blend mode of the layer : Luminance
11
highlight bottom layer
copy / paste « déco » as new layer
don’t move it
blend mode of the layer : Screen
12
highlight top layer
copy / paste « déco papillon » as new layer
don’t move it
effects => 3D effects => drop shadow => 0 / 0 / 40 / 20 / black
your layers palette looks like this
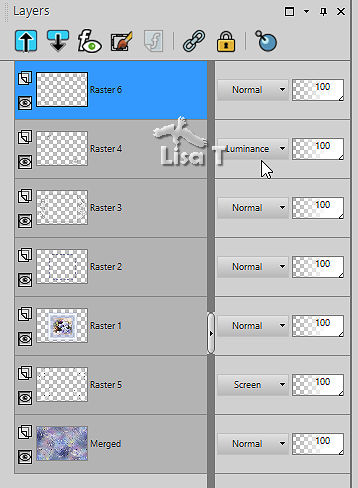
layers => merge => merge visible
13
image => add borders => tick « symmetric » => ...
2 px white
4 px color 6
2 px white
2 px color 2
selections => select all
image => add borders => tick « symmetric » => 25 px color 6
selections => invert
effects => plugins => Graphic Plus => Cross Shadow => default settings
effects => texture effects => weave / colors 5 and 4
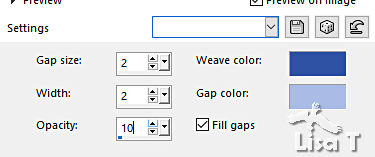
selections => invert
effects => 3D effects => drop shadow => 0 / 0 / 80 / 40 / black
selections => select none
14
image => add borders => tick « symmetric » => ...
2 px white
4 px color 6
2 px white
2 px color 2
selections => select all
image => add borders => tick « symmetric » => 55 px white
effects => 3D effects => drop shadow => 0 / 0 / 40 / 20 / black (TWICE)
selections => select none
15
copy / paste the character tube (by Narah) as new layer
image => resize => untick « resize all layers » => 110 %
place as shown on final result
effects => plugins => Alien Skin Eye Candy 5 Impact / Perspective Shadow / preset provided
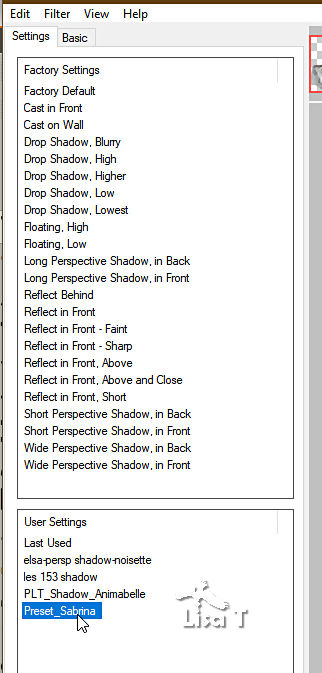
the settings
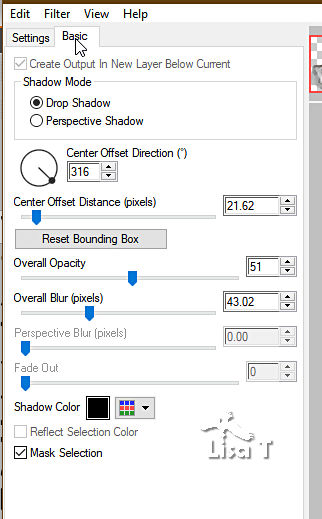
16
copy / paste « déco coins 2 » as new layer
don’t move it
image => add borders => tick « symmetric » => 2 px color 6
apply your watermark or signature
write your licence number if you used a licenced tube
layers => merge => merge all (flatten)
image => resize => tick « resize all layers » => 950 px width
save your work as... type .jpeg
 
My tag with a tube created by Nadège (I colorized the hat ang gloves to match my colors)

Don't hesitate to write to me if you have any trouble with her tutorial
If you create a tag (using other tubes than those provided) with this tutorial
and wish it to be shown, send it to Laurette !
It will be a real pleasure for her to add it to the gallery at the end of the tutorial


back to the boards of Laurette’s tutorials
board 1


|