

You will find the original tutorial here :

Thank you Laurette for your permission to translate your work
This tutorial is a personal creation.
Any resemblance with another one would be only pure coincidence.
It is stricly forbidden to modify tubes, to change their name or take off the matermarks,
To present them on your sites or blog,
To share them in groups,
to make a bank of images, or to use them on lucrative purposes.

Thank you to respect Laurette’s work and the tubers work.
Don’t hesitate to warn me if you have any trouble with this translation,
and I’ll try to fix the problem as quickly as I can

Laurette and I work with PSP2020 Ultimate
you can follow this tutorial with another version of PSP, but the result might be slightly different
don’t hesitate to change blend modes and opacities of the layers to match your personal colors and tubes
place the tools and materials provided into the appropriate folders of My COREL PSP general folder
open the mask(s) and minimize to tray
duplicate all the tubes and decorations, and alpha layers, and work with the copies to preserve originals
install the plugins necessary
this tutorial is the property of Laurette, and the translation is my property

Supplies
Masks – alpha layer (selecitons included) – tubes and decorations

some tubes are not provided (licensed tubes)

Hints and Tips
TIP 1 -> if you don’t want to install a font -->
open it in a software as « Nexus Font » (or other font viewer software of you choice)
as long as both windows are opened (software and font), your font will be available in your PSP
TIP 2 -> from PSPX4, in the later versions of PSP the functions « Mirror » and « Flip » have been replaced by -->
« Mirror »has become --> image => mirror => mirror horizontal
« Flip » has become --> image => mirror => mirror vertical

Plugins needed
Mura's seamless / Emboss at Alpha
Unlimited 2.0 -Distortion Filters - Scaline Shifter
VM / Distortion Filters - Tile à gogo
Graphic plus / Cross Shadow / par défaut
Graphic plus / Quik tile I

colors

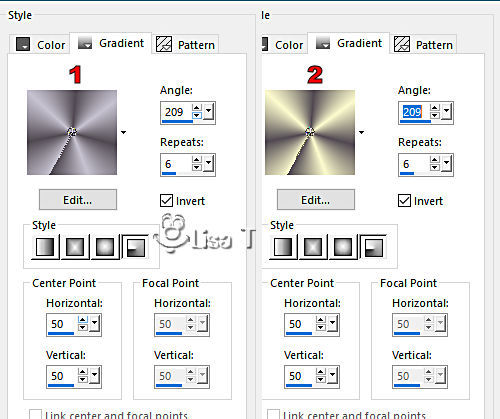
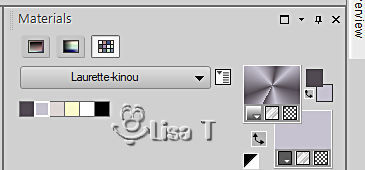
prepare 2 radial gradients into the materials palette
1st gradient =< colors 1 & 2
2nd gradient => colors 1 & 4
 
Use the pencil to mark your place
along the way
hold down left click to grab and move it
 |
 
1
open the alpha layer, duplicate, close the original and work with the copy
rename « Raster 1 »
flood fill layer with the first gradient
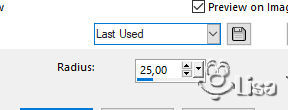
adjust => blur => gaussian blur => 25
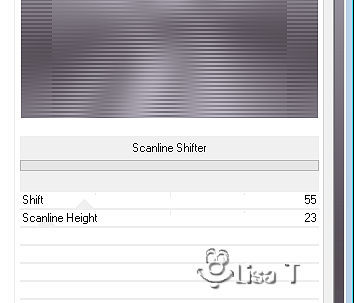
effects => plugins => Unlimited 2 => Distortion Filters – Scanline Shifter
adjust => sharpness => sharpen
2
layers => duplicate
flood fill layer with the second gradient
adjust => blur => gaussian blur => 25
effects => plugins => VM Distortion => Tiles a GoGo
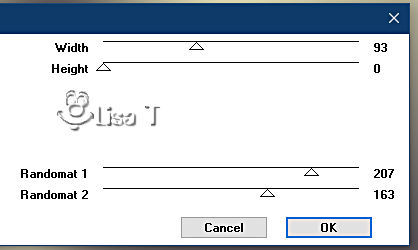
mode of the layer : Overlay
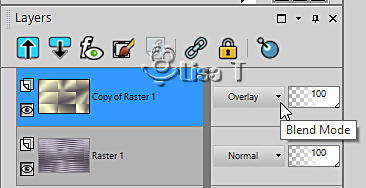
layers => merge => merge visible
3
layers => new raster layer
flood fill layer with color 3
layers => new mask layer => from image
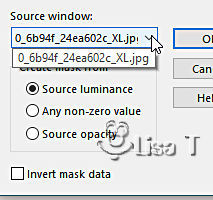
effects => edge effects => enhance
layers => merge => merge group
effects => plugins => Mura’s Seamless => Emboss at Alpha
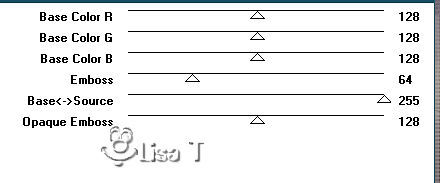
4
highlight bottom layer
selections => load-save selection => from alpha channel => selection # 1
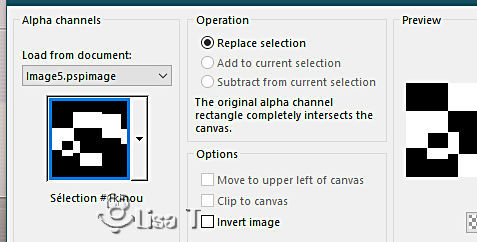
selections => promote selection to layer
effects => plugins => Carolaine and Sensibility => CS-Ldots
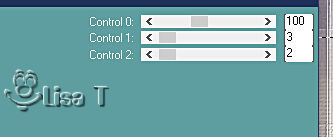
edit => repeat => CS-Ldots
effects => edge effects => enhance
selections => select none
blend mode of the layer => Soft Light
5
highlight bottom layer
effects => texture effects => blinds / black
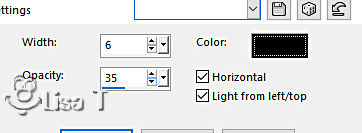
6
highlight top layer
layers => new raster layer
flood fill layer with color 4
layers => new mask layer => from image
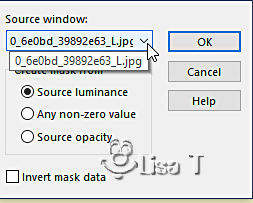
layers => merge => merge group
effects => 3D effects => drop shadow => 1 / 1 / 50 / 1 / color 4
opacity of the layer : 40% (or less according to your colors)
your layers palette looks like this
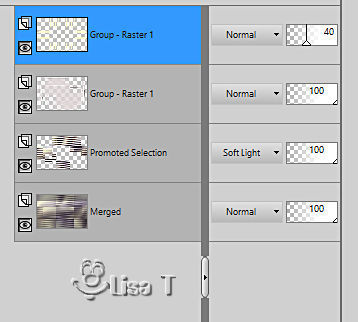
layers => merge => merge visible
7
copy / paste « tige » as new layer
***
Translator’s note : Laurette provides a tube named « tige blanche à coloriser » to colorize if necessary
I didn’t use it to c reate my tag
***
enable the Pick tool with the following settings, to move the layer acurately => position X : -2 / position Y : 57
hit the « M » key of your keyboard to disable the tool
effects => 3D effects => drop shadow => 1 / 1 / 50 / 1 / color 1
opacity of the layer : 85%
8
copy / paste « duo fleurs » as new layer
enable the Pick tool with the following settings, to move the layer acurately => position X : 34/ position Y : 148
hit the « M » key of your keyboard to disable the tool
opacity of the layer : 85%
9
copy / paste « tige & fleur » as new layer
resize
add a flower (select / copy / paste as new layer one of the flowers of « duo fleurs ») if you wish
***
Translator’s note : I idn’t add a second flower
***
layers => merge => merge down (to have stem and flower on the same layer)
enable the Pick tool with the following settings, to move the layer acurately => position X : 657/ position Y : -39
hit the « M » key of your keyboard to disable the tool
opacity of the layer : 85%
10
copy / paste « ronds » as new layer
enable the Pick tool with the following settings, to move the layer acurately => position X : 288/ position Y : 36
hit the « M » key of your keyboard to disable the tool
effects => 3D effects => drop shadow => 1 / 1 / 50 / 1 / color 3
11
copy / paste « fleurs rose jaunes » as new layer
enable the Pick tool with the following settings, to move the layer acurately => position X : 288/ position Y : 20
hit the « M » key of your keyboard to disable the tool
12
layers => duplicate
image => resize => untick « resize all layers » => 35%
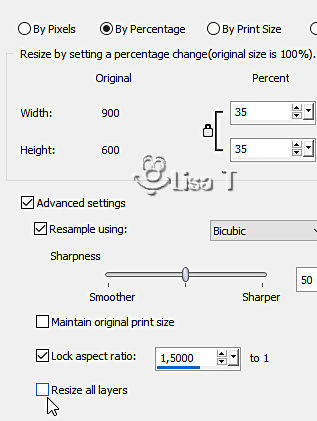
enable the Pick tool with the following settings, to move the layer acurately => position X : 699/ position Y : 406
hit the « M » key of your keyboard to disable the tool
layers => duplicate
image => resize => untick « resize all layers » => 75%
enable the Pick tool with the following settings, to move the layer acurately => position X : 771/ position Y : 227
hit the « M » key of your keyboard to disable the tool
layers => duplicate
image => resize => untick « resize all layers » => 55%
enable the Pick tool with the following settings, to move the layer acurately => position X : 599/ position Y : 521
hit the « M » key of your keyboard to disable the tool
layers => merge => merge down 3 times
effects => 3D effects => drop shadow => 0 / 0 / 70 / 40 / color 4
opacity of the layer : 75% (or less)
your layers palette looks like this
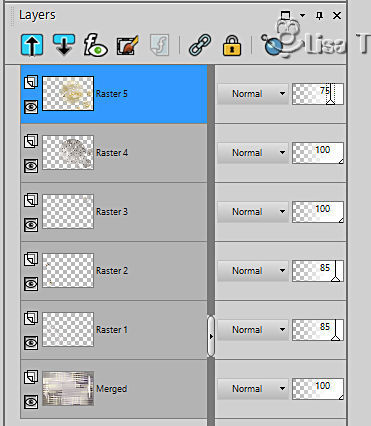
layers => merge => merge visible
13
copy / paste « rond 2 » as new layer
enable the Pick tool with the following settings, to move the layer acurately => position X : 292/ position Y : 42
hit the « M » key of your keyboard to disable the tool
blend mode of the layer : Soft Light
14
image => add borders => tick « symmetric » => ...
2 px color 1
2 px color 4
2 px color 1
selections => select all
image => add borders => tick « symmetric » => ...
20 px color 3
selections => invert
effects => plugins => Graphic Plus => Cross Shadow / default settings
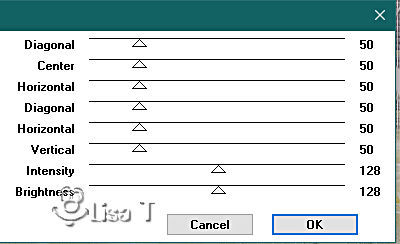
selections => select none
image => add borders => tick « symmetric » => ...
2 px color 1
2 px color 4
2 px color 1
40 px color 3
2 px color 1
2 px color 4
2 px color 1
select inside the 40 px frame with the Magic Wand tool

flood fill layer with the first gradient
adjust => blur => gaussian blur => 25
effects => texture effects => blinds / color 1
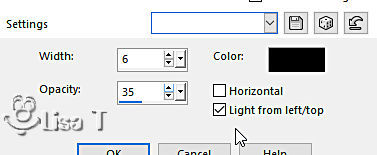
effects => edge effects => enhance
effects => plugins => Graphic Plus => Quick Tile 1

selections => select none
15
selections => select all
image => add borders => tick « symmetric » => ...
35 px color 3
selections => invert
effects => plugins => Graphic Plus => Cross Shadow / default settings
selections => select none
image => add borders => tick « symmetric » => ...
2 px color 1
2 px color 4
2 px color 1
16 – optional
effects => plugins => AAA Filters / Custom / Brightness : 20 / Landscape / OK
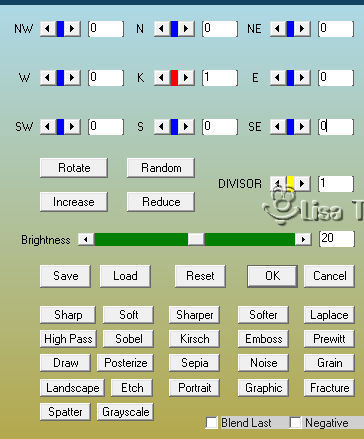
image => resize => tick « resize all layers » => 950 px width
17
Open the woman tube
adjust => sharpness => sharpen
image => mirror => mirror horizontal
image => resize => untick « resize all layers » => 110%
copy / paste as new layer on your main work
place where you like
effects => 3D effects => drop shadow => 0 / 0 / 80 / 40 / color 1
18
apply your watermark or signature
write your licence number if you used a licensed tube
image => add borders => tick « symmetric » => 1 px color 1
file => save your work as... type .jpeg
 
My tag with a tube created by Colybrix

Don't hesitate to write to me if you have any trouble with her tutorial
If you create a tag (using other tubes than those provided) with this tutorial
and wish it to be shown, send it to Laurette !
It will be a real pleasure for her to add it to the gallery at the end of the tutorial


back to the boards of Laurette’s tutorials
board 1


|