

You will find the original tutorial here :

Thank you Laurette for your permission to translate your work
This tutorial is a personal creation.
Any resemblance with another one would be only pure coincidence.
It is stricly forbidden to modify tubes, to change their name or take off the matermarks,
To present them on your sites or blog,
To share them in groups,
to make a bank of images, or to use them on lucrative purposes.

Thank you to respect Laurette’s work and the tubers work.
Don’t hesitate to warn me if you have any trouble with this translation,
and I’ll try to fix the problem as quickly as I can

Laurette and I work with PSP2020 Ultimate
you can follow this tutorial with another version of PSP, but the result might be slightly different
don’t hesitate to change blend modes and opacities of the layers to match your personal colors and tubes
place the tools and materials provided into the appropriate folders of My COREL PSP general folder
to import presets, double-click on them, or import
open the masks and minimize to tray
duplicate all the tubes and decorations, and alpha layers, and work with the copies to preserve originals
install the plugins necessary
this tutorial is the property of Laurette, and the translation is my property

Supplies
tubes and decoration tubes
color palette
texture (import in the dedicated folder of My Corel PSP general folder)
Laurette’s watermark


Hints and Tips
TIP 1 -> if you don’t want to install a font -->
open it in a software as « Nexus Font » (or other font viewer software of you choice)
as long as both windows are opened (software and font), your font will be available in your PSP
TIP 2 -> from PSPX4, in the later versions of PSP the functions « Mirror » and « Flip » have been replaced by -->
« Mirror »has become --> image => mirror => mirror horizontal
« Flip » has become --> image => mirror => mirror vertical

Plugins needed
L EN K’s /Adonis
MuRa’s Filter Meister / Perspective Tiling
Graphics Plus/ Cross Shadow
Graphics plus/ Quik Tile 1
AAA Frames / Foto Frame

colors
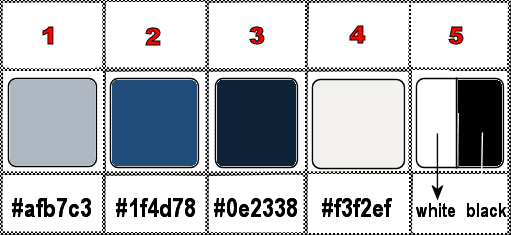
set FG to color 1 and BG to color 2 in materials palette

Use the pencil to mark your place
along the way
hold down left click to grab and move it
 |

1
duplicate the tubes, close the originals and work with the copis to preserve orginal files
prepare a linear gradient
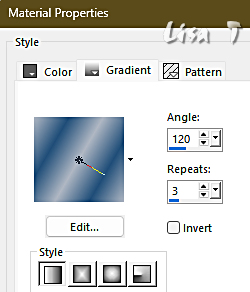
open a new image => transparent => 900 * 600 px
2
flood fill layer with the gradient
adjust => blur => gaussian blur => 60
3
effects => reflection effects => feedback
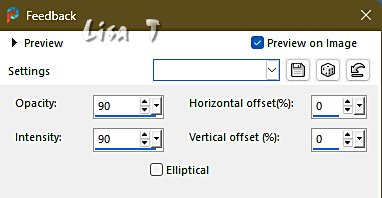
effects => edge effects => enhance more
4
effects => reflection effects => kaleidoscope
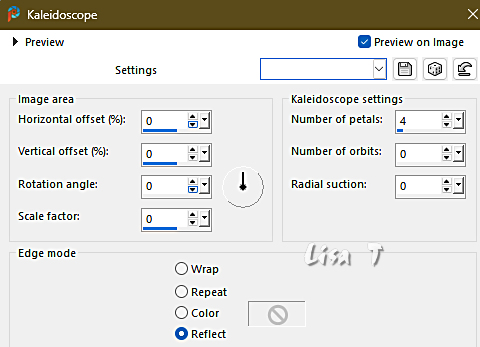
layers => duplicate
effects => plugins => L en K’s => Adonis => apply twice
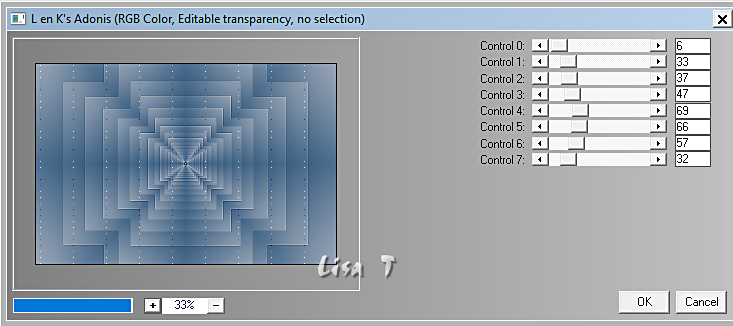
5
image => resize => untick « resize all layers » => 85%
effects => 3D effects => drop shadow => 0 / 11 / 80 / 30 / WHITE / tick « shadow on new layer »
6
Blend mode of the layer « dissolve »
Opacity => 52%
layers => duplicate
image => mirror => mirror horizontal
layers => merge => merge down
your tag looks like this
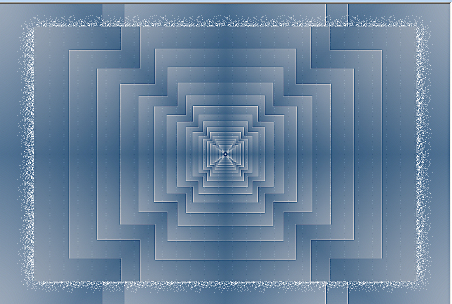
7
highlight top layer
enable the Selection tool / custom selection
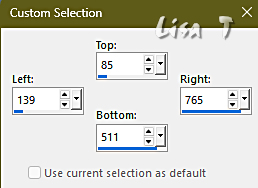
layers => new raster layer
flood fill selection with color 4
selections => modify => contract => 10 px
selections => invert
effects => 3D effects => drop shadow => 0 / 0 / 80 / 40 / color 3 / UNtick « shadow on new layer »
8
selections => invert
keep selection active
layers => new raster layer
copy / paste the landscape tube into selection
layers => duplicate
layers => merge => merge down
selections => select none
your layers palette looks like this
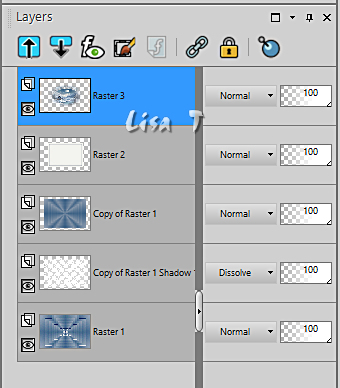
close the eye of bottom layer
layers => merge => merge visible
open the eye of bottom layer
9
copy / paste « deco01 » as new layer
don’t move it
effects => 3D effects => drop shadow => 0 / 0 / 80 / 40 / color 3
10
highlight bottom layer
layers => duplicate
layers => arrange => bring to top
effects => plugins => Mura’s Meister => Perspective Tiling
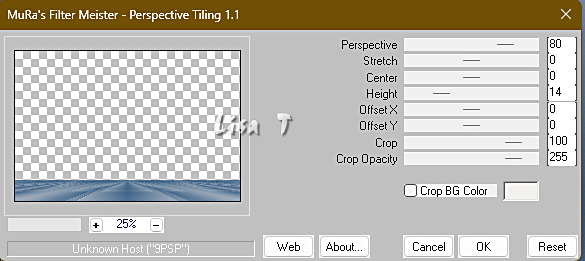
enable the Magic Wand tool / tolerance : 0 / feather : 60
select the empty space of the layer
hit 5 times the DELETE key of your keyboard
selections => select none
reset feather of the tool to 0
effects => 3D effects => drop shadow => 0 / 0 / 80 / 40 / color 3
layers => arrange => move down
11
selections => select all
selections => modify => contract => 10 px
selections => invert
flood fill selection with color 4
effects => texture effects => texture
use the texture provided
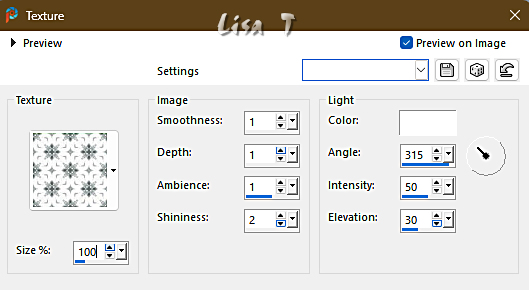
effects => edge effects => enhance
selections => select none
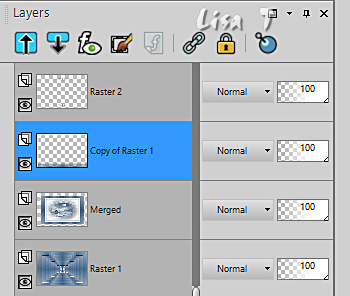
your layers palette looks like this
12
image => add borders => tick « symmetric » => 2 px color 1
selections => select all
image => add borders => tick « symmetric » => 35 px color 2
selections => invert
prepare a linear gradient
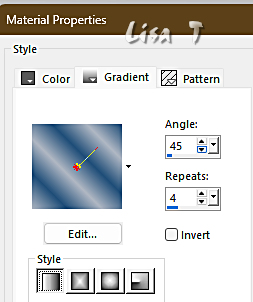
flood fill layer with the gradient
effects => plugins => Graphics Plus => Cross Shadow / default settings
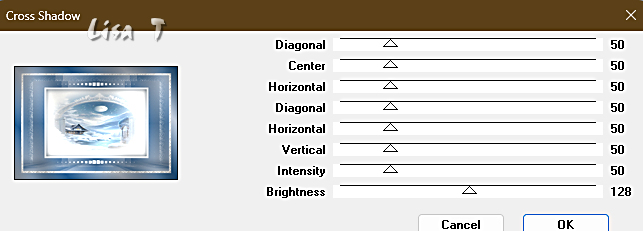
keep selection active
13
effects => plugins => Graphics Plus => Quick Tile 1 / default settings
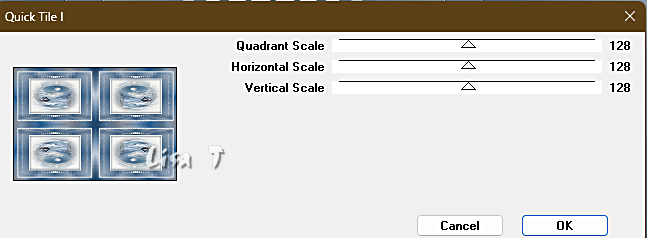
effects => edge effects => enhance
selections => invert
effects => 3D effects => drop shadow => 0 / 0 / 80 / 40 / color 3
selections => select none
14
image => add borders => tick « symmetric » => 1 px color 3
selections => select all
image => add borders => tick « symmetric » => 45 px color 4
selections => invert
effects => texture effects => texture
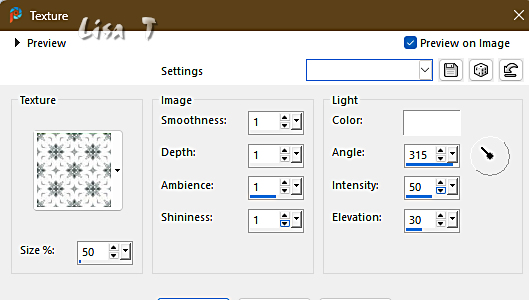
effects => 3D effects => Inner Bevel
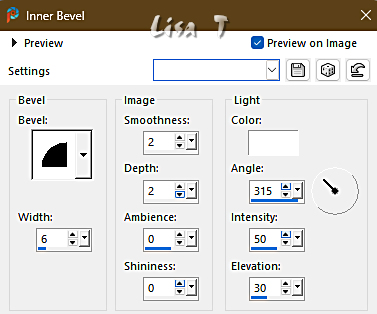
selections => select none
15
copy / paste the character tube as new layer (don’t forget to erase the tuber’s watermark)
place properly
adjust => sharpness => sharpen
effects => 3D effects => drop shadow => 0 / 0 / 60 / 40 / color 3
16
copy / paste the flower tube as new layer (don’t forget to erase the tuber’s watermark)
image => resize => untick « resize all layers » => 80%
place properly
adjust => sharpness => sharpen
effects => 3D effects => drop shadow => 0 / 0 / 60 / 40 / color 3
17
image => add borders => tick « symmetric » => 5 px color 4
effects => plugins => AAA Frames => Foto Frame
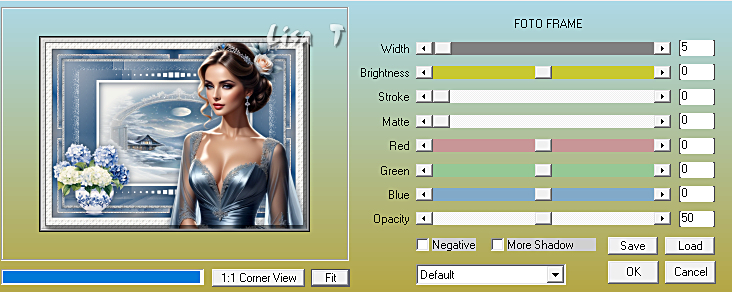
18
layers => new raster layer
apply your watermark or signature on a new layer
add Laurette’s watermark if you wish
write your licence number if you used a licenced tube
image => add borders => tick « symmetric » => 3 px color 2
layers => merge => merge all (flatten)
resize to 950 px width
file => save your work as... type .jpeg

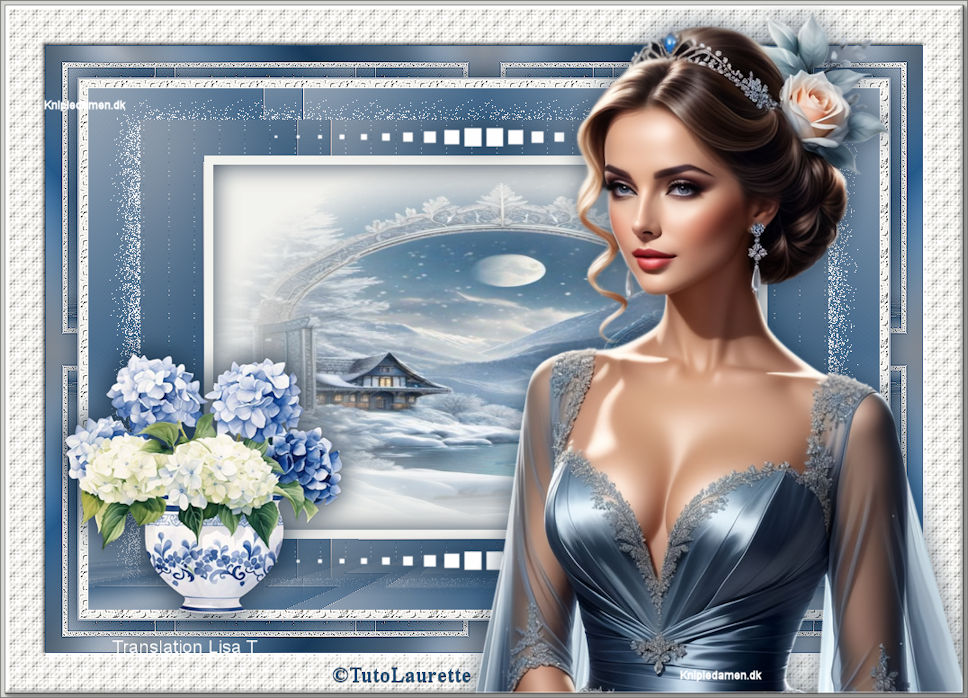
My tag with tubes : created by Wieskes (woman) - Nena Silva (Flowers) - Cat Dana (landscape)
Click on their name to access their sites

Don't hesitate to write to me if you have any trouble with this translation
If you create a tag (using other tubes than those provided) with this tutorial
and wish it to be shown, send it to me !
It will be a real pleasure for me to add it to the gallery below



created by ▼ Birte

back to the boards of Laurette’s tutorials
20 tutorials on each board
board 4 => 
at the bottom of each board you will find the arrows allowing you to navigate from one board to another


|