
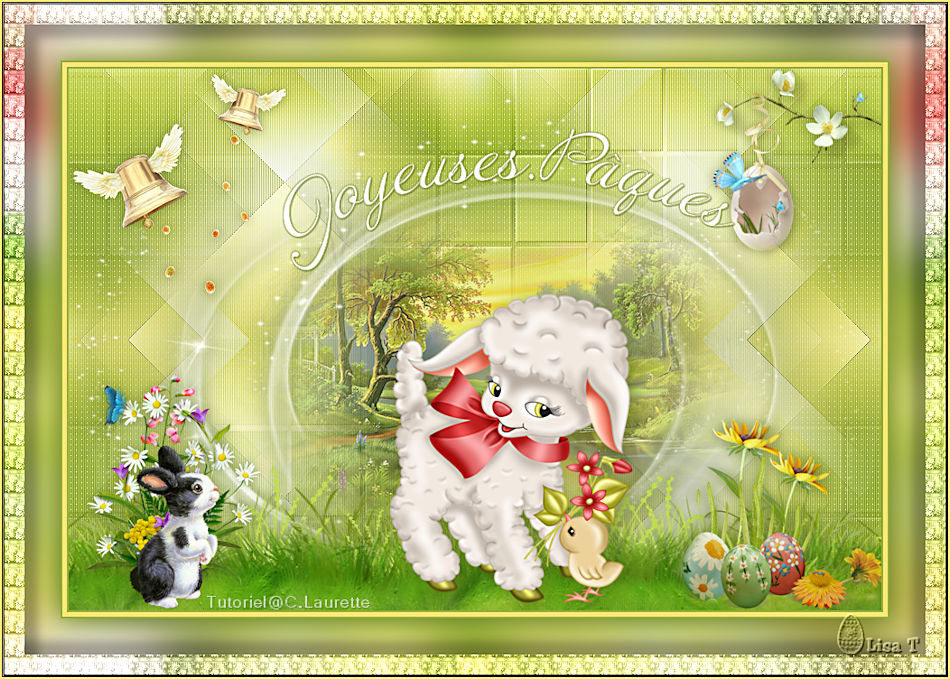
You will find the original tutorial here :
Thank you Laurette for your permission to translate your work
This tutorial is a personal creation.
Any resemblance with another one would be only pure coincidence.
It is stricly forbidden to modify tubes, to change their name or take off the matermarks,
To present them on your sites or blog,
To share them in groups,
to make a bank of images, or to use them on lucrative purposes.

Thank you to respect Laurette’s work and the tubers work.
Don’t hesitate to warn me if you have any trouble with this translation,
and I’ll try to fix the problem as quickly as I can

Laurette and I work with PSP2020 Ultimate
you can follow this tutorial with another version of PSP, but the result might be slightly different
don’t hesitate to change blend modes and opacities of the layers to match your personal colors and tubes
place the tools and materials provided into the appropriate folders of My COREL PSP general folder
to import presets, double-click on them, or import
open the mask(s) and minimize to tray
duplicate all the tubes and decorations, and alpha layers, and work with the copies to preserve originals
install the plugins necessary
this tutorial is the property of Laurette, and the translation is my property

Supplies
Masks – tubes – word Art – color palette

open the masks and minimize to tray
some tubes are not provided (licensed tubes)

Hints and Tips
TIP 1 -> if you don’t want to install a font -->
open it in a software as « Nexus Font » (or other font viewer software of you choice)
as long as both windows are opened (software and font), your font will be available in your PSP
TIP 2 -> from PSPX4, in the later versions of PSP the functions « Mirror » and « Flip » have been replaced by -->
« Mirror »has become --> image => mirror => mirror horizontal
« Flip » has become --> image => mirror => mirror vertical

Plugins needed
Emboss at Alpha
Medhi Wavy Lab
Medhi / Sorting Tiles
Simple / Pizza Slice
Simple / Half Wrapt
Simple / 4 Way Aveyrage
AAAFrames / Foto Frame...

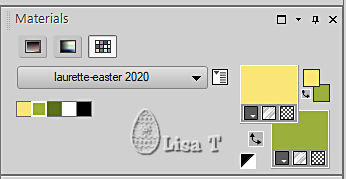
colors

set FG to color 1 and BG to color 2 in materials palette

Use the pencil to mark your place
along the way
hold down left click to grab and move it
 |

1
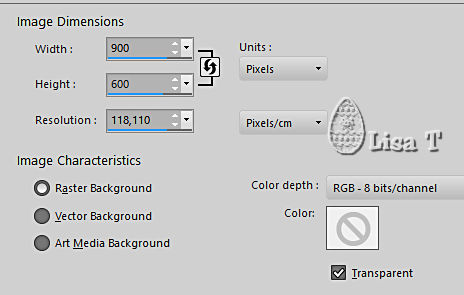
open a new transparent image 900 * 600 px
effects => plugins => Mehdi => Wavy Lab 1.1 / colors => 2 1 3 white
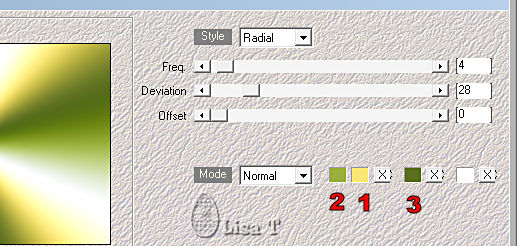
effects => plugins => Mehdi => Sorting Tiles
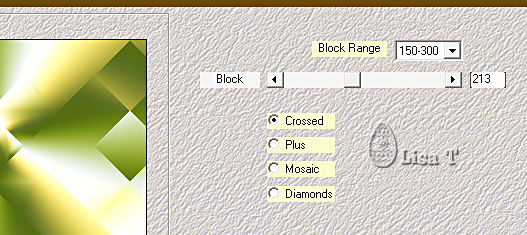
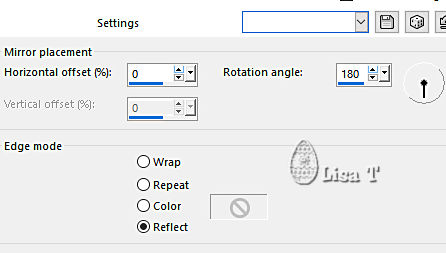
effects = > plugins => Simple => Pizza Slice Mirror
effects = > plugins => Simple => Half Wrap
2
effects => reflection effects => rotating Mirror
effects => edge effects => enhance
3
effects => image effects => seamless tiling => Side by Side
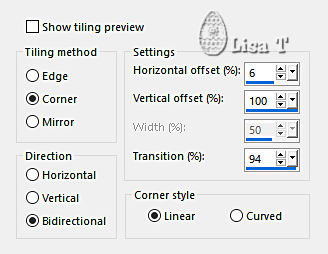
4
layers => duplicate
enable the Flood Fill Tool (match mode : 0)
flood fill layer with color 2
layers => new mask layer => from image
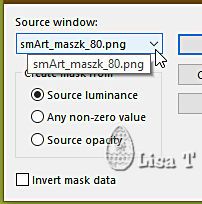
adjust => sharpness => sharpen
layers => merge => merge group
effects => plugins => Mura’s Seamless => Emboss at Alpha => default settings
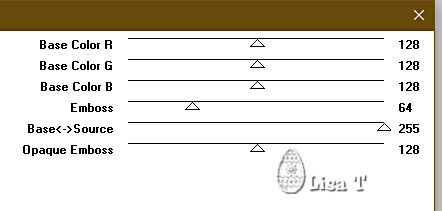
layers => merge => merge down
5
layers => new raster layer
flood fill white
layers => new mask layer => from image
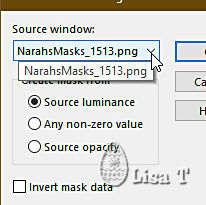
layers => merge => merge group
effects => 3D effects => drop shadow => 3 / 3 / 60 / 20 / color 3
effects => 3D effects => drop shadow => -3 / -3 / 60 / 20 / color 3
opacity of the layer : 87%
6
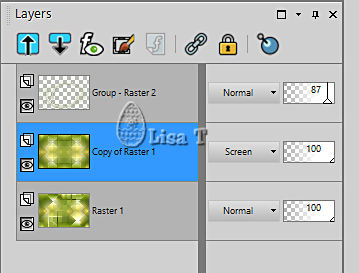
highlight bottom layer
layers => duplicate
effects = > plugins => Simple => 4 Way Average
blend mode of the layer : Screen
7
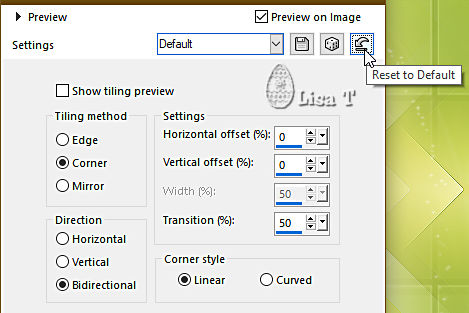
effects => image effects => seamless tiling => default settings
8
effects => texture effects => blinds

adjust => sharpness => sharpen
layers => merge => merge down
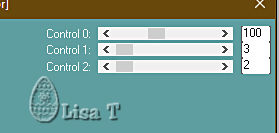
effects => plugins => Carolaine and Sensibility => CS-Ldots
9
Open the landscape tube
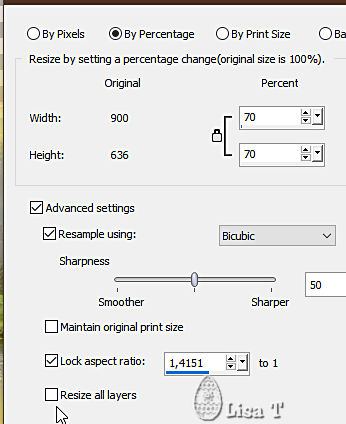
image => resize => untick « resize all layers » => 70%
copy / paste as new layer on your main work
enable the Pick tool with the following settings, to move the layer acurately => position X : 158 / position Y : 123
hit the « M » key of your keyboard to disable the tool
layers => merge => merge visible
10
copy / paste « herbe » as new layer
objects => align => bottom
effects => 3D effects => drop shadow => 0 / 0 / 60 / 20 / color 3
11
copy / paste « Cluster 2 » as new layer
enable the Pick tool with the following settings, to move the layer acurately => position X : 14 / position Y : 336
effects => 3D effects => drop shadow => 0 / 0 / 60 / 20 / color 3
12
copy / paste « Cluster 1 » as new layer
enable the Pick tool with the following settings, to move the layer acurately => position X : 617 / position Y : 375
effects => 3D effects => drop shadow => 0 / 0 / 60 / 20 / color 3
13
copy / paste « Cluster 3 » as new layer
enable the Pick tool with the following settings, to move the layer acurately => position X : 713 / position Y : 0
effects => 3D effects => drop shadow => 0 / 0 / 60 / 20 / color 3
14
copy / paste « Cloches » as new layer
enable the Pick tool with the following settings, to move the layer acurately => position X : 3 / position Y : 5
effects => 3D effects => drop shadow => 0 / 0 / 60 / 20 / color 3
15
copy / paste « Petit Agneau » as new layer
place as shown in final result
effects => 3D effects => drop shadow => 5 / 5 / 60 / 30 / color 3
16
copy / paste « Joyeuses Pâques » as new layer
enable the Pick tool with the following settings, to move the layer acurately => position X : 236 / position Y : 65
effects => 3D effects => drop shadow => 5 / 5 / 60 / 30 / color 3
17
layers => merge => merge visible
image => add borders => tick « symmetric » => ...
2 px color 2
5 px color 1
2 px color 2
selections => select all
image => add borders => tick « symmetric » => 40 px color 2
selections => invert
effects = > plugins => Simple => Half Wrap
adjust => blur => gaussian blur => 25

selections => invert
effects => 3D effects => drop shadow => 0 / 0 / 80 / 40 / color 3
18
selections => select all
image => add borders => tick « symmetric » => 25 px color 1
selections => invert
effects = > plugins => Simple => Half Wrap
adjust => blur => gaussian blur => 15

effects => plugins => VM Extravaganza / Picture in a Picture

selections => invert
19
layers => new raster layer
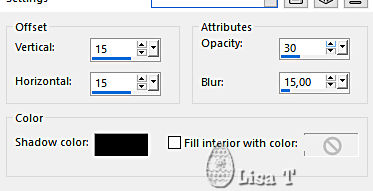
effects => 3D effects => cutout / black
layers => new raster layer
redo « cutout » changing (15) (Vertical and Horizontal) by (-15)
20
selections => select all
image => add borders => tick « symmetric » => 2 px color 1
effects => plugins => AAA Frames => Foto Frame
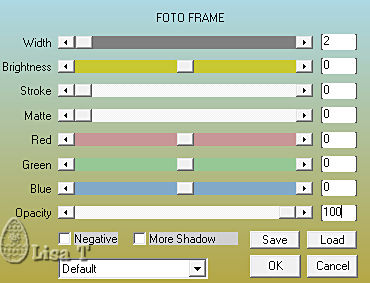
selections => select none
21
apply your watermark or signature
write your licence number if you used a licensed tube
apply Laurette’s watermark if you wish
image => resize => tick « resize all layers » => 950 px width
file => save your work as... type .jpeg

My tag with my tubes and misted image

Don't hesitate to write to me if you have any trouble with her tutorial
If you create a tag (using other tubes than those provided) with this tutorial
and wish it to be shown, send it to Laurette !
It will be a real pleasure for her to add it to the gallery at the end of the tutorial


back to the boards of Laurette’s tutorials
board 1

|