

You will find the original tutorial here :

Thank you Laurette for your permission to translate your work
This tutorial is a personal creation.
Any resemblance with another one would be only pure coincidence.
It is stricly forbidden to modify tubes, to change their name or take off the matermarks,
To present them on your sites or blog,
To share them in groups,
to make a bank of images, or to use them on lucrative purposes.

Thank you to respect Laurette’s work and the tubers work.
Don’t hesitate to warn me if you have any trouble with this translation,
and I’ll try to fix the problem as quickly as I can

Laurette and I work with PSP2020 Ultimate
you can follow this tutorial with another version of PSP, but the result might be slightly different
don’t hesitate to change blend modes and opacities of the layers to match your personal colors and tubes
place the tools and materials provided into the appropriate folders of My COREL PSP general folder
to import presets, double-click on them, or import
open the mask(s) and minimize to tray
duplicate all the tubes and decorations, and alpha layers, and work with the copies to preserve originals
install the plugins necessary
this tutorial is the property of Laurette, and the translation is my property

Supplies
1 Palette
1 flower tube
1 mask
5 personal tubes
1 Word Art

translator’s note => I added a « Word Art » in english

Hints and Tips
TIP 1 -> if you don’t want to install a font -->
open it in a software as « Nexus Font » (or other font viewer software of you choice)
as long as both windows are opened (software and font), your font will be available in your PSP
TIP 2 -> from PSPX4, in the later versions of PSP the functions « Mirror » and « Flip » have been replaced by -->
« Mirror »has become --> image => mirror => mirror horizontal
« Flip » has become --> image => mirror => mirror vertical

Plugins needed
MuRas' Meister
Lines - SilverLining / Dotty Grid
FM Tiles Tools / Blend Emboss
Itali@n Editors Effect / Effetto Fantasma
/ Graphic Plus Cross Shadow

colors

 
Use the pencil to mark your place
along the way
hold down left click to grab and move it
 |
 
set colors 1 and 2 as FG and BG colors into materials palette
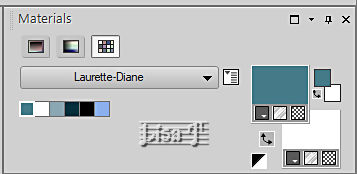
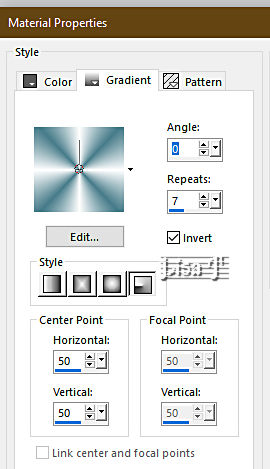
prepare a radial gradient in materials palette
1
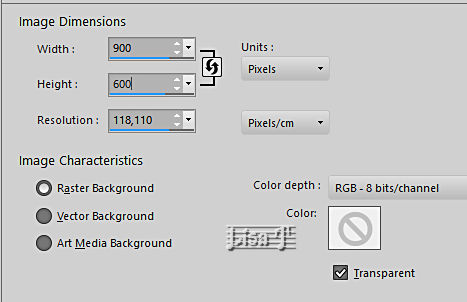
open a new image => transparent => 900 * 600 px
flood fill layer with the gradient
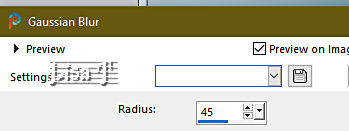
adjust => blur => gaussian blur => 45%
2
layers => duplicate
effects => plugins => Mura’s Meister => Cloud
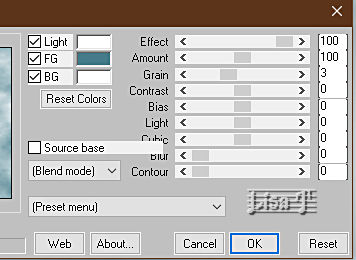
effects = > plugins => Simple => Blintz
layers => duplicate
image => mirror => mirror vertical
opacity of the layer : 50%
layers => merge => merge down
effects => edge effects => enhance more
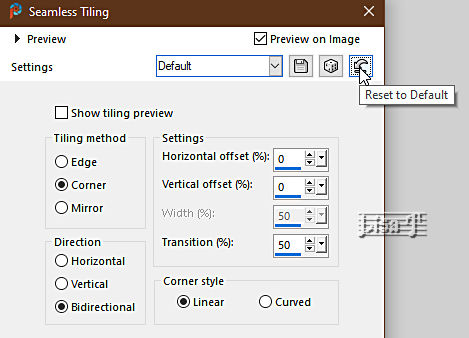
effects => image effects => seamless tiling => default settings
3
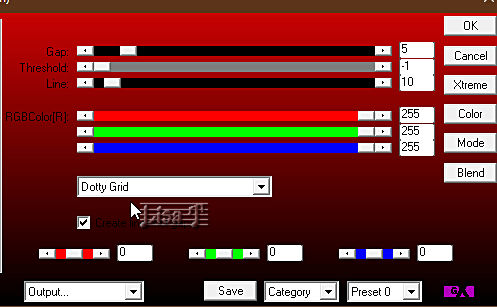
effects => plugins => AP Lines => Lines Silverlining
4
top layer is highlighted
layers => new raster layer
flood fill white
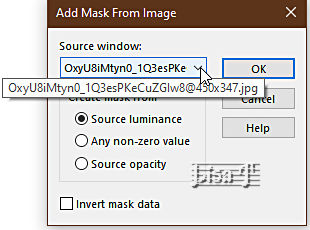
layers => new mask layer => from image
adjust => sharpness => sharpen
layers => merge => merge group
effects => 3D effects => drop shadow => 1 / 1 / 100 / 1 / color #8cb0eb
adjust => sharpness => sharpen
effects => plugins => FM Tile Tools / Blend Emboss => default settings
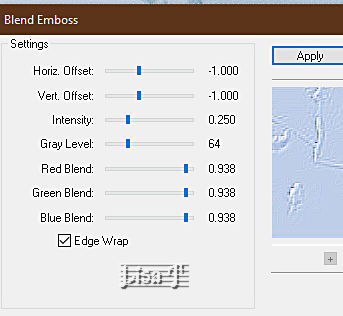
layers => merge => merge down
5
copy / paste « déco masque 1 » as new layer
objects => align => left
OR
enable the Pick tool with the following settings, to move the layer acurately => position X : 0 / position Y : 0

effects => plugins => FM Tile Tools / Blend Emboss => default settings
layers => merge => merge down
6
copy / paste « Tube fleur » as new layer
enable the Pick tool with the following settings, to move the layer acurately => position X : 18 / position Y : 1
effects => 3D effects => drop shadow => 1 / 1 / 100 / 1 / WHITE
7
enable the Selection tool / custom selection

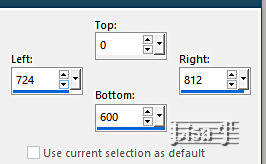
flood fill selection white
selections => modify => contract => 5 px
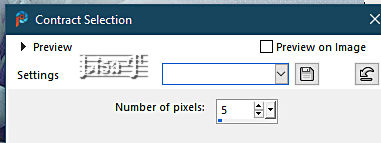
hit the DELETE key of your keyboard
selections => select none
effects = > plugins => It@lian Editors Effects / Effeto Fantasma => default settings / 41 / 41
blend mode of the layer : Screen
layers => merge => merge down
8
enable the Selection tool / custom selection ( same settings as previously )
layers => new raster layer
flood fill selection white
selections => modify => contract => 5 px

flood fill selection with color 3
effects => texture effects => Weave / color 4 and white

selections => invert
effects => 3D effects => drop shadow => 0 / 0 / 80 / 40 / color 4
selections => select none
9
copy / paste « déco dentelle » as new layer
effects => image effects => offset => H : 319 / V : 0 / tick « custom » and « transparent»
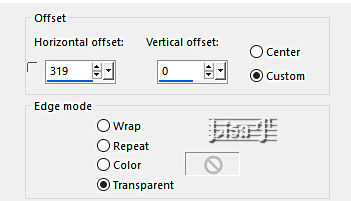
layers => arrange => move down
highlight top layer
layers => merge => merge down
effects => 3D effects => drop shadow => 1 / 1 / 100 / 1 / color 3
layers => merge => merge down
10
copy / paste « déco - 2 » as new layer
effects => image effects => offset => H : 319 / V : 0 / tick « custom » and « transparent »
effects => 3D effects => drop shadow => 1 / 1 / 100 / 1 / color 4
11
copy / paste « déco perle » as new layer
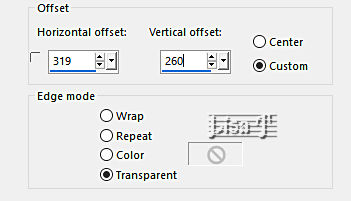
effects => image effects => offset => H : 319 / V : 260 / tick « custom » and « transparent»
layers => duplicate
image => mirror => mirror vertical
layers => merge => merge down
effects => 3D effects => drop shadow => 0 / 0 / 80 / 40 / color 4
layers => merge => merge down three times
12
top layer is highlighted
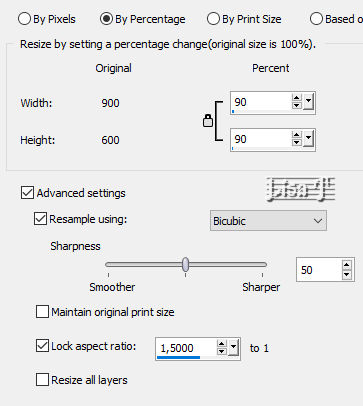
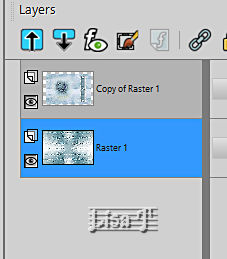
image => resize => untick « resize all layers » => 90%
highlight Raster 1
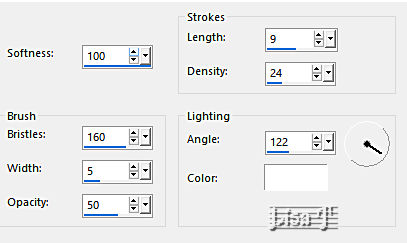
effects => Art Media Effects => brush strokes
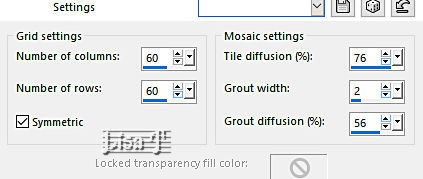
effects => texture effects => mosaic / Antique
adjust => sharpness => sharpen more
13
highlight top layer
selections => select all / selections => float / selections => defloat
selections => modify = > select selection borders
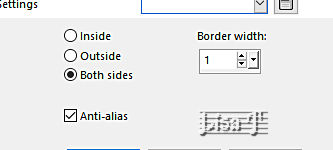
flood fill selection white
selections => select none
effects => 3D effects => drop shadow => 0 / 0 / 80 / 40 / color 4
14
image => add borders => tick « symmetric » => 2 px white
selections => select all
image => add borders => tick « symmetric » => 20 px color 1
selections => invert
effects => plugins => Graphic Plus => Cross Shadow => default settings
selections => invert
effects => 3D effects => drop shadow => 0 / 0 / 80 / 40 / color 4
selections => select none
15
image => add borders => tick « symmetric » => 20 px white
selections => select all
image => add borders => tick « symmetric » => 2 px color 1
image => add borders => tick « symmetric » => 50 px white
effects => 3D effects => drop shadow => 0 / 0 / 80 / 40 / color #808080
selections => select none
16
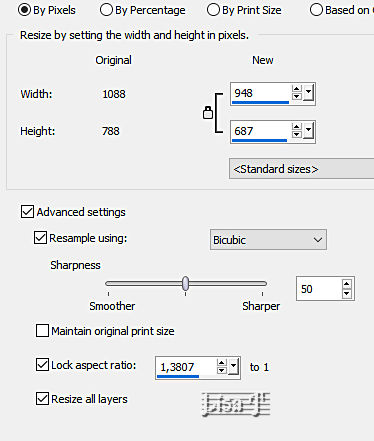
image => resize => tick « resize all layers » => 948 px width
17
copy / paste « word art » as new layer
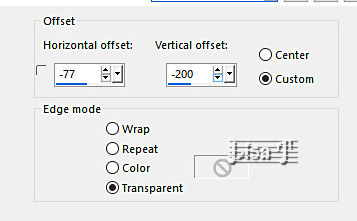
effects => image effects => offset => H : -77 / V : -200 / tick « custom » and « transparent»
effects => 3D effects => drop shadow => 1 / 1 / 80 / 1 / color 4
18
copy / paste « coin » as new layer
effects => image effects => offset => H : -392 / V : 265/ tick « custom » and « transparent»
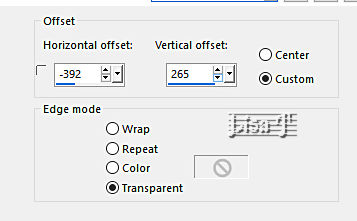
layers => duplicate
image => mirror => mirror horizontal
image => mirror => mirror vertical
layers => merge => merge down
effects => 3D effects => drop shadow => 1 / 1 / 80 / 1 / color 4
19
image => add borders => tick « symmetric » => 2 px color 1
apply your watermark or signature
write your licence number if you used a licenced tube
file => save your work as... type .jpeg
 
My tag with my misted image

Don't hesitate to write to me if you have any trouble with her tutorial
If you create a tag (using other tubes than those provided) with this tutorial
and wish it to be shown, send it to Laurette !
It will be a real pleasure for her to add it to the gallery at the end of the tutorial


back to the boards of Laurette’s tutorials
board 1


|