

You will find the original tutorial here
:
Thank you Laurette for your permission to translate your
work
This tutorial is a personal creation.
Any resemblance with another one would be only pure coincidence.
It is stricly forbidden to modify tubes, to change their
name or take off the matermarks,
To present them on your sites or blog,
To share them in groups,
to make a bank of images, or to use them on lucrative purposes.

Thank you to respect Laurette’s work and the tubers
work.
Don’t hesitate to warn me if you have any trouble
with this translation,
and I’ll try to fix the problem as quickly as I can

Laurette works with PSPX9 and I work with PSP 2019
you can follow this tutorial with another version of PSP,
but the result might be slightly different
don’t hesitate to change blend modes and opacities
of the layers to match your personal colors and tubes
place the tools provided into the appropriate folders of
My COREL PSP general folder
to import presets, double-click on them
this tutorial is the property of Luarette, and the translation
is my property

Supplies
mask - tubes - text tube - color palette _ brush

some tubes are not provided (licensed
tubes) - you can puchase them HERE
translator's note : I
used a character tube created by Paimpollab ( licence
free tubes) HERE
duplicate all the tubes and decorations, and alpha layers,
and work with the copies to preserve originals
open the mask(s) and minimize to tray
double click on presets to install (or import)
place (or import) the selections, brushes, etc....
into the appropriate folders of My Corel PSP
TIP 1 -> if you don’t want to install
a font -->
open it in a software as « Nexus Font » (or
other font viewer software of you choice)
as long as both windows are opened (software and font),
your font will be available in your PSP
TIP 2 -> from PSPX4, in the later versions
of PSP the functions « Mirror » and « Flip » have
been replaced by -->
« Mirror »has become --> image => mirror => mirror
horizontal
« Flip » has become --> image => mirror => mirror
vertical

Plugins needed
Mehdi / Sorting Tiles
Toadies / What Are You ?...
penta.com / Dot and Cross
Alien Skin Eye Candy : Textures / Swirl
Alien Skin Eye Candy : Textures / Marble
Alien Skin Eye Candy : Impact / Glass
FunHouse / Evanescence
Simple /Diamond

colors


Use the pencil to mark your place
along the way
hold down left click to grab and move it
 |

1
open the alpha layer, duplicate, close the original and
work with the copy
flood fill with color 1
effects => texture effects => blinds / color 2
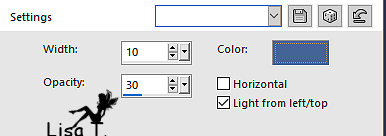
layers => duplicate
2
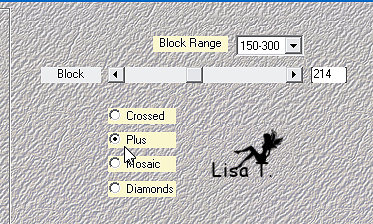
effects => plugins => Mehdi => Sorting Tiles
effects => edge effects => enhance
effects => reflection effects => rotating Mirror
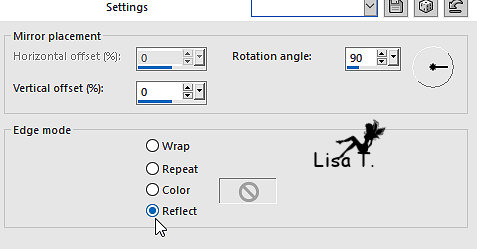
effects => image effects => seamless
tiling
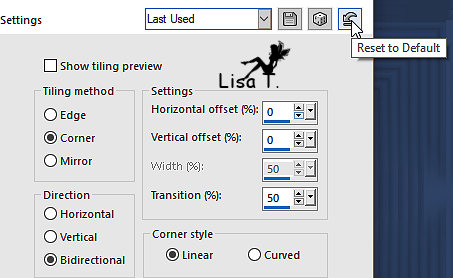
effects = > plugins => Simple => Diamonds / default
settings
3
layers => new raster layer
flood fill with color 2
layers => new mask layer => from image
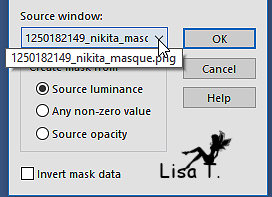
layers => merge => merge group
effects => edge effects => enhance
4
copy / paste « deco fond » as new
layer
adjust => sharpness => sharpen
5
layers => new raster layer
selections => load-save selection => from alpha
channel => selection # 1
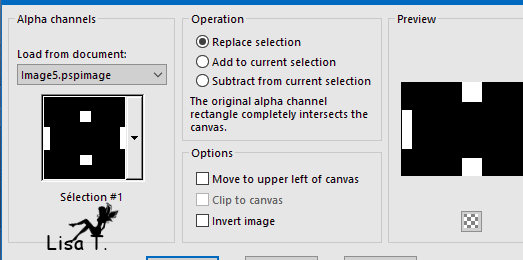
flood fill selection with color 2
effects => texture effects => texture (pattern provided)
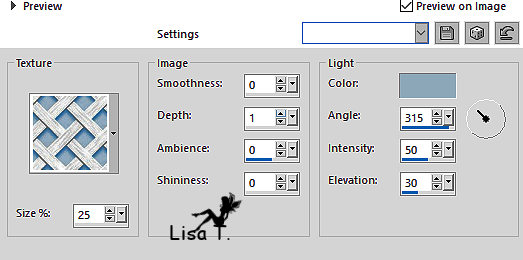
effects => plugins => Toadies => What
Are You ?...

selections => select none
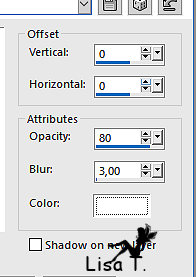
effects => 3D effects => drop shadow => 0 / 0
/ 80 / 3 / color 6
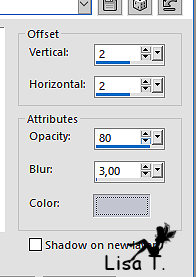
effects => 3D effects => drop shadow => 2 / 2
/ 80 / 3 / color 4
6
layers => new raster layer
selections => load-save selection => from alpha channel
=> selection # 2
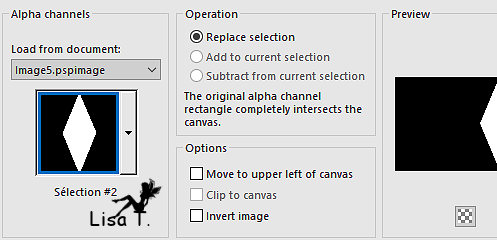
flood fill selection with color 5
selections => modify => contract => 3 px
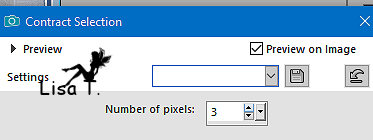
flood fill selection with color 2
effects => texture effects => texture (pattern provided)
(same settings as before)
effects => 3D effects => drop shadow => 0 / 0
/ 60 / 20 / black
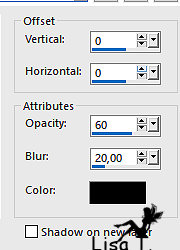
selections => select none
7
layers => new raster layer
selections => load-save selection => from alpha channel
=> selection # 3
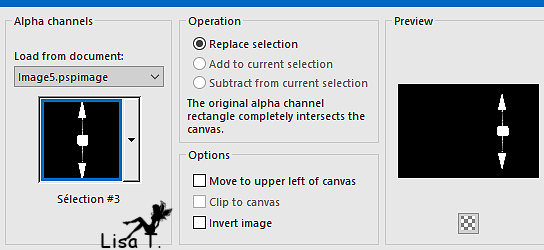
flood fill selection with color 2
effects => plugins => Alien Skin Eye Candy 5 :
Textures / Marble / color 2
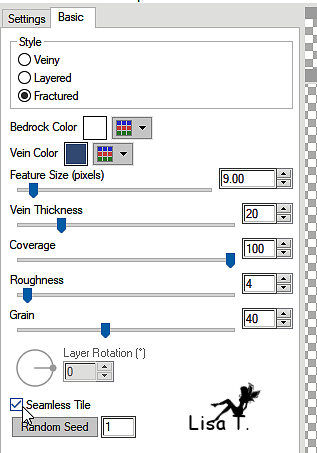
selections => select none
effects => plugins => Alien Skin Eye Candy 5 Impact
/ Glass
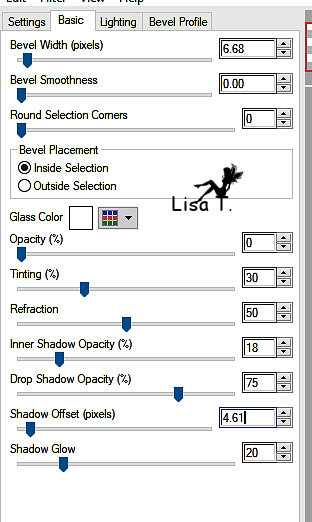
effects => 3D effects => drop shadow => 0 / 0
/ 80 / 20 / black
8
layers => new raster layer
selections => load-save selection => from alpha channel
=> selection # 4
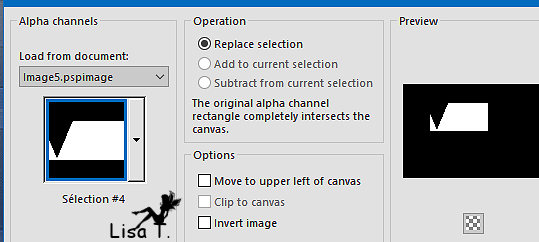
flood fill selection with color 5
selections => modify => contract => 2 px
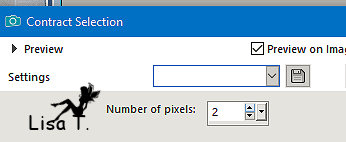
flood fill selection with color 2
effects => plugins => Penta.com => Dot and Cross
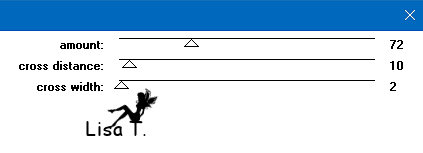
effects => plugins => Alien Skin
Eye Candy 5 : Textures / Swirl
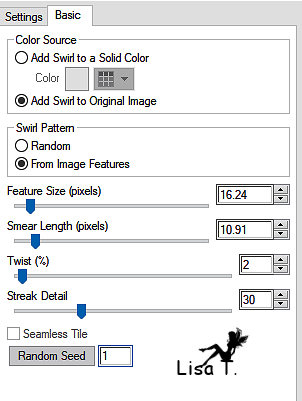
adjust => sharpness => sharpen
effects => 3D effects => drop shadow => 0 / 0
/ 80 / 20 / black
selections => select none
9
layers => new raster layer
selections => load-save selection => from alpha channel
=> selection # 5
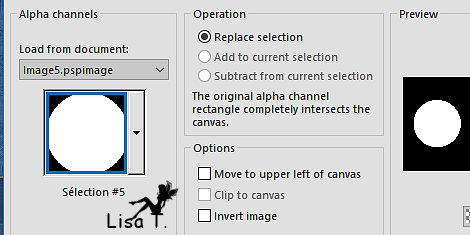
flood fill selection with color 5
selections => modify => contract => 2 px

flood fill selection with color 2
effects => plugins => Alien Skin Eye Candy 5 : Textures
/ Marble

selections => select none
effects => plugins => Alien Skin Eye Candy 5 Impact
/ Glass (same settings as before)
effects => 3D effects => drop shadow => 0 / 0
/ 80 / 20 / black
10
layers => new raster layer
selections => load-save selection => from alpha channel
=> selection # 6
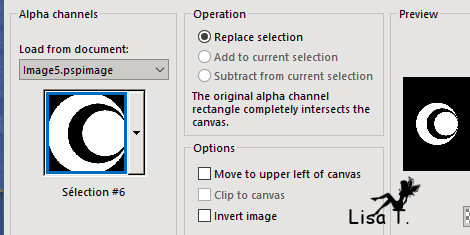
flood fill selection with color 2
effects => texture effects => texture (pattern provided)
(same settings as before)
set color 5 as BG color into the materials palette
effects => plugins => FunHouse => Evanescence
/ default settings
selections => select none
effects => 3D effects => drop shadow => 0 / 0
/ 60 / 10 / black
layers => merge => merge visible
11
selections
=> select all
selections => modify => contract => 5 px

image => selection => crop to selection
12
image => add borders => tick « symmetric » => ...
2 px color 4
3 px color 2
3 px color 3
30 px white
2 px color 3
3 px color 2
3 px color 3
selections => select all
image => add borders => tick « symmetric » => ...
25 px color 2
selections => invert
effects => plugins => Alien Skin Eye Candy 5 : Textures
/ Swirl / default settings / color source : n° 2
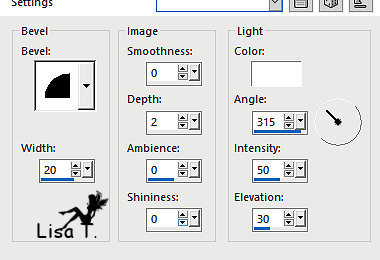
effects => 3D effects => inner bevel
selections => select none
13
image => add borders => tick « symmetric » => ...
2 px color 3
3 px color 2
3 px color 3
14
copy / paste « deco 2 » as new layer
don’t move it
effects => 3D effects => drop shadow => 1 / 1
/ 80 / 4 / black
15
layers => new raster layer
set color 1 (white) as FG color into the materials palette
enable the brush tool / brush provided

apply top left / 1 or 2 clicks
effects => 3D effects => drop shadow => 1 / 1
/ 50 / 1 / black
16
copy / paste « texte » as new layer
move to the right (see final result)
17
copy / paste your character tube as new layer
effects => 3D effects => drop shadow => 0 / 0
/ 80 / 40 / black
18
layers => new raster layer
apply your watermark or signature
write your licence number if you used a licenced tube
image => resize => tick « resize all layers » => 900
px width
save your work as... type .jpeg

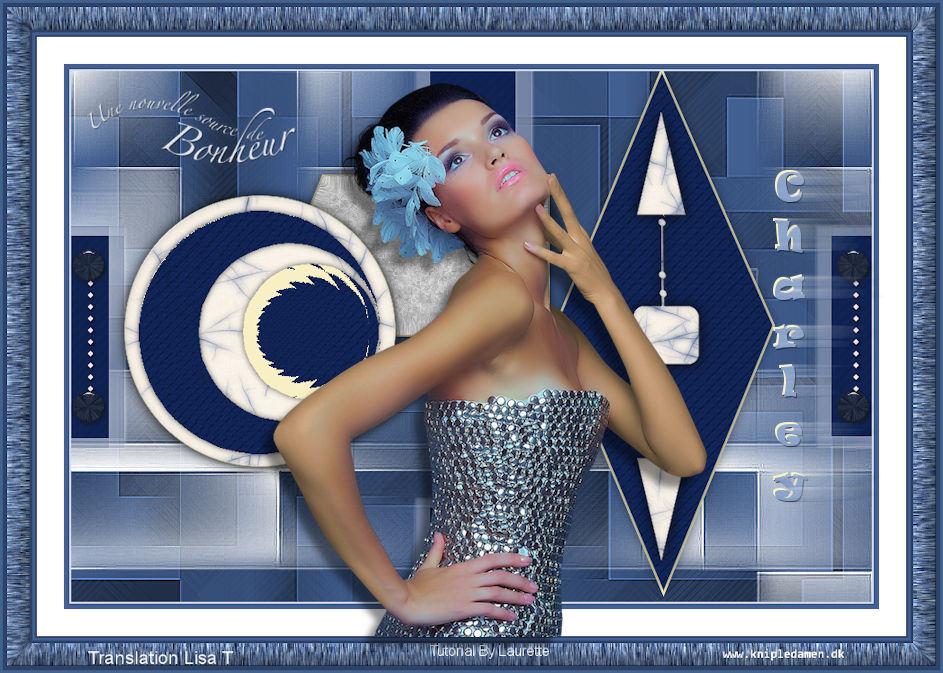
My tag with my tubes

Don't hesitate to write to me if you have any trouble
with her tutorial
If you create a tag (using other tubes than those provided)
with this tutorial
and wish it to be shown, send it to me !
It will be a real pleasure for me to add it to the gallery
at the end of the tutorial


created by  Birte Birte

back to the boards of Laurette’s tutorials
board 1

|