

You will find the original tutorial here
:
Thank you Laurette for your permission to translate your
work
This tutorial is a personal creation.
Any resemblance with another one would be only pure coincidence.
It is stricly forbidden to modify tubes, to change their
name or take off the matermarks,
To present them on your sites or blog,
To share them in groups,
to make a bank of images, or to use them on lucrative purposes.

Thank you to respect Laurette’s work and the tubers
work.
Don’t hesitate to warn me if you have any trouble
with this translation,
and I’ll try to fix the problem as quickly as I can

Laurette works with PSPX9 and I work with PSP 2019
you can follow this tutorial with another version of PSP,
but the result might be slightly different
don’t hesitate to change blend modes and opacities
of the layers to match your personal colors and tubes
place the tools provided into the appropriate folders of
My COREL PSP general folder
to import presets, double-click on them
this tutorial is the property of Luarette, and the translation
is my property

Supplies
masks - tubes - text tube - color palette

some tubes are not provided (licensed
tubes) - you can puchase them HERE
duplicate all the tubes and decorations, and alpha layers,
and work with the copies to preserve originals
open the mask(s) and minimize to tray
TIP 1 -> if you don’t
want to install a font -->
open it in a software as « Nexus Font » (or
other font viewer software of you choice)
as long as both windows are opened (software and font),
your font will be available in your PSP
TIP 2 -> from PSPX4,
in the later versions of PSP the functions « Mirror » and « Flip » have
been replaced by -->
« Mirror »has become --> image => mirror => mirror
horizontal
« Flip » has become --> image => mirror => mirror
vertical

Plugins needed
* Modules externes / MuRa's Meister / Cloud
* I.C.NET Software /Filters Unlimited 2.0/Filter Factory
Gallery B/Bubble
* Modules externes / Graphic Plus / Cros Shadow
* Modules externes / MuRa's Seamless / Emboss at Alpha
* Modules externes / AAA Filters / Foto Frame

colors


Use the pencil to mark your place along
the way
hold down left click to grab and move it
 |

1
set colors 1 & 2 as FG and BG colors into the materials
palette
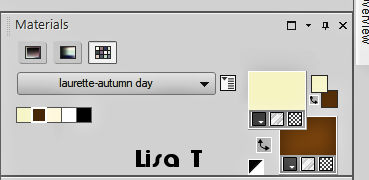
open a new transparent image 900 * 600
px
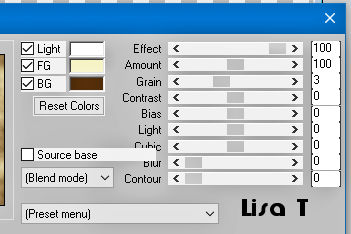
effects => plugins => Mura’s Meister => Cloud
2
open the landscape tube n°1
respect the following settings if you changed this tube
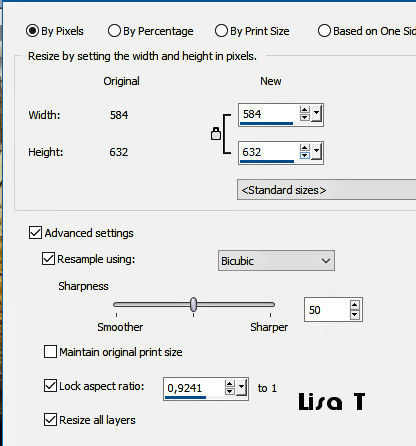
copy / paste as new layer
objects => align => left OR ...
enable the Pick tool with the following settings, to move
the layer acurately => position X : 0 / position Y :
- 4
layers => duplicate
image => mirror => mirror horizontal
layers => merge => merge down
layers => duplicate
effects => plugins => Unlimited 2 => Filter Factory
Gallery B/ Bubble
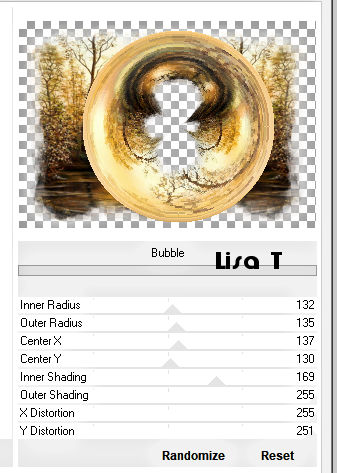
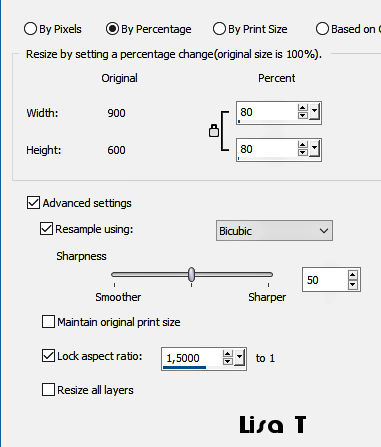
image => resize => untick « resize all layers » => 80
%
3
open the landscape tube n°1 again
layers => new mask layer => from image
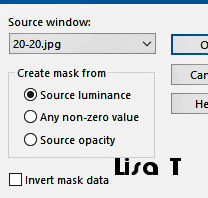
layers => merge => merge group
copy / paste as new layer
don’t move it
4
copy / paste the ducks tube as new layer
move upward (see final result)
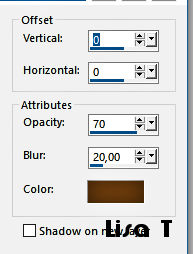
effects => 3D effects => drop shadow
5
copy / paste « Antique Autumn Frames (8) »
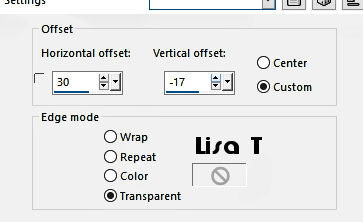
effects => image effects => offset => H : 30/
V : -17 / tick « custom » and « transparent »as
new layer
effects => 3D effects => drop shadow
=> same settings as previously
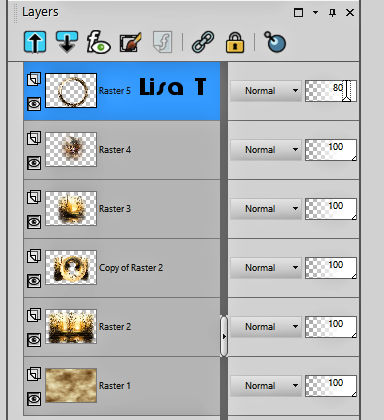
drop down oapcity of the layer : 80%
your layers palette looks like this
layers => merge => merge visible
6
layers => new raster layer
flood fill with color 3
layers => new mask layer => from image
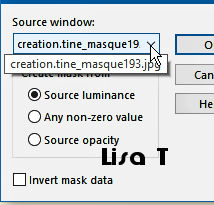
layers => duplicate 2 times
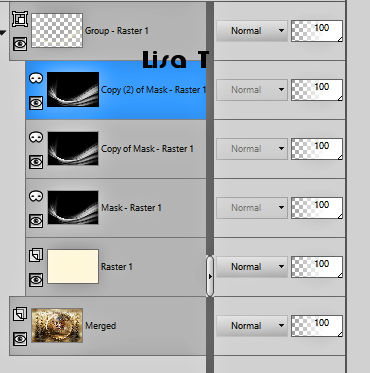
layers => merge => merge group
layers => duplicate
image => mirror => mirror horizontal
layers => merge => merge down
blend mode of the layer : Luminance (Legacy) / opacity
: 50 %
7
layers => new raster layer
set colors 1 & 2 as FG and BG colors into the materials
palette
prepare a linear gradient into the materials palette
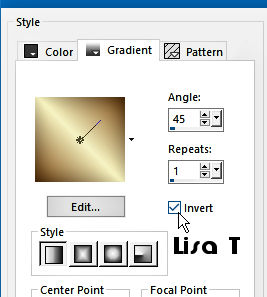
flood fill layer with the gradient
layers => new mask layer => from image
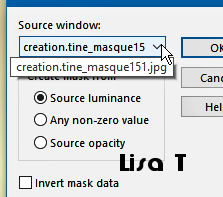
adjust => sharpness => sharpen more
layers => merge => merge group
effects => 3D effects => drop shadow / BG color
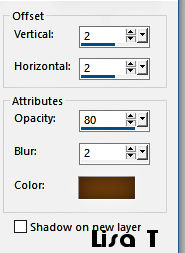
8
effects => plugins => Graphic Plus => Cross Shadow
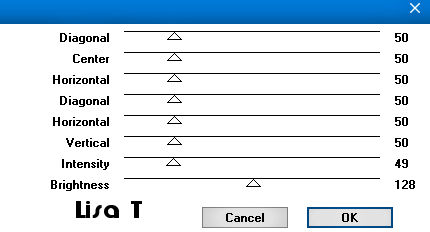
effects => plugins => Mura’s Seamless => Emboss
at Alpha
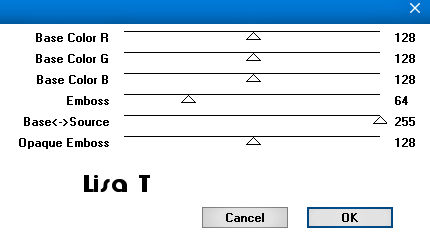
your layers palette looks like this
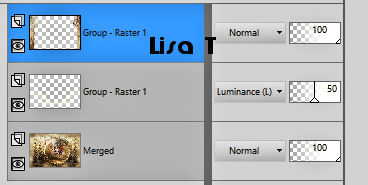
9
image => add borders => tick « symmetric » => ...
2 px FG color
2 px BG color
2 px color 3
selections => select all
image => add borders => tick « symmetric » => ...
30 px FG color
selections => invert
flood fill selection with the gradient (step 7)
effects => texture effects => tiles
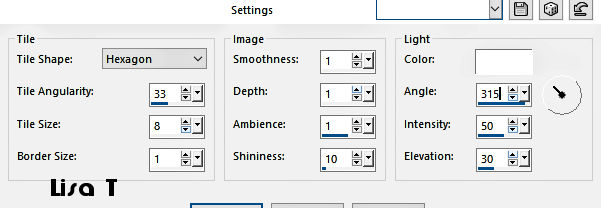
effects => 3D effects => inner bevel
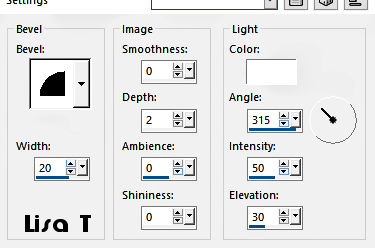
selections => select none
10
image => add borders => tick « symmetric » => ...
2 px FG color
2 px BG color
2 px color 3
selections => select all
image => add borders => tick « symmetric » => ...
45 px FG color
selections => invert
effects => texture effects => weave
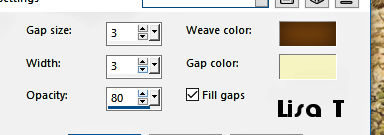
selections => invert
effects => 3D effects => drop shadow => 0 / 0
/ 80 / 40 / black
selections => select none
effects => plugins => AAA Frames => Foto Frame
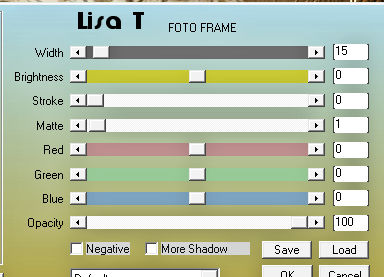
copy / paste « autumn journey (128) » as
new layer
move bottom right
effects => 3D effects => drop shadow => 0 / 0
/ 70 / 10 / black
11
copy / paste Word Art as new layer
place where you like
effects => 3D effects => drop shadow => 1 / 1
/ 70 / 1 / black
layers => duplicate
effects => distortion effects => wind
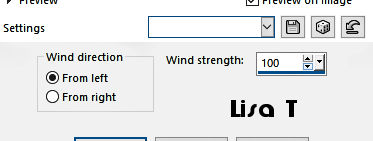
layers => arrange => move down
12
highlight top layer
copy / paste the 4 buttons tube as new layer (colorize
if necessary)
don’t move it
effects => 3D effects => drop shadow => 0 / 0
/ 80 / 10 / black
13
layers => new raster layer
apply your watermark or signature
write your licence number if you used a licenced tube
save your work as... type .jpeg
image => add borders => tick « symmetric » => 2
px BG color
image => resize => tick « resize all layers » => 900
px width
save your work as... type .jpeg

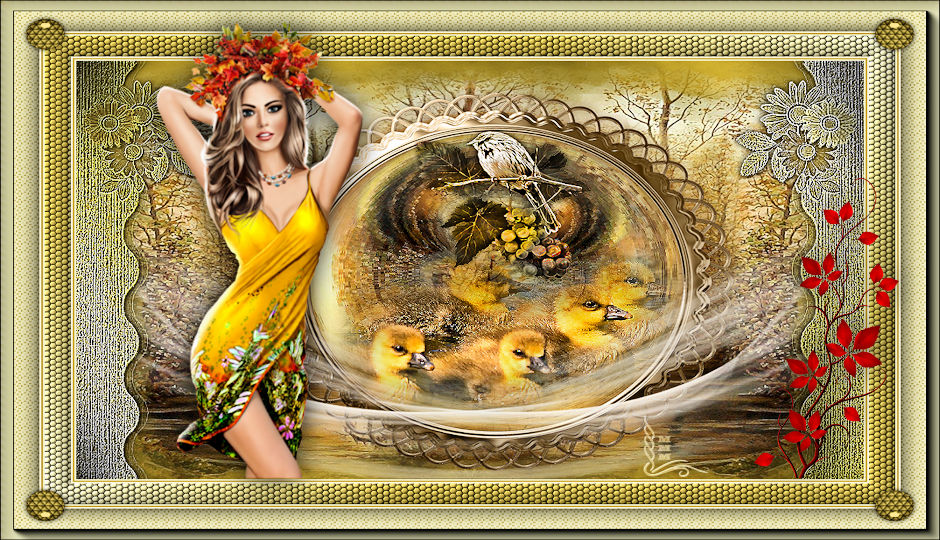
My tag with my tubes

Don't hesitate to write to me if you have any trouble
with her tutorial
If you create a tag (using other tubes than those provided)
with this tutorial
and wish it to be shown, send it to me !
It will be a real pleasure for me to add it to the gallery
at the end of the tutorial



created by  MMM MMM

back to the boards of Laurette’s tutorials
board 1


|