

You will find the original tutorial here :

Thank you Laurette for your permission to translate
your work
This tutorial is a personal creation.
Any resemblance with another one would be only pure coincidence.
It is stricly forbidden to modify tubes, to change their
name or take off the matermarks,
To present them on your sites or blog,
To share them in groups,
to make a bank of images, or to use them on lucrative purposes.

Thank you to respect Laurette’s work and the tubers
work.
Don’t hesitate to warn me if you have any trouble
with this translation,
and I’ll try to fix the problem as quickly as I can

Laurette and I work with PSP2020 Ultimate
you can follow this tutorial with another version
of PSP, but the result might be slightly different
don’t hesitate to change blend modes and opacities
of the layers to match your personal colors and tubes
place the tools and materials provided into the appropriate
folders of My COREL PSP general folder
to import presets, double-click on them, or import
open the mask(s) and minimize to tray
duplicate all the tubes and decorations, and alpha layers, and work with
the copies to preserve originals
install the plugins necessary
this tutorial is the property of Laurette, and the
translation is my property

Supplies
Alpha layers OR selections (you choose the method
you prefer)
tubes
selections
color palette
plugin to place into Unlimited 2


Hints and Tips
TIP 1 -> if you don’t
want to install a font -->
open it in a software as « Nexus Font » (or
other font viewer software of you choice)
as long as both windows are opened (software and font),
your font will be available in your PSP
TIP 2 -> from PSPX4,
in the later versions of PSP the functions « Mirror » and « Flip » have
been replaced by -->
« Mirror »has become --> image => mirror => mirror
horizontal
« Flip » has become --> image => mirror => mirror
vertical

Plugins needed
Simple : Pizza Slice Mirror
Kang / Patch Wheel
MuRa’s Filter Meister -Pole Transformation 2.1
Flaming Pear / Flexify 2

colors
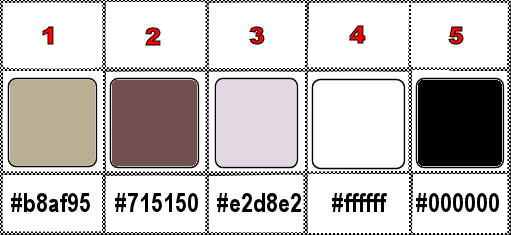
set FG to color 1 and BG to color 2 in materials
palette

Use the pencil to mark your place
along the way
hold down left click to grab and move it
 |

1
duplicate the tubes, close the originals and work
with the copy
place the selections into the dedicated folder of My Corel
PSP general folder
OR
use the copy of the alpha layer, it contains all the selections
saved on an alpha channel (invisible)
prepare a linear gradient
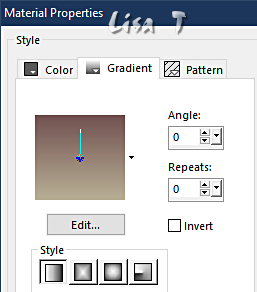
2
open the alpha layer (or a new layer 900 * 600 px)
flood fill with the gradient
effects => texture effects => Weave / colors 2 & 1

effects = > plugins => Simple => Pizza Slice
Mirror / default settings
effects => reflection effects => rotating Mirror
/ 0 / 180 / tick « reflect »
3
selections => load-save selection => from alpha channel
=> selection # 1
selections => promote selection to layer
layers => new raster layer
flood fill selection with color 2
selections => modify => contract => 10 px
selections => invert
effects => texture effect => Blinds

selections => select none
effects => image effects => seamless tiling => default
settings
adjust => sharpness => sharpen more
4
selections => load-save selection => from alpha channel
=> selection # 2
hit the DELETE key of your keyboard
selections => select none
5
highlight layer below (promoted selection)
selections => load-save selection => from alpha channel
=> selection # 3
layers => new raster layer
flood fill selection with color 2
effects = > plugins => Kang 1 => Patcj Wheel
/ default settings
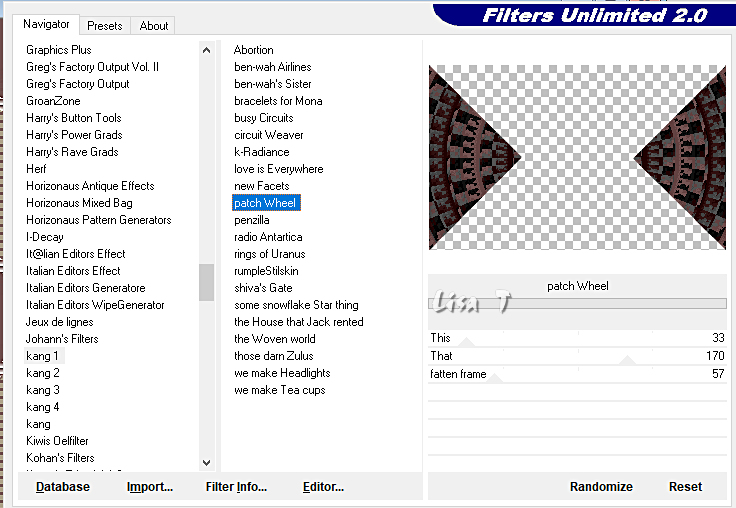
selections => invert
effects => 3D effects => drop shadow => 0 / 0
/ 80 / 40 / black
selections => select none
layers => arrange => bring to top

6
highlight bottom layer
selections => load-save selection => from alpha channel
=> selection # 4
selections => promote selection to layer
selections => select none
7
layers => duplicate
image => mirror => mirror vertical
layers => merge => merge down
selections => load-save selection => from alpha channel
=> selection # 5
layers => new raster layer
flood fill selection with color 2
effects => plugins => Unlimited 2 => Texturize
/ Raw Canvas / default settings

layers => merge => merge down
selections => select none
8
layers => duplicate
effects => plugins => Mura’s Meister => Pole
Transformation 2.1

layers => duplicate
image => mirror => mirror vertical
layers => merge => merge down TWICE
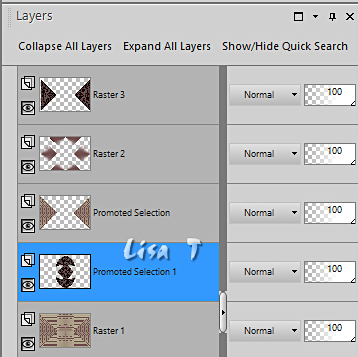
« promoted selection 1 » layer is highlighted
effects = > plugins => Kang 1 => Patch Wheel
/ default settings

effects => 3D effects => drop shadow => 0 /
0 / 50 / 20 / black
9
highlight top layer (Raster 3)
selections => load-save selection => from alpha channel
=> selection # 6
edit => copy / paste as new image (it is a pattern)
/ set aside
back to your main work
selections => select none
10
layers => new raster layer
selections => load-save selection => from alpha channel
=> selection # 7
set FG to color 3
flood fill selection with color 3
effects => texture effects => Weave / colors 2 & 1

selections => select none
11
effects => plugins => Flaming Pear => Flexify
2
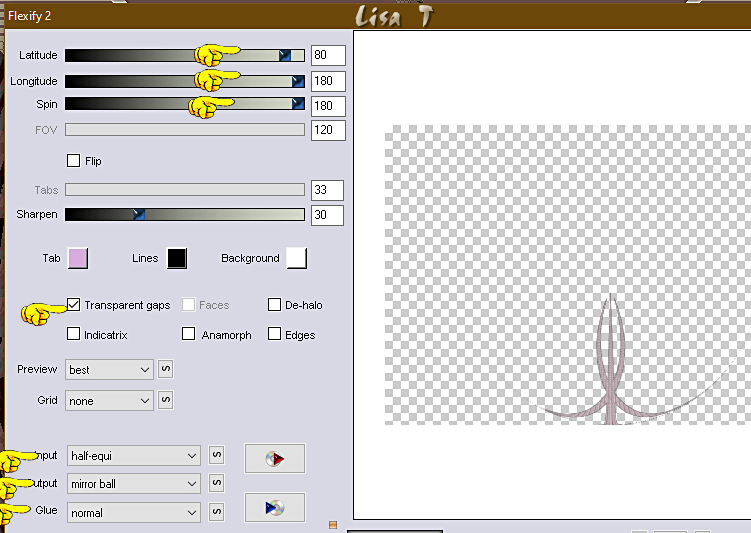
image => free rotate
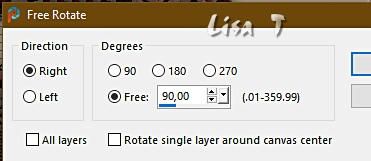
image => resize => untick « resize all layers » => 90%
effects => image effects => offset => H : -170
/ V : 0 / tick « custom » and « transparent »
layers => duplicate
image => mirror => mirror horizontal
layers => merge => merge down
effects => 3D effects => drop shadow => 0 / 0
/ 50 / 20 / black
12
highlight Raster 2
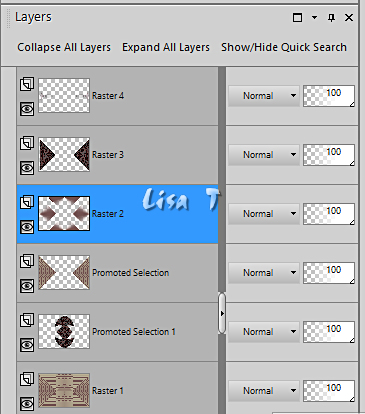
selections => load-save selection => from alpha channel
=> selection # 8
hit the DELETE key of your keyboard
selections => select none
13
highlight top layer
copy / paste the « deco 2 » tube
as new layer
don’t move it
effects => 3D effects => drop shadow => 1 / 1
/ 80 / 1 / black
14
selections => select all
image => add borders => tick « symmetric » => 10
px color 2
selections => invert
effects => texture effect => Blinds

image => rotate Left
effects => texture effect => Blinds (same settings)
image => rotate right
selections => select none
15
image => add borders => tick « symmetric » => ...
4 px color 2
30 px white
3 px color 2
selections => select all
image => add borders => tick « symmetric » => 50
px white
selections => invert
activate the pattern set aside in
step 9
place this pattern in the materials palette
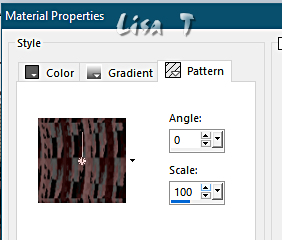
flood fill selection with this pattern
selections => invert
effects => 3D effects => drop shadow => 0 / 0
/ 80 / 40 / black => TWICE
selections => select none
16
copy / paste the character tube as new layer
place properly and drop a shadow of your choice (Laurette
chose => 0 / 0 / 60 / 40 / black)
17
apply your watermark or signature on a new layer
add Laurette’s watermark if you wish
write your licence number if you used a licenced tube
image => add borders => tick « symmetric » => 3
px color 2
image => add borders => tick « symmetric » => 2
px black
layers => merge => merge all (flatten)
resize to 950 px width
file => save your work as... type .jpeg

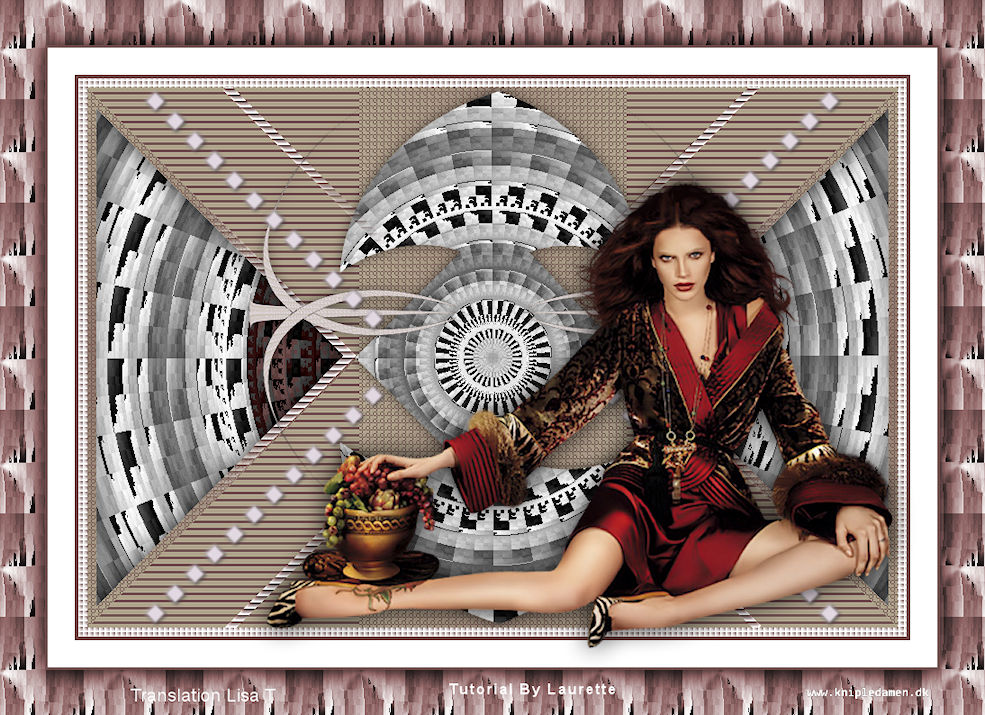
My tag with a tube created
by Nadège

Don't hesitate to write to me if you have any trouble
with this translation
If you create a tag (using other tubes than those provided)
with this tutorial
and wish it to be shown, send it to me !
It will be a real pleasure for me to add it to the gallery
at the end of the translation



created by  Birte Birte

back to the boards of Laurette’s tutorials
20 tutorials on each board
board 3 => 
at the bottom of each board you will find the arrows
allowing you to navigate from one board to another


|