Christmas
at Pinuccia

The original tutorial can be found HERE

Conditions of use of the material provided
It is forbidden to modifiy, change the name, take off the
watermarks or alter the tubes.
It is forbidden to share them in groups or offer them on
your site, blog or forum without permission
If you want to use them to create a tutorial, you must ask
the permission to the authors.
This is a personal work.
any resemblance with another tutorial would be pure coincidence
it is forbidden to share it or distribute it on the Web,
to present it in a group or forum without the author’s
permission
Rose de Sables is happy to share her work with you
she hopes it will help you dream and get away from your eveyday
life

Material

thank you to the tubers for their great work
open tubes, duplicate them and work with the copies
open mask and minimize it to tray
copy / paste selections into the folder « selections » of
Corel PSP Folder
to prevent the theft of tubes, they are no longer provided
in the ZIP material
the only material provided is : decorations, masks
and selections
you will have to use your personal collection

Filters Used
MuRa’s Meister/Perspective Tilling -FM Tile Tools/Blend
Emboss
AAAFiltre/ Median 3x3


translator’s note
Rose des Sables works with PSP X, I use PSPX9 to create
my tag and write my translation
but this tutorial can be realized with another version
according to the version of PSP you use, the results might
be slightly differents
don’t hesitate to change the blend modes of the layers
to match your tubes and colors
Colors

color 1 --> foreground color --> FG --> left
click --> #74818a
color 2 --> background color --> BG --> right
click --> #5a6778

Use the pencil to follow the steps
hold down left click to grab it and move it


Realization
1
open a new transparent image 900 *** 600 pixels
selections -> select all
2
open « image 99 » and minimize to
tray
in materials palette prepare FG box this way

3
flood fill layer with this pattern
if you use different colors, don’t forget to colorize
this layer matching your colors
4
layers -> duplicate
5
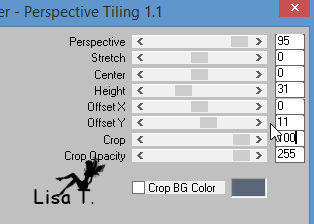
effects -> plugins -> Mura’s Meister / Perspective
Tiling 1.1
6
highlight Raster 1
load selection from disk -> Noël chez Pinuccia
7
selections -> promote selection to layer
8
DELETE (press delete key of your keyboard)
9
copy / paste into selection Christmas image
keep selection active
10
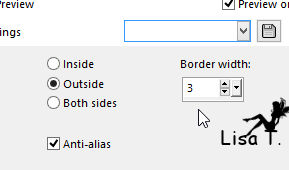
selections -> modify -> select selection borders
/ 3 pixels
11
in materials palette, set color #74818a as FG color
flood fill selection
12
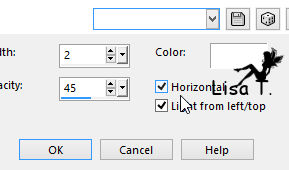
effects -> texture effects -> blinds

then
13
effects -> edge effects -> enhance more
14
selections -> select none
15
copy / paste as new layer « barre »
16
image -> resize -> uncheck « resize all
layers » -> 60%
17
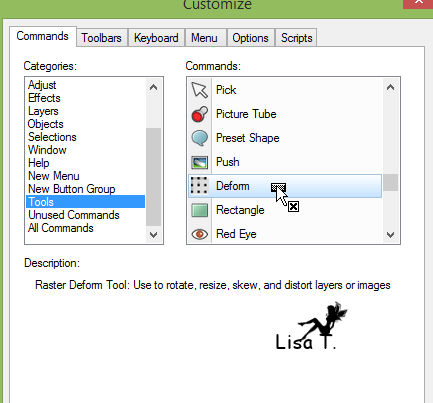
activate Raster deform tool
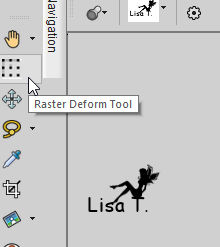
translator’s note : if this tool is not in your tools palette,
you will have to install it
view -> customize -> tools
drag and drop tool by left click in tools palette
rotate bar to the right
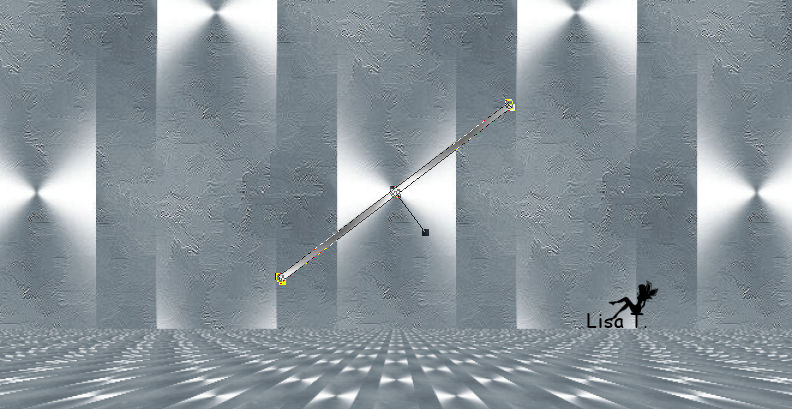
to see better, you may close frame’s visibility (open
it afterwards)
disable tool (M key)
18
layers -> duplicate
image -> mirror -> mirror horizontal
layers -> merge -> merge down
19
image -> resize -> uncheck « resize all layers » -> 80%
20
your tag looks like this

21
effects -> image effects -> offset
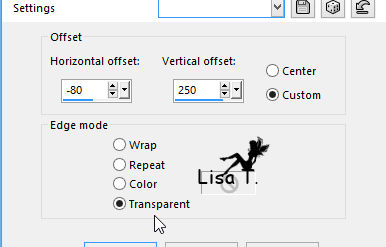
22
layers -> duplicate
image -> mirror -> mirror horizontal
23
layers -> merge -> merge down
24
in layers palette, move this layer under frame’s
layer
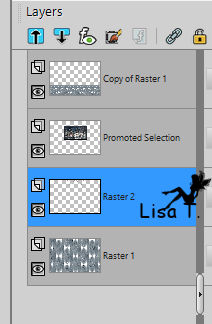
25
effects -> texture effects -> blinds
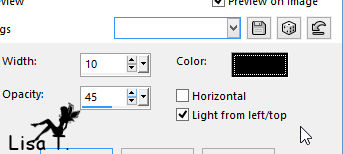
then
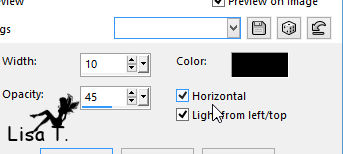
26
blend mode : Luminance (Legacy)
27
your tag and layers palette
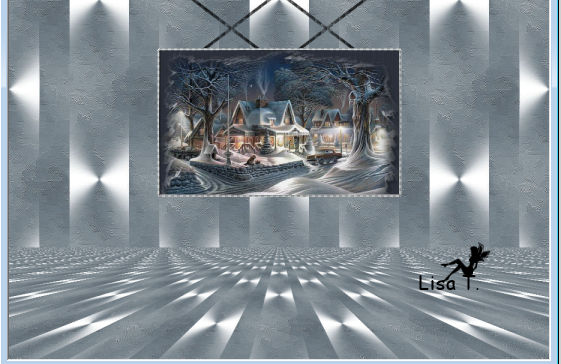
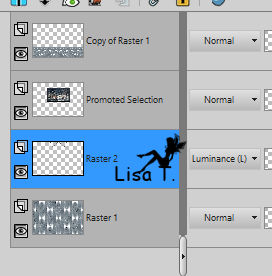
28
highlight Frame’s layer
layers -> merge -> merge down
29
copy / paste as new layer a character tube, bring layer
to top
move it to the right
30
copy / paste as new layer tree tube
resize to 80% if necessary
31
effects -> image effects -> offset
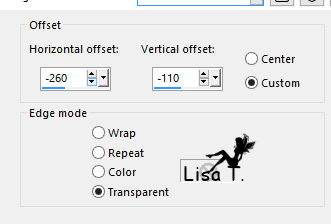
blend mode : Luminance (Legacy) (or other)
32
adjust -> sharpness -> sharpen
33
drop shadow on 3 layers : character, tree and frame
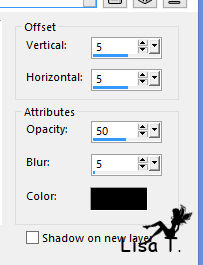
34
make sure top layer is highlight
copy / paste as new layer star tube (image 4)
35
image -> resize -> 60%
36
effects -> image effects -> offset
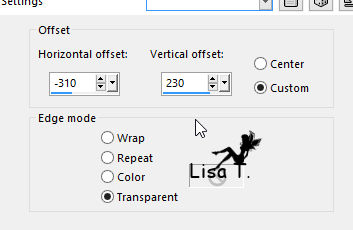
37
copy / paste as new layer « word art noel »
38
effects -> image effects -> offset
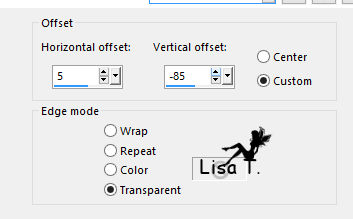
39
effects -> plugins -> FM Tile Tools / Blend Emboss
/ default settings
40
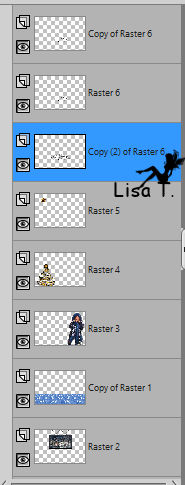
layers -> duplicate TWICE
layers -> arrange -> move down twice
41
your tag and your layers palette

42
layers -> merge -> merge all (flatten)
43
image -> add borders -> ...
2 pixels color 2
2 pixels color 1
25 pixels white
44
select large border with magic wand tool
flood fill with pattern
selections -> promote selection to layer
45
effects -> plugins -> Graphic Plus / Cross Shadow
/ default settings
46
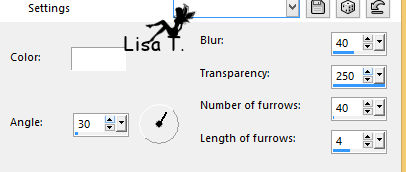
effects -> texture effects -> fine leather
47
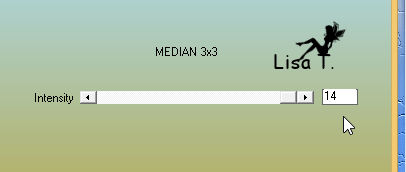
effects -> plugins -> AAA Filters / Median 3x3 -> APPLY
TWICE
48
effects -> edge effects -> enhance
49
selections -> invert
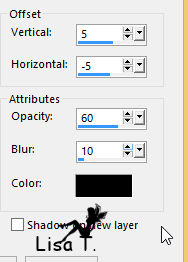
effects -> 3D effecst -> drop shadow
50
highlight promoted selection
effects -> 3D effects -> cutout
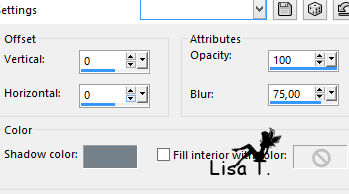
51
selections -> select none
52
apply your watermark
53
image -> add borders -> 2 pixels color 2
file -> save as... type .jpeg

Your tag is finished.
Thank you for following this tutorial
Don’t forget to sign (to avoid plagiarism) and save
file as… type JPEG

Don’t hesitate to send your creations
to Rose des Sables

It will be a real pleasure for her to show them in the
gallery at the bottom of the tutorial page
Don’t forget to indicate her your name and the adress
of your blog or site if you have one


Back to the boards of Rose des Sables’ tutorials
Board 1 

|