Christmas
2016

The original tutorial can be found HERE

Conditions of use of the material provided
It is forbidden to modifiy, change the name, take off the
watermarks or alter the tubes.
It is forbidden to share them in groups or offer them on
your site, blog or forum without permission
If you want to use them to create a tutorial, you must ask
the permission to the authors.
This is a personal work.
any resemblance with another tutorial would be pure coincidence
it is forbidden to share it or distribute it on the Web,
to present it in a group or forum without the author’s
permission
Rose de Sables is happy to share her work with you
she hopes it will help you dream and get away from your eveyday
life

Material
scraps elements - kts text
translator's note : thank you to Animabelle and Cibi for
their lovely tubes
background (place into « gradients » folder
of your Corel PSP)
xxxxxxxxxxxxx material xxxxxxxxxxxx
thank you to the tubers for their great work
open tubes, duplicate them and work with the copies
copy / paste selections into the folder « selections » of
Corel PSP Folder
to prevent the theft of tubes, they are no longer provided
in the material ZIP
the only material provided is : decorations, masks and
selections
you will have to use your personal collection

Filters Used
Mehdi/Wavy Lab-Graphix Plus/Button Beveler II-
Alf’s Border FX/Mirror Bevel-Flexify 2


translator’s note
Rose des Sables works with PSP X, I use PSPX9 to create my
tag and write my translation
but this tutorial can be realized with another version
according to the version of PSP you use, the results might
be slightly differents
don’t hesitate to change the blend modes of the layers
to match your tubes and colors
Colors
prepare two colors into your materials palette

color 1 --> foreground color --> FG --> left click
--> #a31835
color 2 --> background color --> BG --> right click
--> #346328

Use the pencil to follow the steps
hold down left click to grab it and move it


Realization
1
open a new transparent image 950 * 550
pixels
selections -> select all
2
copy / paste into selection « paper 3 »
selections -> select none
3
Raster 1 is highlighted
selections -> load selection -> from disk -> « cadre
noel rose 1 »
4
layers -> new raster layer
5
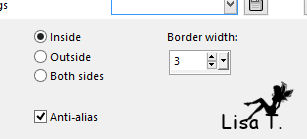
selections -> modify -> select selection borders
6
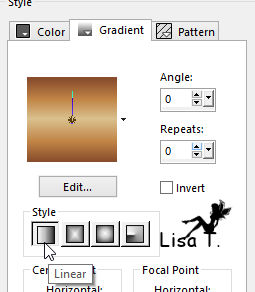
flood fill selection with « bkgr87 » (provided)
7
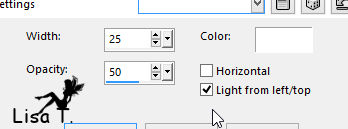
effects -> texture effects -> blinds / white
8
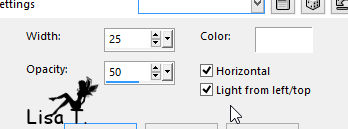
again, apply same effect, changing settings
selections -> select none
9
effects -> edge effects -> enhance
10
highlight Raster 1
layers -> duplicate
11
effects -> plugins -> Mehdi / Wavy Lab
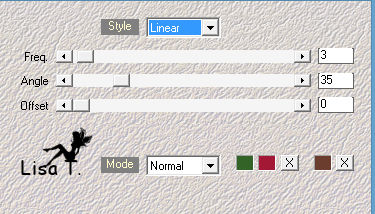
12
image -> resize -> uncheck « resize all
layers » -> 80%
13
activate Ras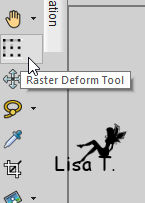 ter Deform tool ter Deform tool
adjust into gold frame
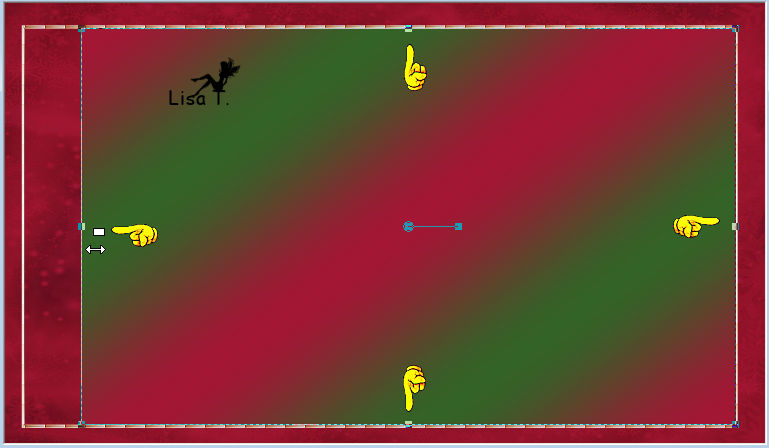
your tag looks like this
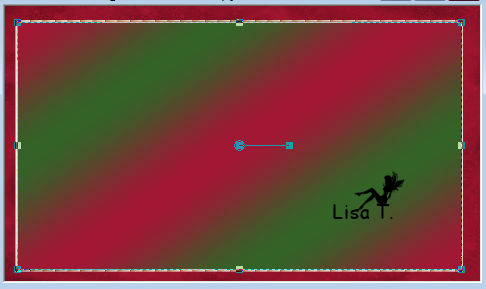
your layers palette looks like this
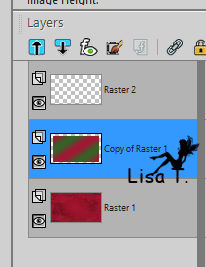
disable tool (key M)
14
Raster 1 is highlighted
effects -> plugins -> Graphic Plus / Button Beveler
II -> apply TWICE

highlight top layer
15
layers -> new raster layer
16
selections -> load selection -> from disk -> « cadre
noel rose 2 »
17
selections -> modify -> select selection borders
-> 5 pixels
18
in materials palette, set bkgr87 as FG color
19
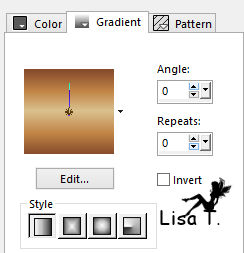
flood fill selection withthe following gradient
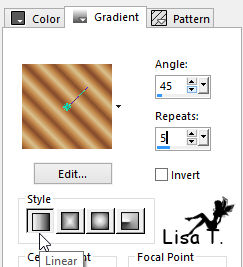
20
effects -> texture effects -> blinds
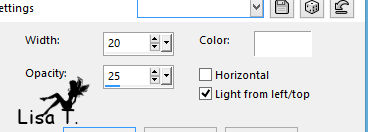
then
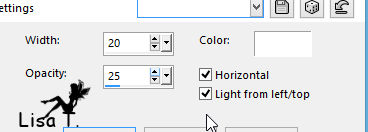
21
effects -> edge effects -> enhance
selections -> select none
22
your tag
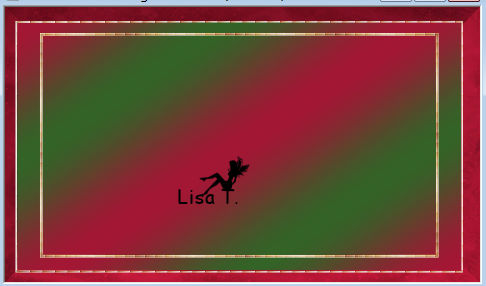
23
highlight « copy of raster 1 »
24
effects -> plugins -> Alf’s Border FX / Mirror
Bevel

24
layers -> duplicate
25
selections -> select all
selections -> float - selections -> defloat
26
effects -> plugins -> Flaming Pear / Flexify 2
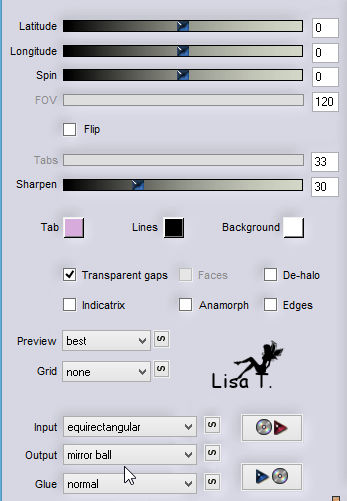
27
image -> resize -> uncheck « resize all layers » -> 60%
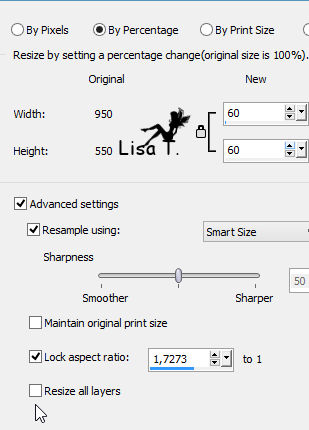
28
your tag and layers palette
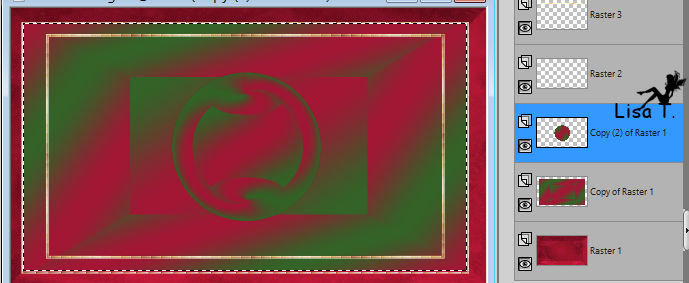
selections -> select none
29
highlight top layer
copy / paste scrap element 1
don’t move it
30
blend mode : overlay
sharpness -> sharpen
31
copy / paste as new layer bulbs tube
resize if necessary
move it to the left
32
open scrap element 2 -> resize -> 80% TWICE
layers -> duplicate 5 times and move it where you like
33
layers -> merge down 4 times (all 5 cristal ices are
on a single layer)
layers -> duplicate
image -> mirror -> mirror horizontal
translator’s note : I didn’t follow this
step
34
copy / paste decoration and move it to the bottom
35
copy / paste as new layer ribbon 1
36
effects -> image effects -> offset
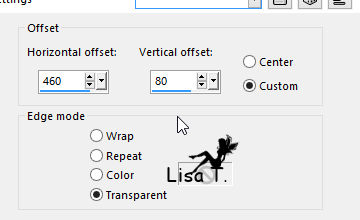
layers -> duplicate
image -> mirror -> mirror horizontal
37
copy / paste « Word Art »
effecst -> image effects -> offset
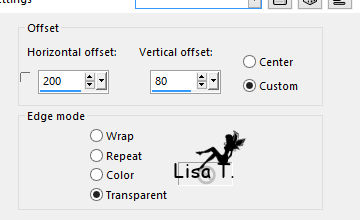
38
adjust -> sharpness -> sharpen more
39
layers -> duplicate
effects -> image effects -> offset
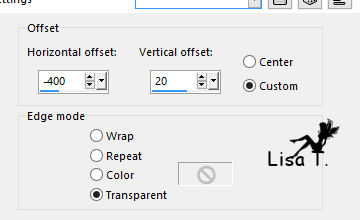
40
apply your watermark
41
effects -> 3D effecst -> drop shadow on decoration,
bulbs, ribbons and word art
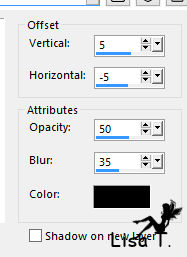
42
image -> add borders -> 5 pixels white
select this border with magic wand tool and flood fill
with gradient
layers -> merge -> merge all (flatten)
file -> save as... type .jpeg

Your tag is finished.
Thank you for following this tutorial
Don’t forget to sign (to avoid plagiarism) and save
file as… type JPEG

Don’t hesitate to send your creations
to Rose des Sables

It will be a real pleasure for her to show them in the
gallery dedicated to this tutorial
Don’t forget to indicate her your name and adress
of your blog or site if you have one

Back to the boards of Rose des Sables’ tutorials
Board 1 

|