Christmas around the world

original can be found HERE

I am member o TWInc
this tutorial is protected


Plugins
VanDerLee/Unplugged X/Transition
Mirror Rave/Quadrant Flip
Flaming Pear/Flexify 2
Simple/Pizza Slice Mirror
Unlimited 2/Factory Galery N/Wee Scratches
Unlimited 2/&BKG Kaleidoscope/Blueberry Pie
Simple/4 Way Average
Toadies/Weaver
Mura’s Meister/Perspective Tiling
AAA Frame/Foto Frame
VanDerLee/Unplugged W/TV RGB
Material
tubes by Jacotte
1 mask MD
1 golden pattern
1 alpha layer-selections « alpha noel autour du monde »
Open all the tubes and the mask with PSP
minimize them
open the alpha layer, window/duplicate, close the original and work with the copy

Colors
foreground color / #9e0005 (dark) / color 1
background color / #white (light) / color 2
Use the paint brush to follow the steps
Left click to grab it

Realization
Step 1
activate the copy of the alpha layer
Step 2
in the materials palette, prepare a radial gradient

Step 3
fill the layer with the gradient
Step 4
effects/plugins/Van Der Lee/Unplugged X/Transition

Step 5
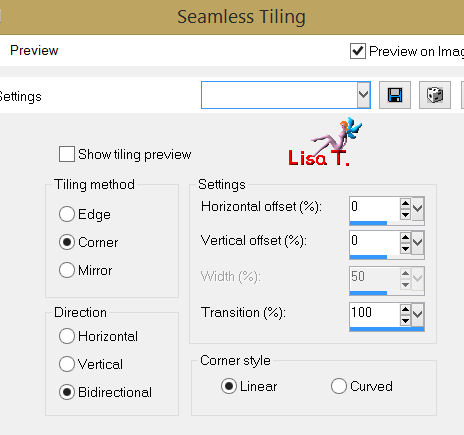
effects/image effects/seamless tiling

Step 6
effects/plugins/&BKG Kaleidoscope/Mirrored and Scaled

Step 7
layers/duplicate
image/resize/75%/ uncheck “resize all layers”
in the layers palette, set the blend mode on “multiply” (or other, according to your colors)
effects/3D effects/drop shadow 0 / 0 / 60 / 30 / black
Step 8
effects/image effects/seamless tiling
Step 9
layers/merge/merge visible
Step 10
effects/image effects/seamless tiling

Step 11
layers/duplicate
effects/reflection effects/rotating mirror

Step 12
effects/plugins/Mirror Rave/Quadrant Flip

Step 13
selections/load-save selection/from alpha channel/selection #1
layers/promote selection to layer
Step 14
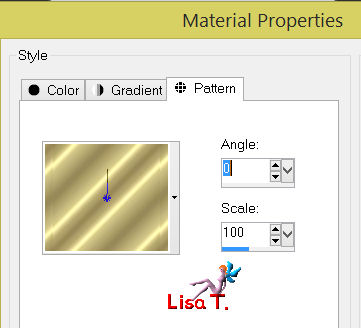
activate the gold pattern “or7”
place this pattern in the materials palette with the following settings
Step 15
layers/new raster layer
fil with the gold pattern
selections/modify/contract/2 pixels
press the delete key of your keyboard
selections/select none
Step 16
layers/merge/merge down
effects/3D effects/drop shadow/ 0 / 0 / 80 / 45 / black
Step 17
selections/load-save selection/from alpha channel/selection #2
layers/promote selection to layer
Step 18
layers/new raster layer
fill with the gold pattern, same settings as before
press the delete key of your keyboard
selections/select none
layers/merge/merge down
Step 19
layers/duplicate
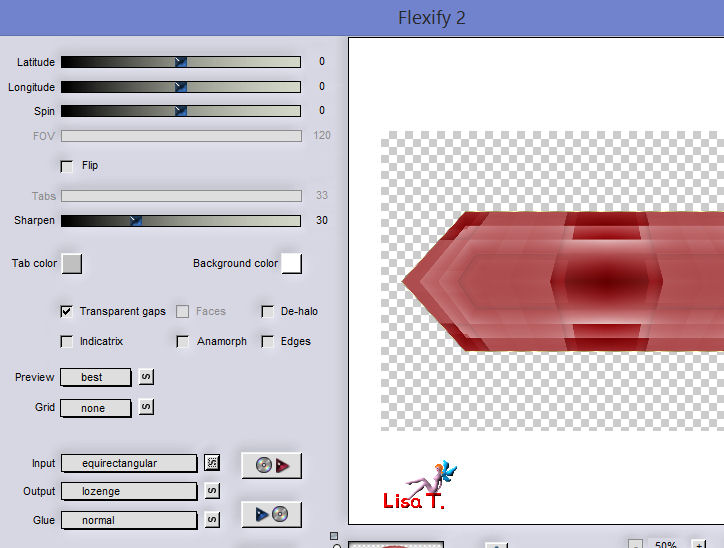
effects/plugins/Flaming Pear/Flexify 2
Step 20
image/resize/85%/uncheck “resize all layers”
Step 21
selections/load-save selection/from alpha channel/selection #3
Step 22
acitvate the landscape tube “paysage noel”
edit/copy - back to your work - edit/paste as a new layer
image/resize/65%/uncheck “resize all layers”
place it in the selection
selections/invert
press the delete key of your keyboard
selections/select none
Step 23
activate the tube “globe”
edit/copy - back to your work - edit/paste as a new layer
image/resize/75%/uncheck “resize all alyers”
in the layers palette, set the opacity on 30%
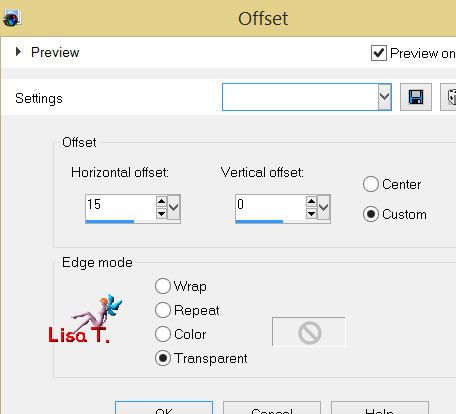
effects/imageeffects/offset
layers/merge/merge down (2 times)
Step 24
effects/3D effects/drop shadow/ 0 / 0 / 80 / 45 / black
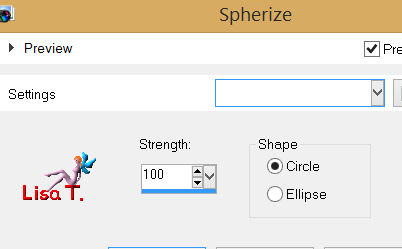
Step 25
effects/geometric effects/spherize
Step 26
image/resize/75%/uncheck “resize all layers”
Step 27
effects/3D effects/drop shadow/ 0 / 0 / 80 / 45 / black
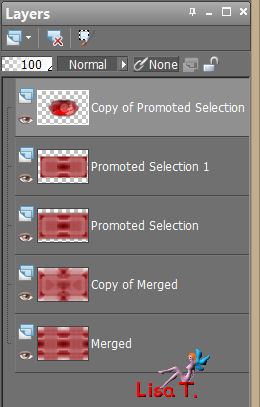
Step 28
your layers palette must be like this
Step 29
in the layers palette, activate the layer “copy of merged” (second from the bottom)
effects/plugins/Simple/Pizza Slice Mirror
Step 30
layers/duplicate
image/mirror
in the layers palette, set the opacity on 50%
layers/merge/merge down
Step 31
in the layers palette, activate the layer on top of the stack
layers/new raster layer
selections/load-save selection/from alpha channel/selection #4
effects/3D effects/drop shadow/ 0 / 0 / 100 / 50 / black
Step 32
selections/modify/select the selection borders
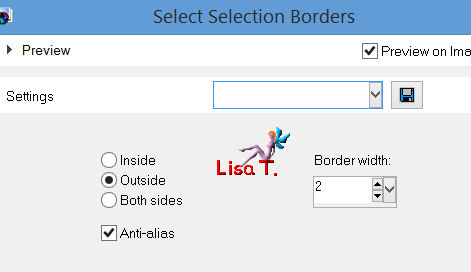
fill with the gold pattern
layers/arrange/move down
selections/select none
Step 33
in the layers palette, activate the layer “copy of merged” (second from the bottom)
efefcts/plugins/Unlimited 2/Filter Factory Gallery N/Wee Scratches

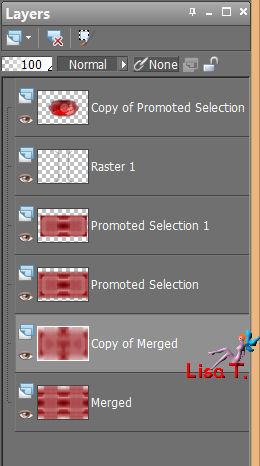
Step 34
your layers palette must be like this
Step 35
in the layers palette, activate the layer “promoted selection 1” (third from the top)
effects/Unlimited 2/& BKG Kaleidoscope/Blueberry Pie

Step 36
effects/plugins/Simple/4 Way Average
Step 37
in the layers palette, activate the layer on top of the stack
selections/load-save selection/from alpha channel/selection #1
effects/3D effects/drop shadow/ 0 / 0 / 100 / 50 / black
selections/select none
Step 38
in the layers palette, the layer on top of the stack is activated
layers/new raster layer
fill with color 2 (white)
Step 39
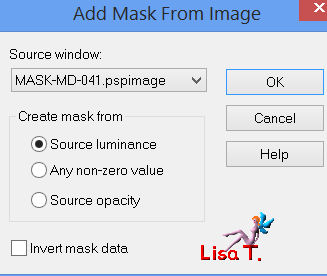
open the mask-MD-041 and minimize it
layers/new mask layer/from image
layers/merge/merge group
in the layers palette, set the opacity on 60%
Step 40
in the layers palette, activate the layer at the bottom of the stack (merged)
layers/arrange/bring to top
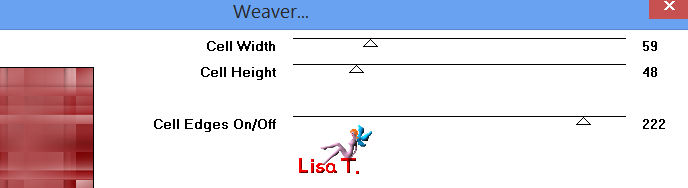
effects/plugins/Toadies/Weaver
effects/edge effects/enhance
Step 41
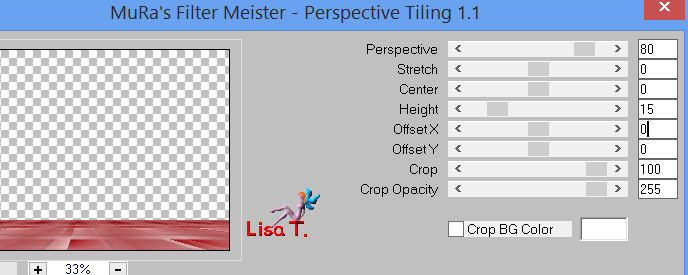
effects/plugins/Mura’s Meister/Perspective Tiling
Step 42
in the layers palette, close the visibility toggle of the layer on top of the stack
activate the layer underneath
layers/merge/merge visible
Step 43
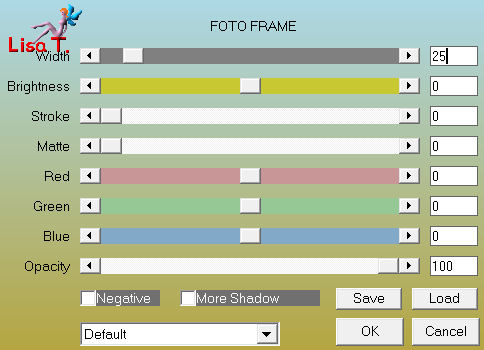
effects/plugins/AAA Frame/Foto Frame
Step 44
in the layers palette, open the visibility toggle of the layer on top of the stack, and activate it
Step 45
layers/new raster layer
selections/select all
activate the tube “déco 1”
edit/copy - back to your work - edit/paste into selection
in the layers palette, set the opacity on 55%
selections/select none
Step 46
activate the tube “déco 2”
edit/copy - back to your work - edit/paste as a new layer
don’t move it
effects/3D effects/drop shadow/ 1 / 1 / 80 / 2 / black
Step 47
activate the tube “décor boules”
edit/copy - back to your work - edit/paste as a new layer
effects/image effects/offset

Step 48
activate the tube “déco 3”
edit/copy - back to your work - edit/paste as a new layer
don’t move it
in the layers palette, set the opacity on 85%
Step 49
activate the tube “tube-jacotte-680” (father Xmas)
edit/copy - back to your work - edit/paste as a new layer
move it on the left as shown
effects/3D effects/drop shadow/ 0 / 0 / 80 / 40 / black
Step 50
activate the tube “garçon”
edit/copy - back to your work - edit/paste as a new layer
move it on the right
apply a light shadow
Step 51
activate the tube “texte”
image/resize/80%/uncheck “resize all layers”
edit/copy - back to your work - edit/paste as a new layer
of course you can write your own text
Step 52
layers/merge/merge all (flatten)
Step 53
image/add borders/check symmetric
3 pixels color 2
3 pixels color 1
3 pixelscolor 2
Step 54
selections/select all
selections/modify/contract/9 pixels
selections/invert
effects/3D effects/drop shadow/ 5 / 5 / 35 / 35 / black
and again, replacing (5) by (-5)
selections/select none
Step 55
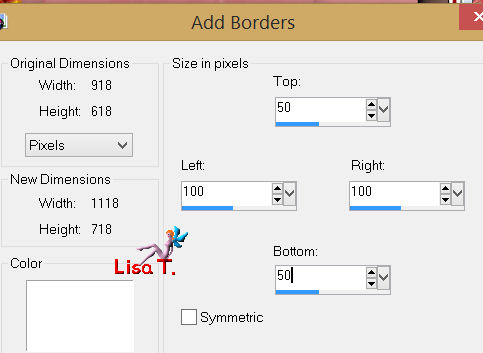
image/add borders/color 2 (white)/uncheck symmetric
Step 56
with the magic wand (default settings), select this border
fill with a linear gradient 45 / 0 (uncheck “invert”)
effects/plugins/VanDerLee/Unplugged X/TV RGB
transparency : 0
mode : overlay

Step 57
selections/invert
effects/3D effects/drop shadow/ 0 / 0 / 100 / 50 / black
selections/select none
Step 58
image/add borders/check symmetric
2 pixels color 1
2 pixels color 2
Step 59
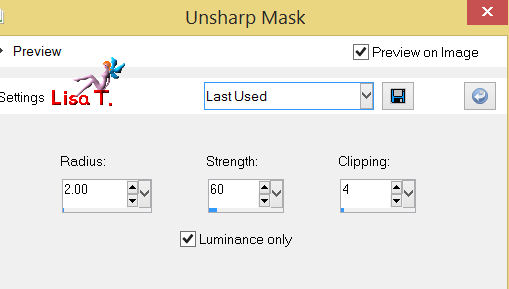
image/resize/900 pixels width
adjust/sharpness/unsharp mask
apply your signature, and save as... type jpeg

Your tag is finished
Thank you to have realized it
You can write to Jacotte or to me if you have any trouble with this tutorial
you can send your creations to Jacotte, she will be very glad to see them

And to present them here

If you want to be informed about Jacotte’s new creations
join her newsletter

My try with my tubes

Back to the boards of Jacotte’s tutorials
board 1  board 2 board 2

|