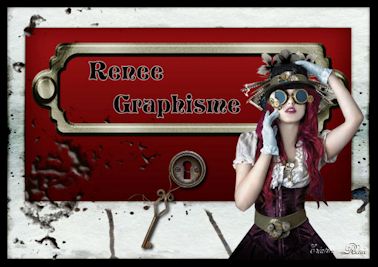
Violinist

Original tutorial can be found HERE

Material


Filters Used
Bordermania : Frame 2
Xero : Fritillary
AP Innovations : Lines silverlining : Zag Across
Unlimited : Button et Frame : 3D Glass Frame 1
Mura Seamless : Checks
Mura meister : perspective tilling
L en K's : Zitah
Mirror Rave : Quadrant flip
Unlimited : Render : ButtonMaker Square
Italian Editors Effects : Picture in Picture
AP Innovations : Lines silverlining : Dotty grid


Colors
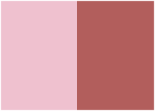

use the pencil to follow the steps
hold down left click to grab it and move it


Realization
1
open alpha layer
window -> duplicate
close orignal image and work with the copy
2
flood fill layer with a sunburst gradient
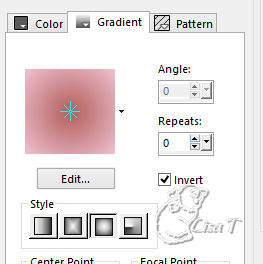
2
layers -> duplicate
image -> resize -> uncheck « resize all
layers » -> 80%
effects -> 3D effects -> drop shadow -> 0 / 0
/ 80 / 25 / black
3
layers -> duplicate
image -> resize -> uncheck « resize all layers » -> 80%
4
layers -> merge -> merge visible
5
effects -> image effects -> seamless tiling
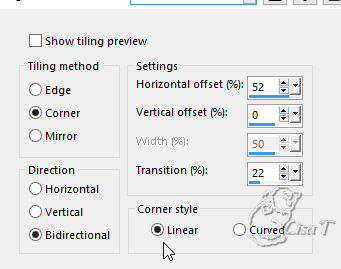
6
effects -> plugins -> Simple -> Half Wrap
7
selections -> load-save selection -> from alpha channel
-> selection 1
selections -> promote selection to layer
effects -> texture effects -> texture (use pattern
provided « support fin »)
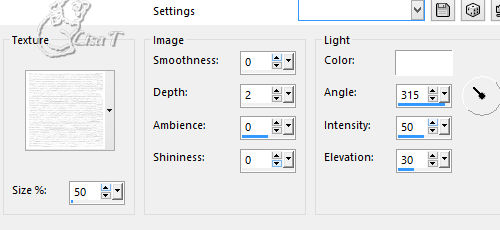
keep selection active
8
effects -> plugin s-> Bordermania / Frame 2
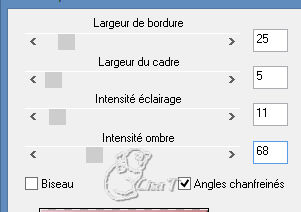
keep selection active
9
selections -> modify -> contract -> 25 pixels
layers -> new raster layer
copy / paste into selection « violon »
effects -> edge effects -> enhance
keep selection active
10
highlight bottom layer (promoted selection)
redo Bordermania effects (same settings as before)
11
highlight Raster 1 (top layer)
layers -> merge -> merge down
effects -> 3D effects -> drop shadow -> 0 / 0
/ 50 / 25 / black
selections -> select none
12
highlight Raster underneath (merged)
selections -> load-save selection -> from alpha channel
-> selection 2
selections -> promote selection to layer
adjust -> blur -> gaussian blur / 40
13
effects -> texture effects -> weave / color 2
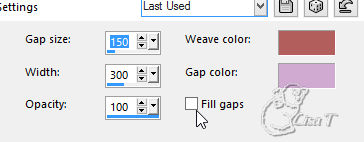
effects -> edge effects -> enhance
14
effects -> plugins -> Xero -> Fritillary
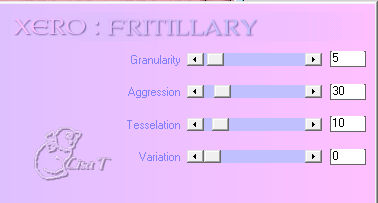
15
effects -> 3D effects -> inner bevel
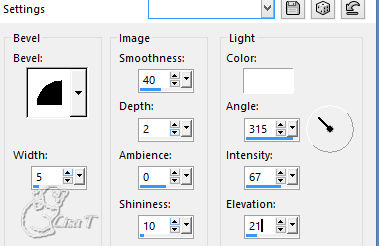
selections -> select none
16
highlight bottom layer (merged)
selections -> load-save selection -> from alpha channel
-> selection 3
selections -> promote selection to layer
17
effects -> AP Innovations / Lines Silverlining / Zag
Accross
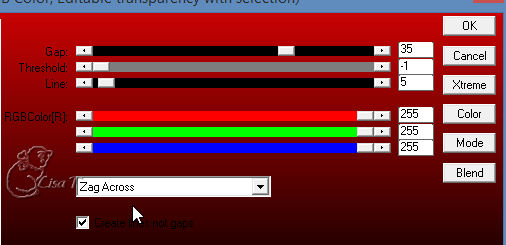
18
effects -> plugins -> Unlimited 2 -> Button and
Frames / 3D Glass Frame 1
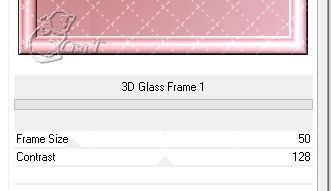
selections -> select none
19
highlight bottom layer (merged)
selections -> load-save selection -> from alpha channel
-> selection 4
selections -> promote selection to layer
20
effects -> plugins -> Mura’s Seamless / Checks
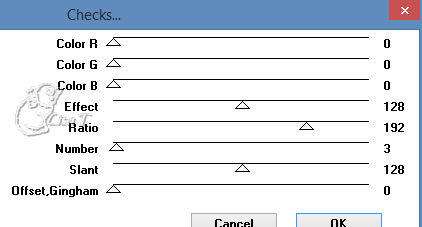
21
effects -> plugins -> Mura’s Meister / Perspective
Tiling
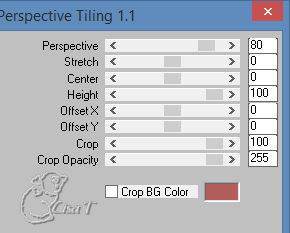
selections -> select none
22
highlight bottom layer (merged)
effects -> plugins -> L en K’s / Zitah
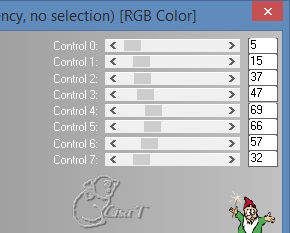
23
selections -> load-save selection -> from alpha channel
-> selection 5
selections -> promote selection to layer
24
effects -> plugins -> Mirror RAve / Quadrant Flip^
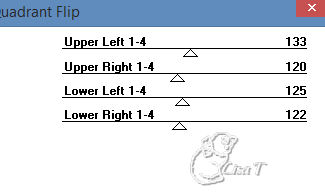
keep selection active
25
effects -> plugins -> Unlimited 2 -> Render /
Button Maker Square
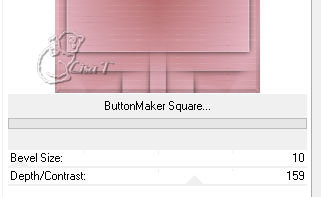
selections -> sleect none
26
highlight top layer
copy / paste as new layer « note de musique »
27
effects -> image effects -> offset
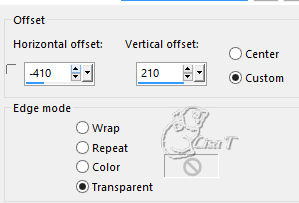
28
layers -> duplicate
image -> mirror -> mirror horizontal
effects -> image effects -> offset
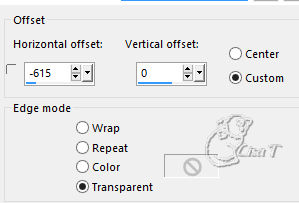
29
copy / paste as new layer character tube
30
effects -> image effects -> offset
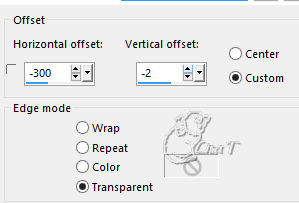
effects -> 3D effects -> drop shadow -> 21 / 33
/ 40 / 40 / black
31
copy / paste as new layer « déco 1 »
colorize if necessary
32
effects -> image effects -> offset
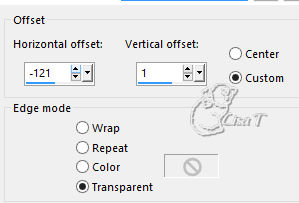
33
copy / paste as new layer text tube (or write your own
text)
move it bottom right as shown
34
effects -> 3D effects -> drop shadow -> 1 / 1
/ 100 / 2 / dark color
35
layers -> merge -> merge all (flatten)
36
image -> add borders -> ...
1 pixel color 1
3 pixels color 2
1 pixel color 1
10 pixels color 2
37
image -> add borders -> 60 pixels white
select white border with the magic wand tool
flood fill selection with a linear gradient 45
/ 5 / unchek « invert »
38
adjust -> add-remove noise -> add noise
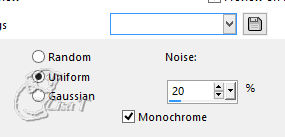
39
selections -> promote selection to layer
40
effects -> plugins -> Unlimited 2 -> Italian
Editors Effects / Picture in Picture
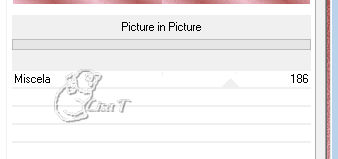
selections -> select none
41
select dark pink parts (color 2) with the magic wand tool
flood fill selection with the linear gradient
42
effects -> plugins -> AP Innovations -> Lines
Silverlining / Dotty Grid
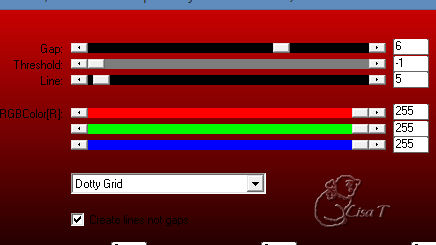
effects -> 3D effects -> drop shadow -> 0 / 0
/ 80 / 40 / black
selections -> select none
layers - merge -> merge down
43
selections -> select all
selections -> modify -> contract -> 28 pixels
effects -> 3D effects -> drop shadow -> 0 / 0
/ 100 / 50 / black
selections -> select none
44
copy / paste as new layer « déco 2 »
45
effects -> image effects -> offset
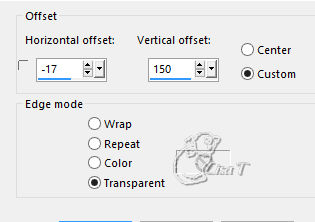
46
layers -> duplicate
image -> mirror -> mirror horizonatl
image -> mirror -> mirror vertical
47
effects -> image effects -> offset
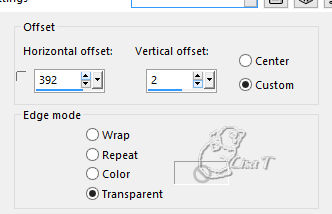
layers -> merge -> merge all (flatten)
48
image -> add borders -> ............
1 pixel color 1
2 pixels color 2
3 pixels color 1
5 pixels color 2
49
add borders -> 20 pixels color 1
select this border with the magic wand tool
flood fill with a linear gradient 45 / 5 /
uncheck « invert »
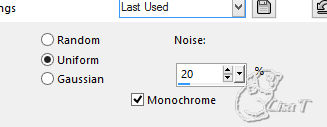
50
adjust -> add-remove noise -> add noise
51
selections -> invert
effects -> 3D effects -> drop shadow -> 0 / 0
/ 100 / 50 / black
selections -> select none
52
image -> add borders -> 1 pixel black
53
image -> resize -> 900 pixels (width) -> check « resize
all layers »
apply your watermark
file -> save as... type .jpeg
Your tag is finished
Thank you for following it

don’t hesitate to write to me if you have any trouble
with this translation
 to
Lisa T to
Lisa T
you can send your creations to Jacotte, she will be very
glad to see them
 to
Jacotte to
Jacotte
And to present them on her blog

If you want to be informed about Jacotte’s new creations
subscribe to her newsletter (fill the box at the bottom
of her home page)


My tag with my tubes

back to the boards of Jacotte’s tutorials
board 1  board
2 board
2  board
3 board
3  board
4 board
4 

|