Lulu

original tutorial can be found HERE


Material
tubes, mask, alpha layer, decoration tubes, text tube


Filters Used
AP Innovations : Lines Silverlining : Dotty Grid
Alien skin Impact : Glass
Alien skin Snap Art : Impasto : Lanscape abstract 
L en K's : Zitah
Carolaine et Sensibility : CS-DLines
Unlimited : Bkg Kaléidoscope : Kaléidoscope divisions
Alien skin impact : extrude
Ulimited Kang 1 : Busy Circuits
Mura meister : Perspective tilling
Unlimited : Render : Button Maker Square
Thank You to Cloclo and Renée for her kind permission to use their plugins pages


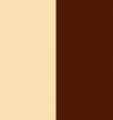
Colors
color 1 -> foreground color -> #
color 2 -> background color -> #
color 3 -> #

translator’s note : I work with PSPX8,
but you can realize this tag with another version of course
This tutorial is dedicated to Jacotte’s friend : Lulu
to thank her for her kindness, and the work she provides testing Jacotte’s tutorials

use the pencil to follow the steps
left click to grab it


Realization
Step 1
open the alpha layer (it contains the selections needed to follow this tutorial)
duplicate and close the original
work with the copy
Step 2
flood fill with color 2
Step 3
layers > new raster layer
flood fill with color 1
Step 4
open the mask and minimize it to tray
layers > new mask layer > from image
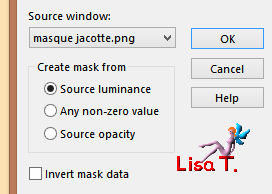
adjust > sharpness > sharpen more
layers > merge > merge group
Step 5
layers > merge > merge visible
Step 6
selections > load-save selection > from alpha channel > selection #1
selections > promote selection to layer
effetcs > plugins > AP Innovations > Lines Silverlining
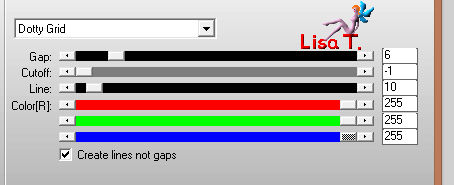
Step 7
effects > plugins > Alien Skin Impact – Glass > Clear
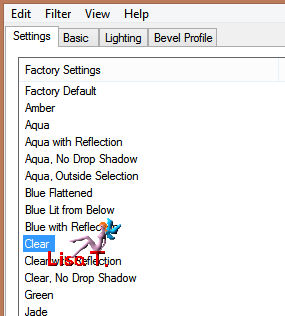
selections > select none
Step 8
layers > duplicate – image > mirror > mirror vertical
layers > merge > merge down
Step 9
effects > 3D effects > drop shadow > 0 / 0 / 80 / 40 / black
Step 10
activate the layer below (merged)
selections > load-save selection > from alpha channel > selection #2
selections > promote selection to layer
Step 11
layers > new raster layer
copy / paste into selection the misted landscape
effects > edge effects > enhance
Step 12
layrs > merge > merge down
keep the selection active
Step 13
layers > new raster layer
effects > 3D effects > cutout
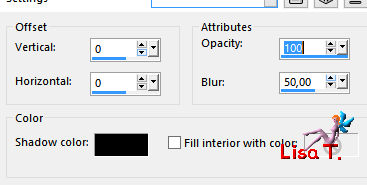
layers > merge > merge down
selections > select none
Step 14
activate the « merged » layer
selections > load-save selection > from alpha channel > selection #3
selections > promote selection to layer
effects > 3D effects > drop shadow as before (don’t change the settings)
selections > select none
Step 15
activate the top layer
layers > new raster layer
selections > load-save selection > from alpha channel > selection #4
Step 16
flood fill the layer with a linear gradient > ( 45 / 0 ) uncheck « invert »
Step 17
effects > Alien Skin Snap Art > Impasto > Landscape Abstract
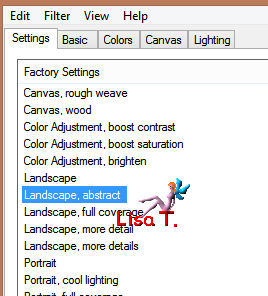
Step 18
selections > modify > select selection borders
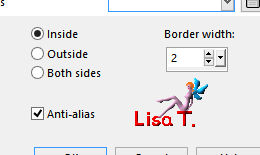
activate the flood fill tool with the following settings

flood fill the selection with color 1
selections > select none
effects > 3D effects > drop shadow as before
Step 19
activate the « merged » layer
selections > load-save selection > from alpha channel > selection #5
selections > promote selection to layer
Step 20
effects > plugins > L en K’s Zitah
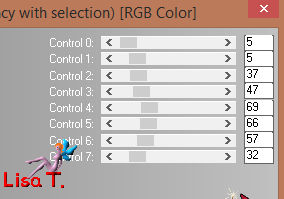
effects > 3D effects > drop shadow as before
selections > select none
Step 21
activate the « merged » layer
selections > load-save selection > from alpha channel > selection #6
selections > promote selection to layer
effects > plugins > Carolaine and Sensibility > CS-DLines
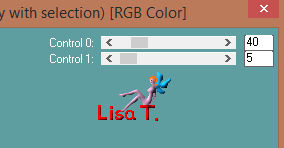
Step 22
selections > modify > contract > 20 pixels
layers > new raster layer – flood fill with color 2
Step 23
effects > plugins > Alien Skin Eye Candy 5-Impact > Glass > Clear

selections > select none
layers > merge > merge down
Step 24
layers > arrange > bring to top
effects > 3D effects > drop shadow as before
Step 25
the top layer is the active layer
layers > new raster layer
selections > load-save selection > from alpha channel > selection #7
flood fill the selection with a linear gradient ( 45 / 0 /) (uncheck « invert »)
Step 26
effects > plugins > Bkg Kaleidoscope > kaleidoscope Divisions
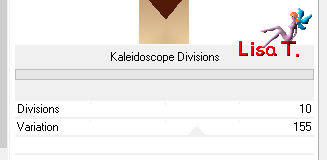
selections > select none
Step 27
selections > load-save selection > from alpha channel > selection #8
selections > promote selection to layer
flood fill the selection with color 2
Step 28
effects > Alien Skin Eye Candy 5-Impact > Clear

Step 29
layers > merge > merge down
selections > invert
Step 30
effects > Carolaine and Sensibility > CS-DLines

selections > select none
Step 31
effects > 3D effects > drop shadow as before
Step 32
copy / paste as new layer the decoration tube 1
Step 33
effects > image effects > offset
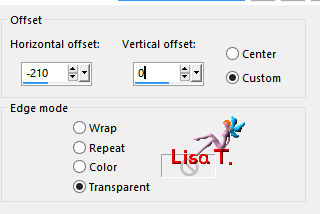
Step 34
copy / paste as new layer the decoration tube 2
Step 35
effects > image effects < offset
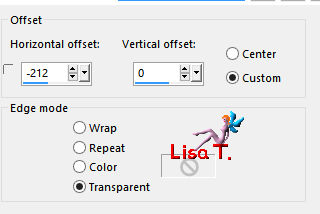
colorize according to your colors or set the blend mode on « Luminance (Legacy) »
Step 36
layers merge > merge all (flatten)
Step 37
image > add borders > 2 pixels color 1
Step 38
layers > promote background layer
image > resize > uncheck « all layers » > 90%
Step 39
effects > Alien SkinEye Candy 5-Impact > Extrude > color 1
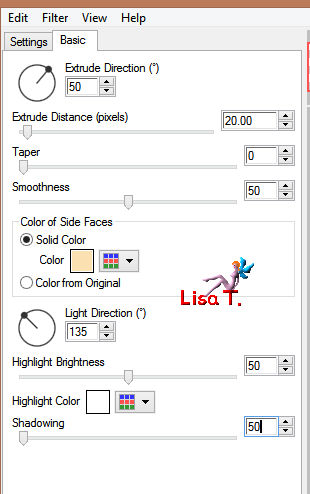
Step 40
layers > new raster layer
flood fill with color 1
selections > select all
selections > modify > contract > 2 pixels
Step 41
flood fill the selection with the gradint 45/0 prepared before
Step 42
effects > Plugins > Unlimited 2 > Kang 1 > Busy Circuits
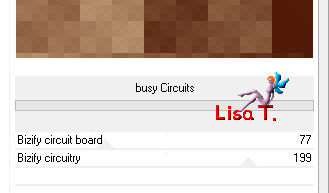
effects > edge effects > enhance
selections > select none
Step 43
edit > COPY
Step 44
layers > arrange > move down
Step 45
image > canvas size (raster 2 is the active layer)
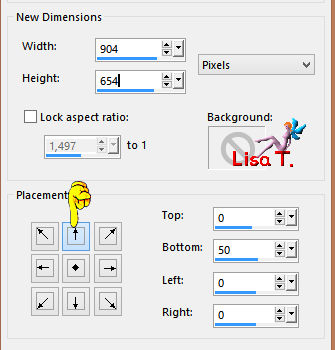
Step 46
veiw > rulers – activate the Pick Tool
move the layer upwards to 570
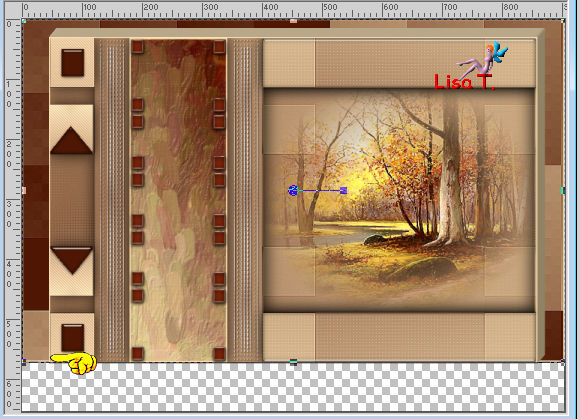
disable the Pick Tool (M key) – disable the rulers
Step 47
select the transparent part with the magic wand tool
Step 48
edit / paste into selection the layer copied in step 43
selections > modify > contract > 2 pixels
Step 49
effects > plugins > Mura’s Meister > Perspective Tiling
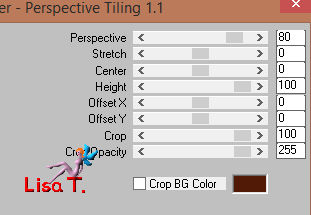
Step 50
adjust > sharpness > sharpen more
selections > select none
layers > merge > merge visible
Step 51
copy / paste as new layer the character tube
image > resize > uncheck « all layers » > 85% (if you use the tube provided)
move it where you like
Step 52
effects > 3D effects > drop shadow > 20 / -20 / 50 / 25 / black
Step 53
copy / paste as new layer the text tube
Step 54
effects > image effects > offset
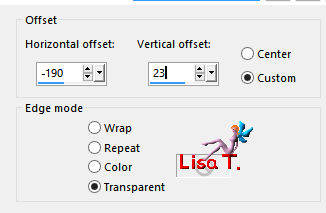
Step 55
effects > 3D effects > drop shadow > color 1
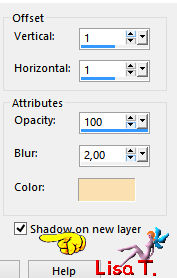
Step 56
the shadow layer is the active layer
effects > texture effects > mosaic antique
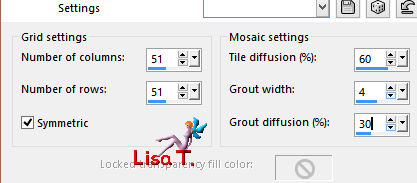
Step 57
activate the top layer (the text)
layers > merge > merge down (the shadow)
layers > arrange > move down (under the character)
Step 58
layers > merge > merge all (flatten)
Step 59
image > aadd borders > 25 pixels color 2
select this border with the magic wand tool
flood fill with the gradient 45 / 0
Step 60
effects > plugins > Render > ButtonMaker Square
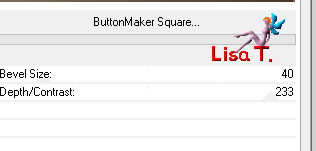
adjust > sharpness > sharpen more
selections > select none
Step 61
image > resize > check « all layers » > width : 900 pixels
adjust > sharpness > unsharp mask

apply your watermark and save as... type .jpeg

Your tag is finished
Thank you to have followed this tutorial
You can write to Jacotte if you have any problem with this tutorial
don’t hesitate to send your creations to Jacotte, she will be very glad to see them

And to present them here

created by ▼ Birte


If you want to be informed about Jacotte’s new creations
subscribe to her newsletter (fill the box at the bottom of her home page)


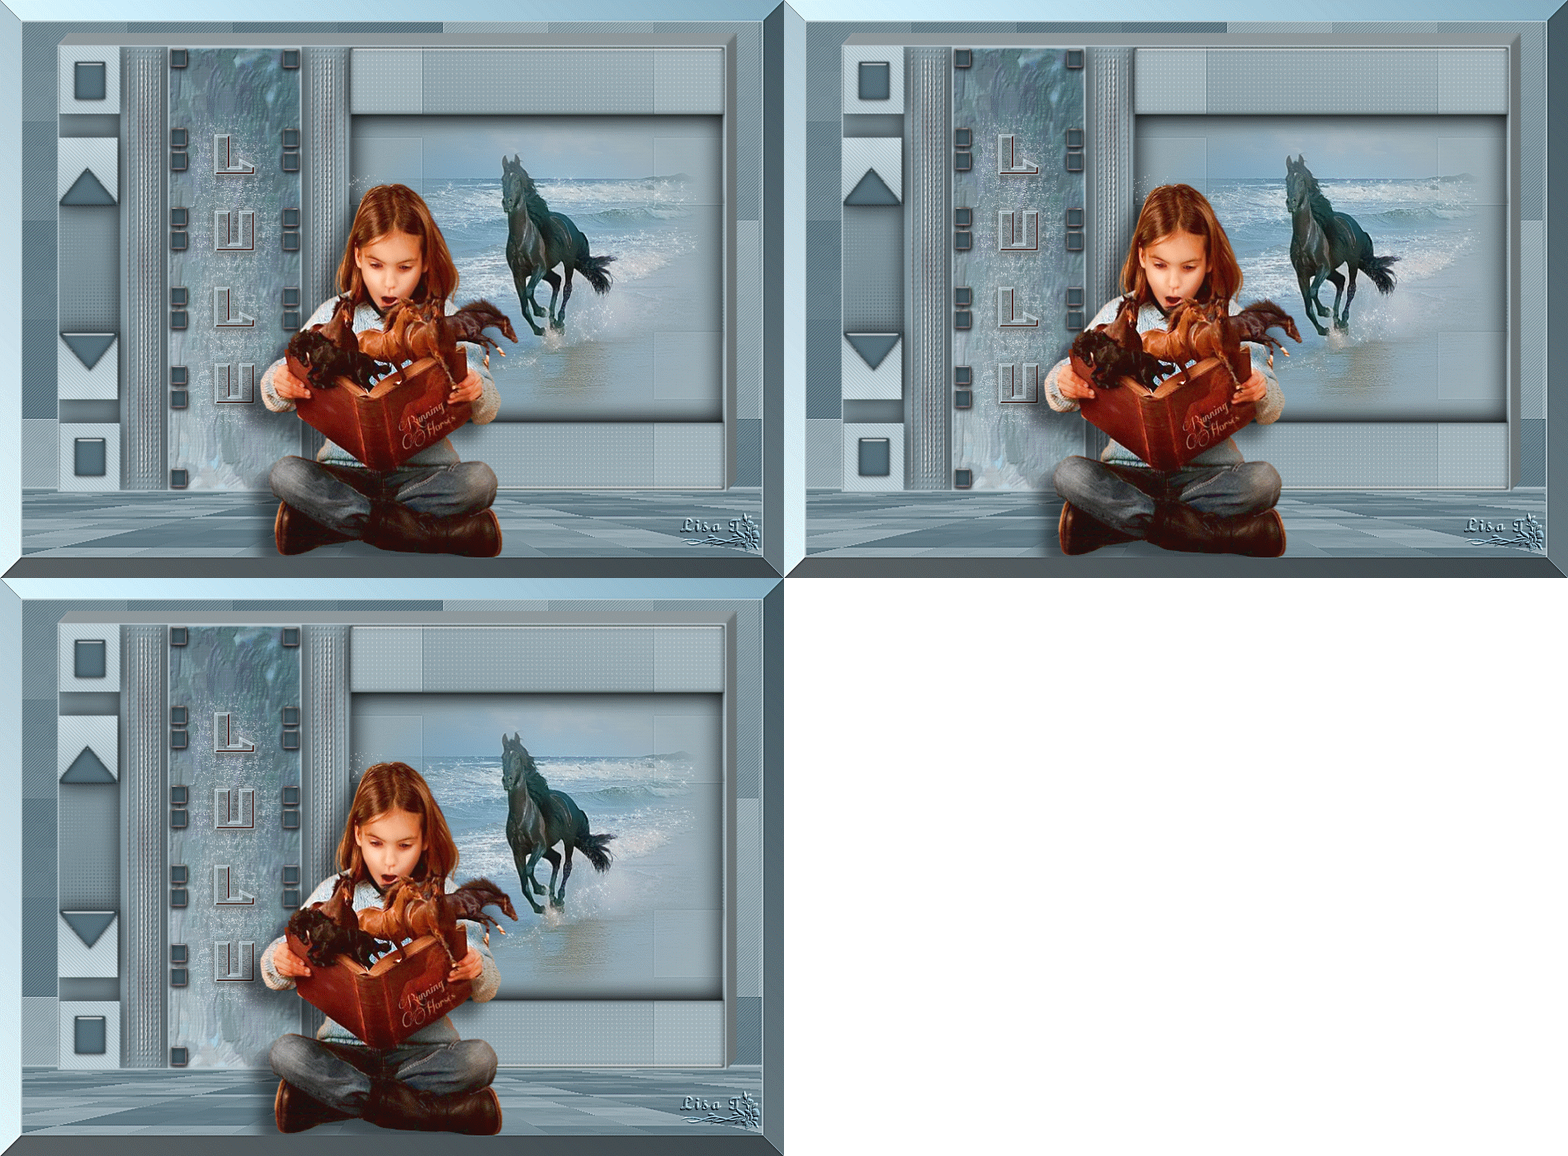
My tag with my tubes
back to the boards of Jacotte’s tutorials
board 2  board 3 board 3 

|