Horse ! my Friend

Original tutorial can be found HERE

I am member of TWInc
this tutorial is protected


Material
1 tube by Jacotte
1 alpha layer-selections
1 background

Filters Used
Simple/Half Wrap & Pizza Slice Mirror
Unlimited 2/Quadrant Mirror
AFS Import/sqborder2
FM Tile Tools/Blend Emboss
Toadies/Weaver
Penta.com/VTR2
Colors
color 1/foreground color/#f7e9d8 (light color)
color 2/Background color/#863110 (dark color)
Use the paint brush to follow the steps
left click to grab it
 |
Realization
Step 1
open the alpha layer “alpha-cheval”
window/duplicate
close the original and work with the copy
Step 2
selections/select all
Step 3
activate the background layer
adjust/Hue and Saturation/colorize according to your main tube
edit/copy - back to your work - edit/paste into selection
selections/select none
Step 4
effects/plugins/Simple/Half Wrap
Step 5
effects/reflection effects/rotating mirror/ - 50 / 0 / 135 / repeat

Step 6
effects/plugins/Unlimited 2//tile & mirror/Quadrant Mirror

Step 7
selections/load selection 1 from alpha channel
selections/promote selection to layer
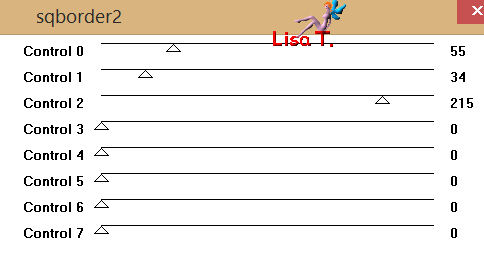
effects/plugins/AFS Import/sqborder 2
effects/edge effects/enhance
Step 8
layers/new raster layer
paint with color 2
selections/modify/contract/2 pixels
press the delete key of your keyboard
selections/select none
layers/merge/merge down
effects/3D effects/drop shadow/ 0 / 0 / 100 / 50
Step 9
selections/load selection 2 from alpha channel
selections/promote selection to layer
layers/new raster layer, and paint with color 2
selections/modify/contract/2 pixels
press the delete key of your keyboard
layers/merge/merge down
keep the selection active
Step 10
activate the tube of the horse
edit/copy - back to your work - edit/paste as new layer
image/resize/uncheck “resize all layers”/75%
move it properly in the middle of the frame
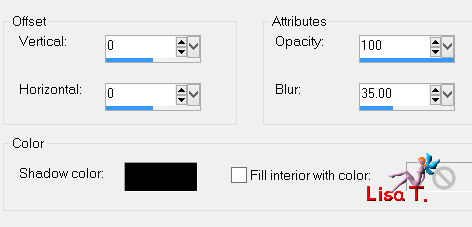
effects/3D effects/drop shadow/ 0 / 0 / 25 / 10 / black
selections/select none
Step 11
layers/merge/merge down
effects/3D effects/drop shadow/ 0 / 0 / 100 / 50 / black
Step 12
in the layers palette, activate the background layer (alpha layer)
selections/load selection 1 from alpha channel
selections/invert
effects/plugins/Simple/Pizza Slice Mirror
effects/plugins/Unlimited 2/Tiles And Mirror/Quadrant Mirror
Step 13
effects/plugins/FM Tile Tools/Blend Emboss/default settings
Step 14
layers/new raster layer
effects/3D effects/Cutout
selections/select nonee
Step 15
layers/merge/merge all (flatten)
Step 16
image/add borders/check “symmetric”/2 pixels/color 1
Step 17
image/add borders/50 pixels/color 2
select this border with the magic wand (defautl settings)
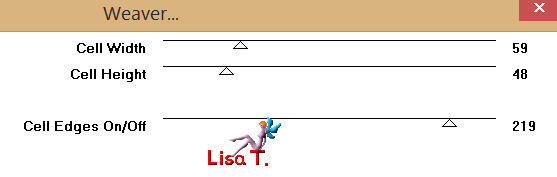
effects/plugins/Toadies/Weaver
Step 18
image/rotate right
apply the plugin Toadies once more
Step 19
image/rotate left
Step 20
keep the selection active
layers/new raster layer
paint with color 1
effects/plugins/Penta.com/VTR2

effects/edge effects/enhance more
in the layers palette, set the blend mode on “overlay”
layers/merge/merge down
Step 21
effects/3D effects/drop shadow/ 0 / 0 / 100 / 50 /black
selections/select none
Step 22
image/add borders
2 pixels color 1
10 pixels color 2
2 pixels color 1
Step 23
selections/select all
selections/modify/contract/14 pixels
selections/invert
effects/3D effects/outer bevel
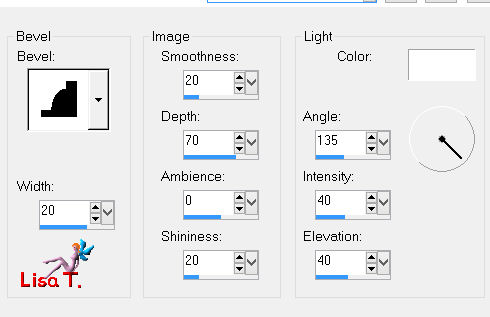
apply this effect once more
selections/select none
Step 24
image/resize/900 pixels width
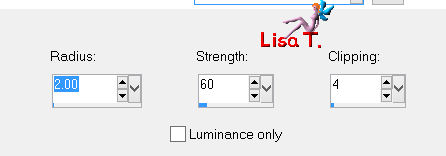
adjust/sharpness/unsharp mask
Step 25
apply your signature
file/save as… type jpeg
Your tag is finished
Thank you to have realized it
You can write to Jacotte or to me if you have any trouble with this tutorial
you can send your creations to Jacotte, she will be very glad to see them

And to present them here
If you want to be informed about Jacotte’s new creations
join her newsletter (fill the box at the bottom of her home page)

Back to the boards of Jacotte's tutorials
board 1  board 2 board 2

|