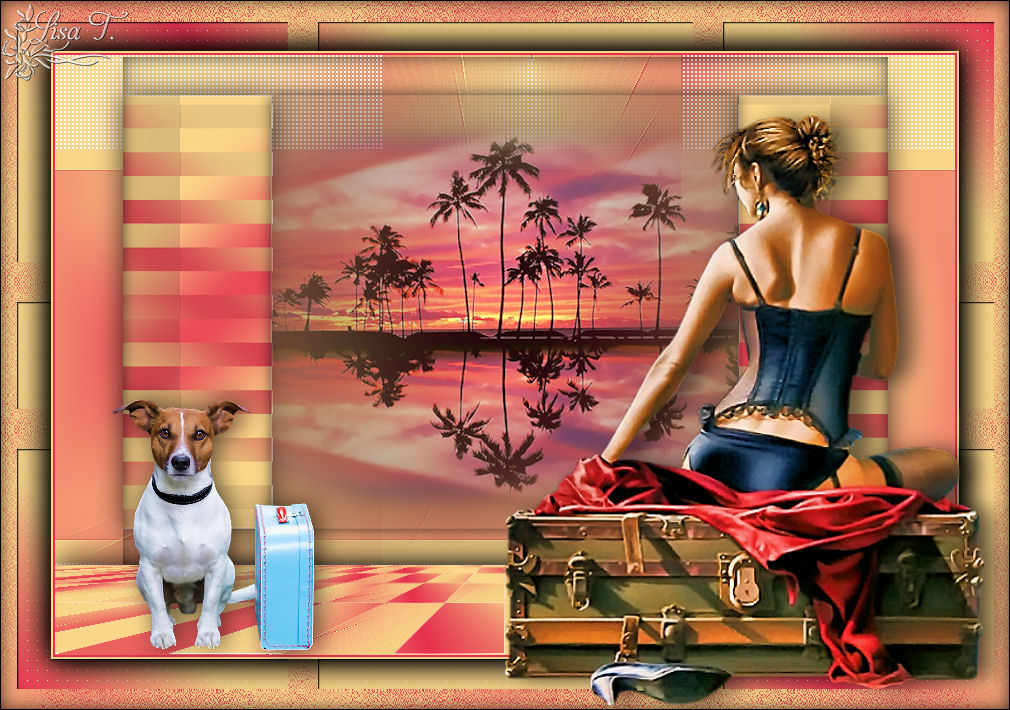
Holiday destination

Original tutorial can be found HERE
I am member of TWInc
this tutorial is protected


Material
tubes by Jacotte - 1 alpha layer (selections)

Filters Used
DSB Flux/Linear Transmission
Unlimited 2/VM Distortion/Flipper
AFS Import/sqborder2
Richeard Rosenman/Pixelate
Unlimited 2/VM Stylize/Zoom Blur
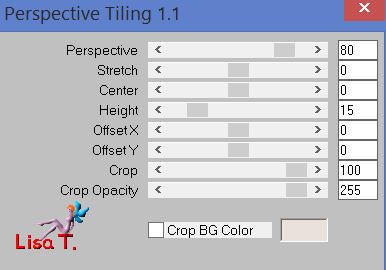
Mura’s Meister/Perspective Tiling
Unlimited 2/Kang1/Circuit Weaver
Graphic Plus/Quick Tile 1
AP 01[Innovations]/Lines Silverlining/Dotty Grid
Colors
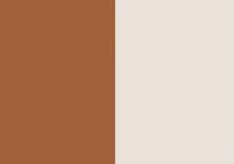
color 1 -> foreground color -> #a2603b
color 2 -> background color -> #ebe1db
in the materials paeltte, prepare a linear gradient / 45 / 3 / check « invert » (light color in the middle)
Use the pencil to follow the steps
left click to grab it
 |
Realization
Step 1
open the alpha layer
window/duplicate
close the original, and work with the copy
Step 2
fill the layer with the gradient
Step 3
adjust/blur/gaussian blur/30
Step 4
layers/duplicate
image/resize/85%/uncheck « resize all layers »
Step 5
effects/edge effects/enhance
Step 6
effects/plugins/DSB Flux/Linear Transmission

Step 7
layers/duplicate - image/mirror
layers/merge/merge down
Step 8
layers/new raster layer
selections/load selection from alpha channel/selection 1
Step 9
activate the tube of the landscape
edit/copy - back to your work - edit/paste into selection
effects/edge effects/enhance
Step 10
selections/invert
layers/new raster layer
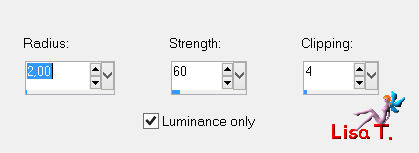
effects/3D effects/cutout
selections/select none
layers/merge/merge down twice
Step 11
in the layers palette, activate the bottom layer (alpha layer)
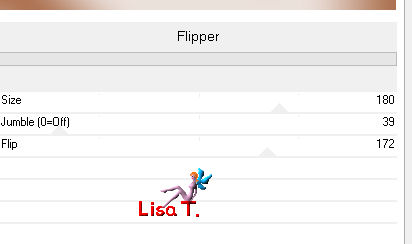
effects/plugins/Unlimited 2/VM Distortion/Flipper
effects/edge effects/enhance
Step 12
layers/duplicate - image/mirror
set the opacity of the layer on 50%
layers/merge/merge down
Step 13
layers/duplicate
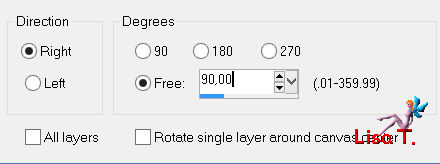
image/free rotate
Step 14
in the layers palette, activate the bottom layer (alpha layer)
selections/select all
image/crop to selection
Step 15
in the layers palette, activate the top layer (copy of alpha layer)
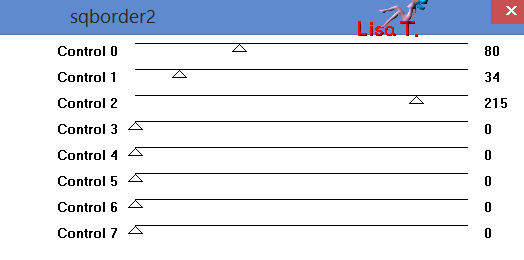
effects/plugins/AFS Import/sqborder2
Step 16
effects/image effects/seamless tiling

Step 17
in the layers palette, activate the top layer
layers/merge/merge down
image/resize/uncheck « resize all layers »/85%
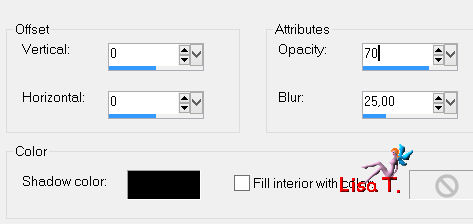
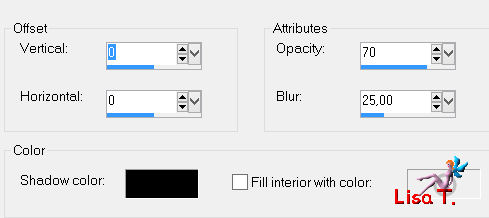
effects/3D effects/drop shadow/ 0 / 0 / 80 / 40 / black
effects/image effects/offset

Step 18
in the layers palette, activate the bottom layer (alpha layer)
adjust/blur/gaussian blur/30
Step 19
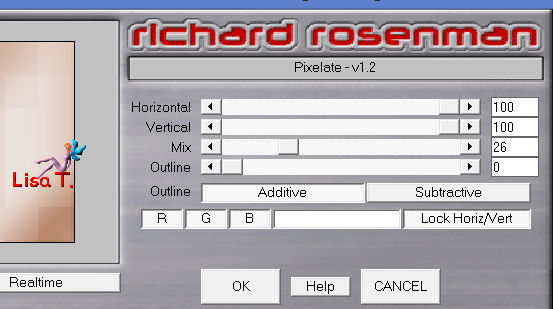
effects/plugins/Richard Rosenman/Pixelate/ 100 / 100 / 26 / 0
effects/edge effects/enhance more
Step 20
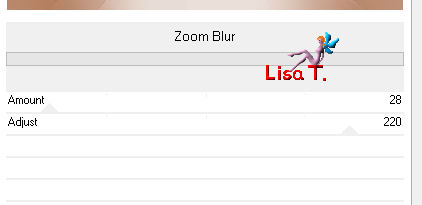
effects/plugins/Unlimited 2/VM Stylize/Zoom Blur/ 28 / 220
effects/edge effects/enhance
Step 21
layers/duplicate
Step 22
layers/new raster layer
selections/load selection from alpha channel/selection 2
fill with the gradient prepared at the begining
selections/select none
effects/edge effects/enhance
layers/merge/merge down
Step 23
effects/plugins/Mura’s Meister/Perspective Tiling
effects/3D effects/drop shadow/ 0 / 0 / 100 / 50 / black
layers/arrgange/bring to top
Step 24
layers/merge/merge visible
Step 25
image/add borders/check « symmetric » ->
2 pixels color 1
2 pixels color 2
50 pixels color 1
select this border with the magic wand tool
selections/promote selection to layer
fill the selection with a linear gradient (45 - 3)/uncheck « invert »
Step 26
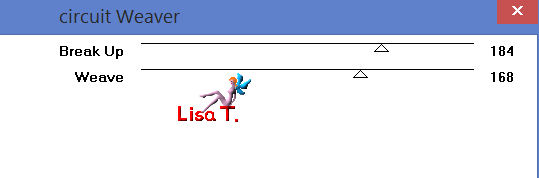
effects/plugins/Unlimited 2/Kang 1/Circuit Weaver
Step 27
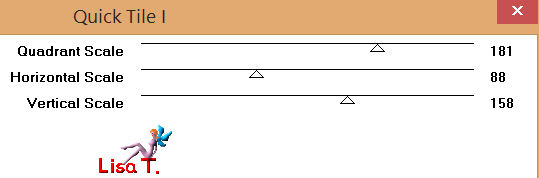
effects/plugins/Graphic Plus/Quick Tile 1
selections/select none
layers/merge/merge visible
Step 28
activate the magic wand tool and select the brown parts around the frame
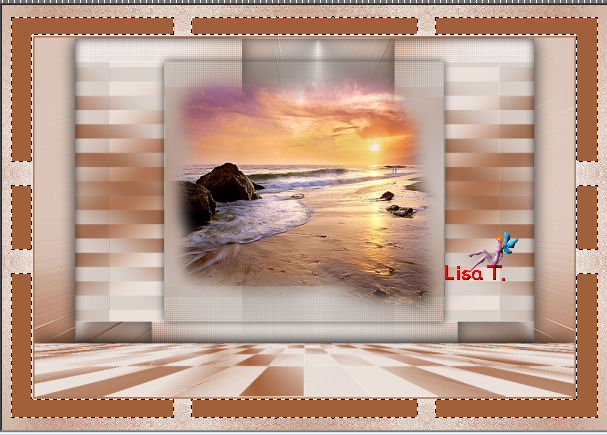
Step 29
fill with the gradient prepared on step 25 (45 - 3)
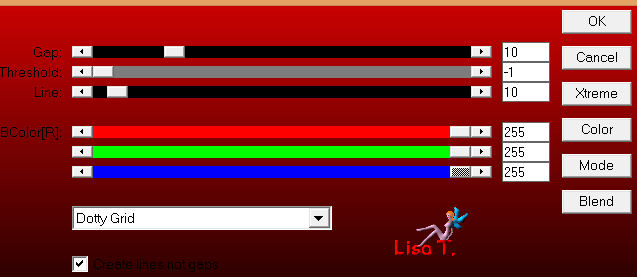
effects/plugins/AP 01[Innovations]/Lines Silverlining/Dotty Grid
Step 30
selections/invert
effects/3D effects/drop shadow/ 1 / 1 / 100 / 2 / black
selections/select none
Step 31
selections/select all
selections/modify/contract/50 pixels
effects/3D effects/drop shadow/ 0 / 0 / 100 / 50 / black . Drop Twice
Step 32
selections/invert
layers/new raster layer
effects/3D effects/cutout
selections/select none
layers/merge/merge all (flatten)
Step 33
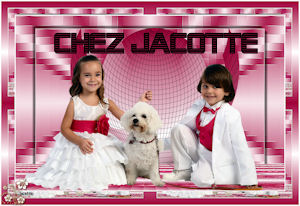
activate the tube of the character
edit/copy - back to your work - edit/paste as new layer
image/resize/uncheck « resize all layers »/80%
move it to the right
adjust/one step photo fix
effects/3D effects/drop shadow/ 0 / 0 / 50 / 25 / black
Step 34
activate the tube of the dogs
edit/copy - back to your work - edit/paste as new layer
image/resize/uncheck « resize all layers »/70%
move it to the left
drop a light shadow
Step 35
layers/merge/merge all (flatten)
image/add borders/check « symmetric »/1 pixel/black
image/resize/width 900 pixels
adjust/sharpness/unsharp mask
apply your signature and save as ... type jpeg
*****************
Your tag is finished
Thank you to have realized it
You can write to Jacotte

or to me
if you have any trouble with this tutorial
you can send your creations to Jacotte, she will be very glad to see them
And to present them here

If you want to be informed about Jacotte’s new creations
join her newsletter (fill the box at the bottom of her home page)

my tag with my tubes
Back to the boards of Jacotte's tutorials
board 1  board 2 board 2

|