Dreaming

Original tutorial can be found HERE


Material

other tubes you might like to use


Filters Used
Andromeda : Cmulti
Andromeda smulti
Miror rave : quadrant flip
AP innovations : lines silverlining : Dotty grid
Unlimited : Tramage : two the lines
Unlimited : toadies : ommadawn
Mura’s meister : perspective tilling
AAA frame : texture frame
AAA frame : foto frame
Richard Roserman : solid border

THANK YOU Renée Graphisme and Cloclo for sharing your plugins
pages


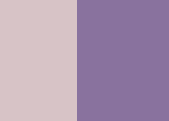
Colors

use the pencil to follow the steps
hold down left click to grab it and move it
.............................

Realization
1
open the alpha layer (invisible selections included)
window -> duplicate
close original layer and work with the copy
prepare both colors into your materials palette
2
flood fill with a linear gradient -> 45 / 0 / uncheck « invert »
3
effects -> plugins -> Andromeda -> C-Multi
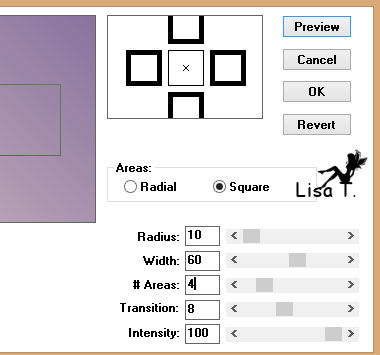
effects -> edge effects -> enhance more
4
load selection from alpha channel -> selection 1
selections -> invert
DELETE (hit DELETE key of your keyboard)
5
flood fill selection with color 2
selections -> invert
effects -> 3D effects -> drop shadow -> 0 / 0
/ 60 / 30 / black
selections -> select none
6
load selection from alpha channel -> selection 2
close the padlock of this layer
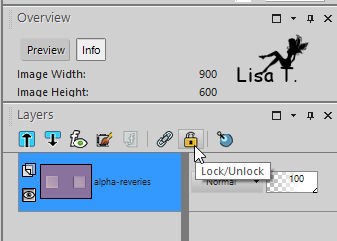
7
effects -> 3D effects -> cutout
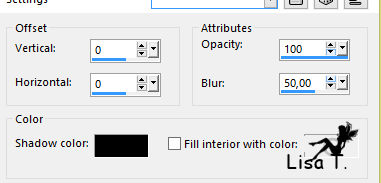
open the padlock and select none
8
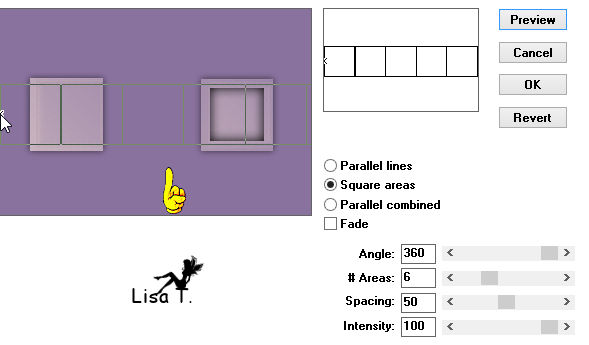
effects -> plugins -> Andromeda / s-Multi
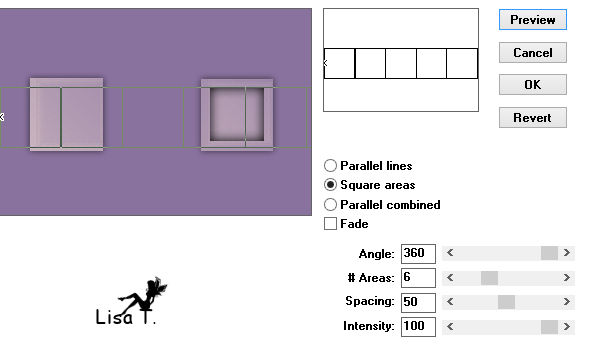
be careful to fit the grid properly by clicking on the
small cross on the left
9
effects -> edge effects -> enhance
10
effects -> plugins -> Mirror Rave / Quadrant Flip
/ default settings
11
selections -> select all
selections -> modify -> contract / 83 pixels
edit -> copy
selections -> invert
edit -> paste into selection
12
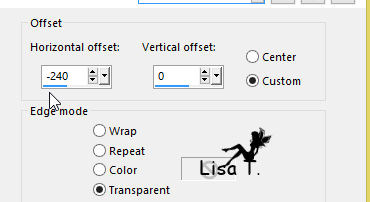
effects -> image effects -> offset
13
effects -> plugins -> Mirror Rave / Quadrant Flip
/ default settings
14
selections -> invert
effects -> 3D effects -> drop shadow -> 0 / 0
/ 50 / 30 / black
keep selection active
15
layers -> new raster layer
flood fill selection with color 1
selections -> modify -> contract / 1 pixel
DELETE
selections -> select none
layers -> merge -> merge down
16
load selection from alpha channel -> selection 3
selections -> promote selection to layer
selections -> select none
17
highlight bottom layer
load selection from alpha channel -> selection 4
selections -> promote selection to layer
selections -> modify -> contract / 5 pixels
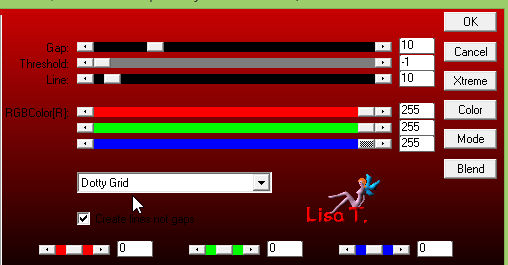
effects -> pllugins -> AP Innovations / Lines Silverliningv
/ Dotty Grid
selections -> select none
18
highlight bottom layer
load selection from alpha channel -> selection 5
19
effects -> plugins -> Unlimited 2 -> Tramages /Tow The
Line
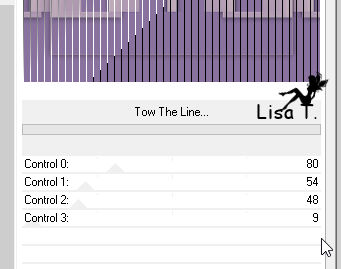
selections -> select none
20
highlight top layer
load selection from alpha channel -> selection 6
DELETE
layers -> new raster layer
21
copy / paste into selection the landscape tube
effects -> edge effects -> enhance
22
layers -> arrange -> move down
23
close the padlock
effects -> 3D effects -> cutout
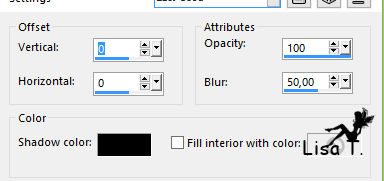
open the padlock
selections -> select none
24
highlight top layer
effects -> 3D effects -> drop shadow -> 0 / 0
/ 50 / 25 / black
layers -> merge -> merge down
25
top layer is highlighted
layers -> new raster layer
flood fill with color 1
26
selections -> select all
selections -> modify -> contract / 2 pixels
DELETE
selections -> select none
27
laeyrs -> merge -> merge visible
28
layers -> duplicate
adjust -> blur -> gaussian blur / 50
29
effects -> plugins -> Toadies / Ommadawn
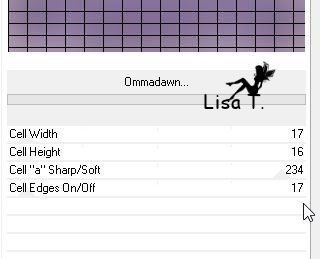
30
effects -> plugins -> Mura’s Meister / Perspective
Tiling
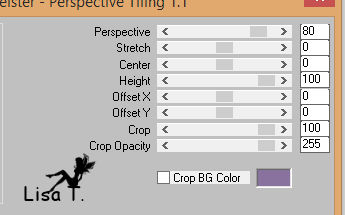
31
edit -> cut
32
highlight « Merged » Layer
image -> canvas size
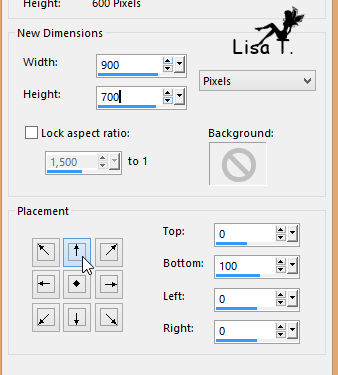
33
delete « copy of Merged »
34
« Merged » layer is highlighted
select transparent border with the magic wand tool
layers -> new raster layer
edit -> paste into selection
keep selection active
35
layers -> new raster layer
flood fill with color 1
selections -> modify -> contract / 2 pixels
DELETE
selections -> select none
layers -> merge -> merge down
36
effects -> 3D effects -> drop shadow -> 0 / 0
/ 50 / 25 / black
37
layers -> merge -> merge all (flatten)
38
image -> add borders -> 2 pixels color 2
39
image -> add borders -> 50 pixels color 1
select this border with the magic wand tool
flood fill selection with a linear gradient ( 45 / 0 )
40
effects -> plugins >6 AAA Frames / Texture Frame
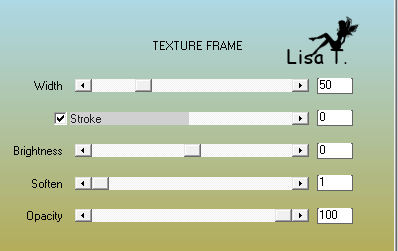
41
selections -> invert
effects -> 3D effects -> drop shadow -> 0 / 0
/ 100 / 50 / black
selections -> select none
42
effects -> plugins -> AAA Frames -> Foto Frame
(Dark with Grey shadow)
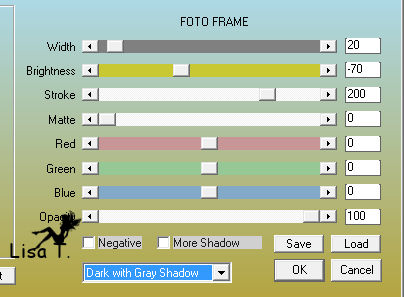
43
effects -> plugins -> Richard Ronsenman / color 2
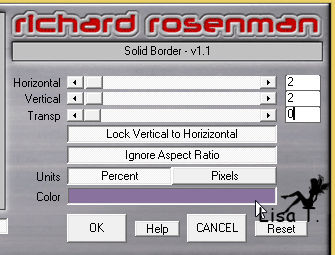
44
selections -> select all
selections -> modify -> contract / 5 pixels
selections -> invert
effects -> texture effects -> Weave / color 1
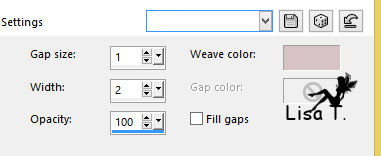
adjsut -> sharpness -> sharpen more
selections -> select none
45
copy / paste as new layer « deco 1 »
colorize if necessary
46
effects -> image effects -> offset
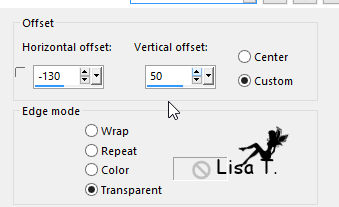
effects -> 3D effects -> drop shadow -> 0 / 0
/ 100 / 2 / black
47
layers -> duplicate
image -> mirror -> mirror horizontal
layers -> merge -> merge down
48
copy / paste as new layer your character tube
move it to the left
49
effects -> 3D effects -> drop shadow -> 4 / 23
/ 24 / 15 / black
50
copy / paste as new layer the flower tube
move it to the right
drop shadow as before (don’t change settings)
51
copy / paste as new layer basket tube
effects -> 3D effects -> drop shadow -> 1 / 1
/ 100 / 2 / black
place it where you like
52
layers -> merge -> merge all (flatten)
53
image -> resize -> check « all layers » -> 900
pixels (width)
54
adjust -> sharpness -> unsharp mask

55
apply your watermark and save as... type .jpeg
apply your watermark and save as... type .jpeg
Your tag is finished
Thank you for following it

don’t hesitate to write to me if you have any trouble
with this translation
 to
Lisa T to
Lisa T
you can send your creations to Jacotte, she will be very
glad to see them
 to
Jacotte to
Jacotte
And to present them on her blog

If you want to be informed about Jacotte’s new creations
subscribe to her newsletter (fill the box at the bottom
of her home page)


My tag with my tubes

back to the boards of Jacotte’s tutorials
board 1  board
2 board
2  board
3 board
3  board
4 board
4 

|