Cosmos
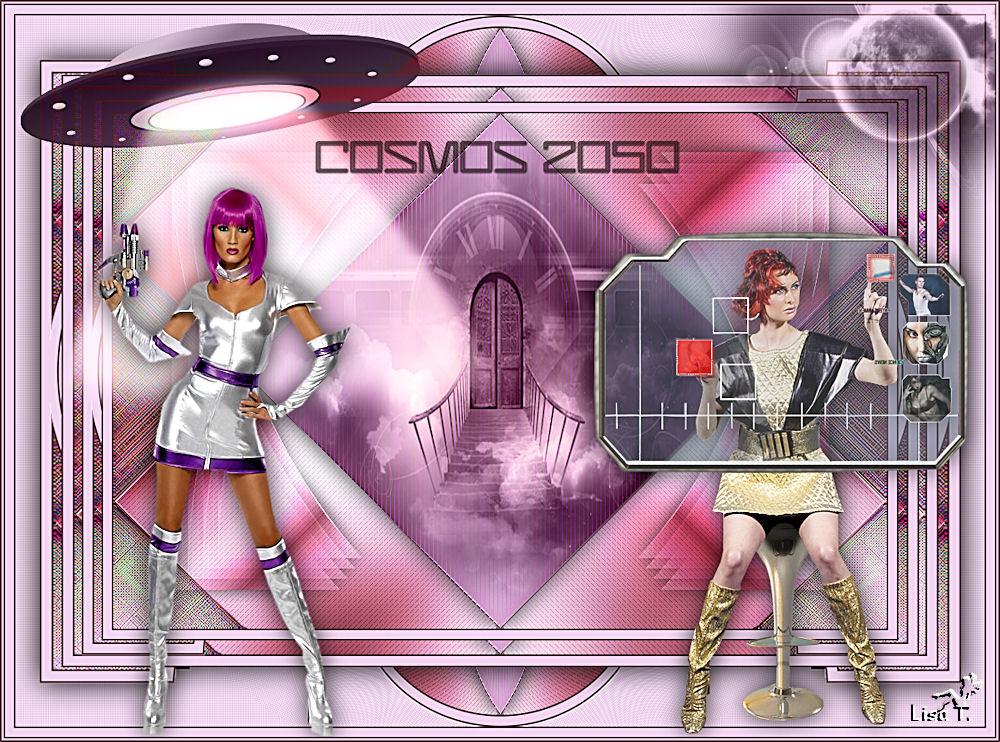
Original tutorial can be found HERE

I am member of TWInc
this tutorial is protected


Material

Filters Used
Simple/Blintz
Simple/Quarter Corner
Transparency/Eliminate White
Contour/Croisillons
L en K’s/Frederiek
AP Innovations/Lines Silverlining/Breaks in Fence
Penta.Com/Color Dot
Colors
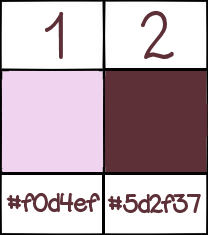
foregraound color / color 1 / #f0d4ef / light color
background color / color 2 / #5d2f37 / dark color

Use the paint brush to follow the steps
left click to grab it


Realization
Step 1
open the alph layer - window/duplicate
close the original, and work with the copy
Step 2
in the materials palette, prepare a linear gradient 45 / 5 / uncheck “invert”
Step 3
adjust/blur/gaussian blur/20
Step 4
effects/plugins/Simple/Blintz
Step 5
layers/duplicate - image/flip
in the layers palette , set the opacity on 50%
layers/merge/merge down
effects/edge effecs/enhance more
Step 6
layers/duplicate
effects/plugins/Simple/Quarter Corner
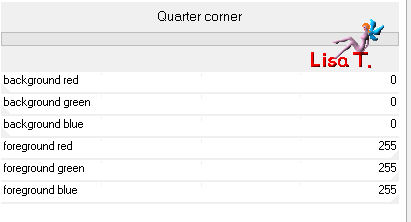
Step 7
with the magic wand, select the black part, and fill with the gradient
selections/select none
Step 8
effects/plugins/Transparency/Eliminate White
effects/edge effects/enhance
Step 9
layers/duplicate - image/mirror - image/flip
layers/merge/merge down
effects/edge effects/enhance
image/resize/85%/uncheck “rezise all layers”
Step 10
layers/duplicate
image/resize/95%/uncheck “resize all layers”
layers/duplicate, and resize-> 95% / uncheck “resize all layers”
layers/duplicate -> 95% / uncheck “resize all layers”
Step 11
in the layers palette, close the visibility toggle of the background layer (alpha layer)
and activate the top layer
layers/merge/merge visible
in the layers palette, open the visibility toggle of the alpha layer
set the blend mode of the layer on “hard light” (or other)
layers/duplicate - image/flip
layers/merge/merge down
effects/3D effects/drop shadow/ 0 / 0 / 60 / 30 / black
Step 12
in the layers palette, activate the bottom layer (alpha layer)
selections/load-save selection/from alpha channel/selection #1
selections/promote selection to layer
effects/plugins/Contour/Croissillons
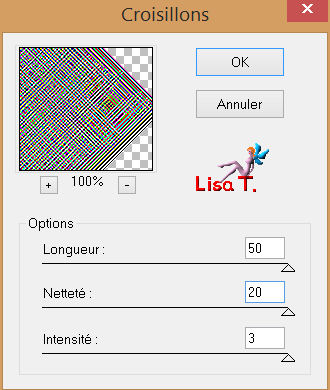
in the layers palette, set the blend mode on “overlay (or other)
selections/select none
layers/duplicate - image/mirror
layers/merge/merge down
effects/3D effects/drop shadow/ 0 / 0 / 60 / 30 / black
Step 13
in the layers paeltte, activate the background layer (alpha layer)
selections/load-save selection/from alpha channel/selection #2
selections/promote selection to layer
effects/plugins/L en K’s Frederiek

in the layers palette, set the blend mode on “overlay” (or other)
selections/select none
Step 14
layers/duplicate - image/mirror
layers/merge/merge down
layers/duplicate - image/flip
laeyrs/merge/merge down
effects/3D effects/drop shadow as before
Step 15
your alyers palette must look like this
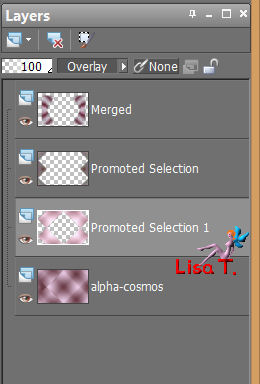
Step 16
close the visibility toggle of the merged layer (top of the stack)
activate the the layer below (promoted selection)
layers/merge/merge visible
open the visibility toggle of the merged layer
Step 17
your layers palette looks like this
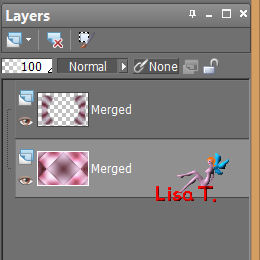
in the layers palette, the bottom layer is active
selections/load-save selection/from alpha channel/selection #3
selections/promote selection to layer
effects/plugins/AP Innovations/Lines Silverlining
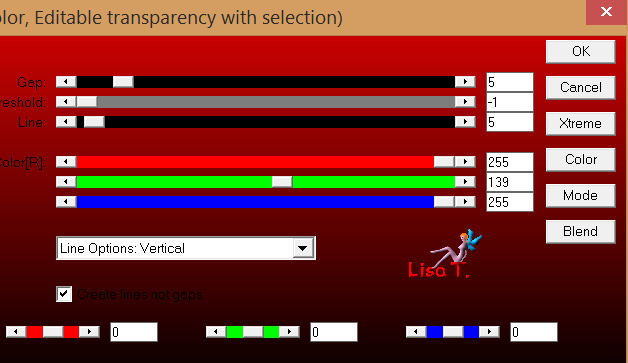
keep the selection active
Step 18
layers/new raster layer
activate the landscape layer
edit/copy - back to your work work - edit/paste into selection
image/resize/105%
selections/invert, and press the Delete key of your keyboard
selections/select none
in the layers palette, set the blend mode on “Luminance (Legacy)”
Step 19
layers/merge merge down
effects/3D effects/drop shadow/ 0 / 0 /80 / 40 / black
Step 20
layers/merge/merge all
Step 21
image/add borders/2 pixels/color 2
image/add borders/10 pixels/color 1
image/add borers/2 pixels/color 2
Step 22
image/add borders/100 pixels/color 1
with the magic wand, select this border
effects/reflection effects/kaleidoscope
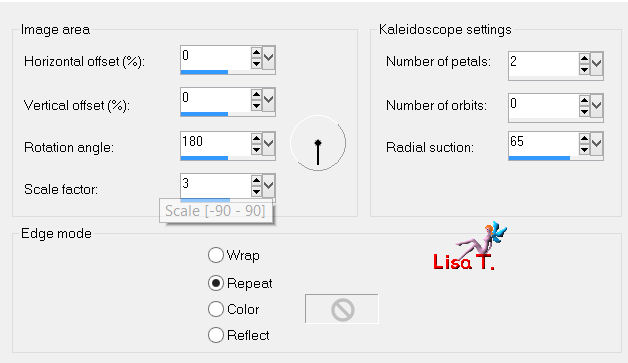
selections/select none
Step 23
layers/duplicate
with the magec wand, select the light border
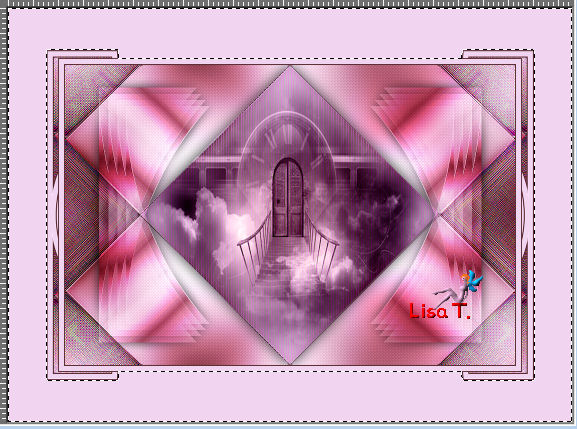
press the Delete key of your keyboard
selections/select none
Step 24
in the layers palette, close the visibility toggle of the copy of the background (top layer)
activate the background (bottom layer)
select the light border
effects/plugins/Penta.Com/Color Dot
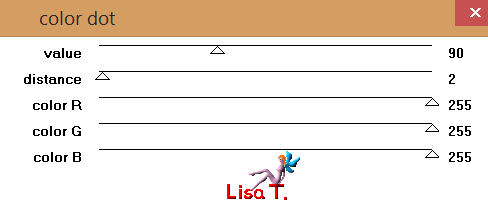
adjust/sharpness/sharpen more
Step 25
effects/reflection effects/kaleidoscope
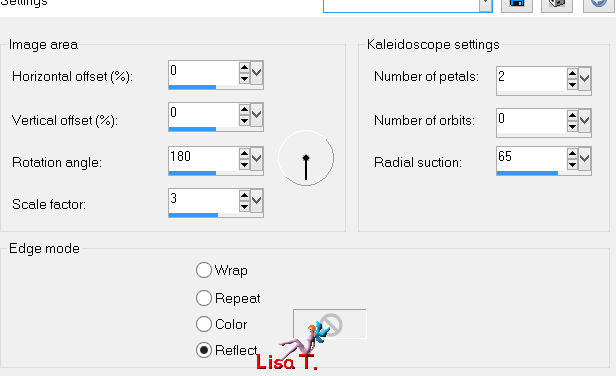
selections/select none
Step 26
in the layers palette, open the visibility toggle of the copy of the background
and activate this layer
layers/duplicate
image/resize/110% (uncheck “resize all layers”)
layers/arrange/move down
in the layers palette, activate the top layer
layers/merge/merge down
effects/3D effects/drop shadow/ 0 / 0 / 100 / 50 / black
laeurs/merge/merge all (flatten)
Step 27
image/add borders/check “symmetric”
2 pixels/color 2
10 pixels color 1
2 pixels clor 2
Step 28
actiate the tube “femme 1”,
edit/copy - back to your work - edit/paste as new layer, move it to the right
effects/3D effects/drop shadow/ 0 / 0 / 80 / 40 / black
Step 29
activate the tube of the flying saucer
edit/copy - back to your work - edit/paste as new layer, move it to the left
in the layers palette, set the blend mode on “luminance (Legacy)”
Step 30
activate the tube of the second woman (tube jacotte 875)
edit/copy - back to your work - edit/paste as new layer, move it under the flying saucer
effects/3D effects/drop shadow/ 0 / 0 / 80 / 40 / black
Step 31
activate the tube of the planet
edit/copy - back to your work - edit/paste as new layer, move it top right
in the layers paeltte, set the blend mode on “Luminance (Legacy)” and the opacity on 65%
Step 32
acivate the tube “text”
edit/copy - back to your work - edit/paste as new layer, move it as you wish
effects/3D effects/drop shadow/ 1 / 1 / 100 / 2 / black
Step 33
image/add borders/2 pixels color 1 and 2 pixels color 2
Step 34
image/resize/900 pixels width
adjust/shrpness/unsharp mask
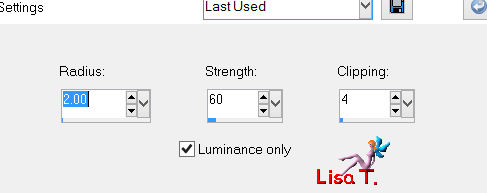
apply your signature
save as… type jpeg
Your tag is finished
Thank you to have realized it

You can write to Jacotte or to me if you have any trouble with this tutorial
you can send your creations to Jacotte, she will be very glad to see them

And to present them here

If you want to be informed about Jacotte’s new creations
join her newsletter


Back to the boards of Jacotte's Tutorials
board 1  board 2 board 2 

|